In this guide, we’ll show you how to create a conditional field in FunnelKit Checkout using a checkbox.
For this example, we’ll use a common scenario: if a customer wants to wrap their purchase as a gift, they can check a box to indicate this choice. Once the checkbox is selected, a new field will appear asking them to provide a special message for the gift.
Step 1: Create a custom field using a checkbox
Create a custom field using a checkbox option.
We created a “Want to wrap as a gift” field using the following values:
- Field type - Checkbox
- Label - Want to wrap as a Gift?
- Field ID - parent_field
- Default - False
- Required - No
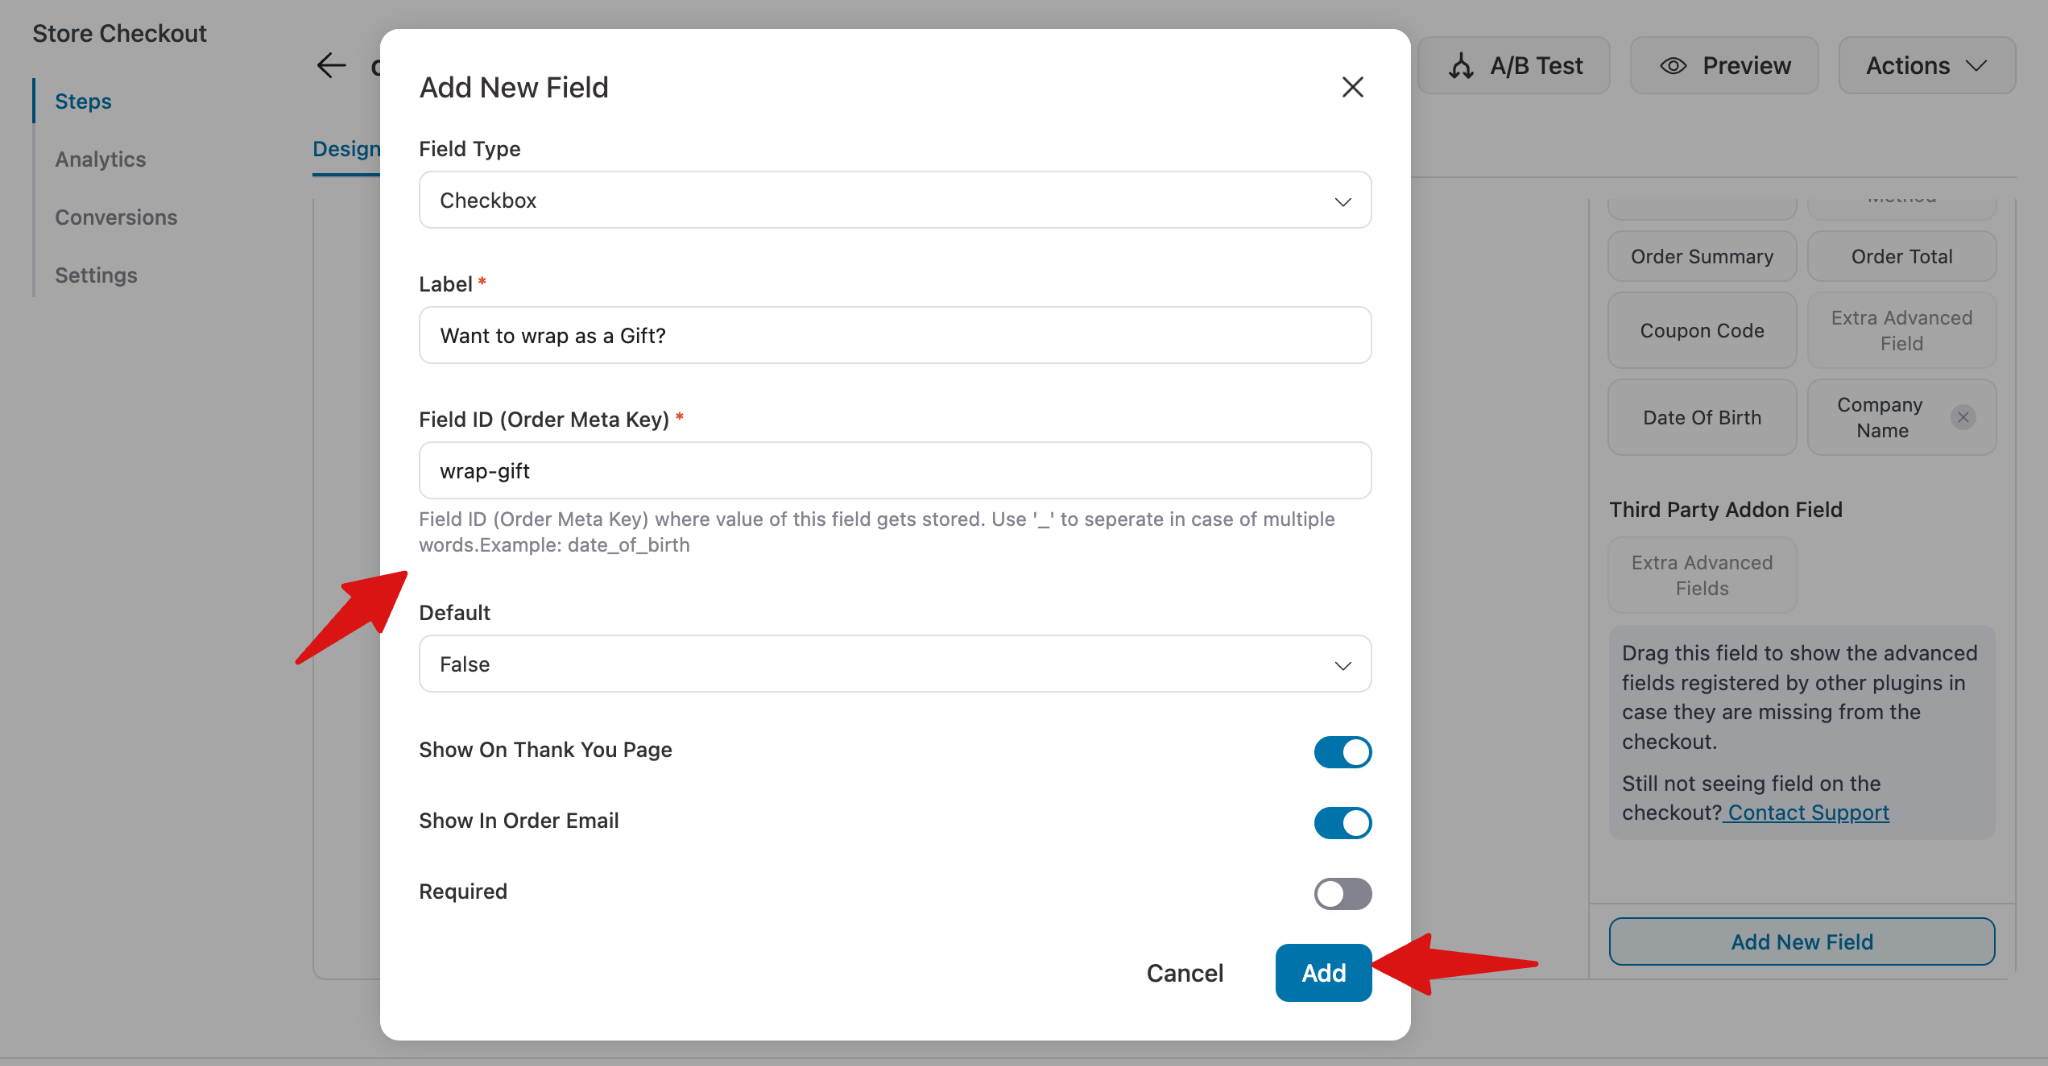
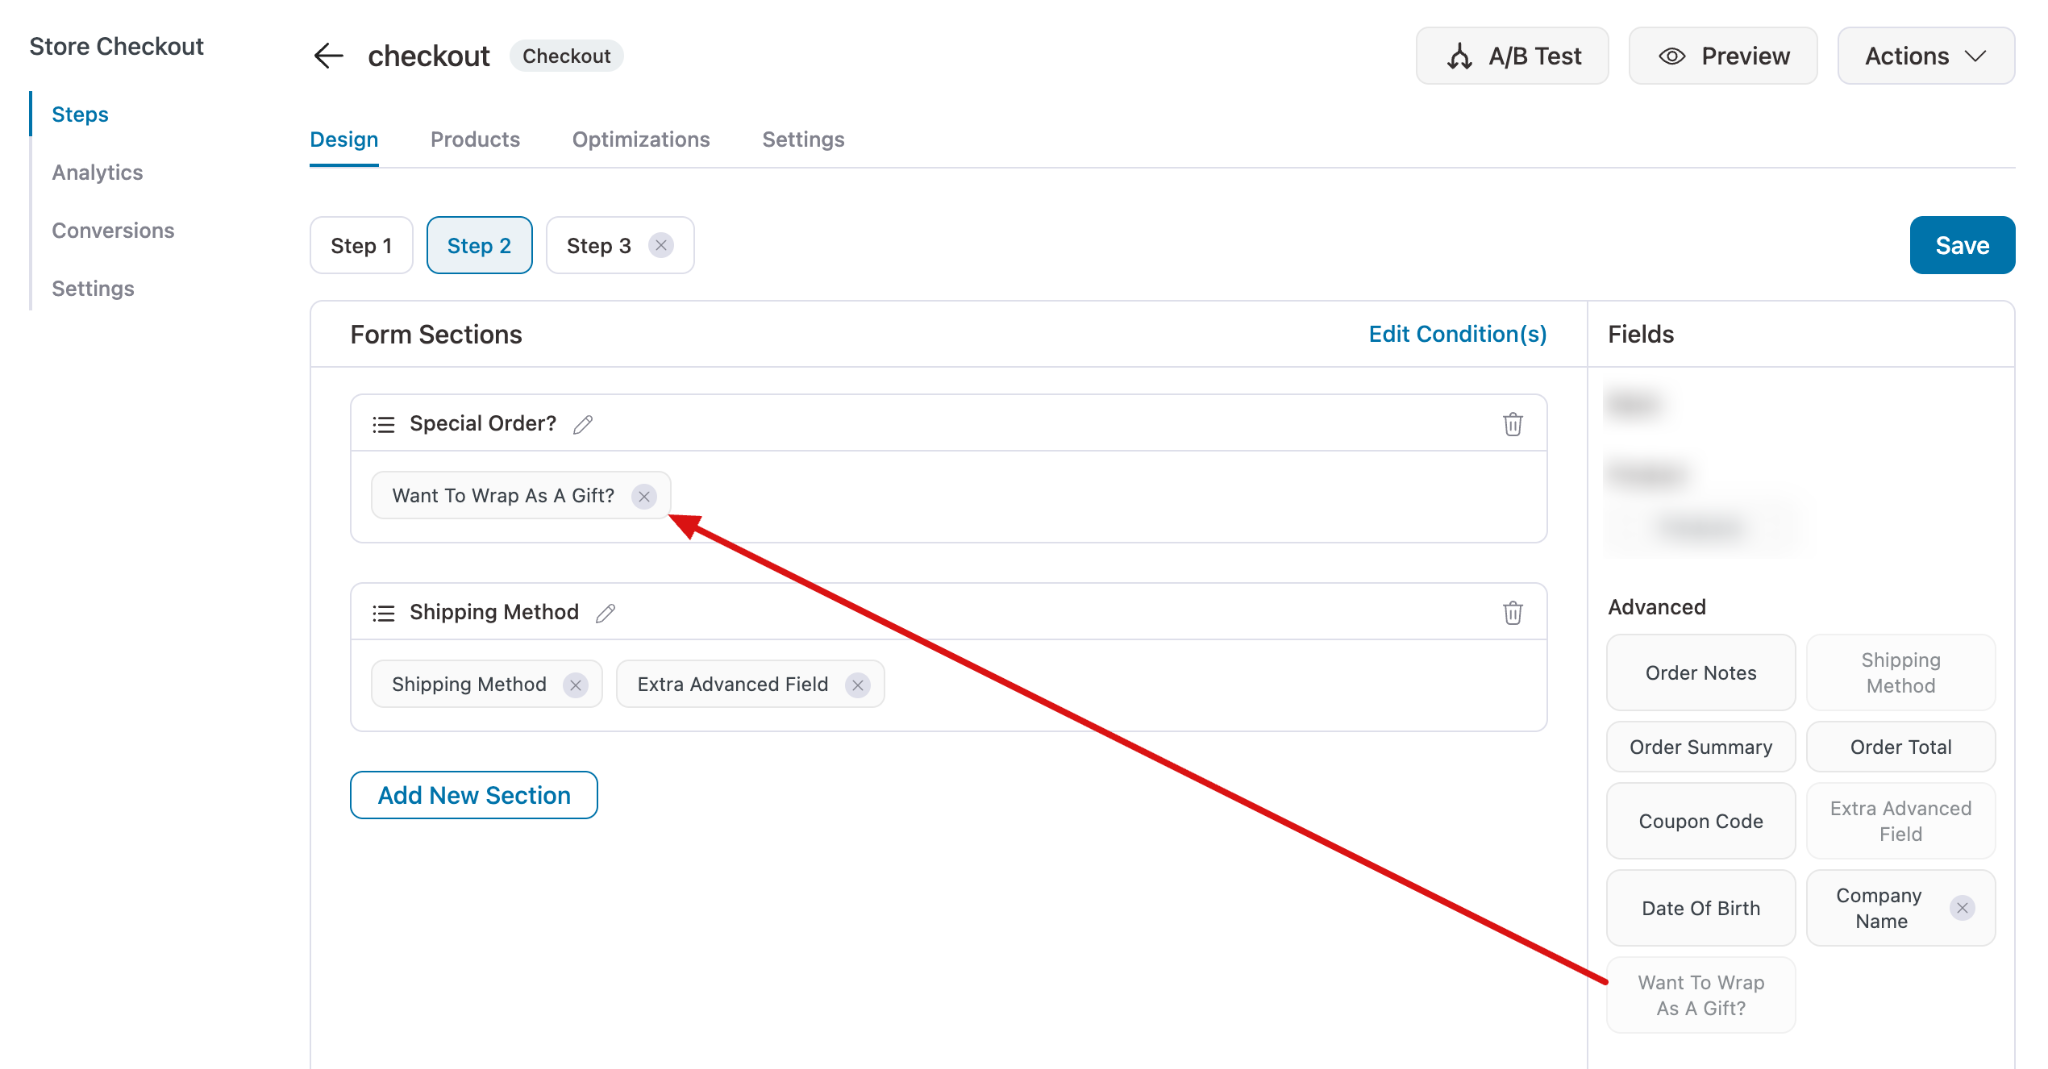
Make sure to drag and drop to add the field to the checkout form.
Step 2: Create additional fields to display when this checkbox is clicked
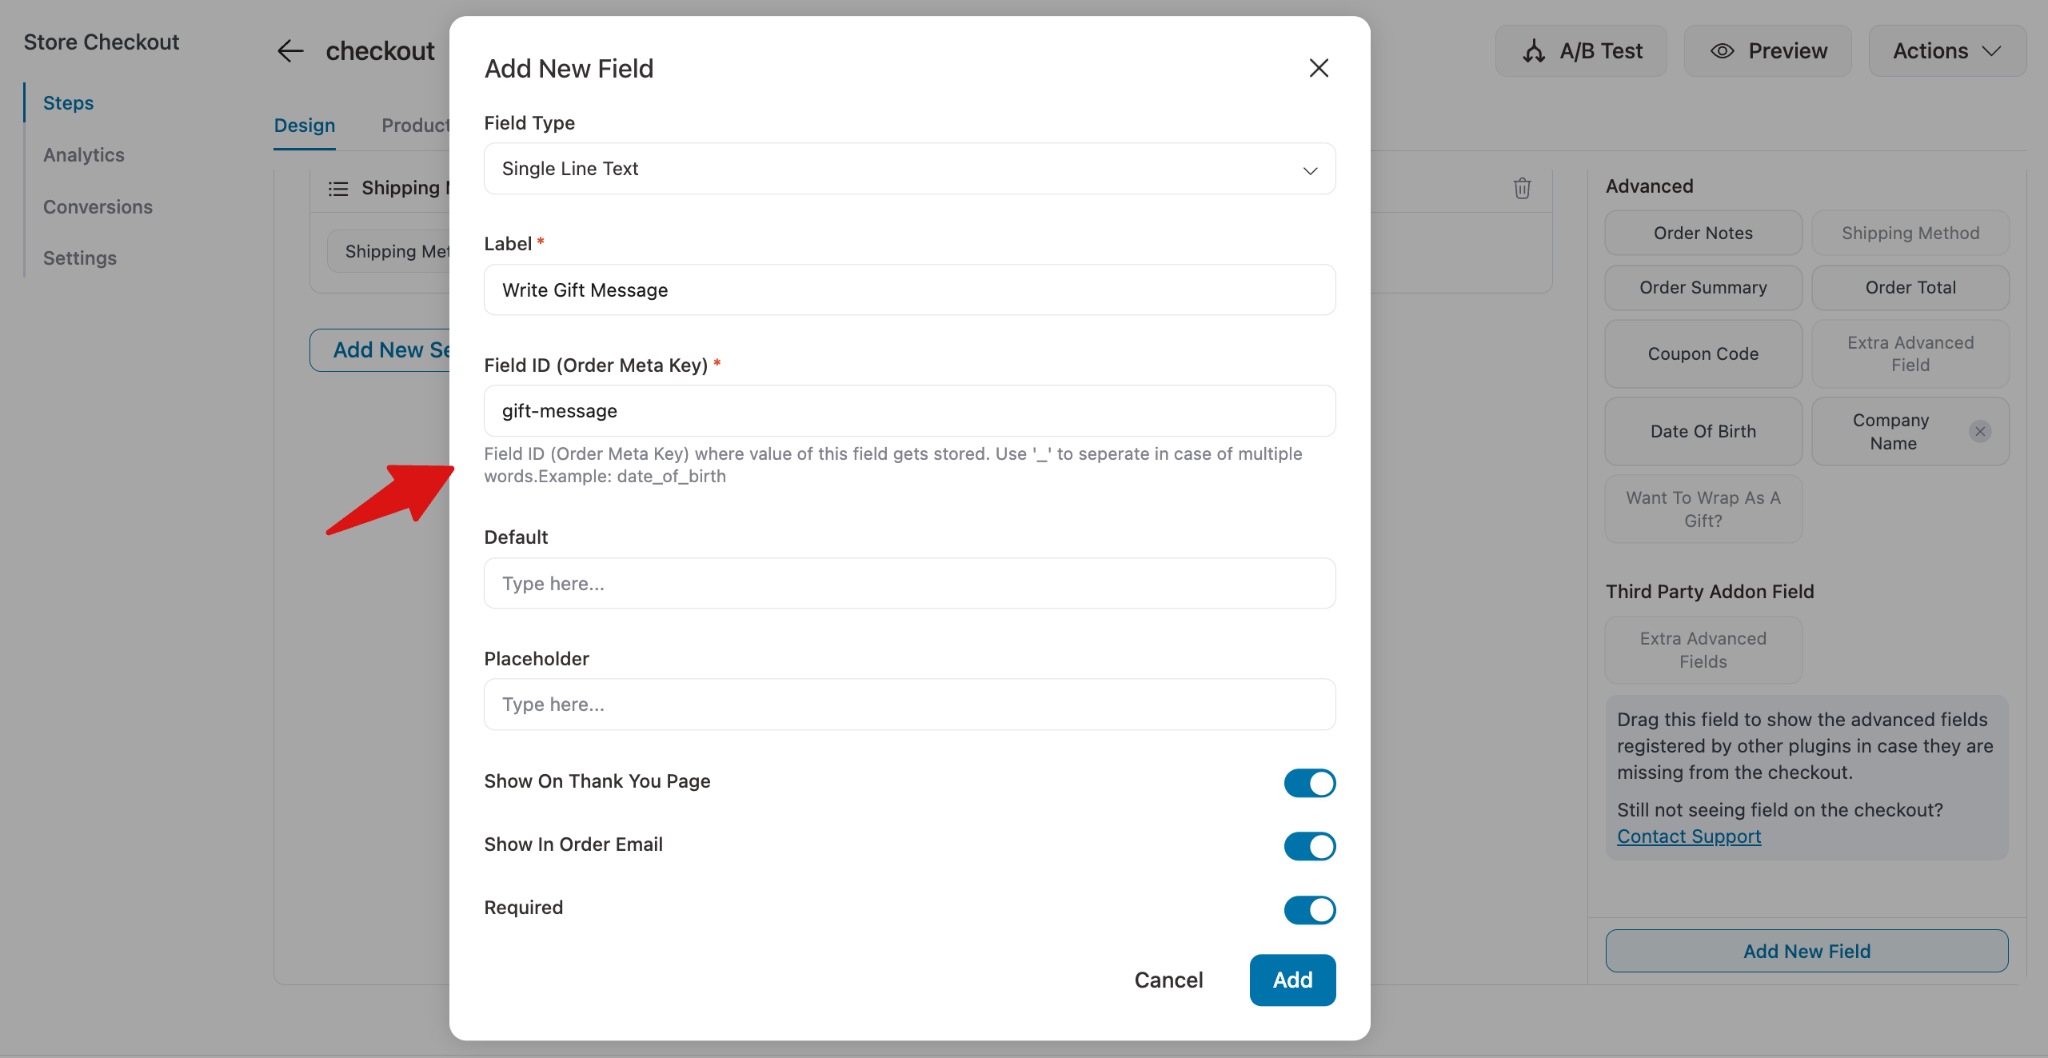
Now it’s time to show the field, you want to show up when the first checkbox is checked.
For example, we are creating a “gift message” field.
- Field type - Single Line text
- Field label - Gift message
- Field ID - child_field
- Required - Yes
If needed, create more fields by following the same
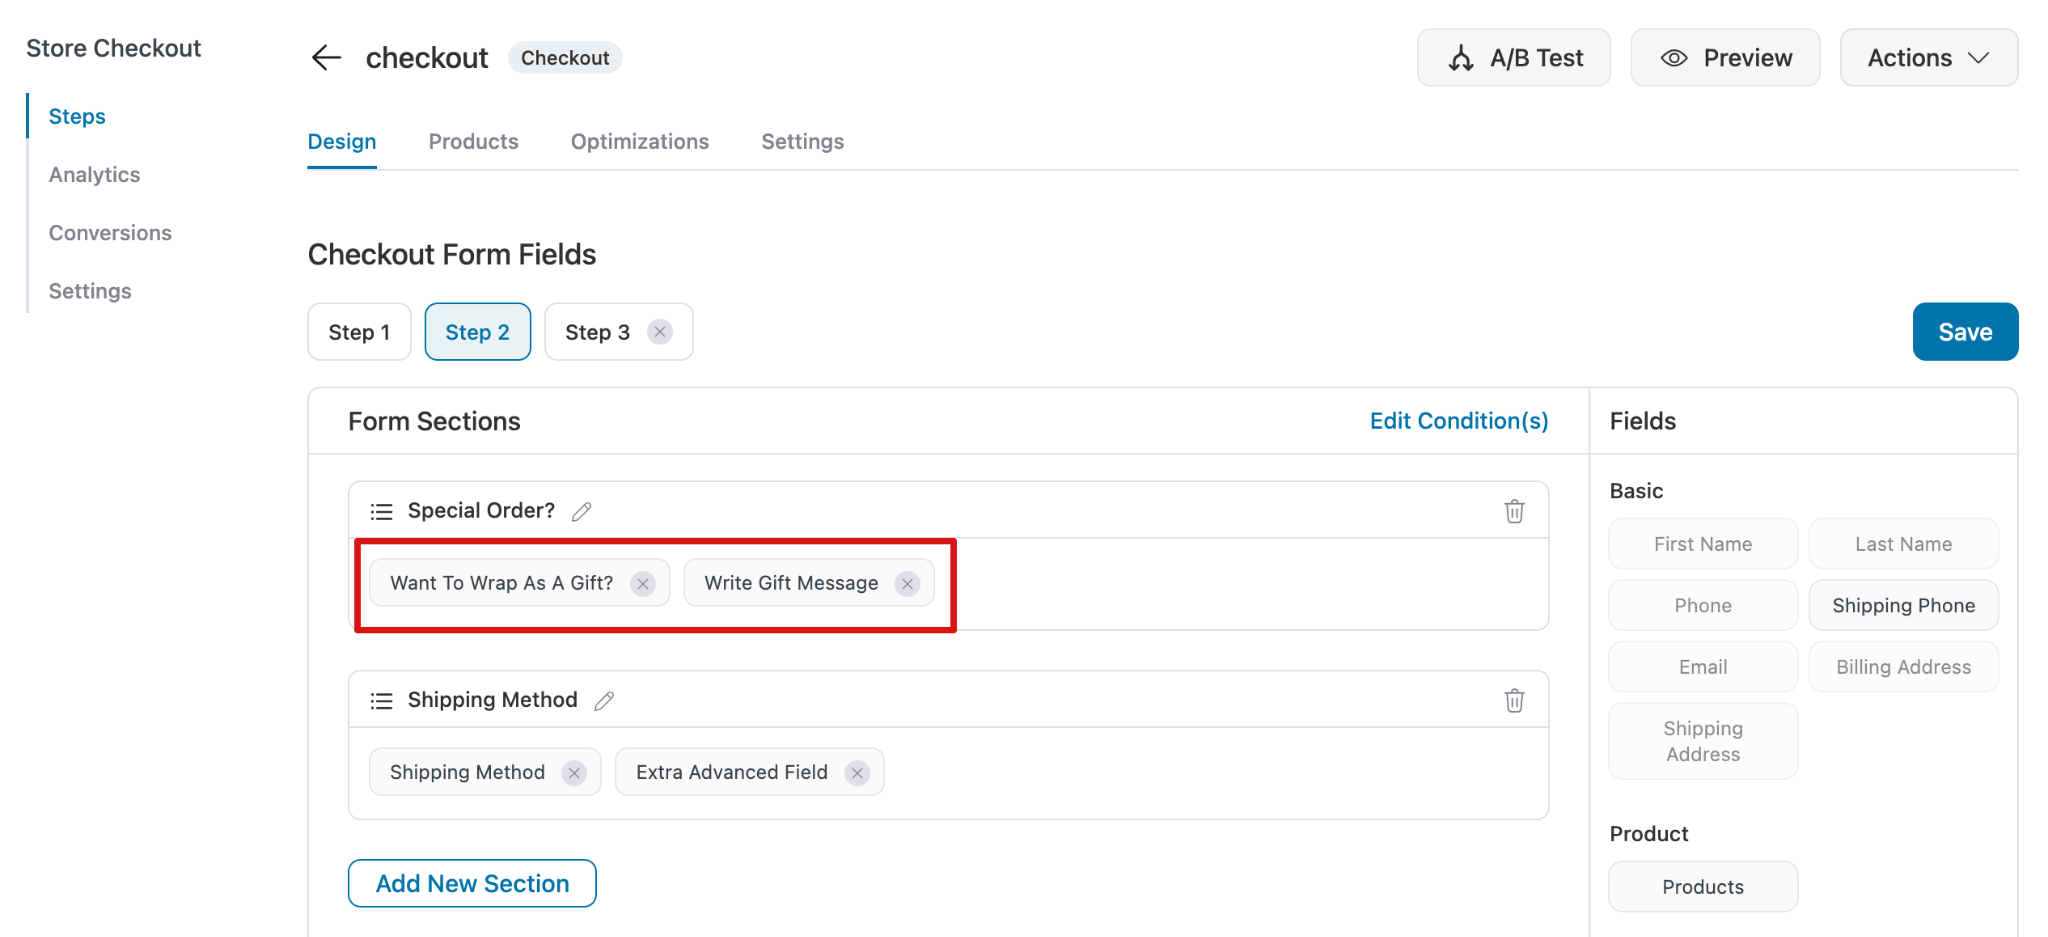
Now add the field next to the first checkbox field.
Step 3: Add conditions
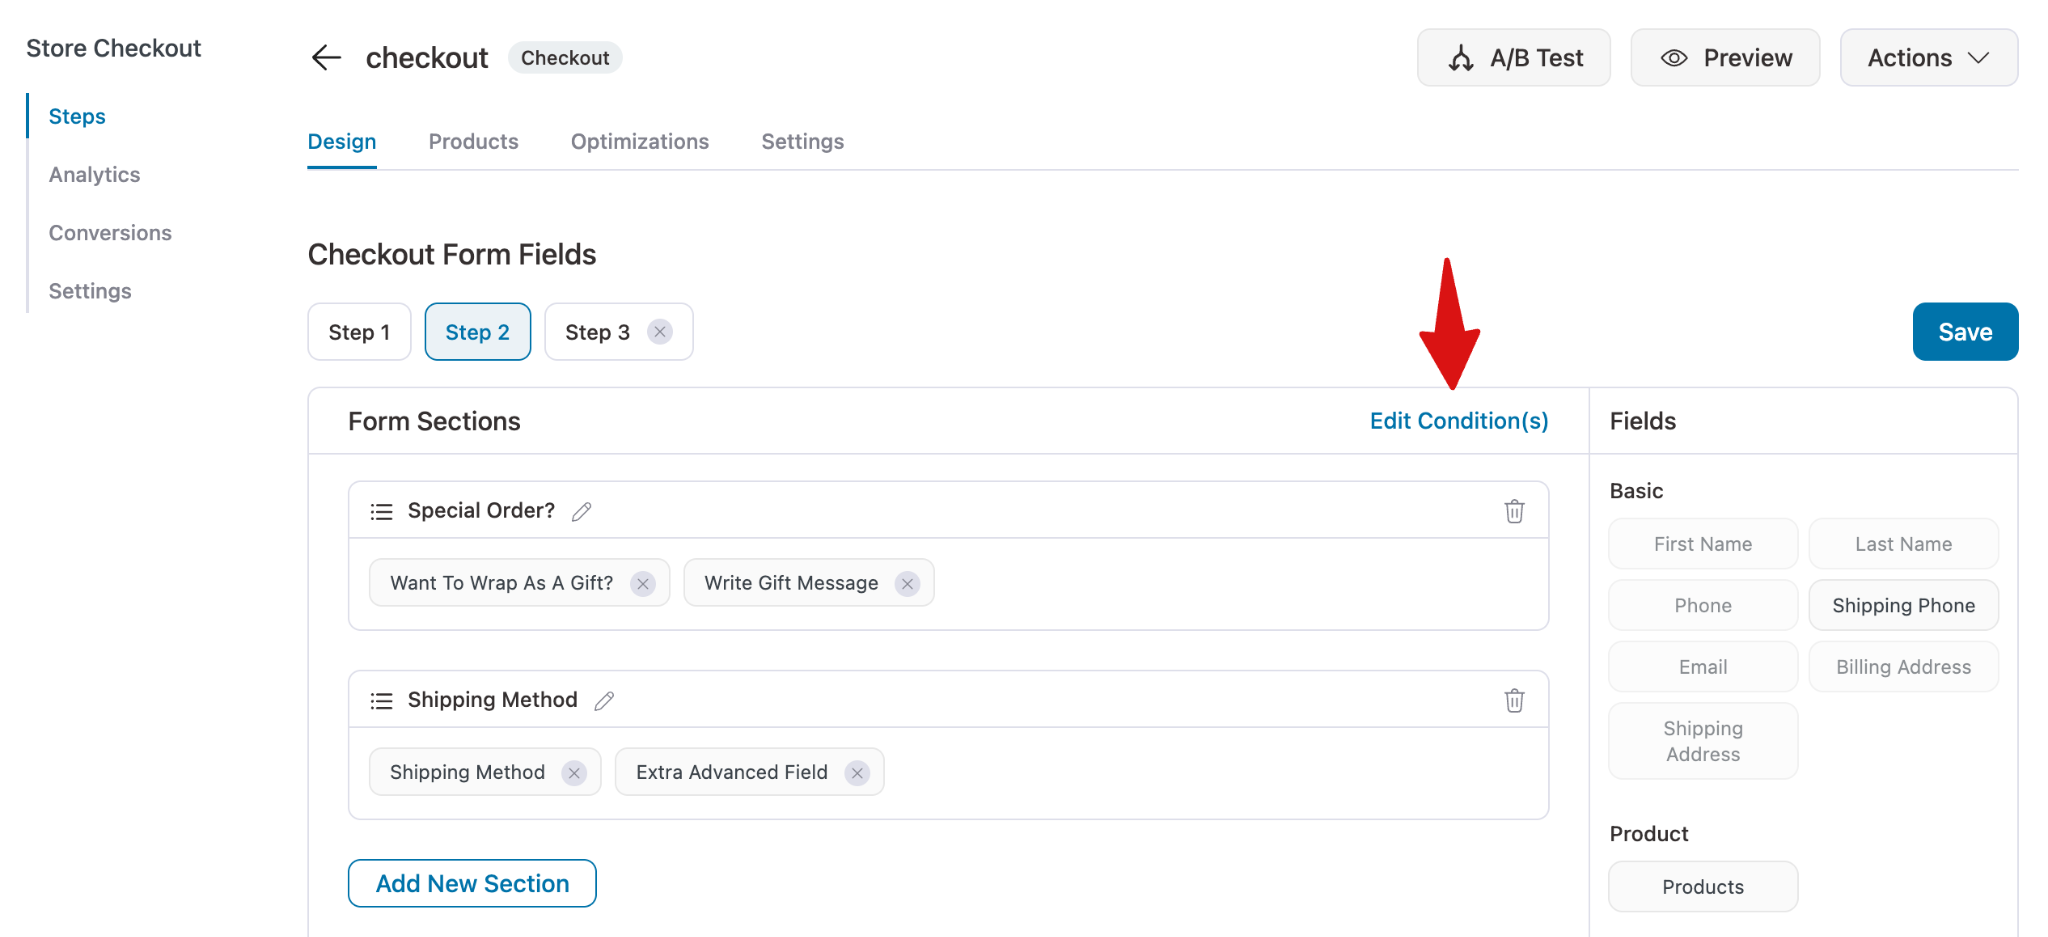
Now, to make the “Write Gift Message” field appear only when people check the “Want to wrap as a Gift?” field, we will add a condition.
To start, hit the button “Edit Conditions”.
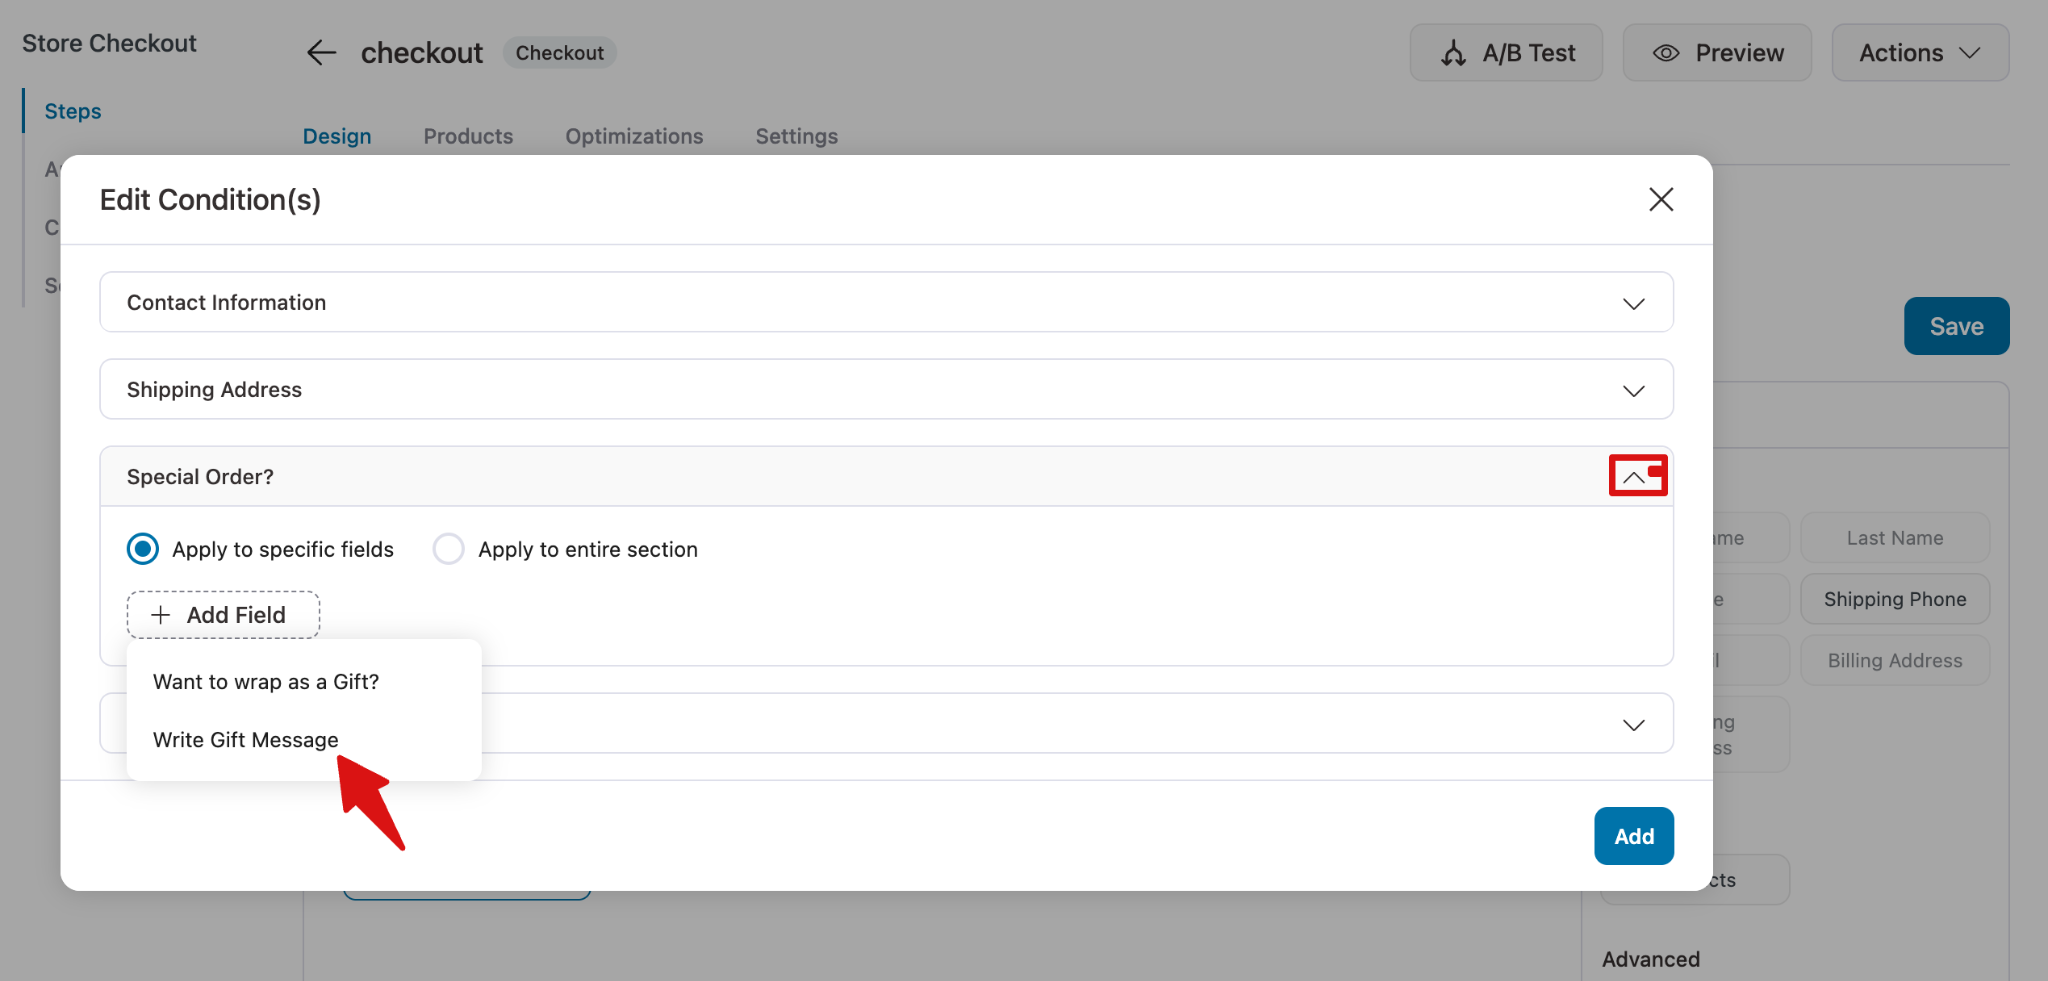
Next, expand the Section that contains the conditional field, and select “Apply to specific fields”. Then hit “+ Add Field” and select the field you want to make conditional.
Next, hit on “+ Add Field”, then click on the option “Fields” to expand and see the existing fields.
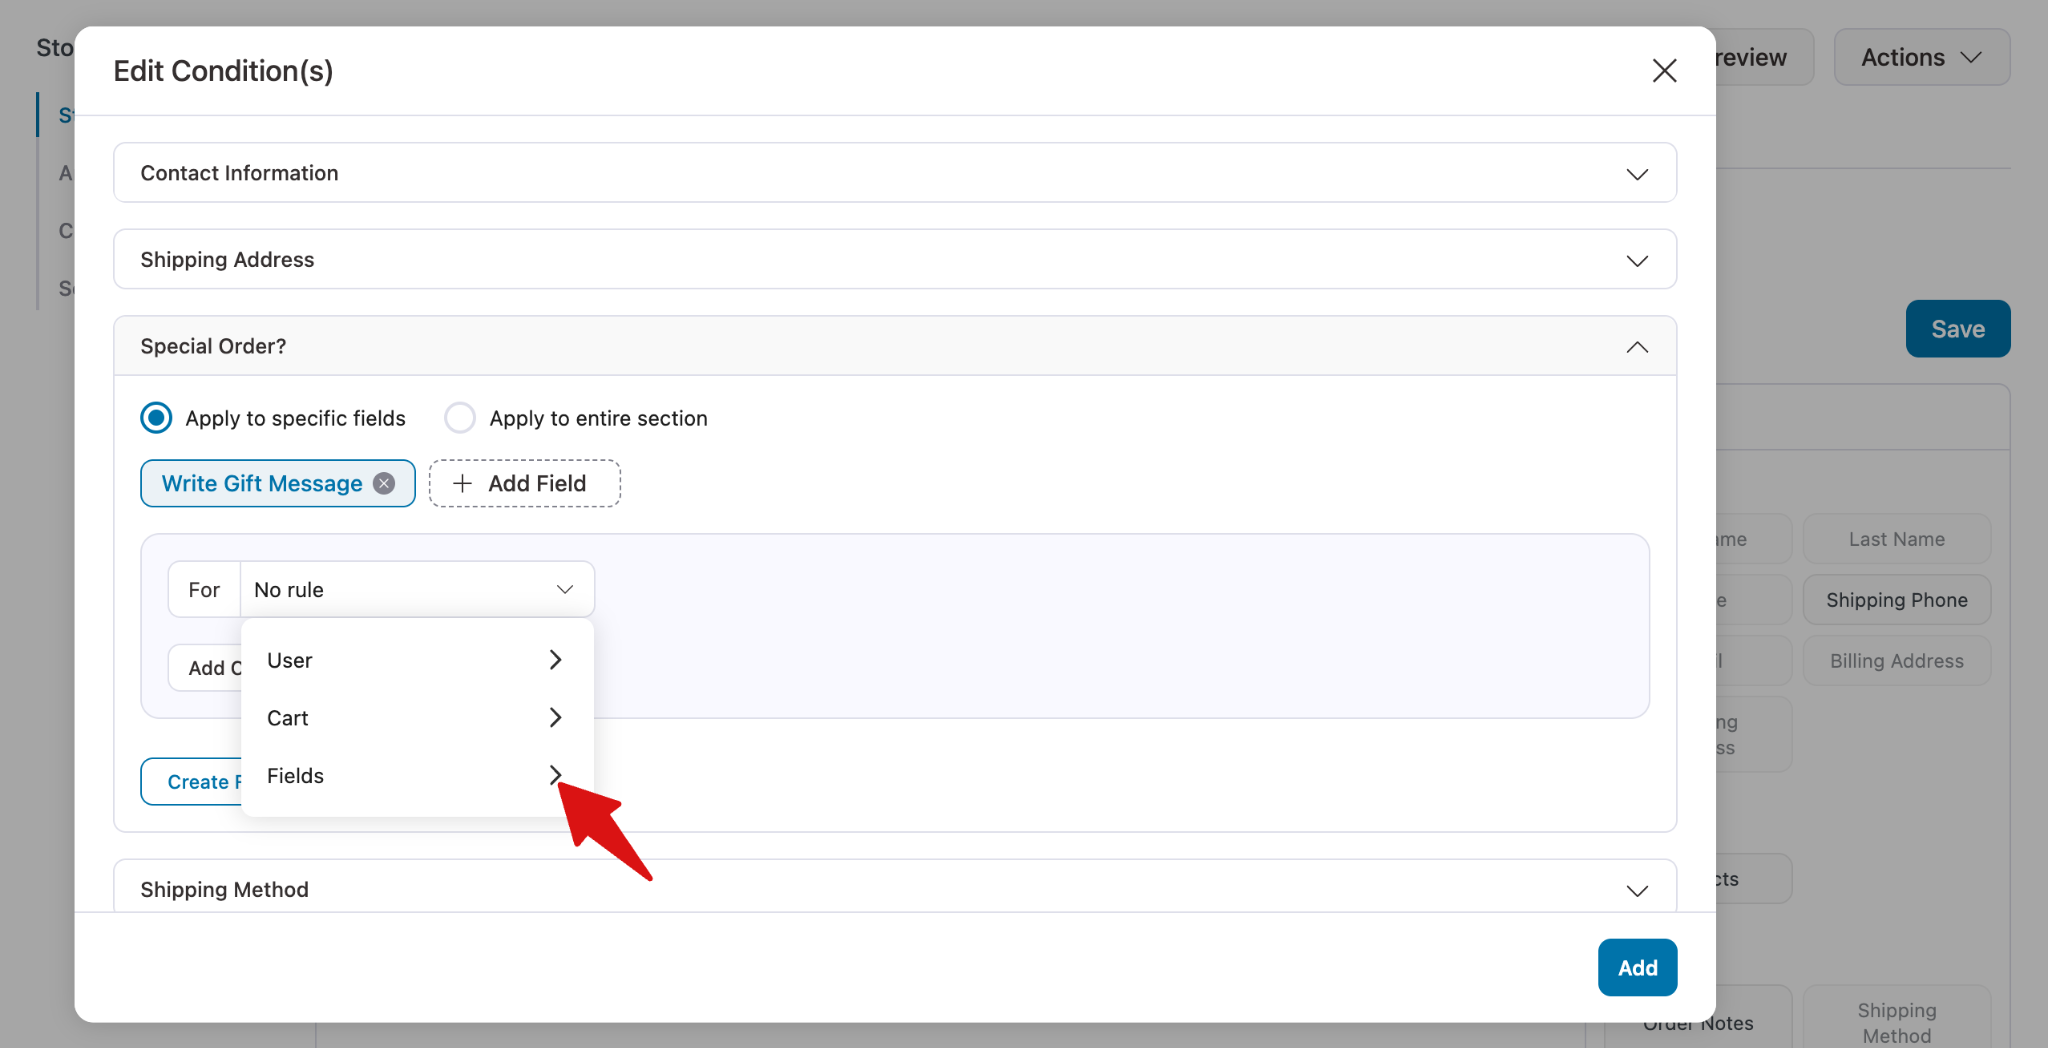
Next, search for and select the field whose value you want to use to make the selected field appear.
Then, set the condition. In our case, “Want to wrap as a field” value matches “Checked”.
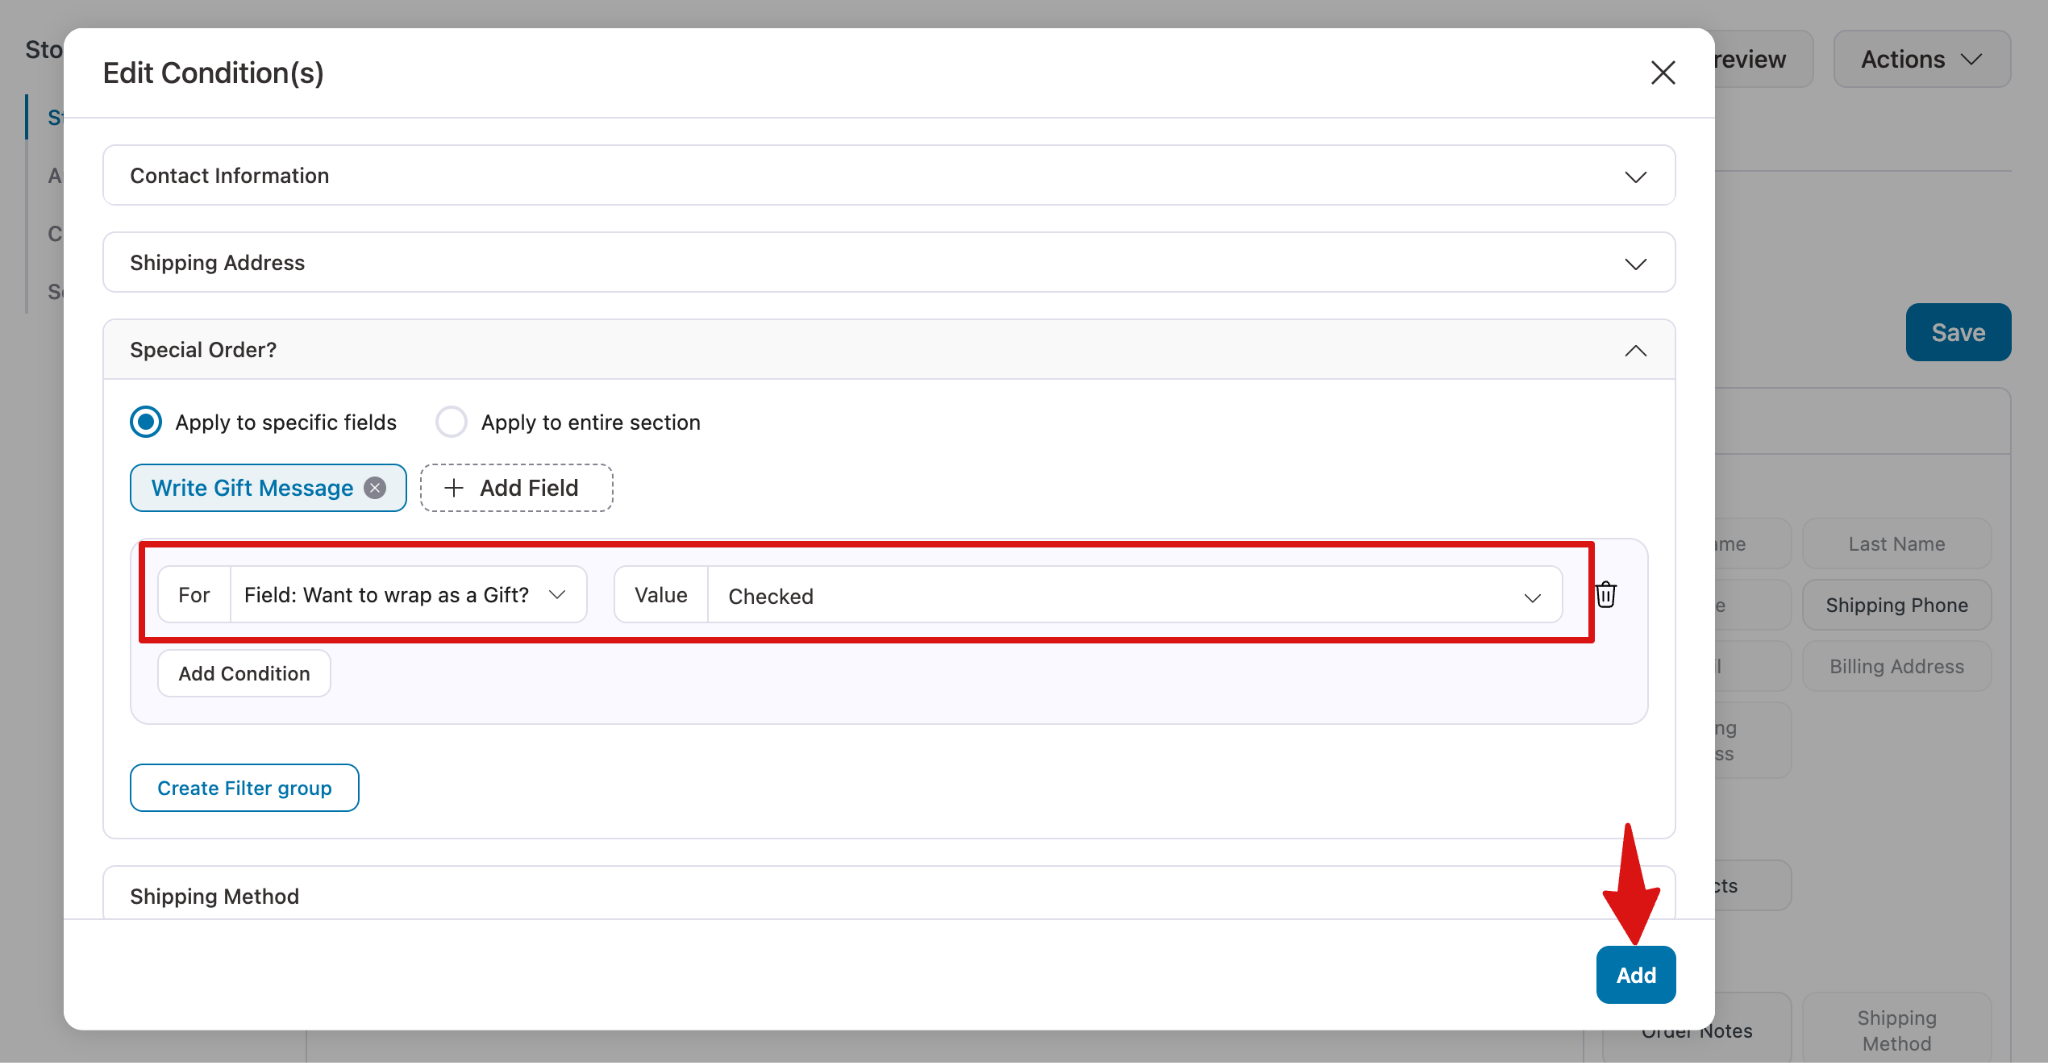
Make sure to hit “Add” and then save the checkout page with custom fields as well.
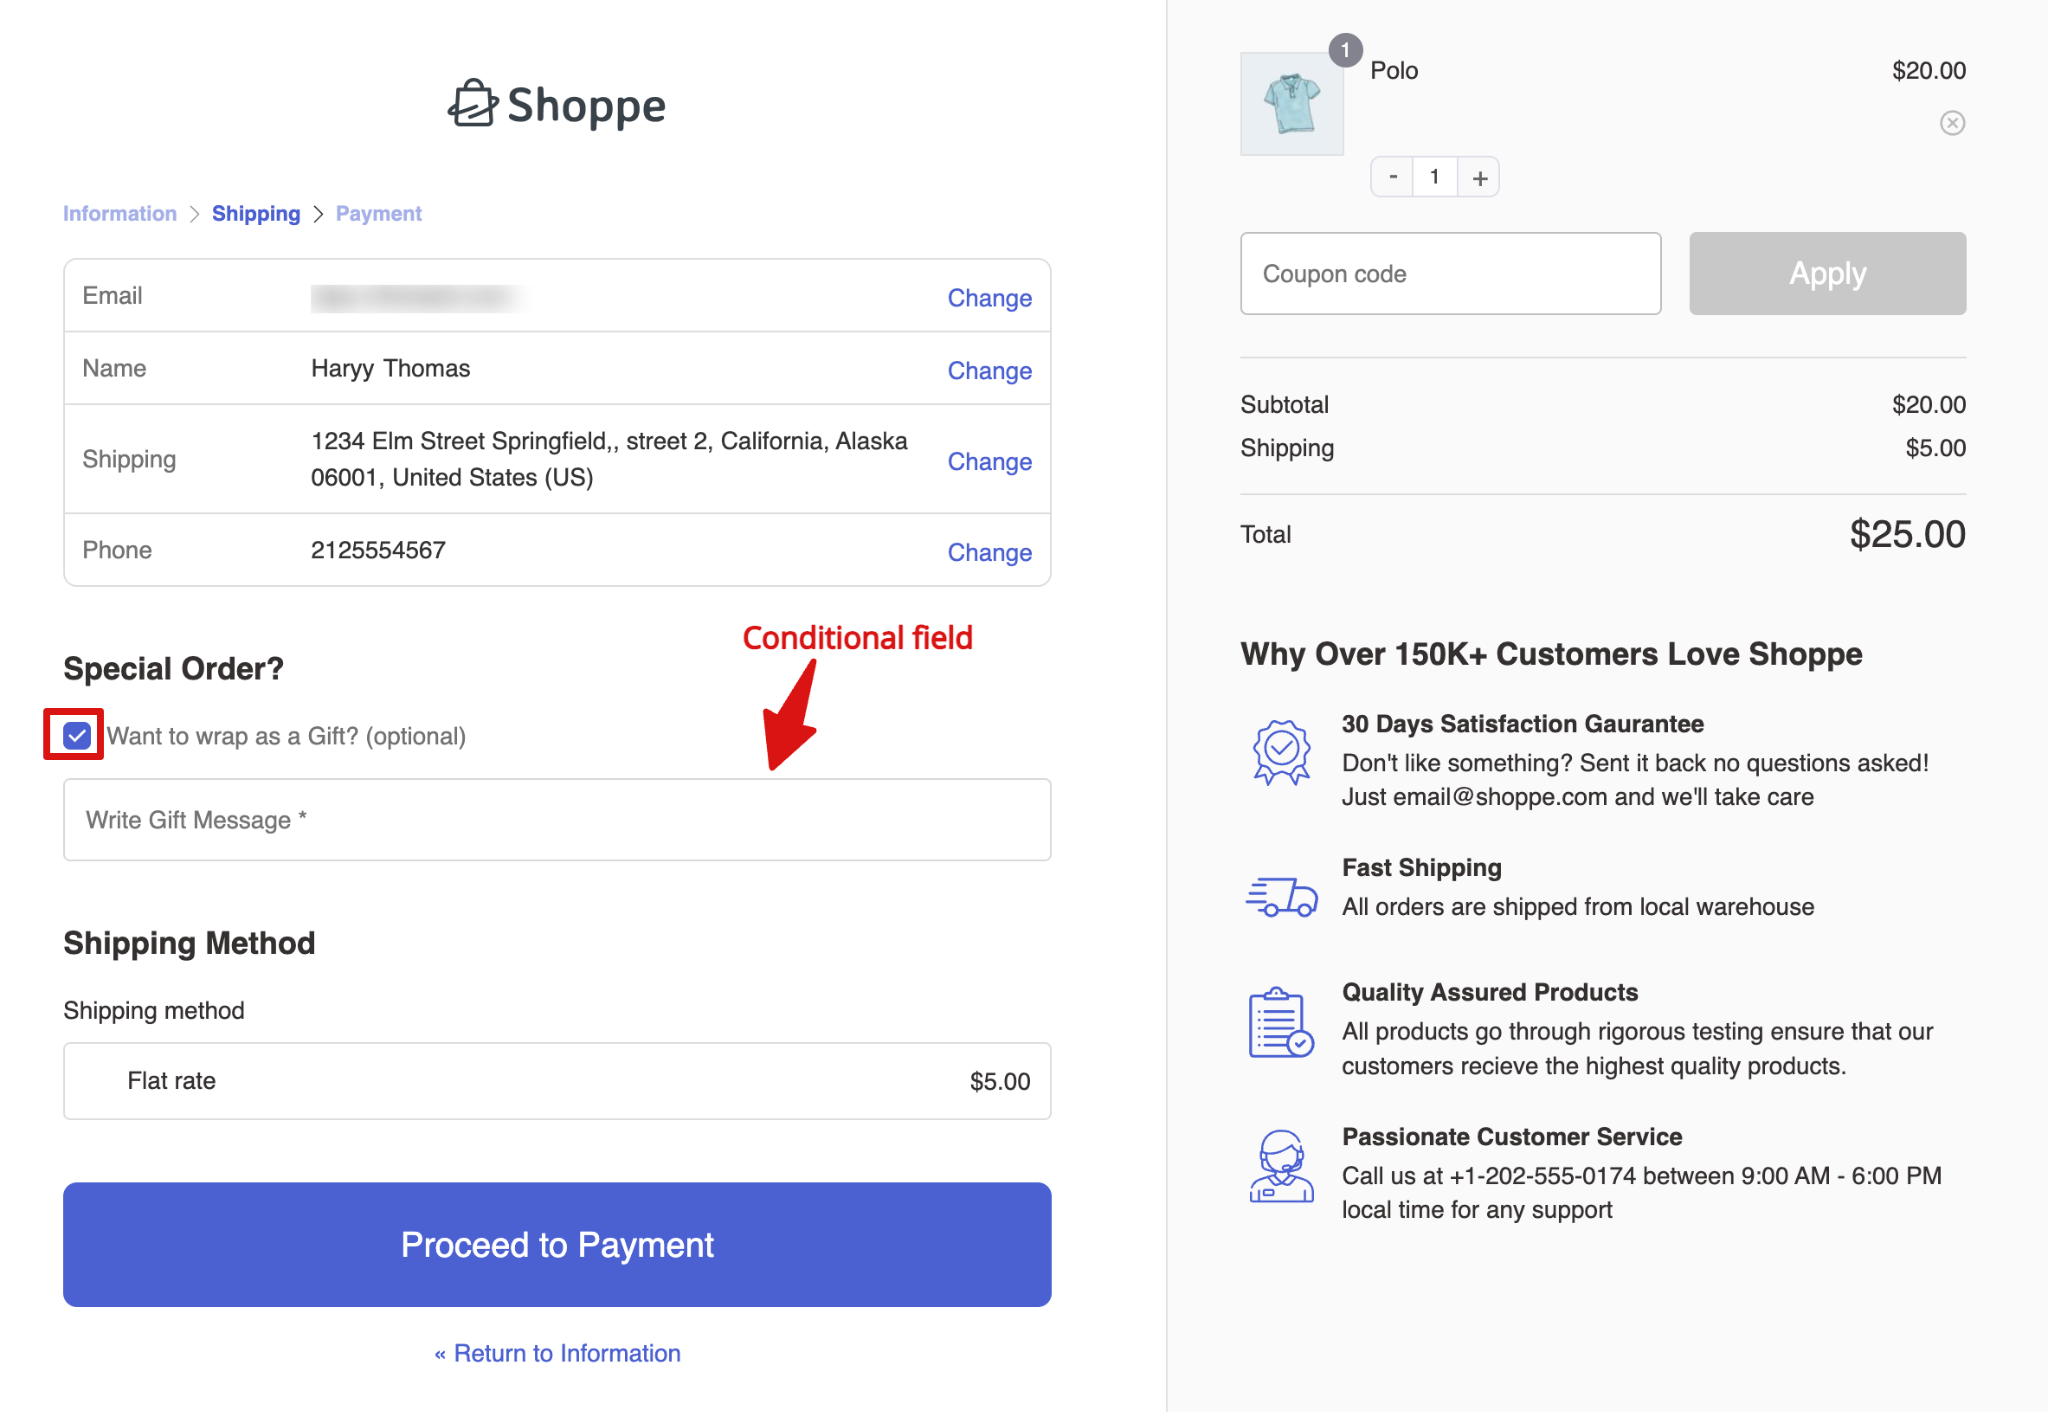
Step 4: Test the conditional field
Now, try placing a test order. You will notice that the conditional field appears only when the checkbox is selected, depending on the value you configured.
If the checkbox is not checked, the field will not appear.
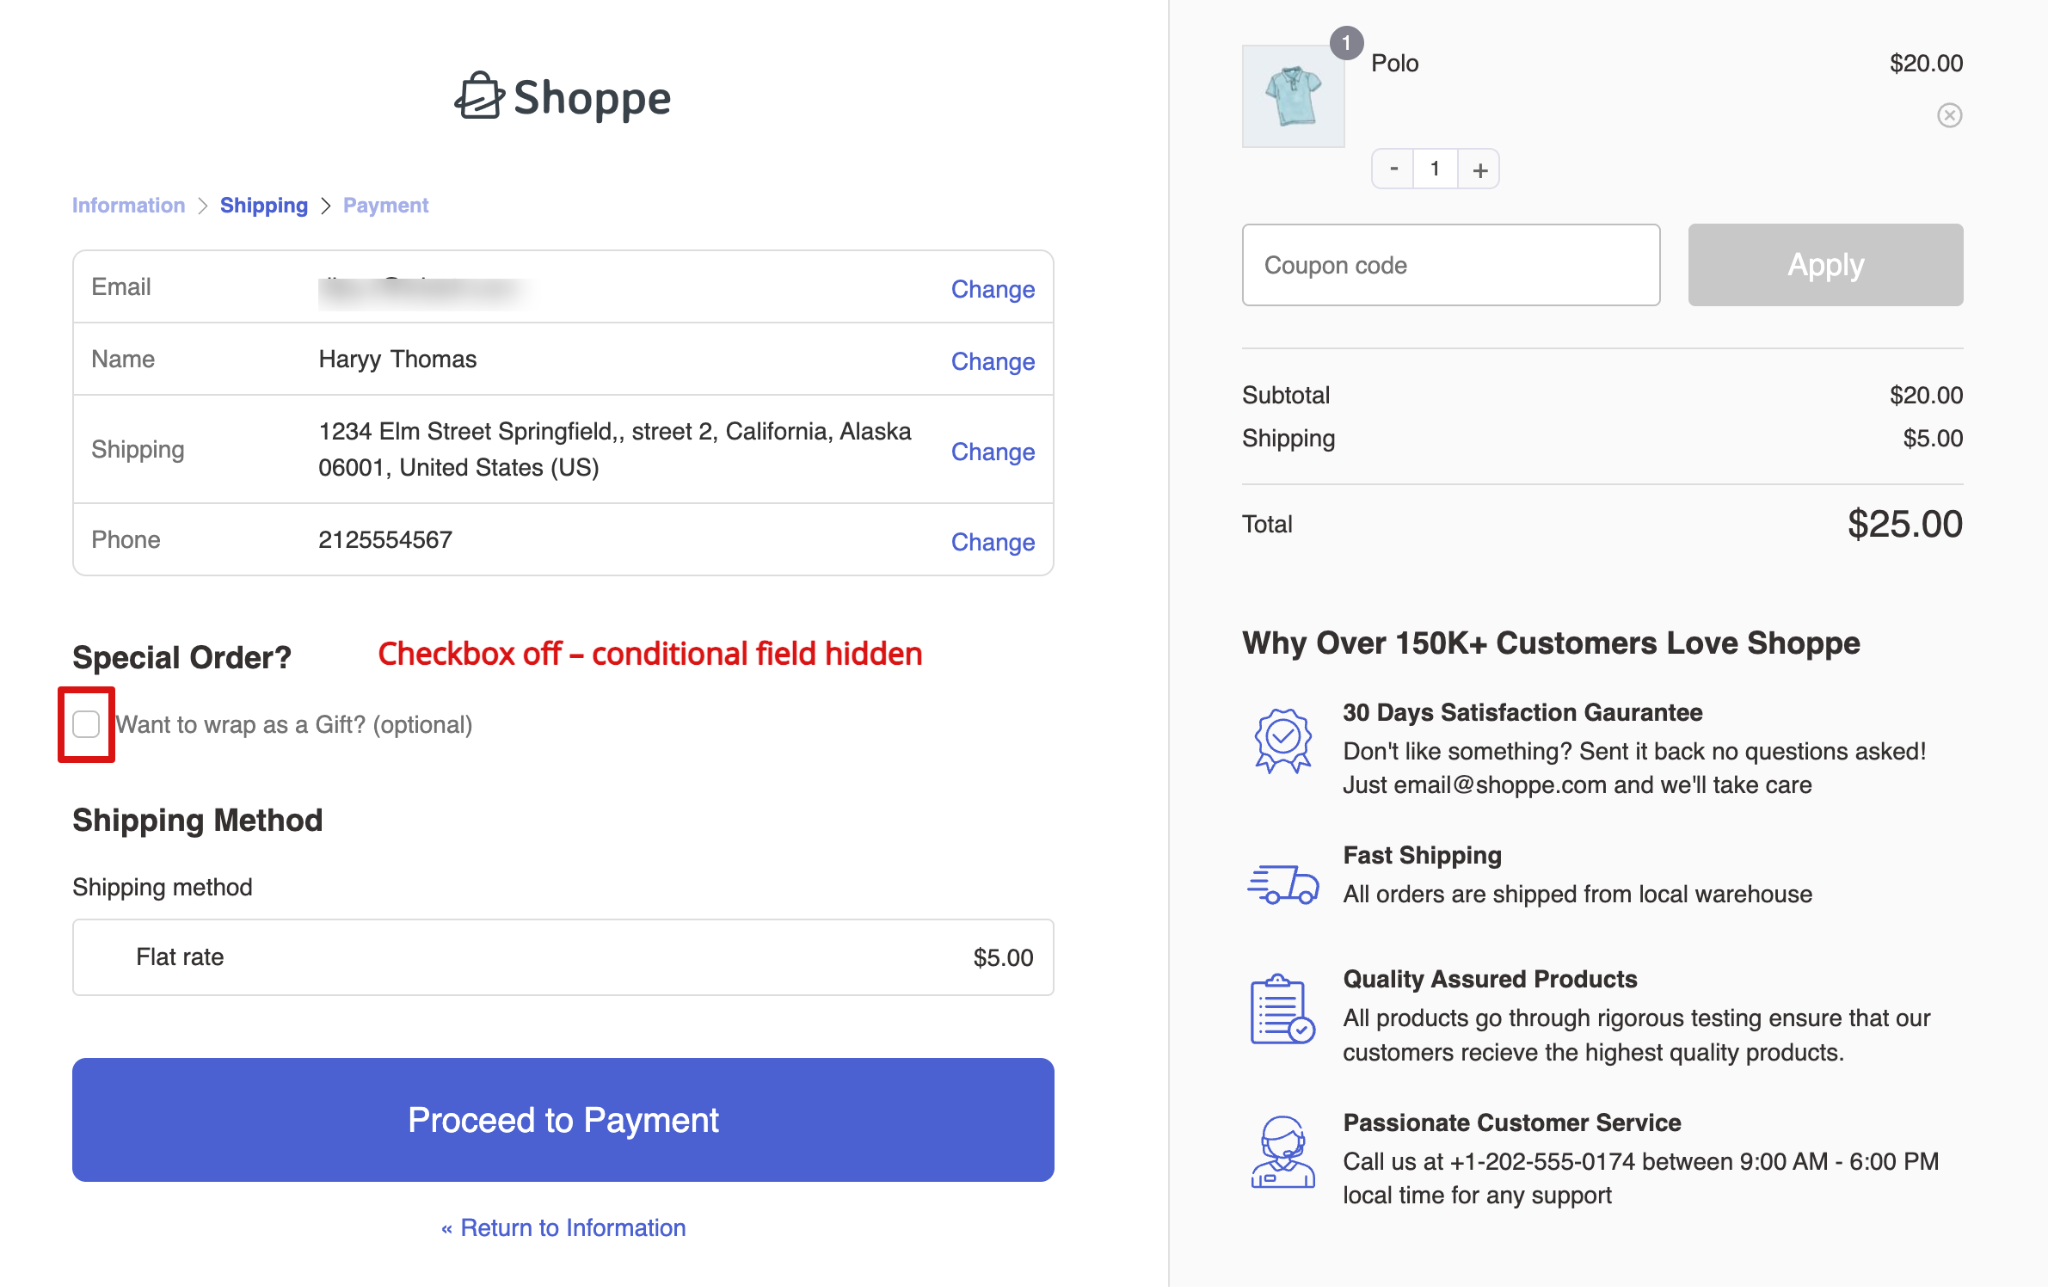
This ensures that additional fields are shown only when relevant, keeping the checkout experience smooth for your customers.


