With the Product Checkout Redirect feature in FunnelKit Funnel Builder, you can control which checkout page each product or category uses.
Instead of sending all products to the default checkout, you can assign specific products or categories to any existing dedicated funnel checkout.
How it works:
- A product can redirect to a specific funnel checkout
- A product category can be assigned to a checkout
- Different products or categories can use different checkouts
- No need for customers to use a funnel URL
Priority rule:
Product-level settings take higher priority over category-level settings. If both are assigned, the product-level checkout rule will be applied.
If multiple products with different checkout rules are added, FunnelKit Funnel Builder automatically falls back to the default checkout for consistency.
Without Product Checkout Redirect:
- If no redirect is set, the default store checkout is used
This feature gives you full control over the checkout experience by letting each product or category send customers to the right checkout page.
How to Set Up Checkout Redirect (Product Level)
To assign a checkout page to a specific product:
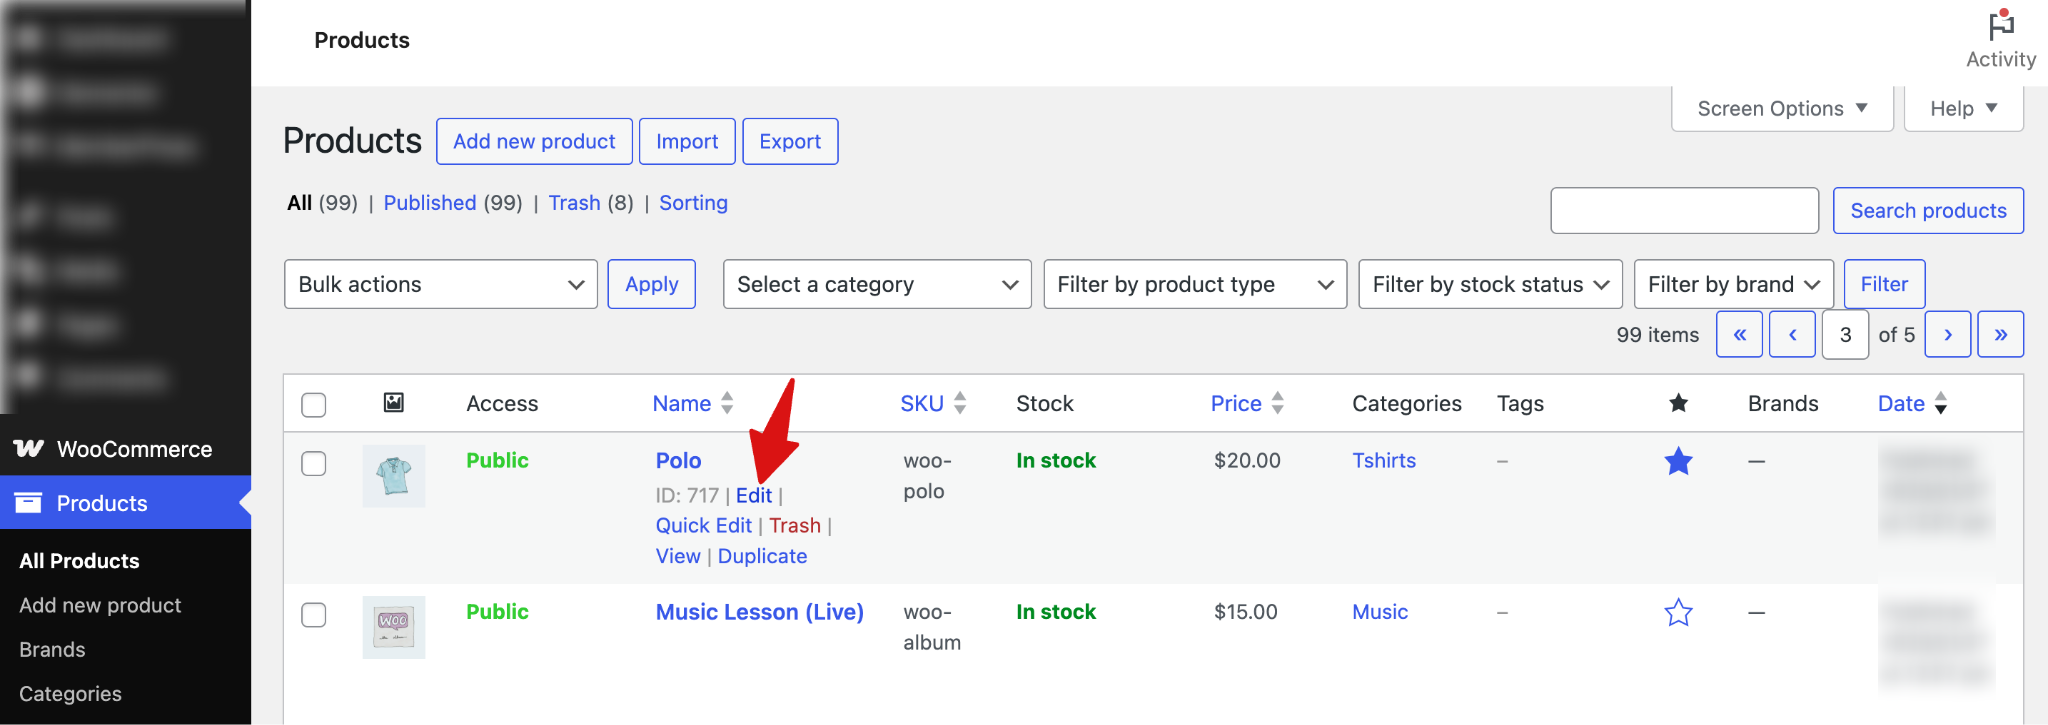
Step 1: Edit the product
Go to Products ⇒ All Products in your WordPress dashboard and edit the product you want to configure.
Step 2: Assign the checkout
Next, scroll down to the “FunnelKit” tab and under “FunnelKit Checkout”, select the Checkout flow you want this product to use from the dropdown.
You can also set the “Add To Cart” Text.
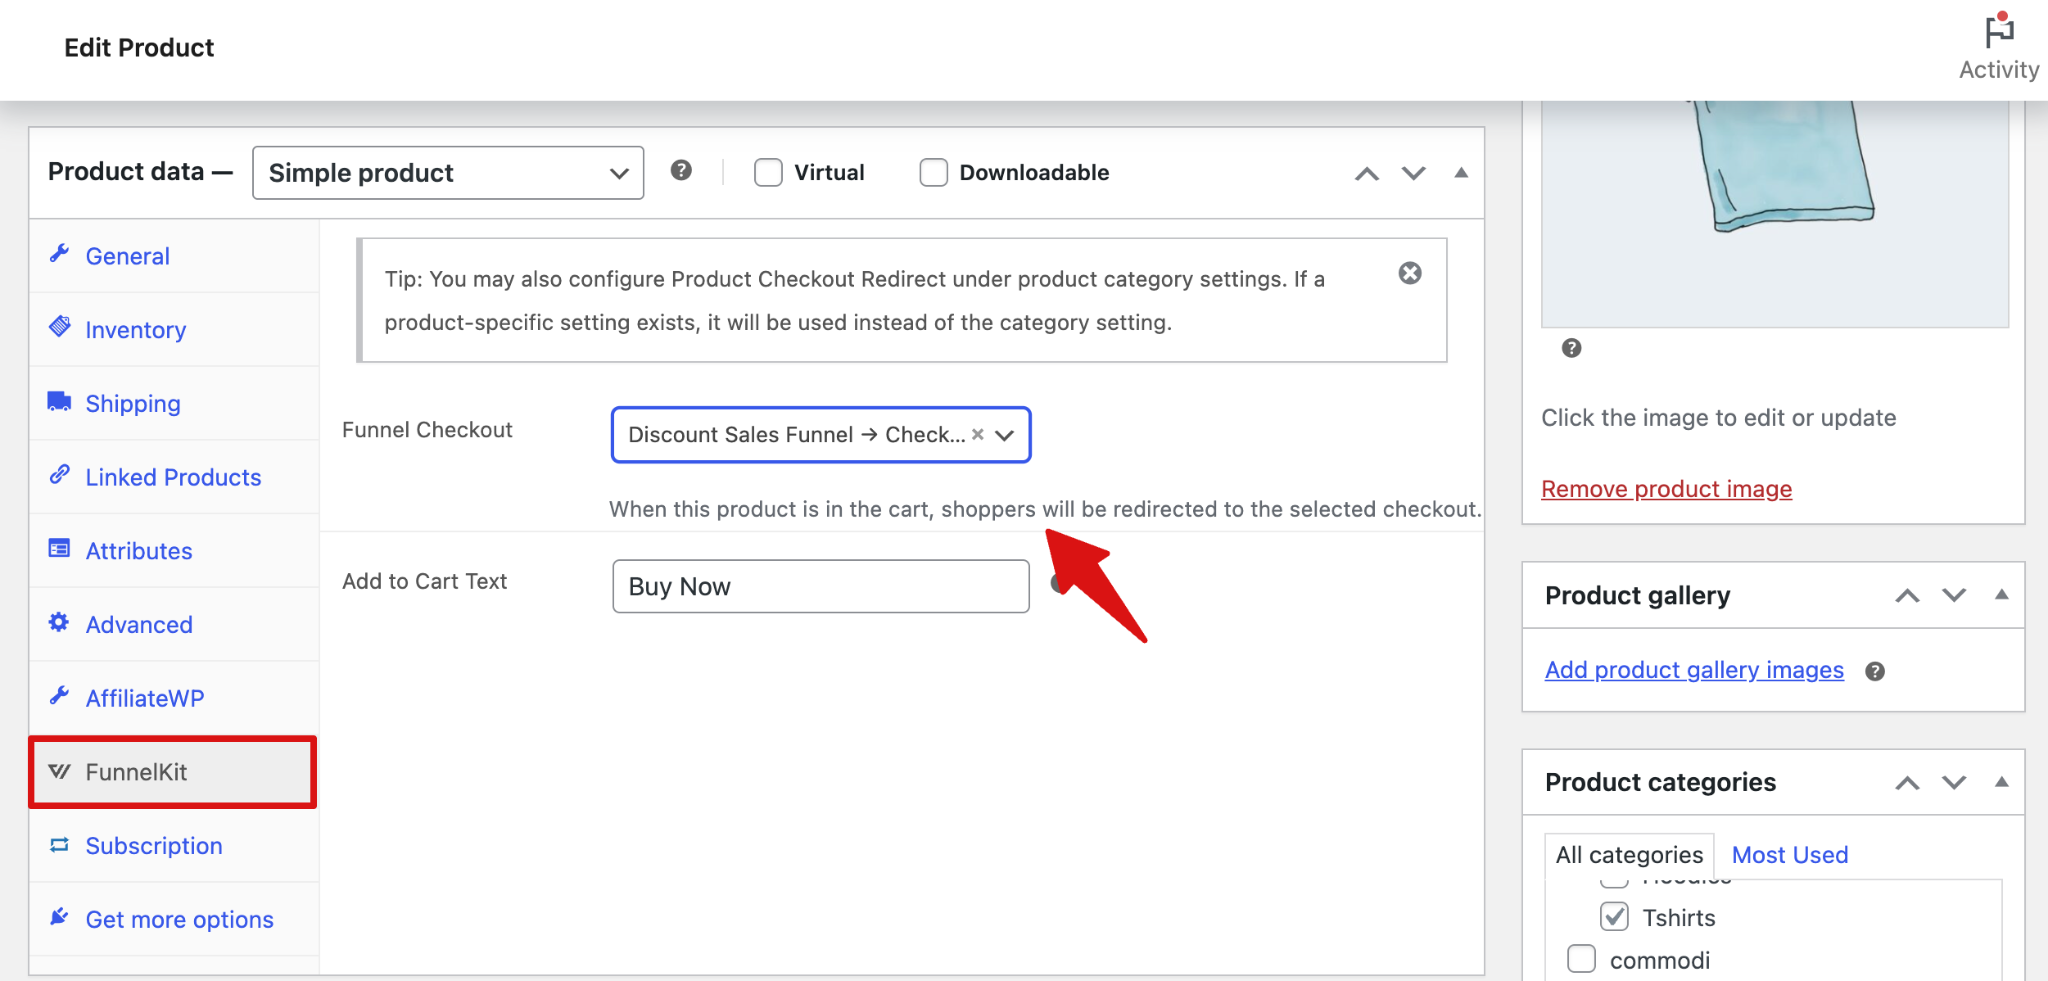
And make sure to save changes.
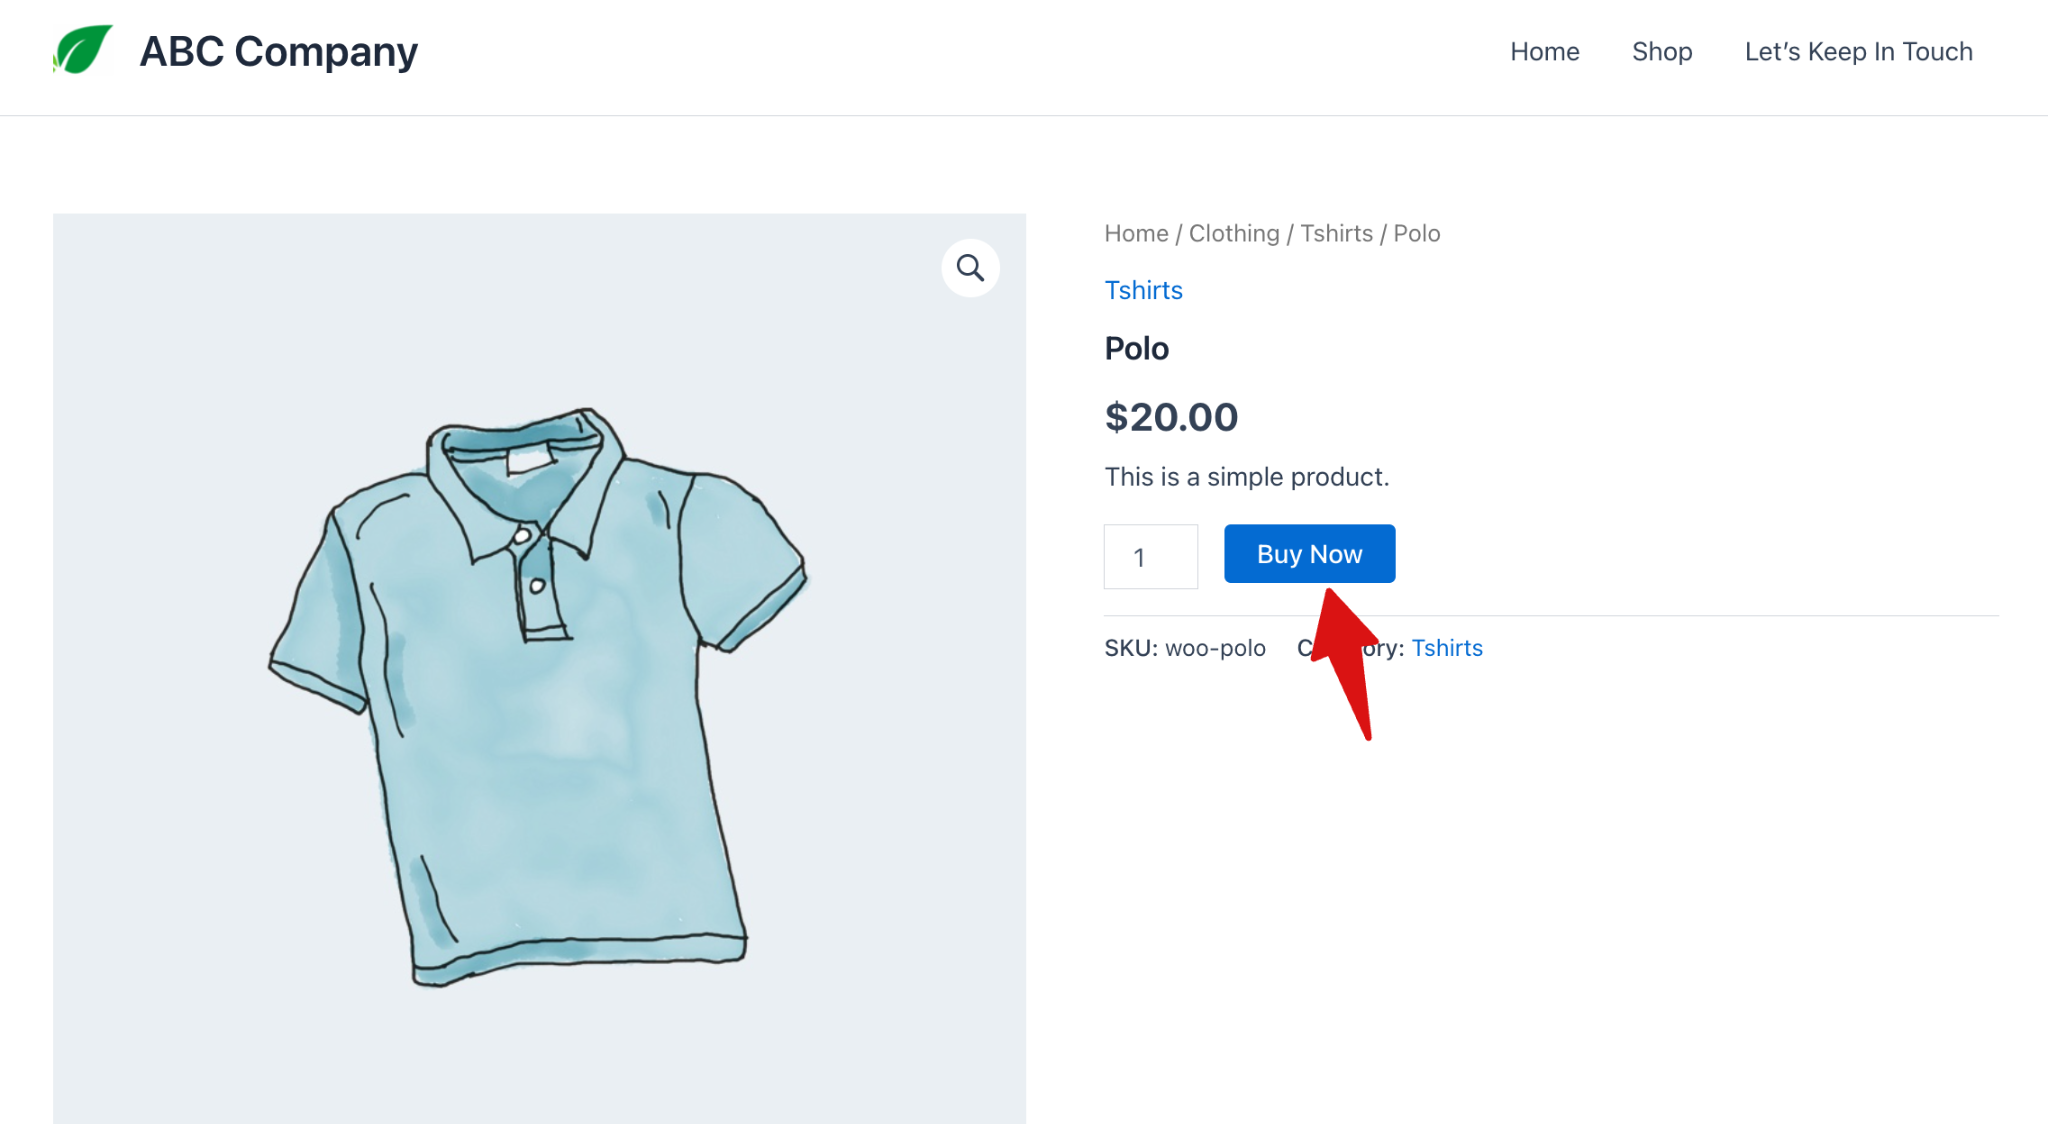
Step 3: Test the product checkout redirect
When a customer adds this product to the cart and proceeds to checkout, they will be redirected to the assigned checkout page automatically.
No special links or landing pages are required.
To test this, visit the product page, and you will see the custom add to cart text.
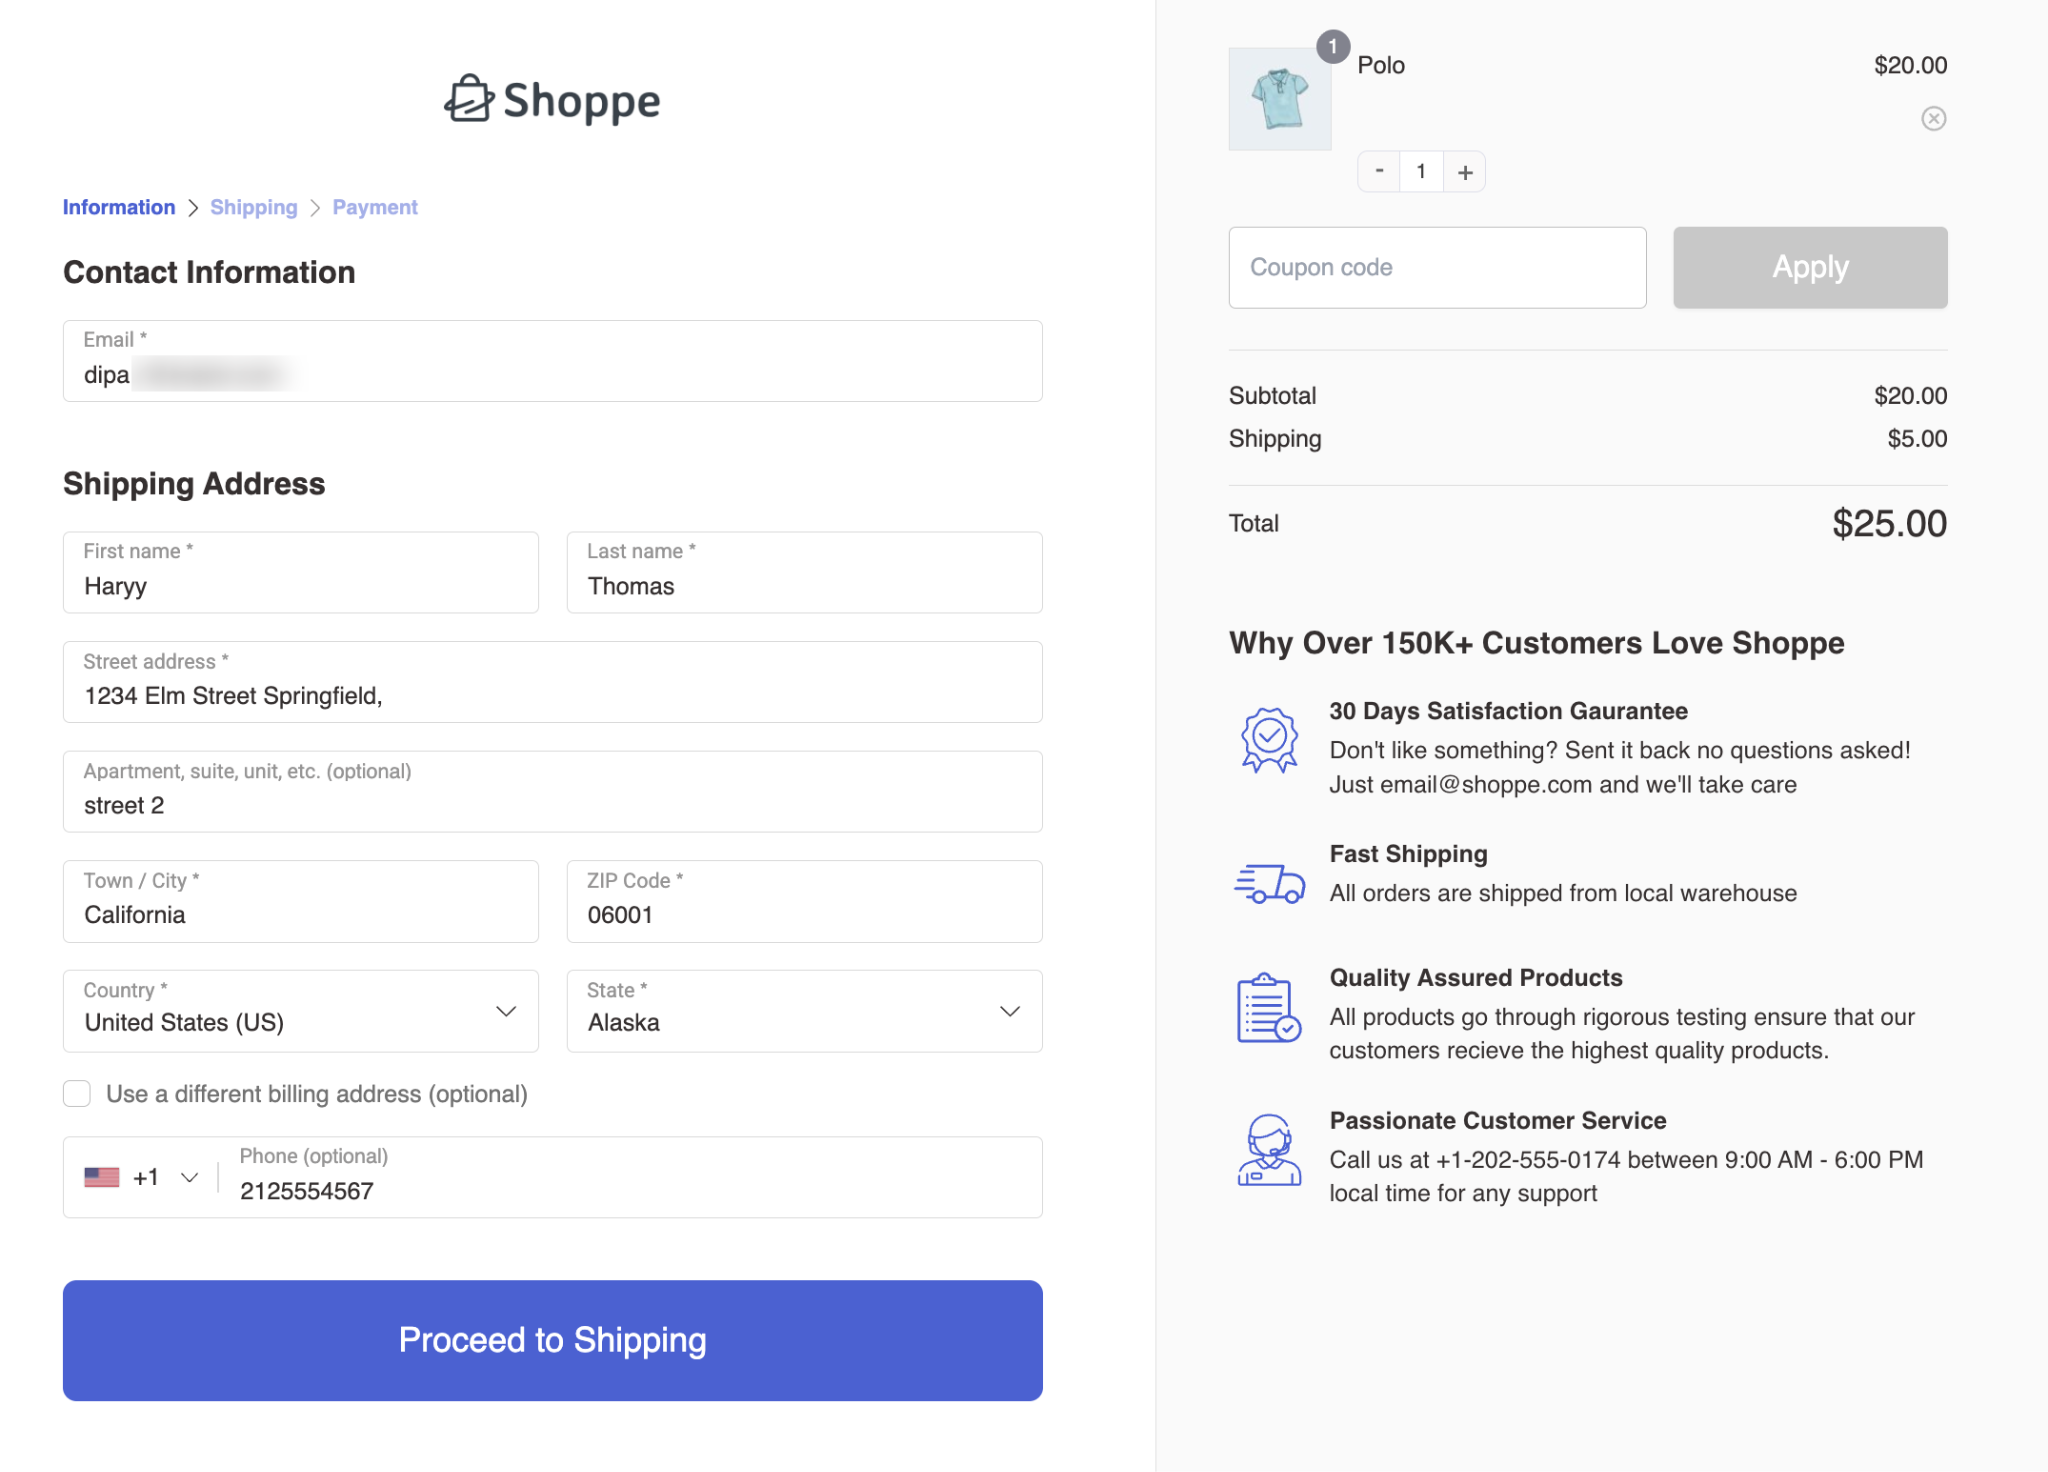
Now, if you redirect to the checkout page, you will be redirected to the one you set.
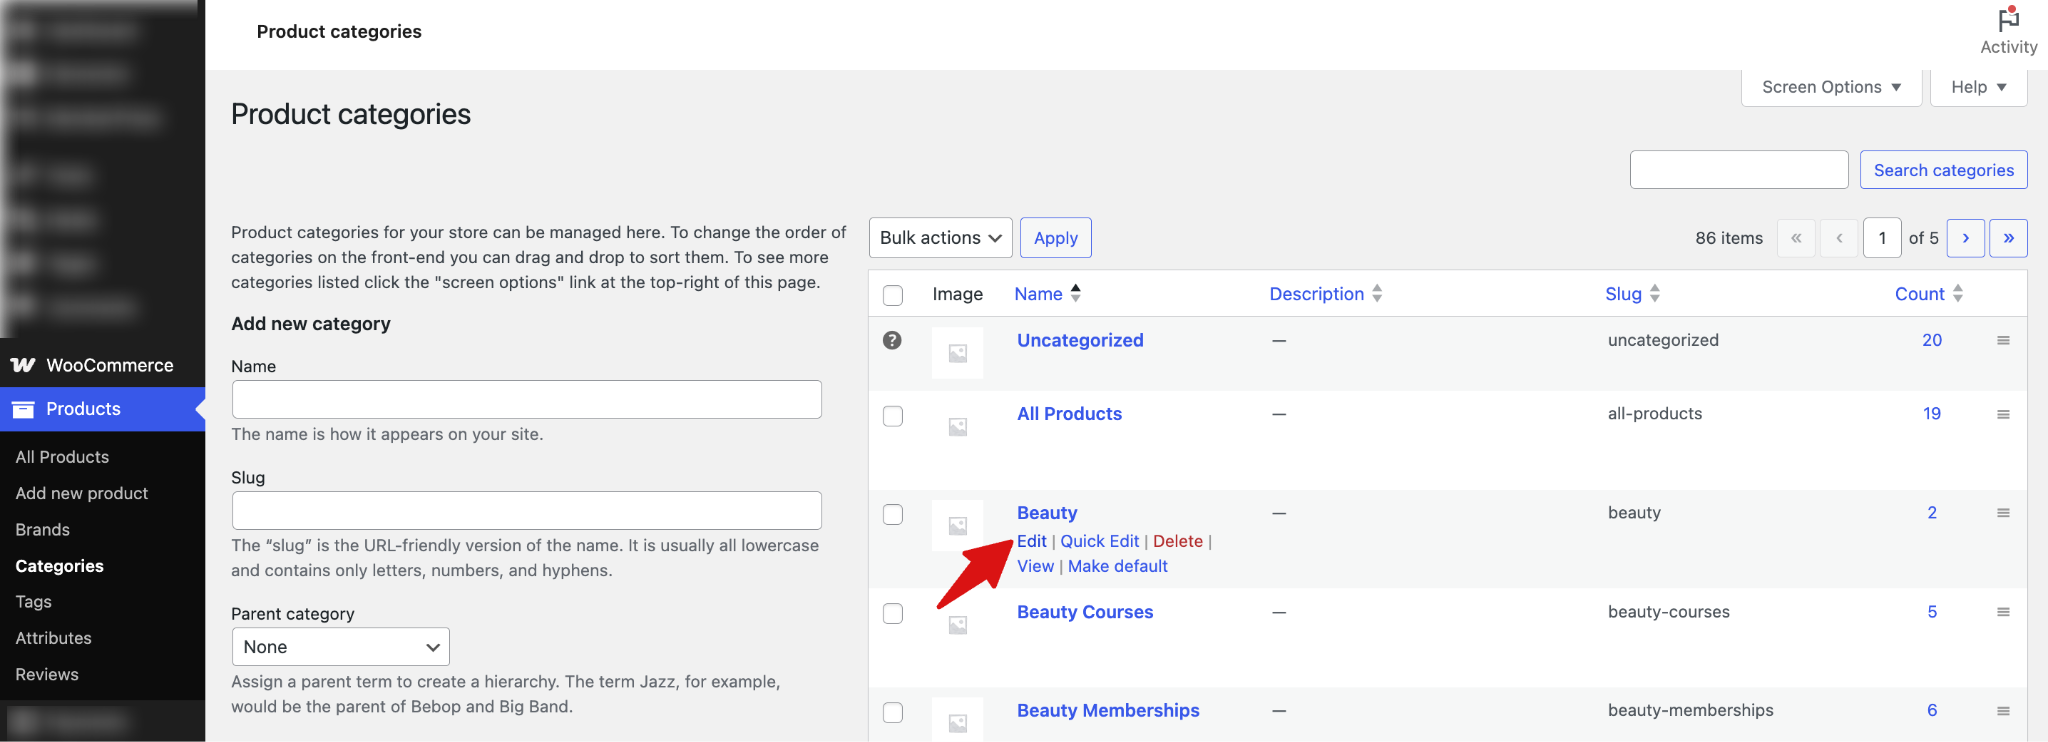
How to Set Up Checkout Redirect (Category Level)
To apply products from a category to a specific checkout, follow these steps:
Step 1: Edit the category
Go to Products ⇒ Categories in your WordPress dashboard and edit the Category you want to configure.
Step 2: Assign the checkout
Next, scroll down to the “FunnelKit Checkout” section and select the Checkout flow you want this category of products to use from the dropdown.
You can also change the “Add To Cart” Text.
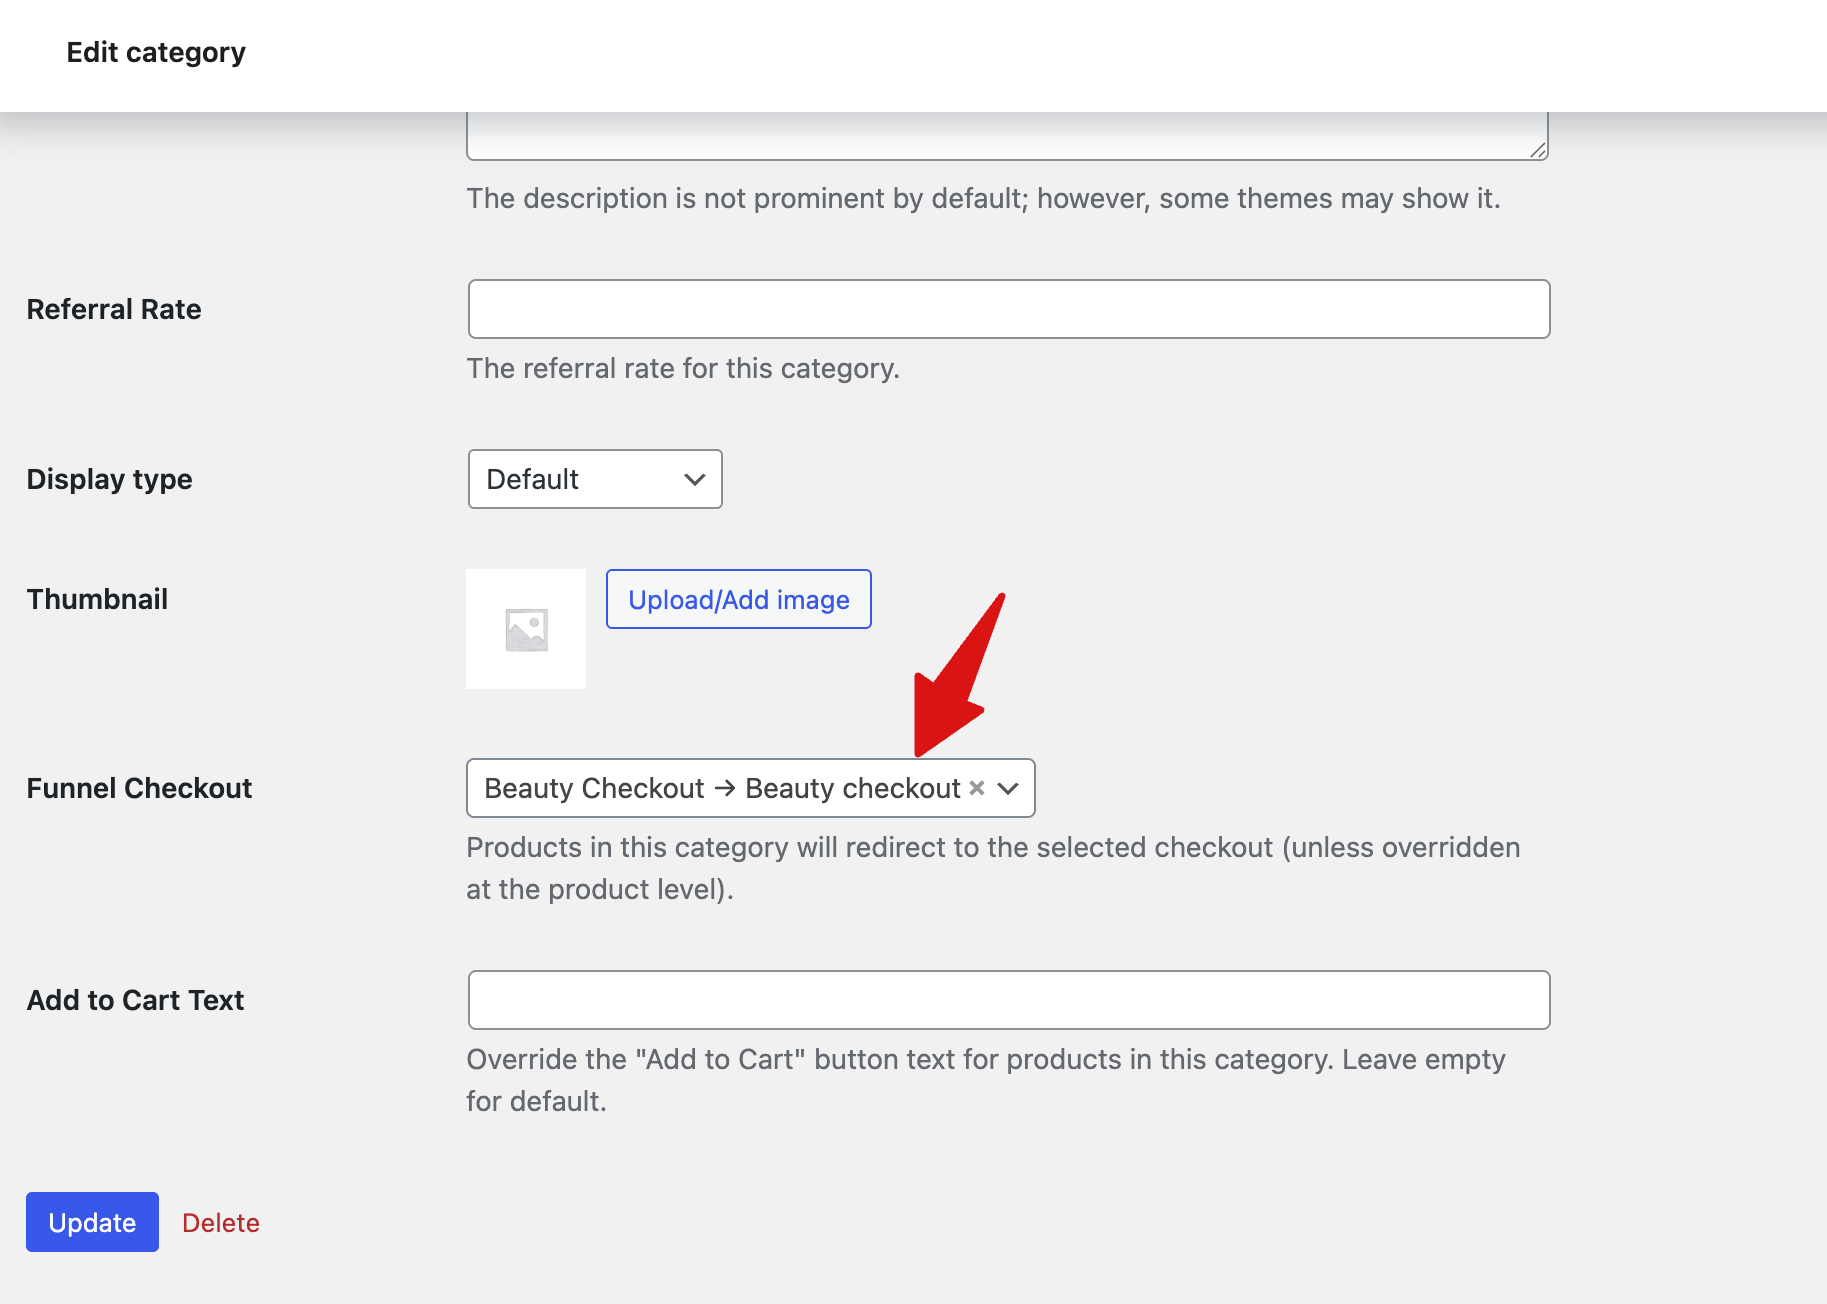
And make sure to save changes.
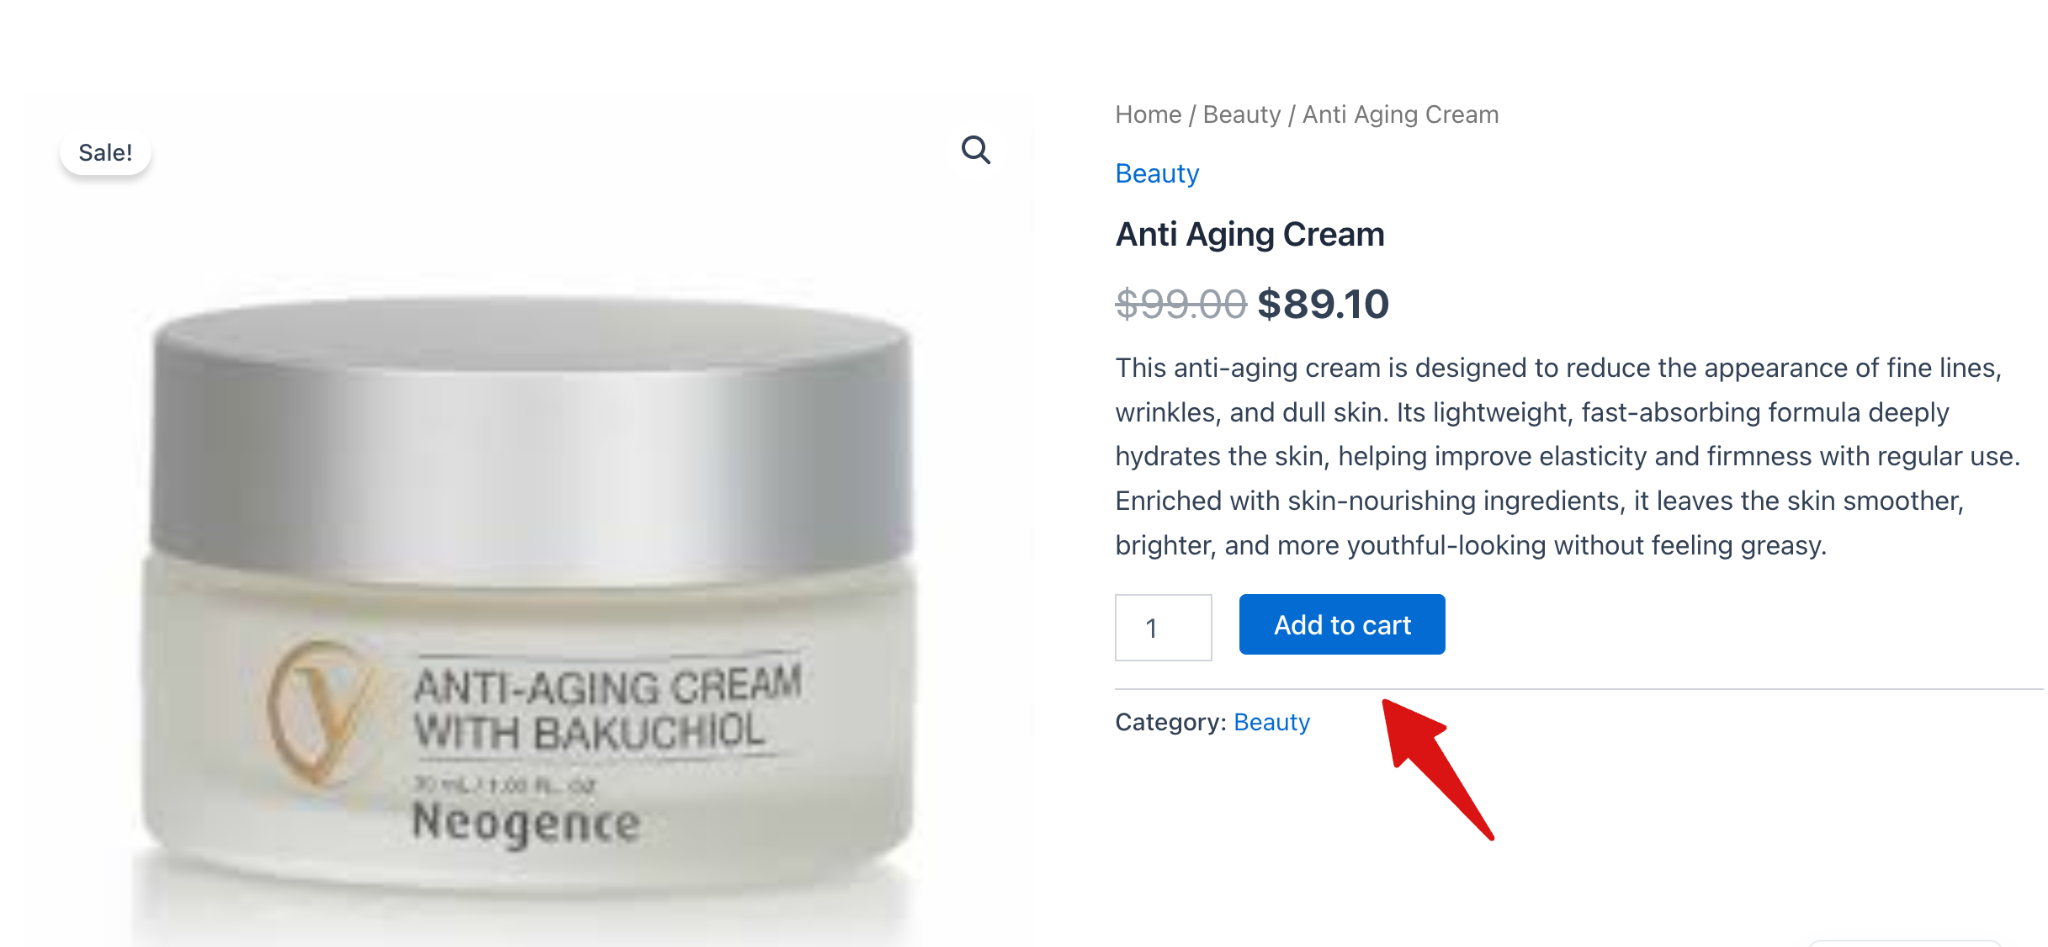
Step 3: Test the category checkout redirect
When a customer adds any product from this category to the cart and proceeds to checkout, they will be automatically redirected to the assigned checkout page.
No special links or landing pages are required.
To test, add any product from the category
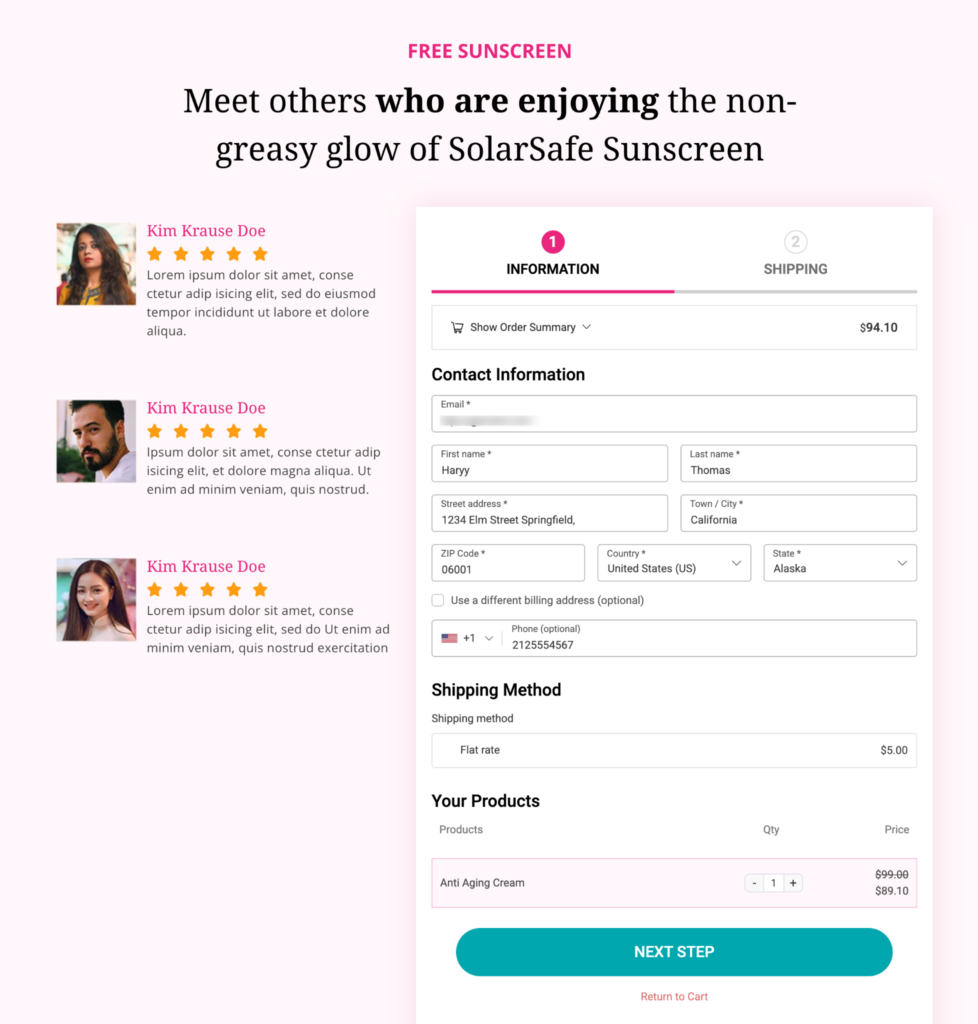
Now, if you redirect to the checkout page, you will be redirected to the one you set.
That’s it. This is how you can use the product checkout redirect feature.


