In this section, we'll look at how to add new custom fields in the Checkout form.
Step 1: Click on add new field
To register a new custom field, go to the 'Design' tab of your Checkout page and click on the “Add New Field” button.
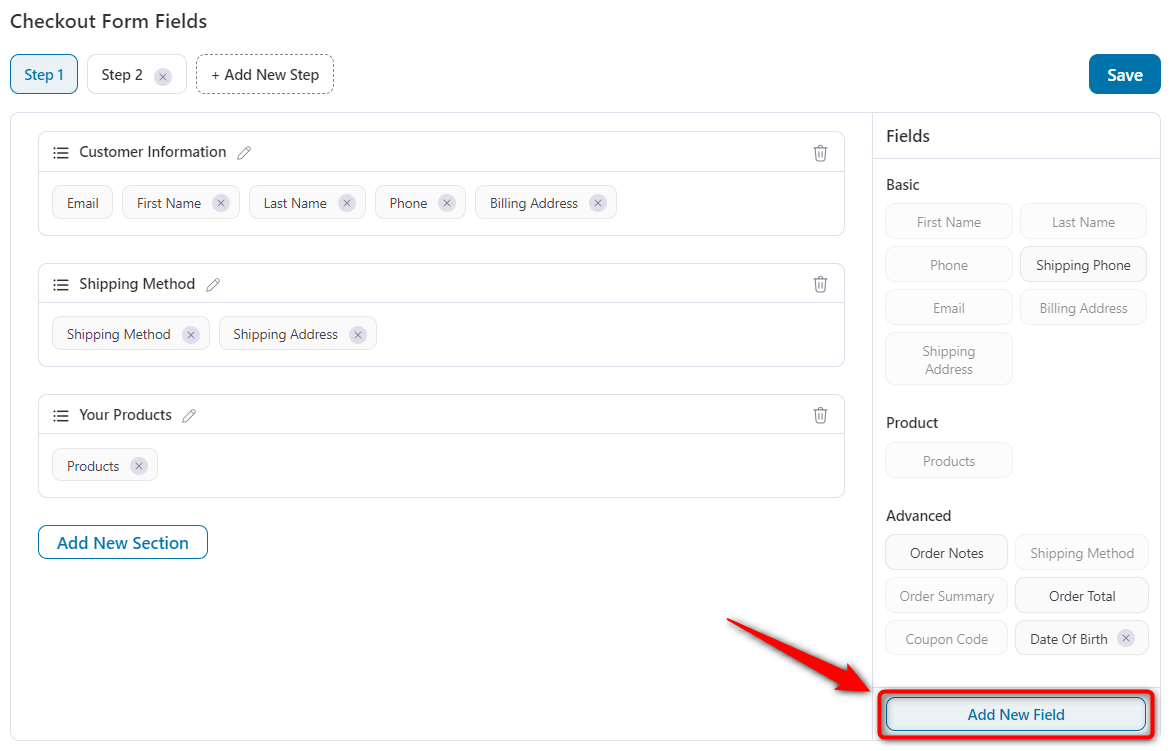
This will open a modal window to fill in the details of the new field you want to add.
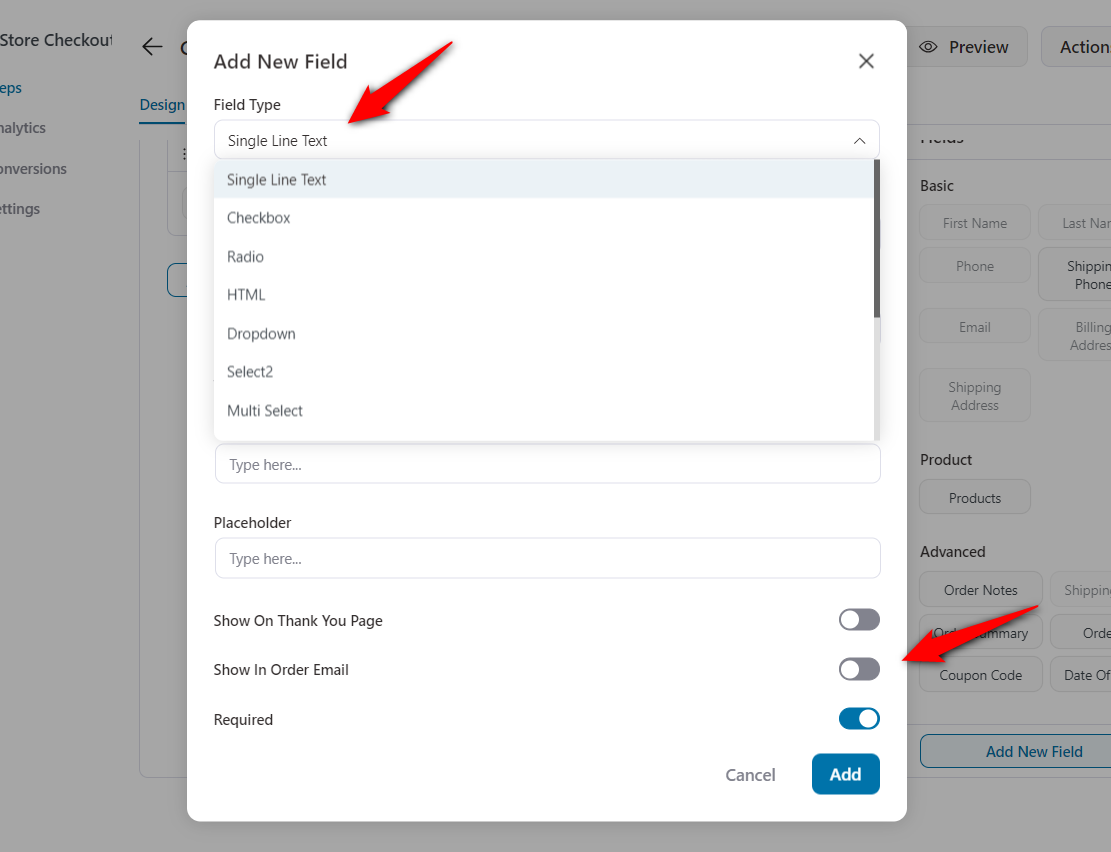
Once you have selected the field type, enter the rest of the information to create your field.
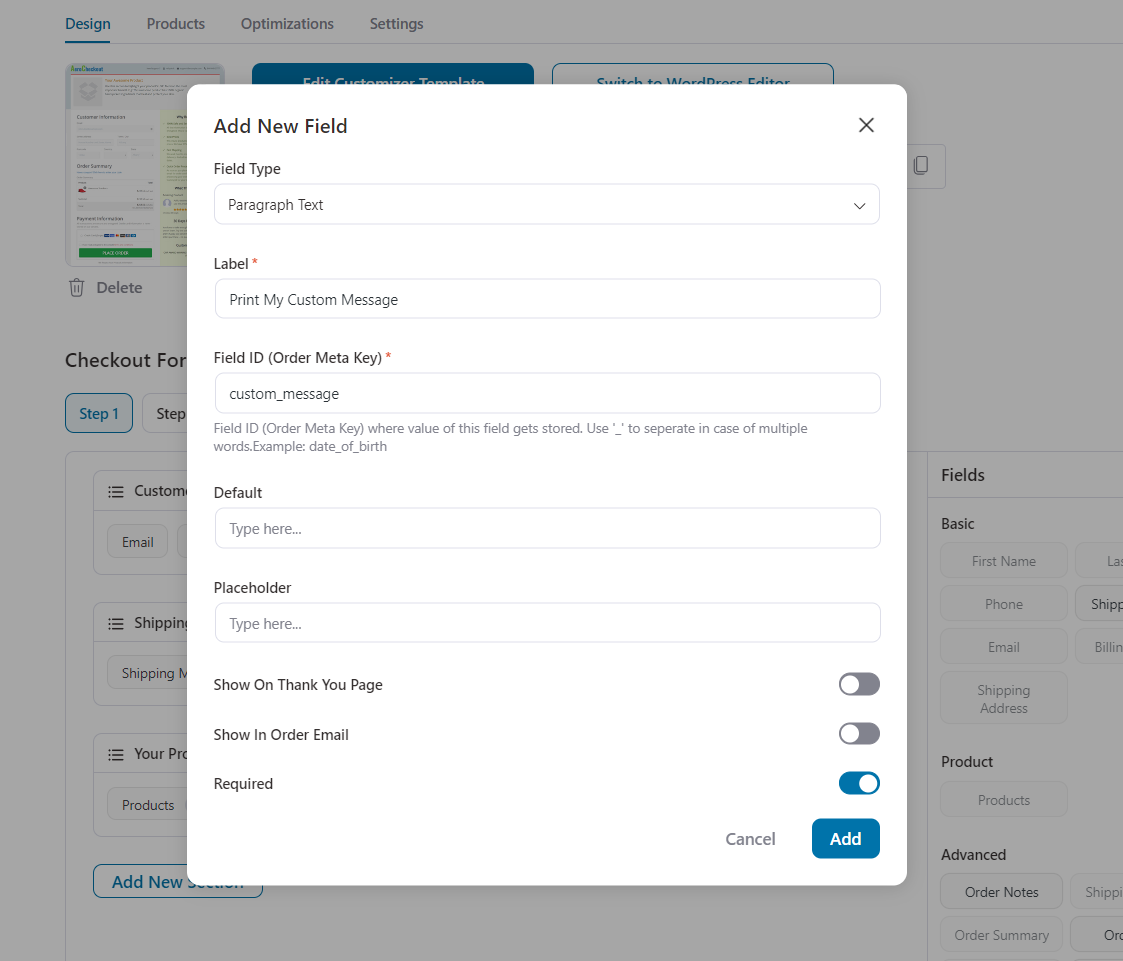
- Field Type - Choose from radio, paragraph, checkbox, HTML, multi-select, dropdown and more
- Field Label - Name the field to let users know what information to fill out
- Enter the Field ID (Order Meta Key) - where the value of this field gets stored. Use '_' to separate in case of multiple words. Example: date_of_birth. This field ID will help you to print this field meta on any other template.
For example, if you are using any invoice generator plugin and wish to print this custom field there, this field_id you need to map with your invoice template.
- Set default value i.e., the option which will be pre-selected on the checkout page
- Type Placeholder value if you want to show any placeholder text within the field
- Show the field on the thank you page and order email for the assurance of the customer
- Make the field required if needed
Step 2: Drag the field into any section on the checkout form
You can easily drag and drop this new field into your checkout form within any existing section / new section.
Save the checkout form by clicking on the 'Save' button.
Here's how the custom field will appear on the checkout form:
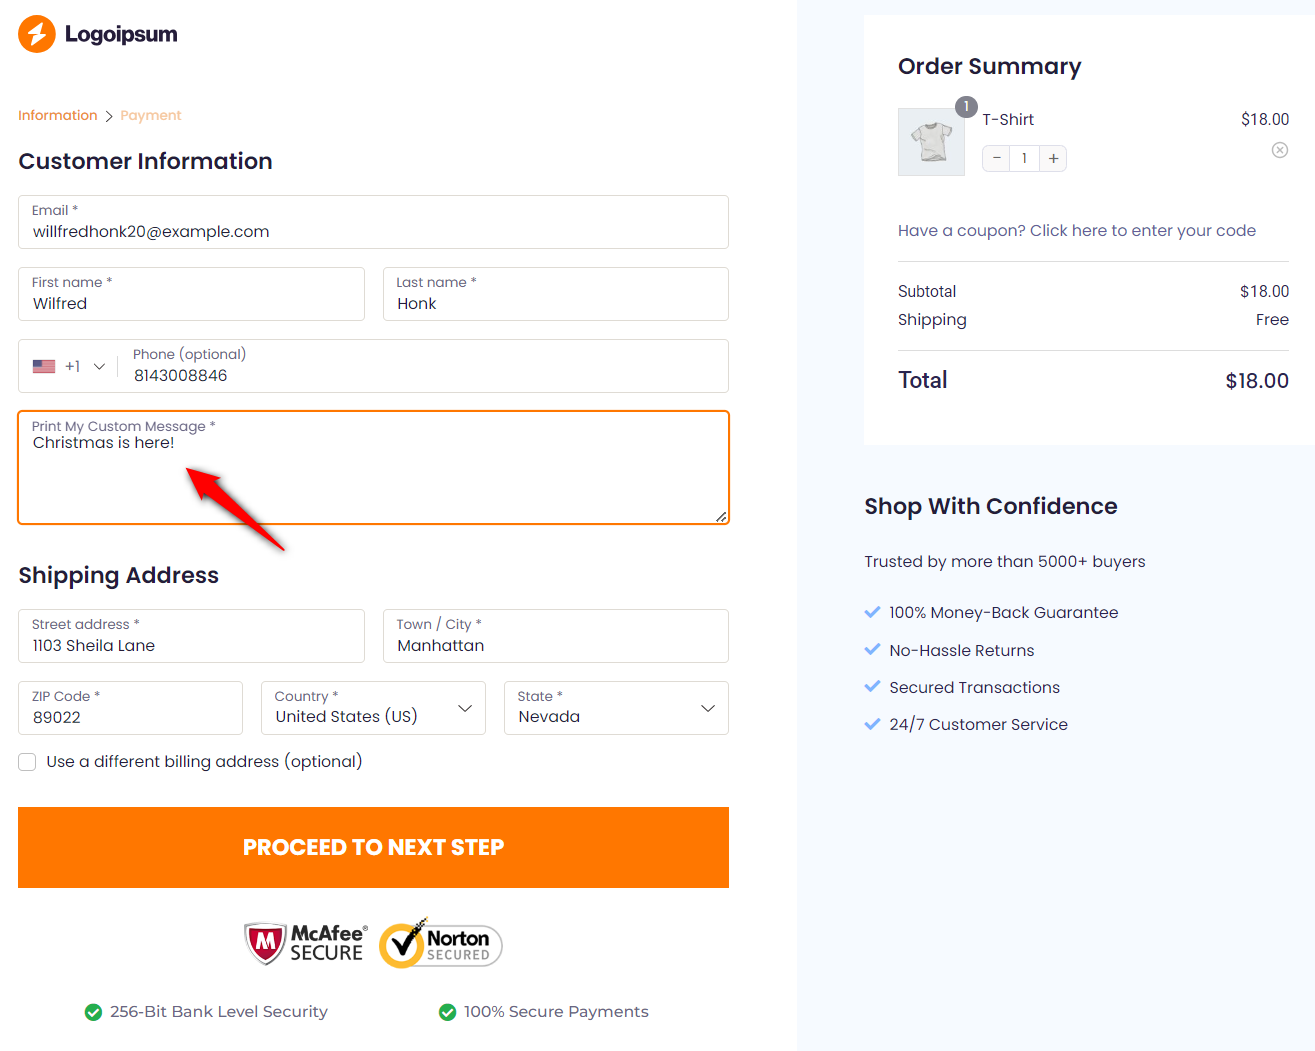
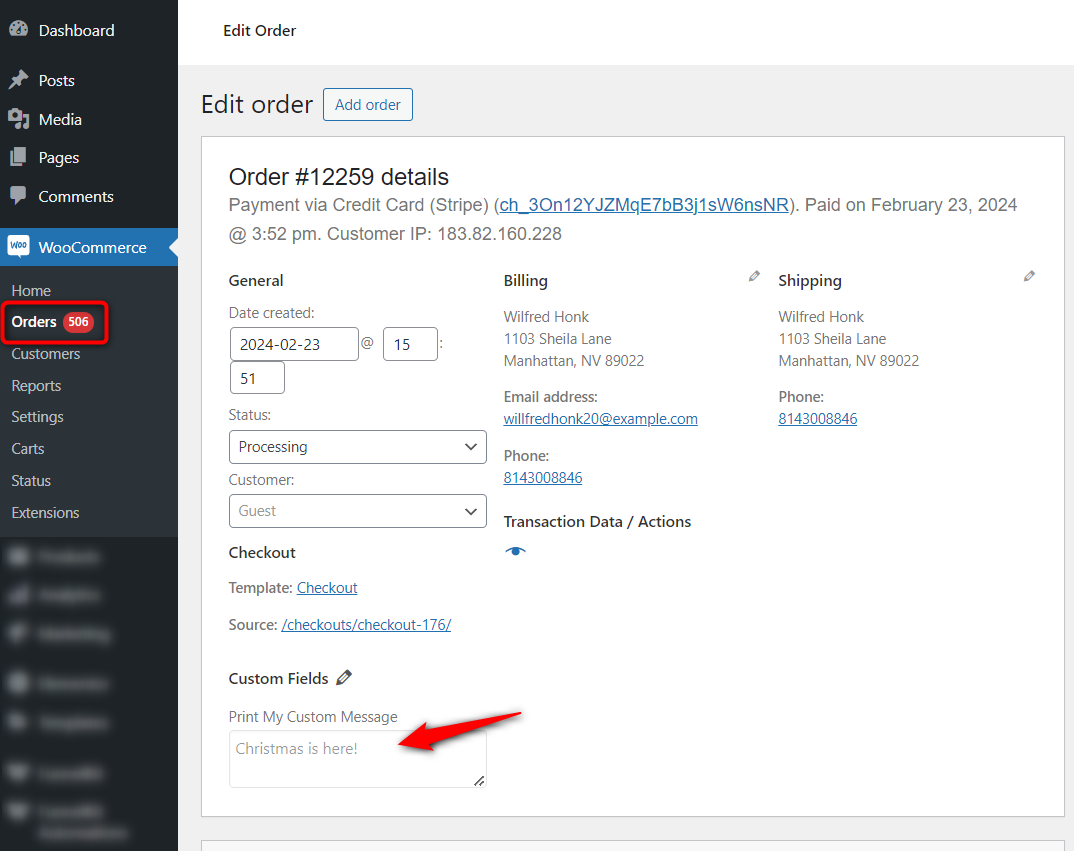
Step 3: View the data of the custom field on the admin's single Order page
The custom field's data is stored in product meta and can be viewed on a single order page.
This stored data is editable for the admin and can be updated easily.
This is how you can add new fields in the Checkout form.


