You can adjust the field widths of your checkout form in Elementor.
Follow the steps below to customize it the way you want:
Step 1: Click on 'Edit Elementor Template' to customize a template in Elementor

When you do so, the page opens up in Elementor.
Step 2: Click on the pencil icon of the checkout form widget
Step 3: Click on the sections you want to edit from the left side panel
Select the field widths from the drop-down
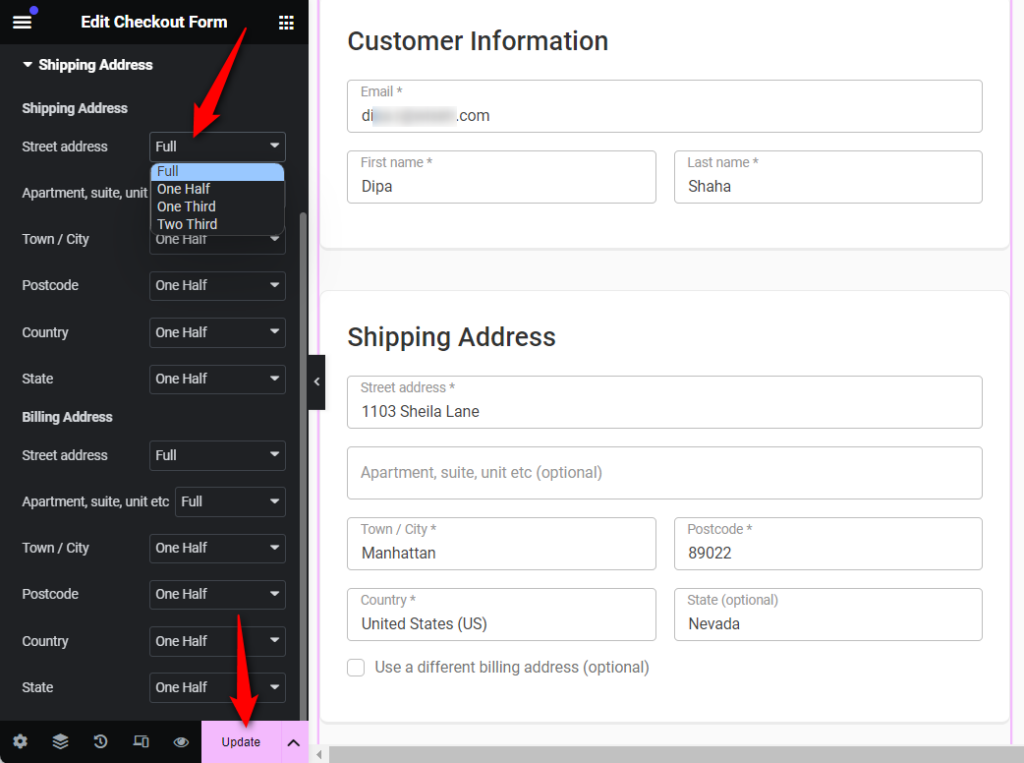
Hit the 'Update' button to save the changes
That's it! You've now successfully set the field widths for your checkout form.
You can click on the 'View' button to preview the changes you made.
Here's the final output:
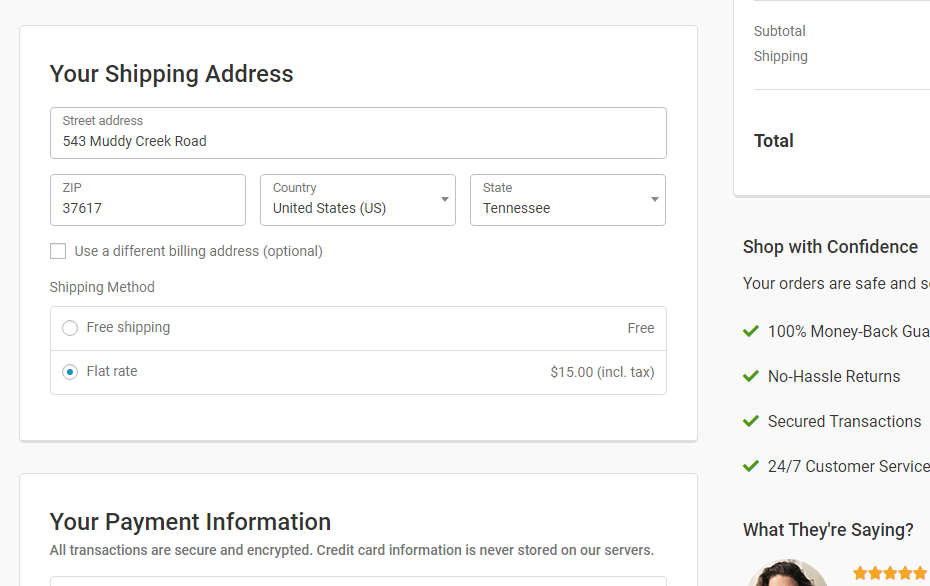
This is how you can adjust the field widths of your checkout form using Elementor.


