Get Started
FunnelKit Documentation
Get unstuck with our helpful reference material

Checkout Pages

How to Show/Hide Certain Address Fields

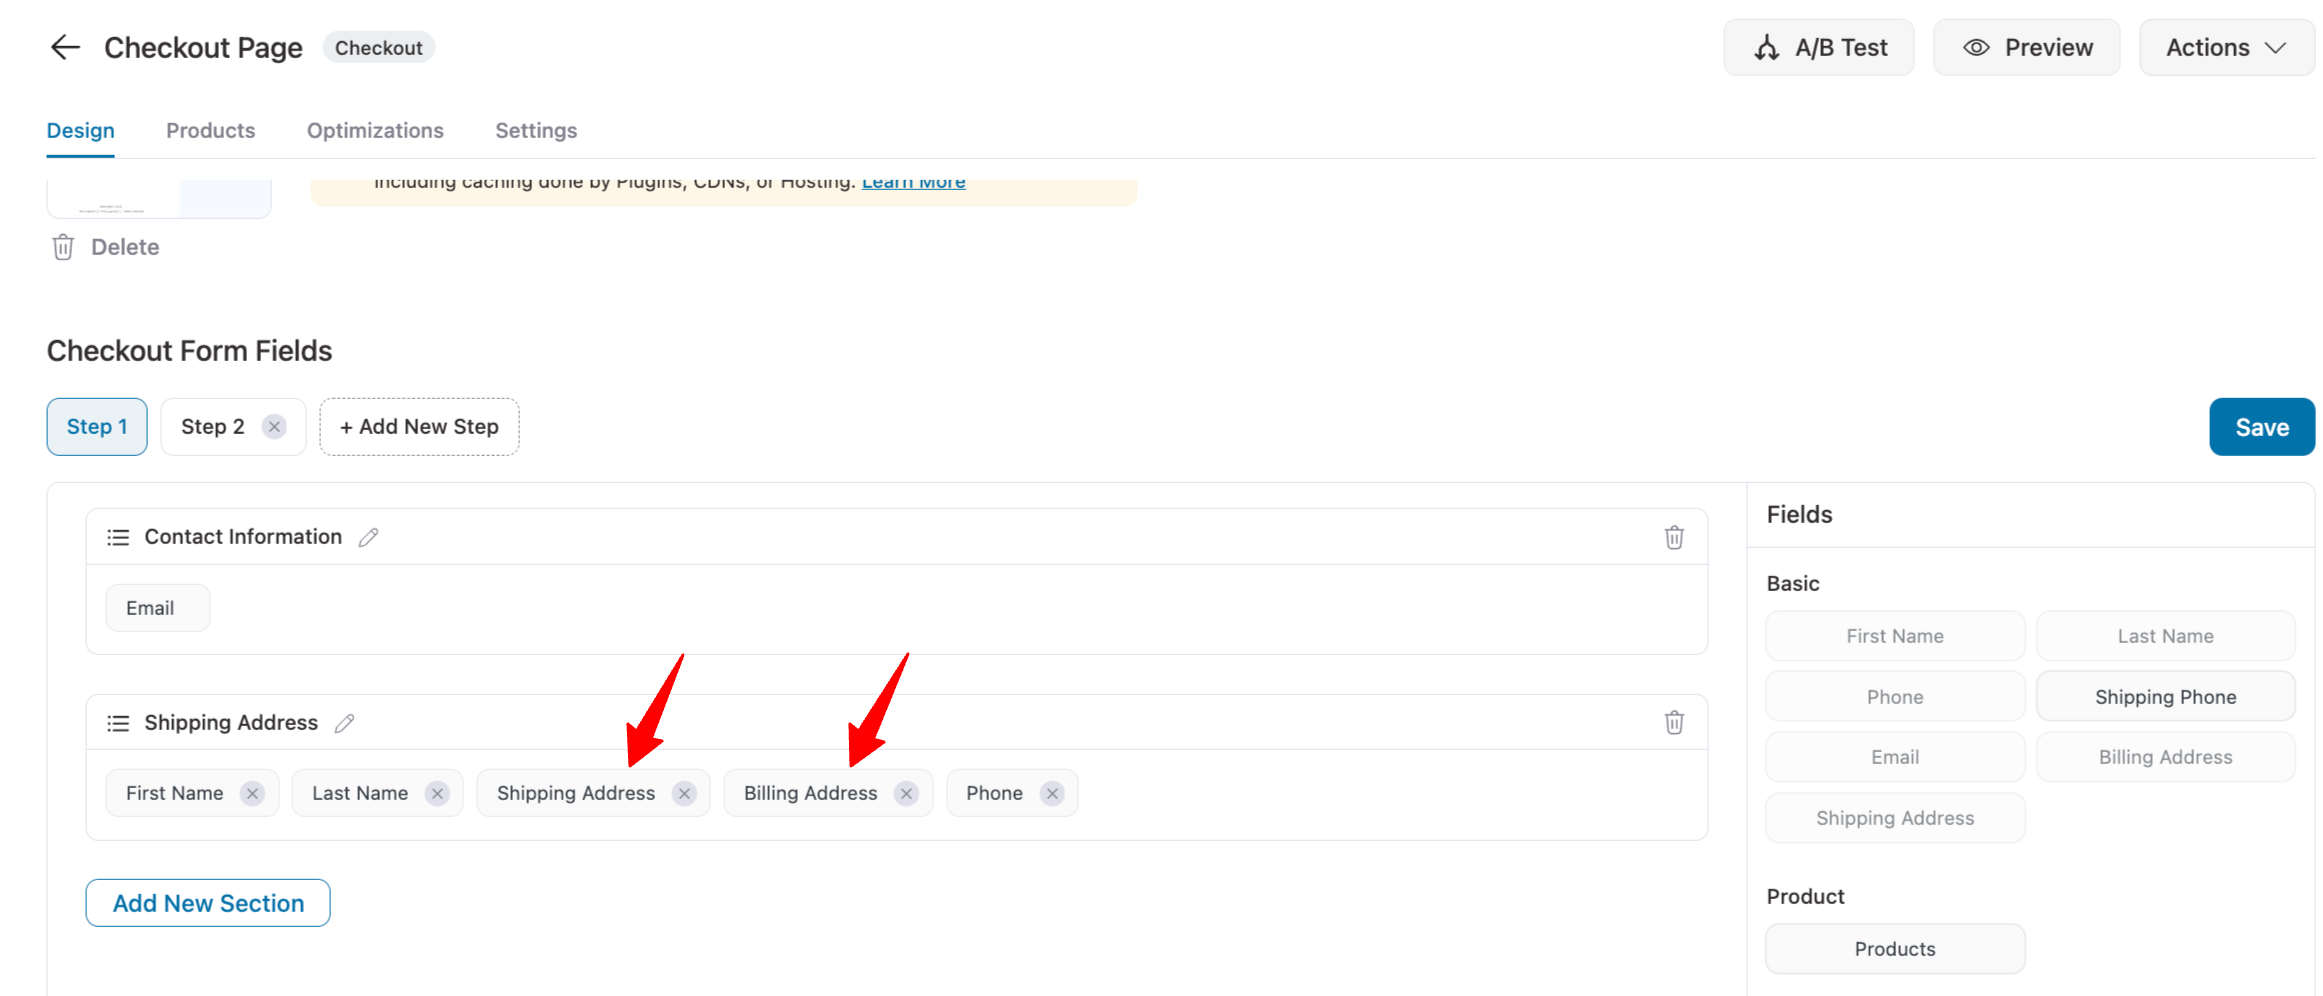
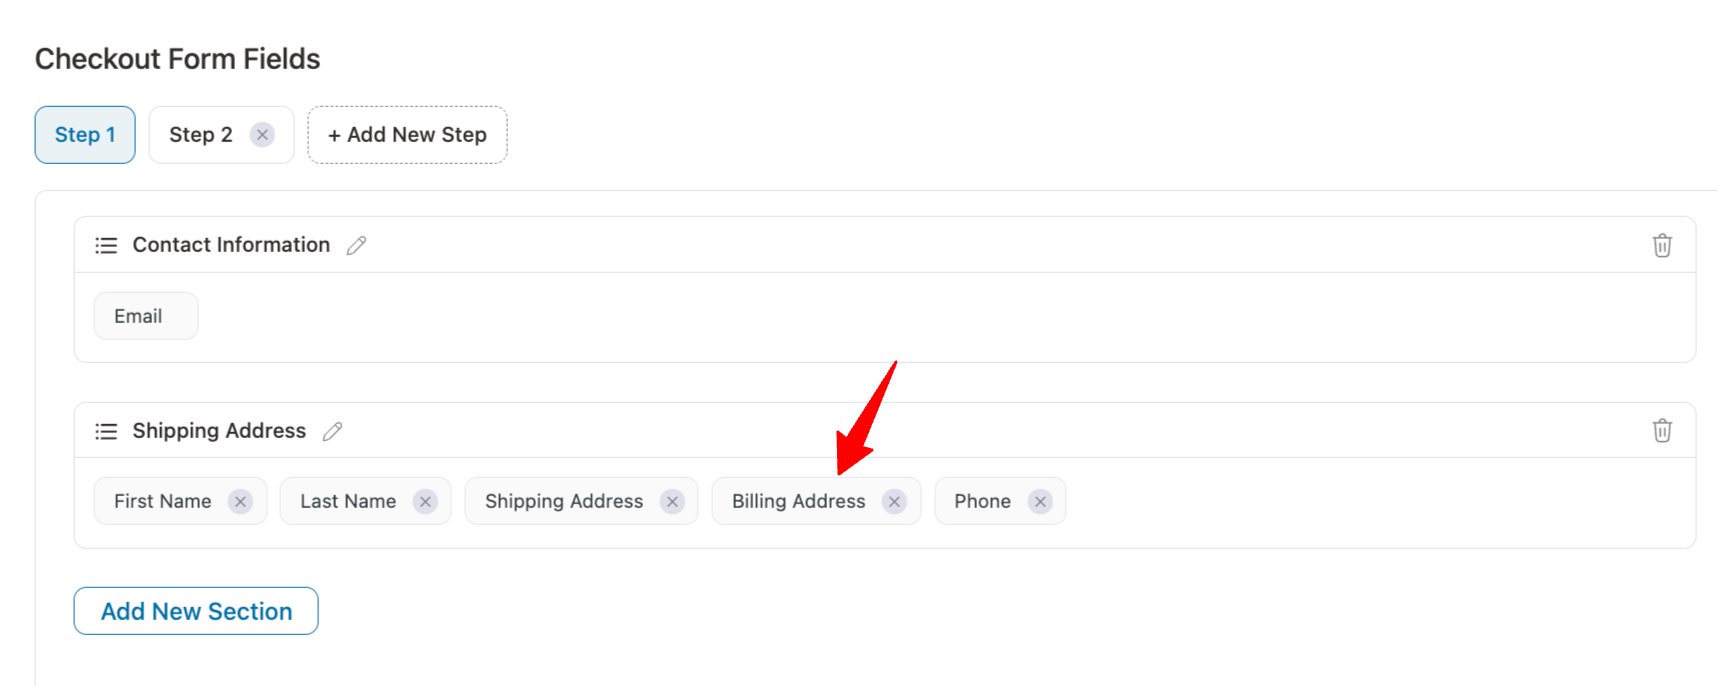
FunnelKit Checkouts give you a lot of flexibility to hide/show certain billing and shipping address fields.

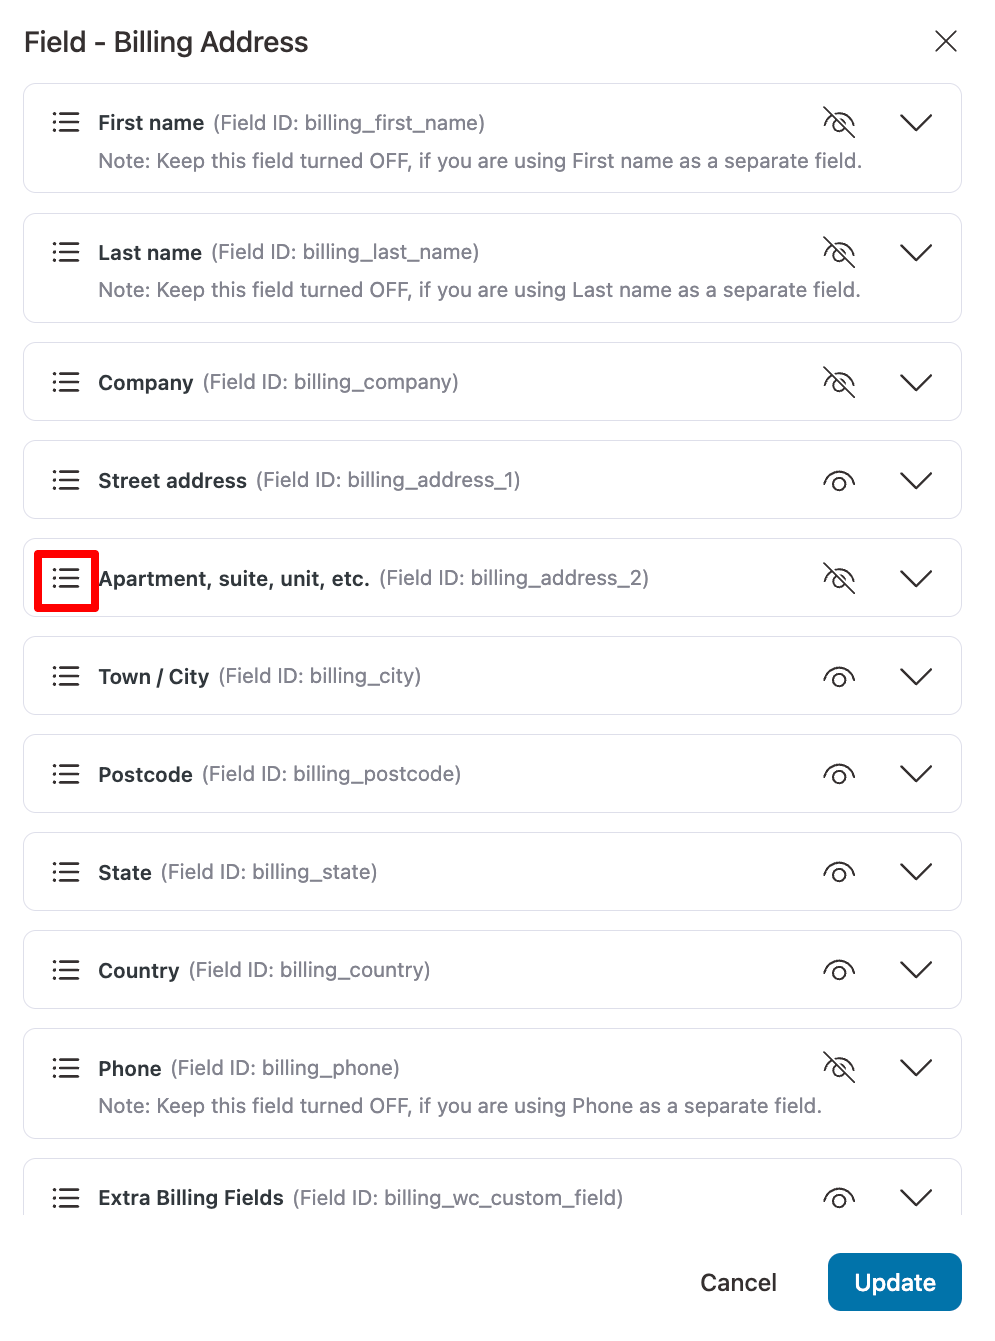
You can click on the eye icon to show/hide them on the checkout form.
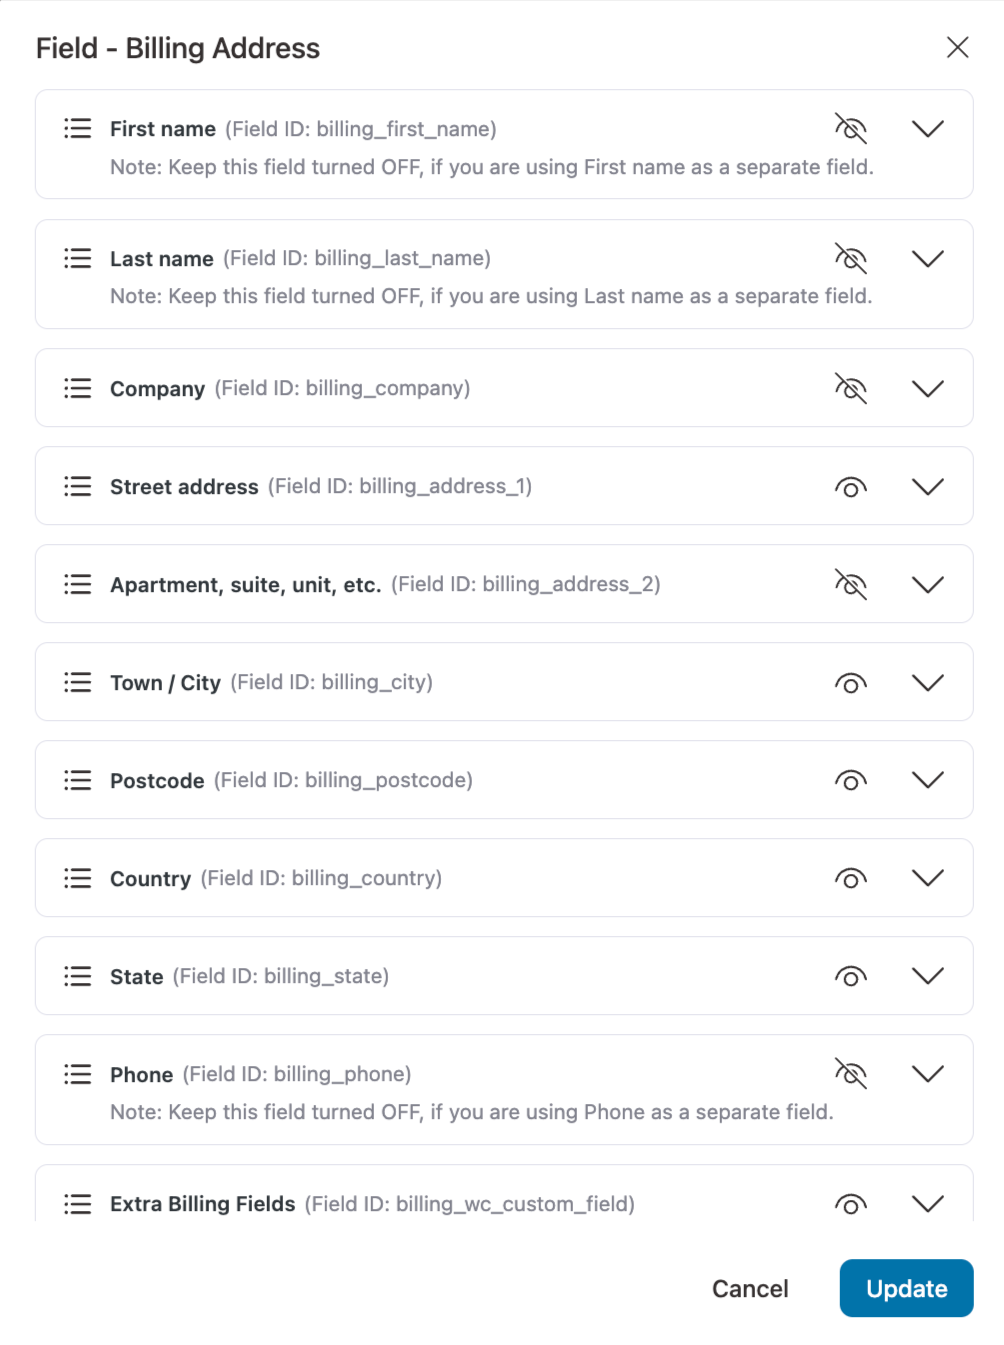
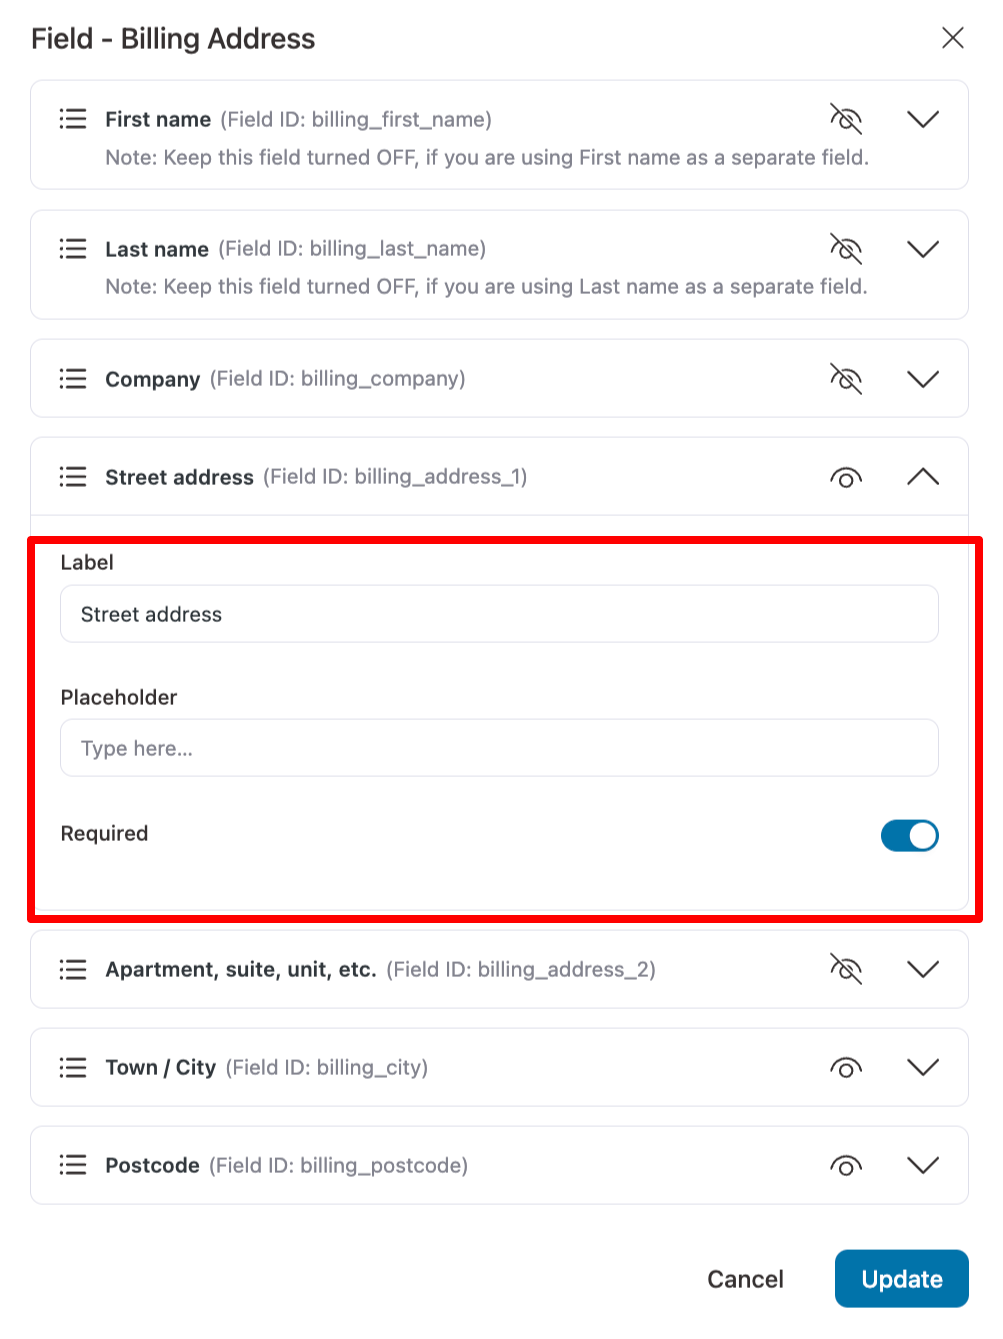
In addition, when you click on a certain field, you can set its Label and Placeholder that you want to display.

You can even change the order of the visible fields using the simple drag and drop functionality.

Adjusting the field width in case you've removed certain fields

Let's look at how to adjust the field width to make the layout look proper and professional.

Adjusting the Field Width in the Customizer

Go to the ‘Design’ tab > Click on the ‘Edit’ button of your selected Customizer template

You’ll see the Customizer open up.

From the left side panel, click on Checkout Form > Field Width

Here you’ll see all the fields listed one after the other.

Each of these fields has a drop-down placed against it.

You can set the width of the fields - Full, One half, One third, and so on.

Choose the one as per your requirement from the drop-down.

Change the field width

You can visually see the changes that you make to the field widths.

Once you’re done, hit the ‘Publish’ button.

Adjusting the Field Width in Elementor

Click on the 'Edit' button of your selected Elementor template.

The page will open up in Elementor.

Click on the pencil icon to edit your checkout form.

Next, on the left side panel, go to the 'Sections' tab.

Click on the 'Your Information' section.

Here you'll find all your fields listed.

You can select the required field widths from the drop-down.

Once you're done selecting your field widths, click on the 'Update' button to save your changes.

chevron-down