In this documentation, you'll learn how to change the label of the fields in your checkout form like email, first name, last name, shipping information, phone, and more.
Follow along:
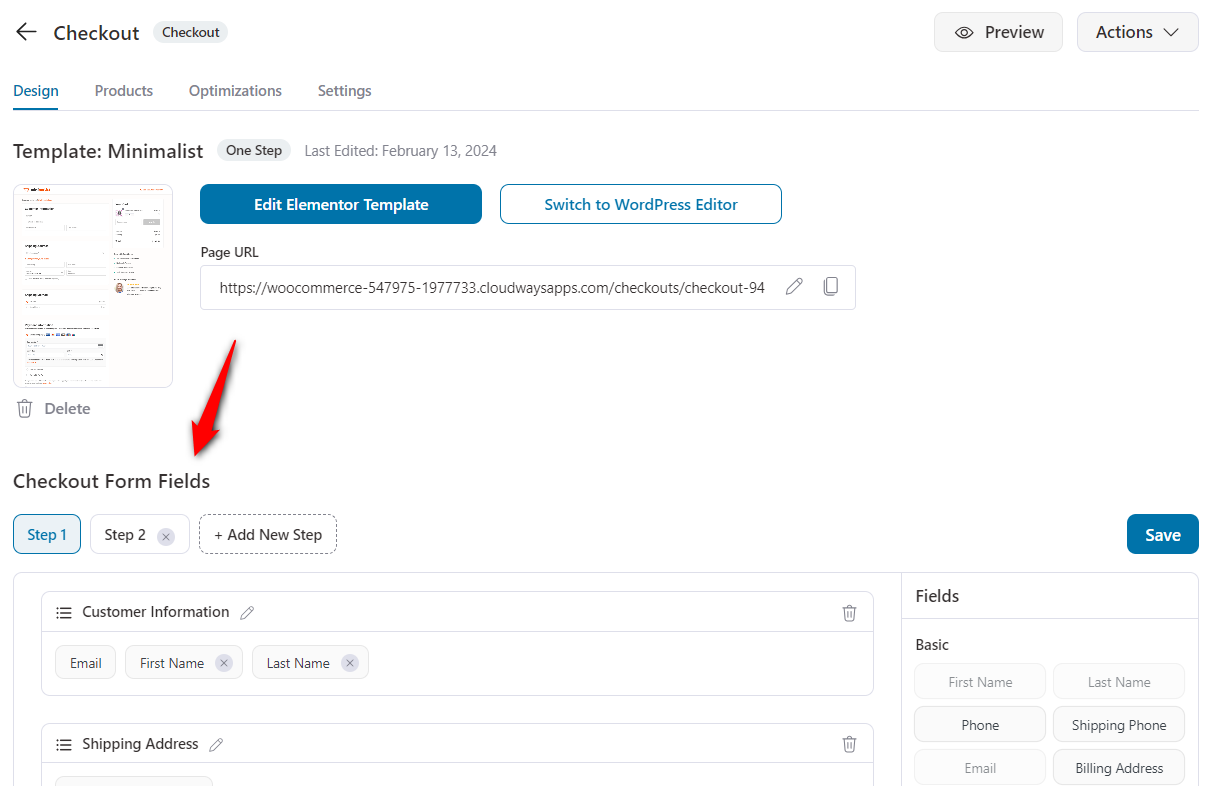
Step 1: Go to the 'Design' tab in Checkout
On the Design tab, scroll down to the Checkout Form Fields section.
You'll see all the fields and sections in your checkout form.
Step 2: Click on the fields for which you want to change the label
Edit the label of the fields.
Here's how:

Now, update your Checkout form field.
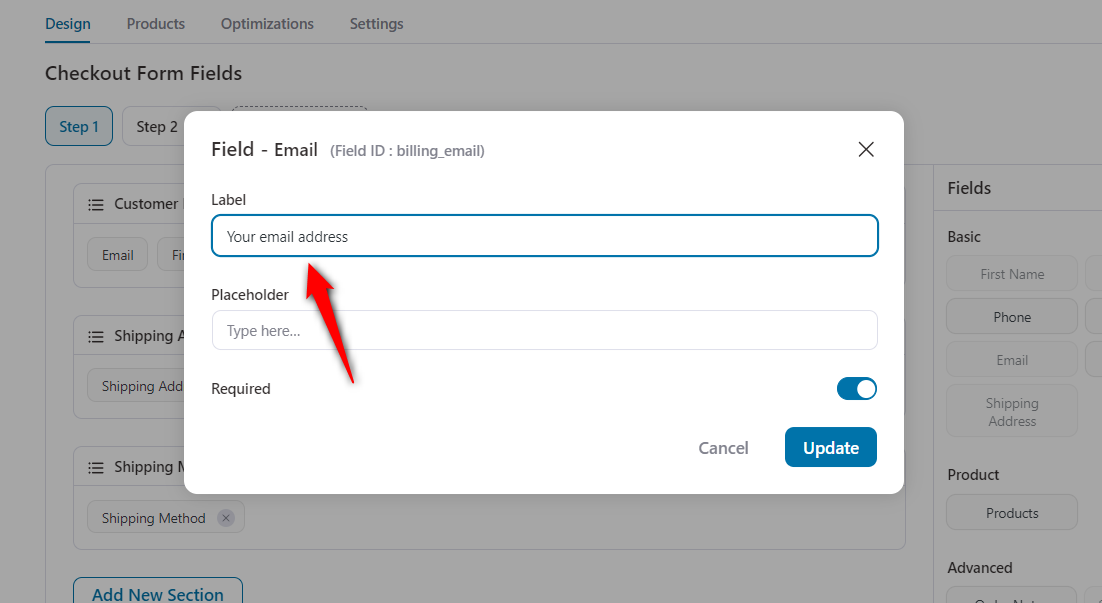
Once done, hit the 'Update' button.
Similarly, you can change the labels of all the other fields by clicking on that respective field.
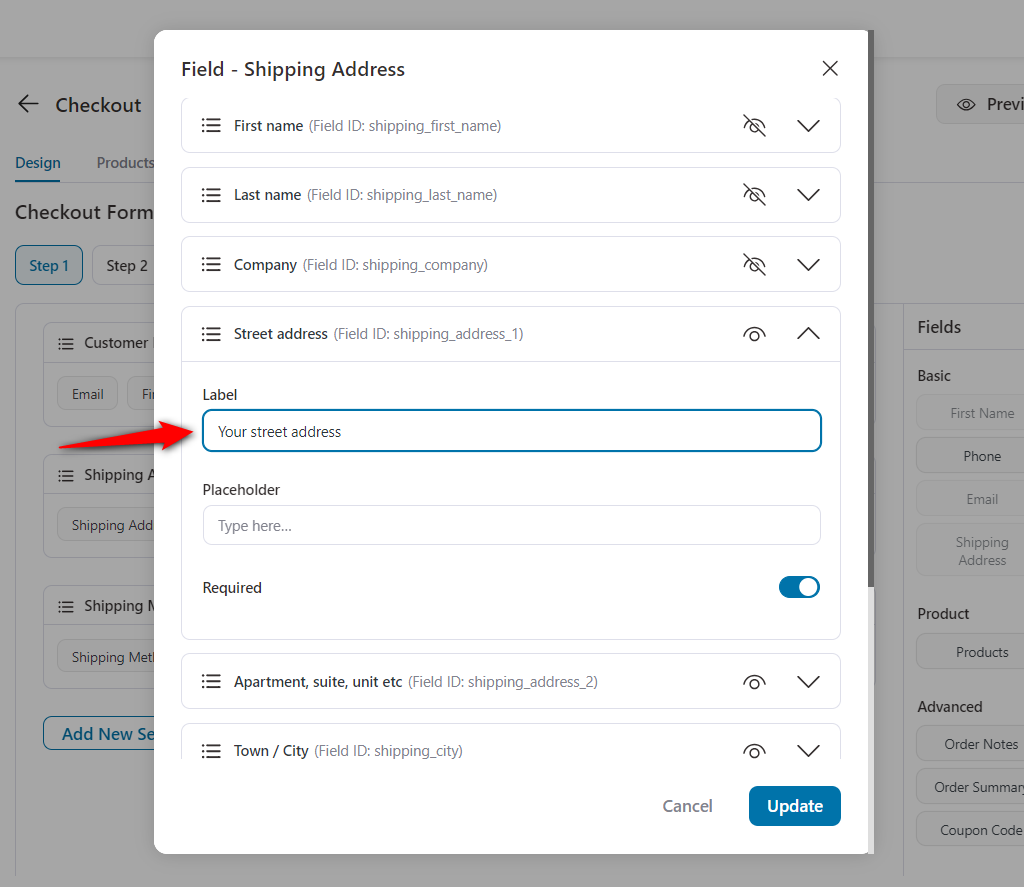
Step 3: Click on the Shipping Address field to change the label
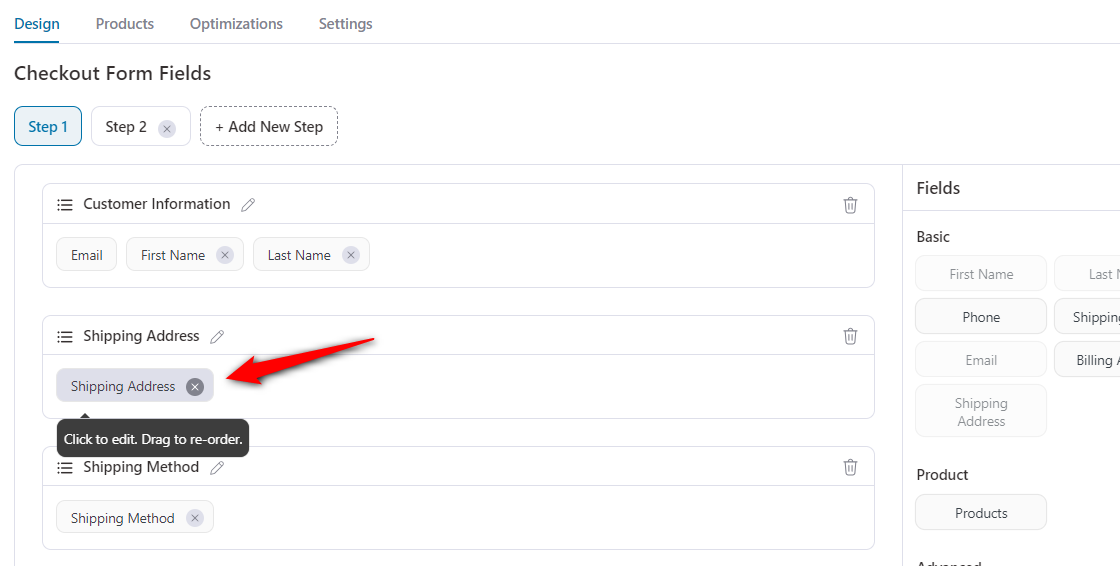
Then, change the respective field label.
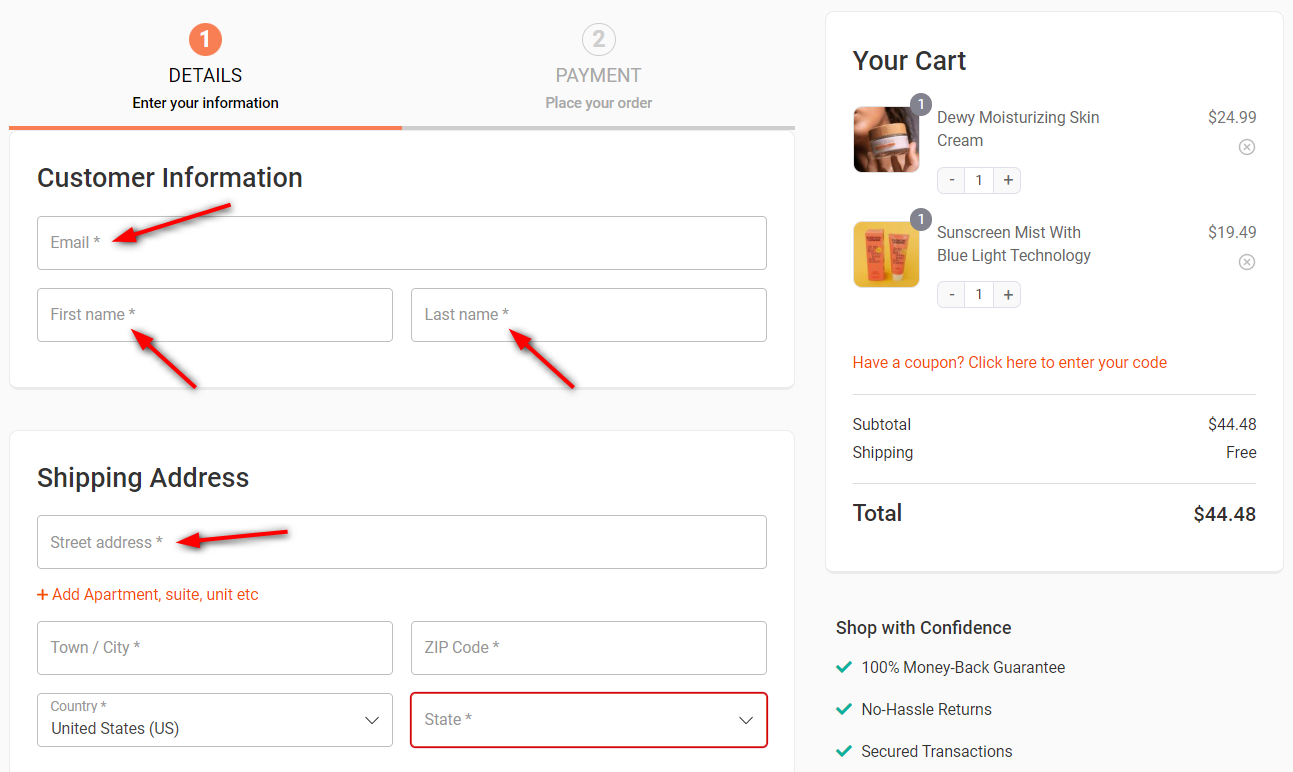
Like for example, if you want to change the street address.
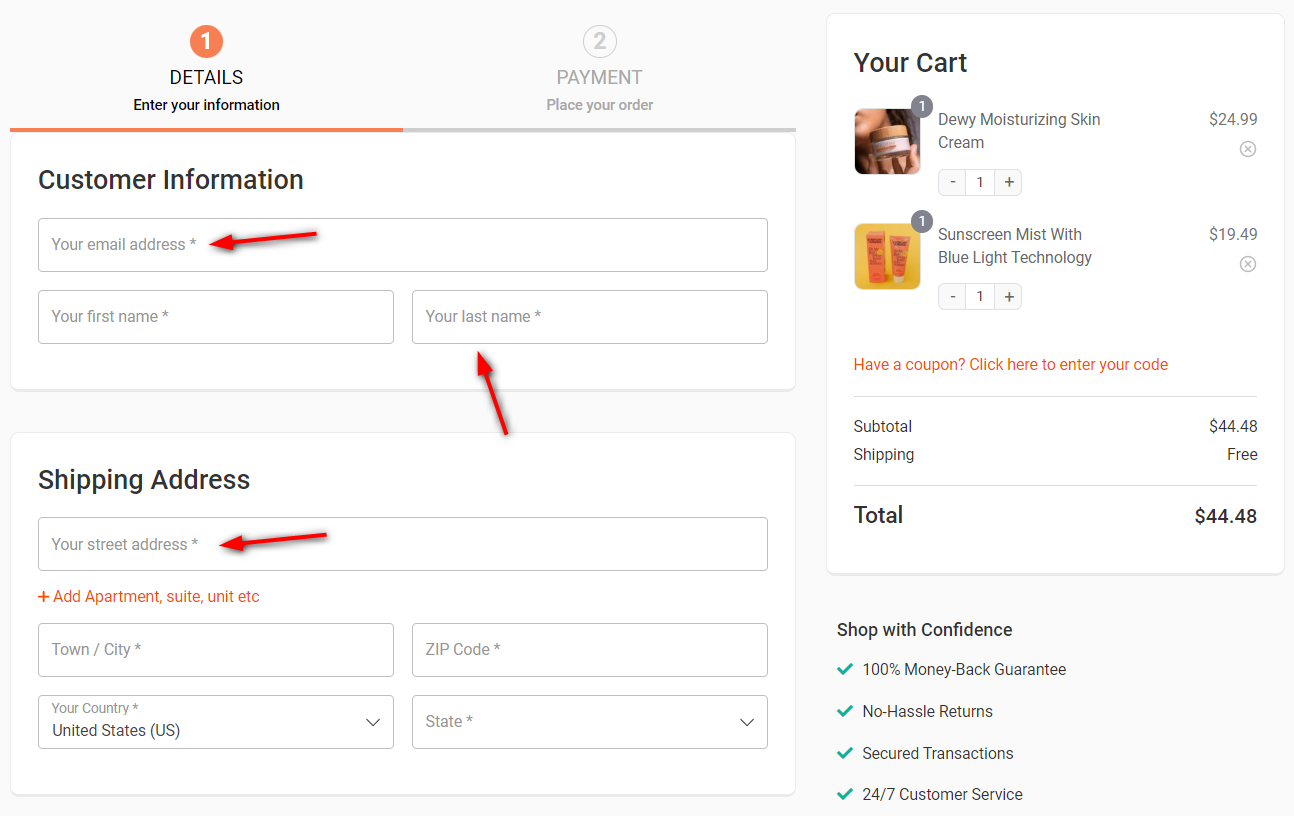
Here's the final output:
This is how you can change the label of the fields on your checkout form.


