You can easily set up automations to contact your users on their birthday or when their special day is around the corner.
In this documentation, you’ll learn the configurations and the process of how to set up a birthday reminder automation with FunnelKit Automations.
Configuration
You can connect the date of birth at the WooCommerce checkout, the My Account page, and the Thank You page.
Here are the options you need to configure:
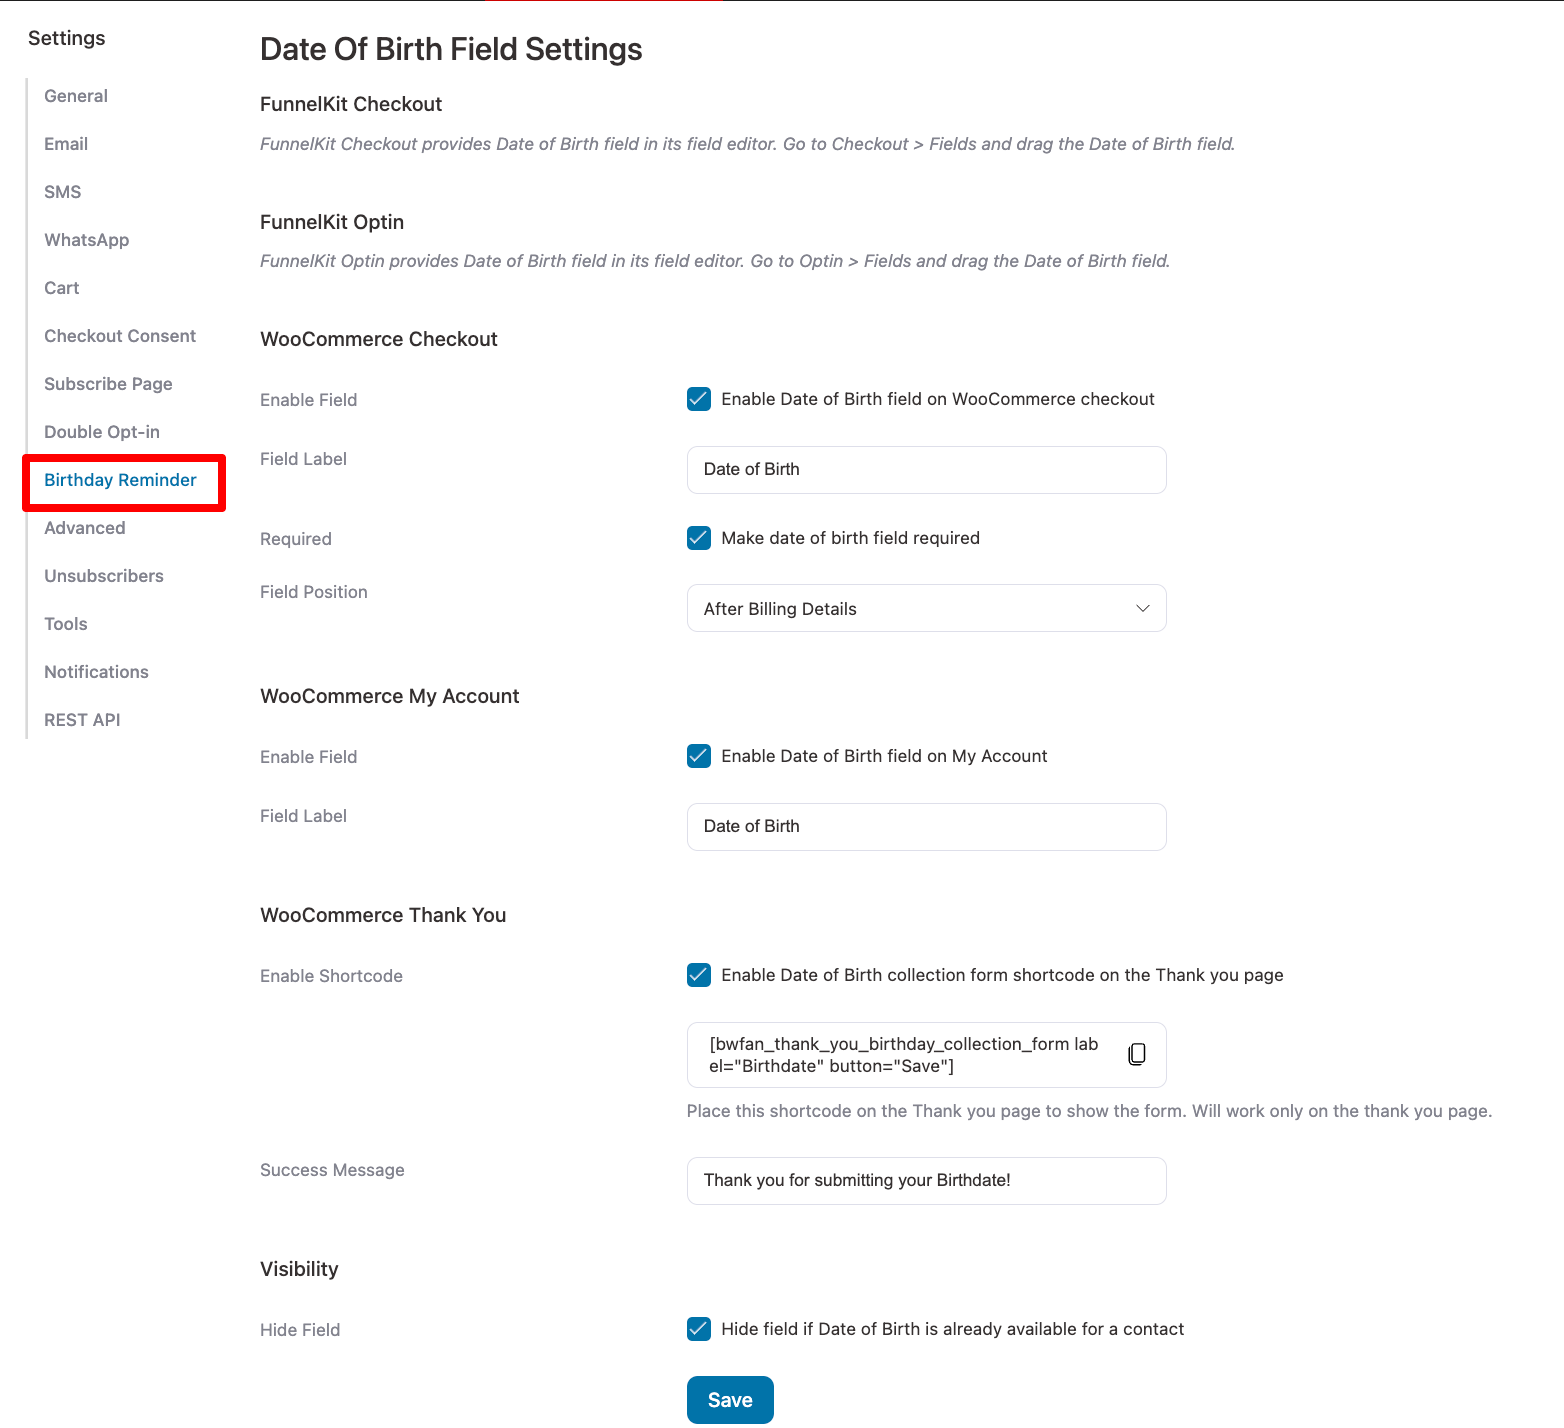
WooCommerce Checkout
Collect your customer’s date of birth directly on the checkout page with these settings:
- Enable Field: Show the Date of Birth field on the checkout page
- Field Label: Customize the label (default: "Date of Birth")
- Required: Make it a required field
- Field Position: Choose where the field appears. Options are After billing details, before order notes and after order notes.
WooCommerce My Account
Allow users to view or update their date of birth from their account page:
- Enable Field: Show the Date of Birth field on the My Account page
- Field Label: Customize the label (default: "Date of Birth")
WooCommerce Thank You
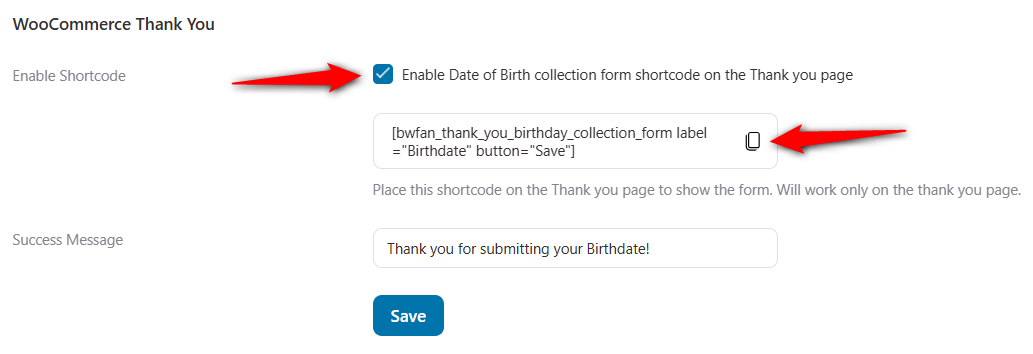
Collect the date of birth after purchase using a shortcode on the Thank You page:
- Enable Shortcode: Enable birthday collection form using shortcode
- Shortcode:
[bwfan_thank_you_birthday_collection_form label="Birthdate" button="Save"]
Place this on the Thank You page — it works only there - Success Message: Customize the message shown after submission (default: "Thank you for submitting your Birthdate!")
Visibility
- Hide Field: Automatically hides the form if the contact already has a saved birthdate
Make sure to save the changes.
If you are using the FunnelKit’s checkout page from your funnel, you can simply drag and drop the field to your desired location:
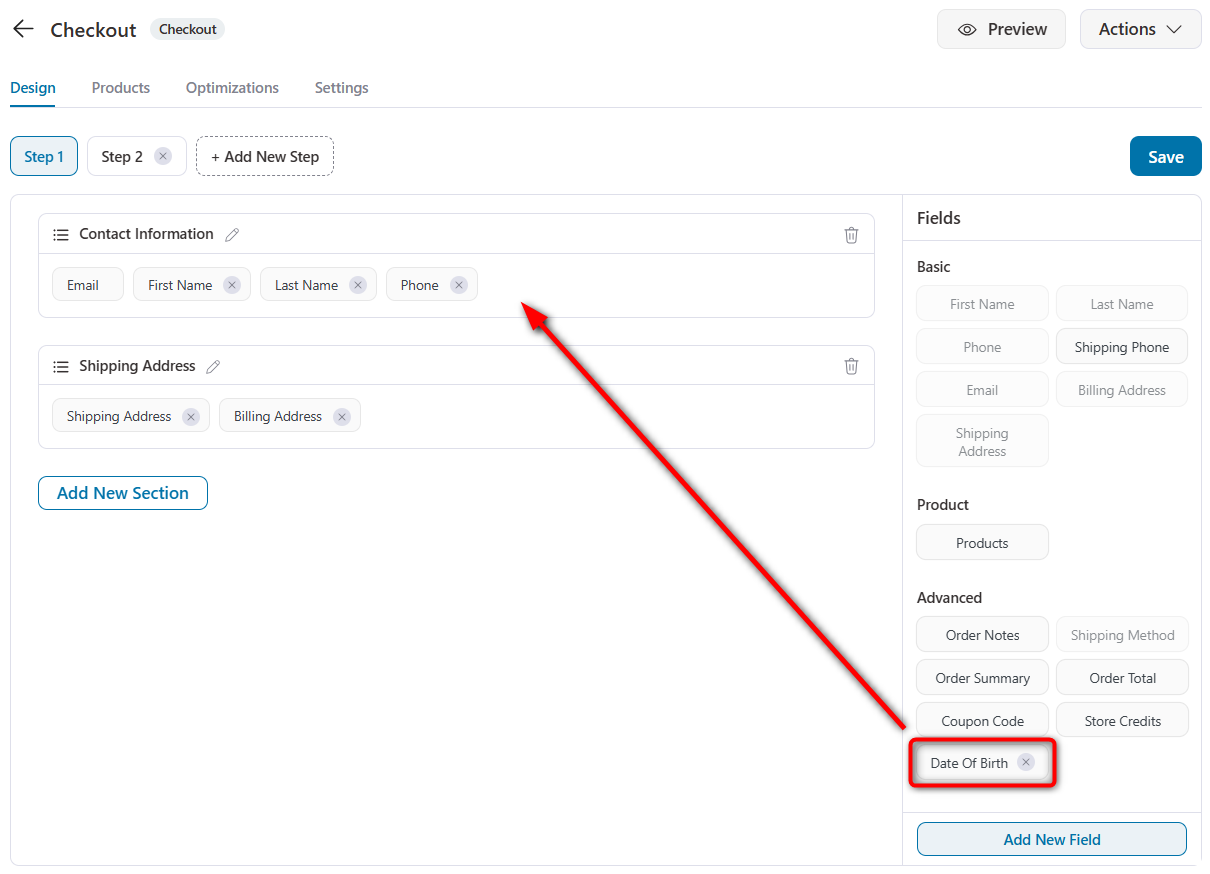
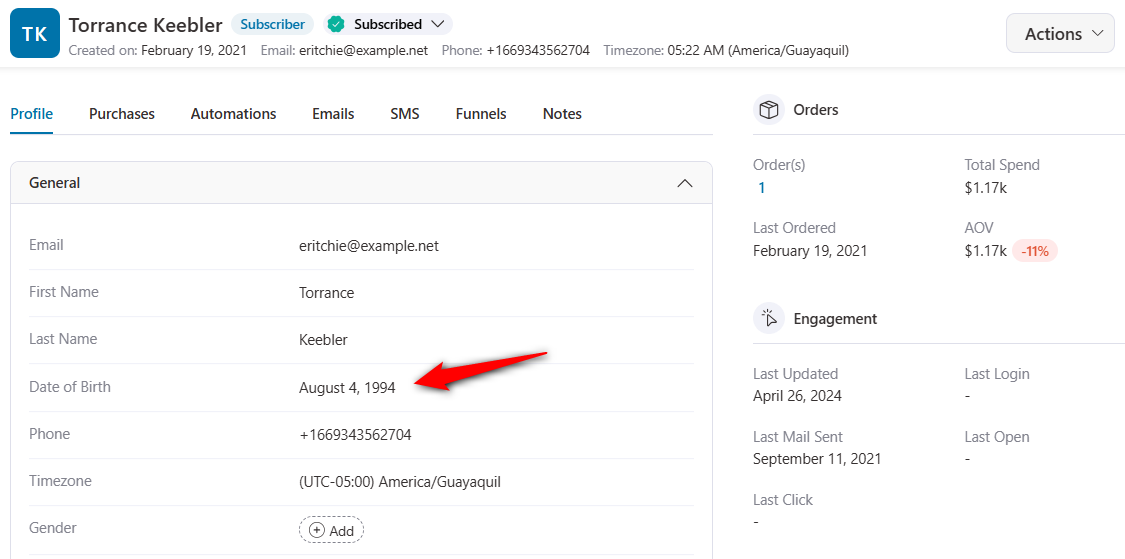
- When your customer enters their date of birth on the checkout, the birthdate gets added to the contacts in FunnelKit Automations.
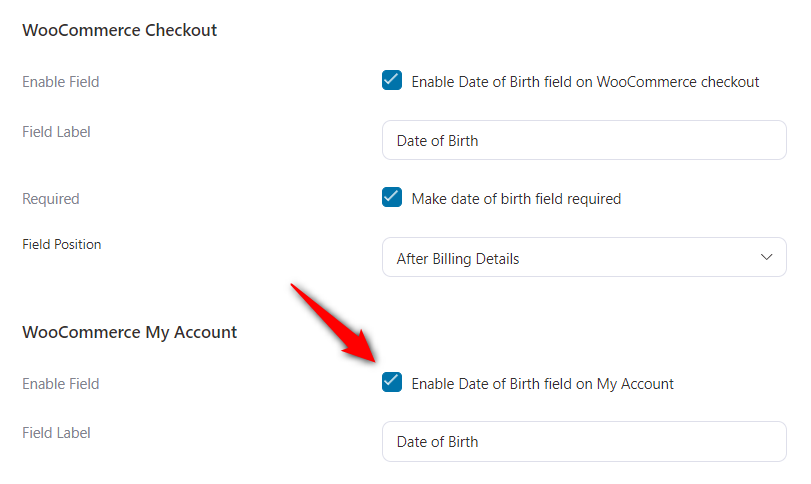
- Enable the DOB field on WooCommerce Accounts from here:
- You can even capture the date of birth of your customers after the checkout on the thank you page. Just enable this setting and embed this shortcode on your thank you page:
Make sure to click on Save to lock all your changes.
Now you know about the basic settings, let’s set up the birthday reminder automation in FunnelKit Automations.
Creating the Birthday Reminder Automation
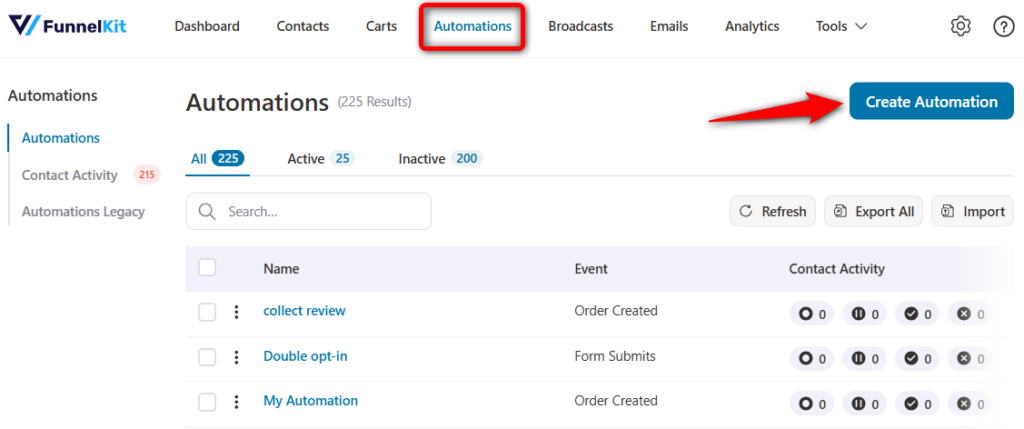
Step 1: Create a new automation
Go to the Automations section and click on the Create Automation button.
Here, you’ll see the pre-built automation recipes.
Click on the Start from scratch option and name your automation.
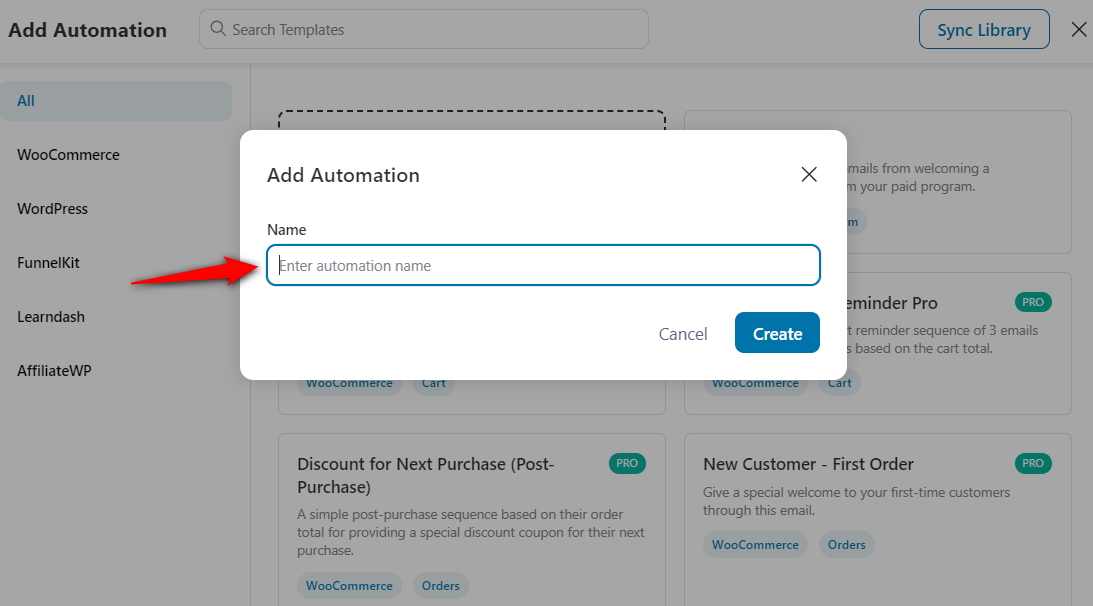
Clicking on Create will add a new automation to your workflow.
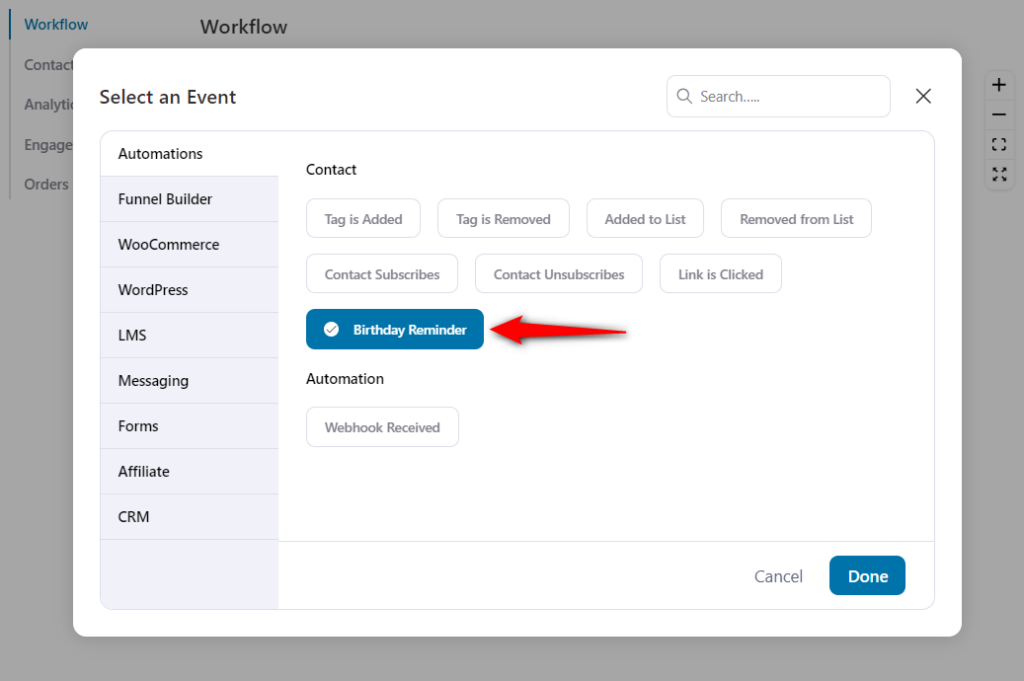
Step 2: Select the birthday reminder event
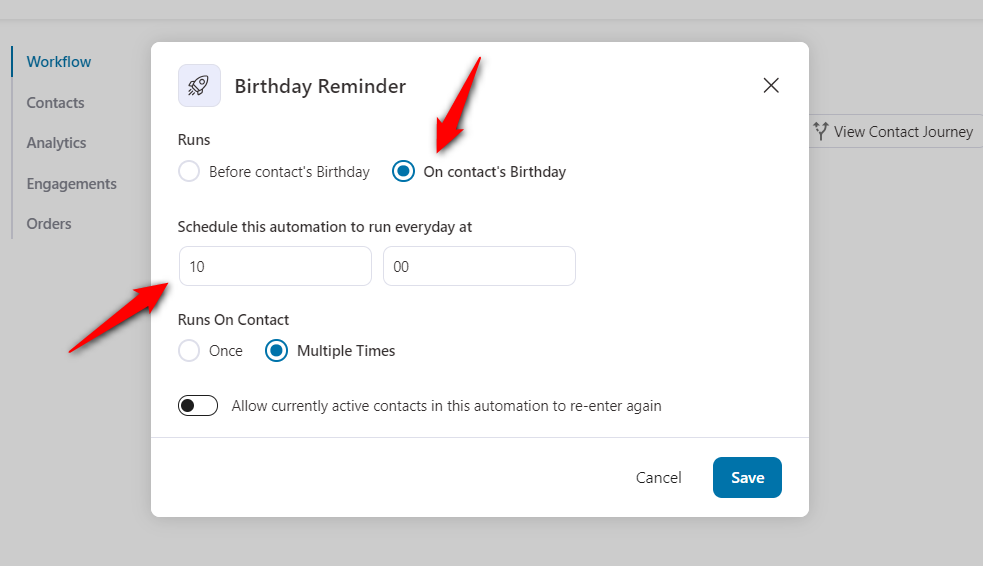
Select the trigger - Birthday Reminder under Automations.
Now, configure this event to trigger the automation on or before a contact's birthday:
- On a contact's birthday - Automation will get triggered on the day of a contact's birthday.
- Before a contact's birthday - This automation will get triggered a number of days before a contact's birthday.
Specify the time if you want it to run on the birthday:
Or specify the number of days before the birthday you want to trigger this automation:
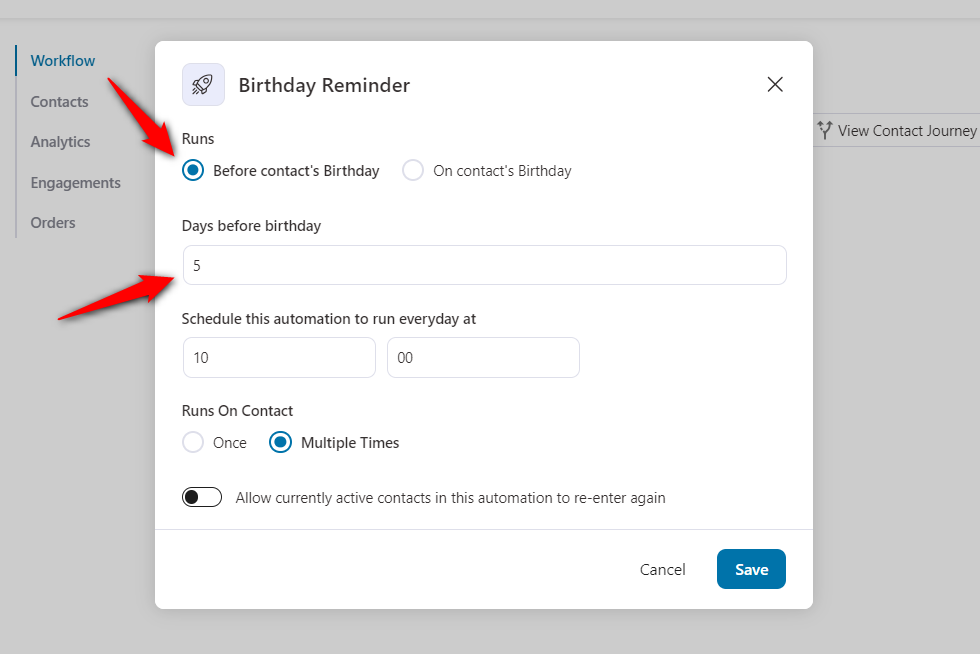
Click on Save when done.
As per the event we configured, this automation will trigger for all contacts who have 5 days left before their birthdays at 10:00 AM.
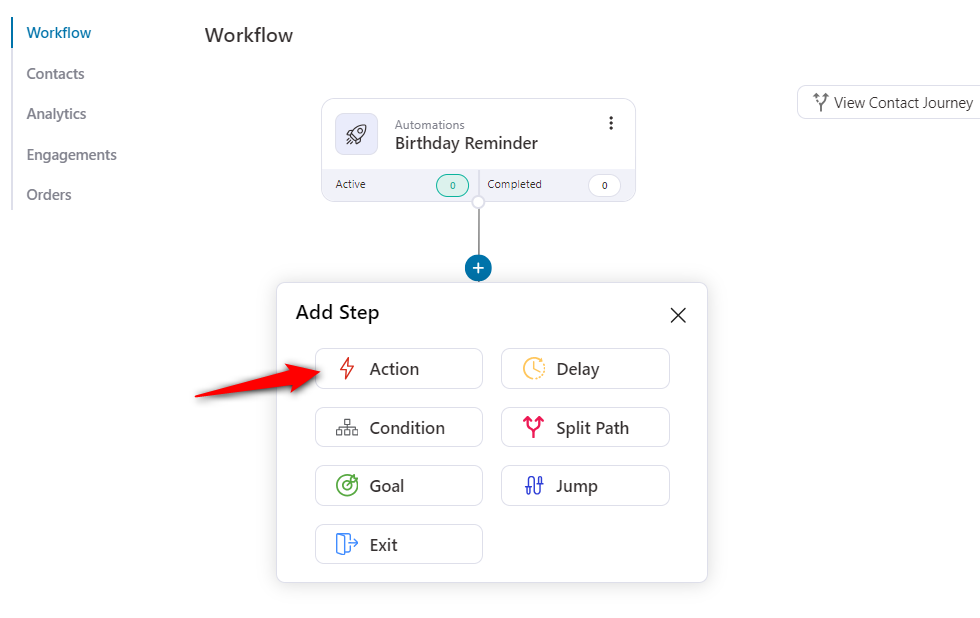
Now, you can specify the action for the birthday reminder automation.
Step 3: Select the action
Here, we will send an email. Therefore, click on the (+) icon and add an Action.
You can create a personalized, dynamic coupon and share it with your users.
But we will keep the sequence short and simple.
Here, specify the Send Email action.
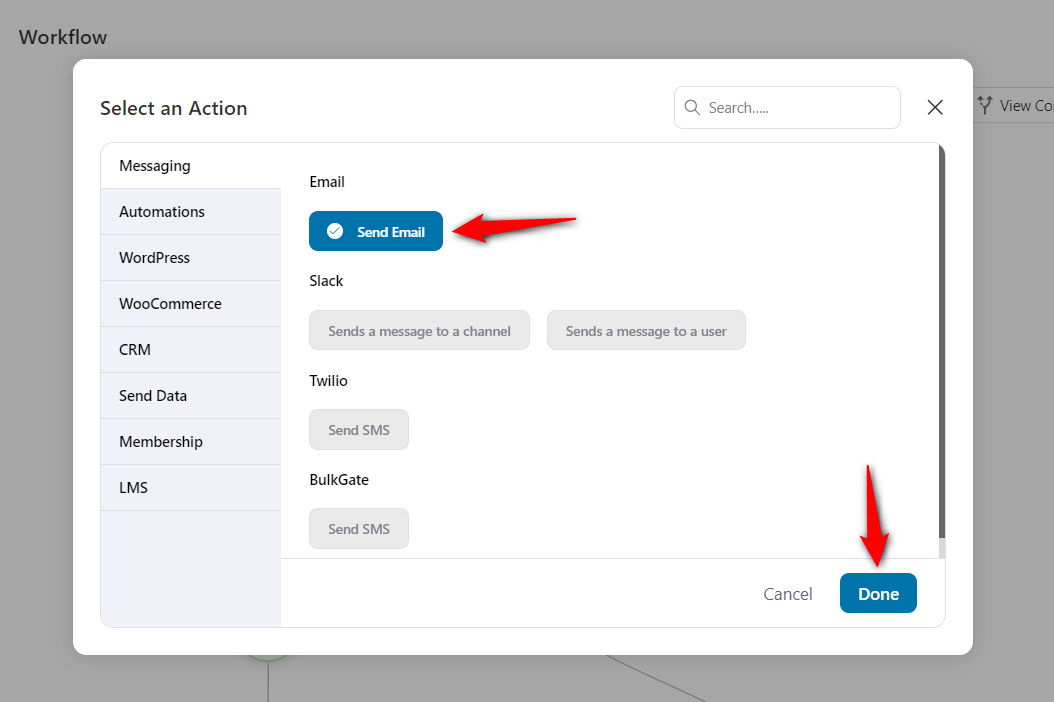
Click on Done.
Step 4: Write your email content
Type in your subject line, preview text and email body content.
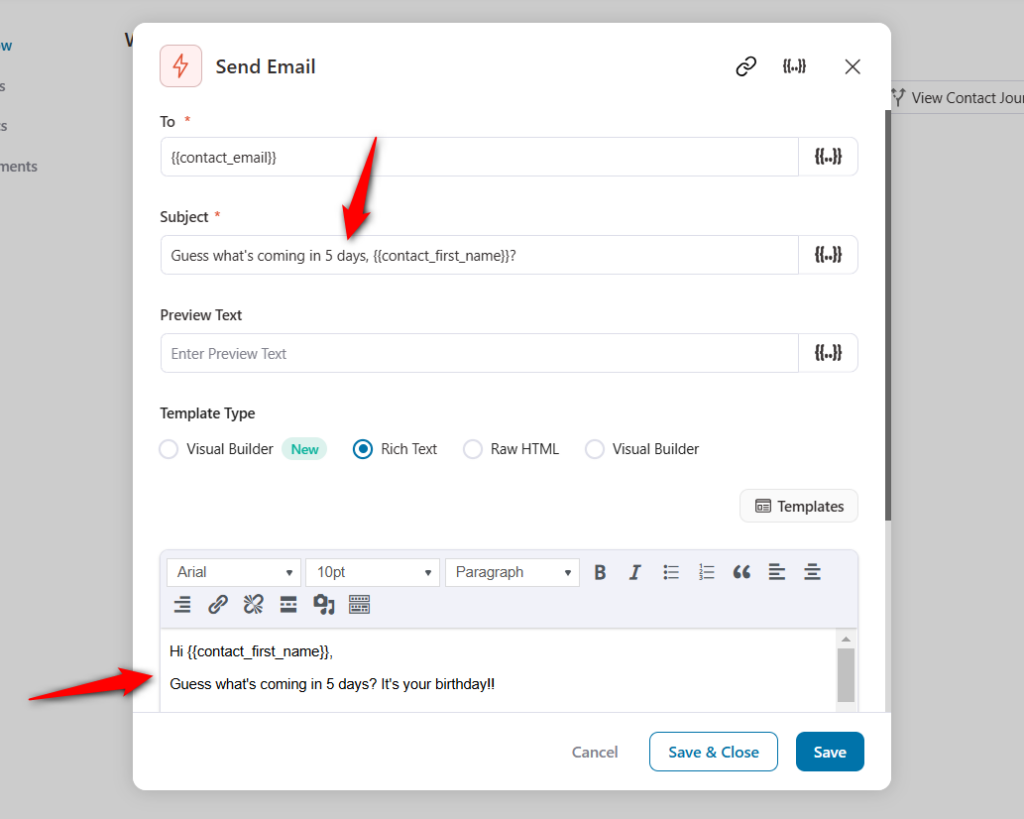
Once done, click on the Save & Close button to lock all the changes and go back to your workflow.
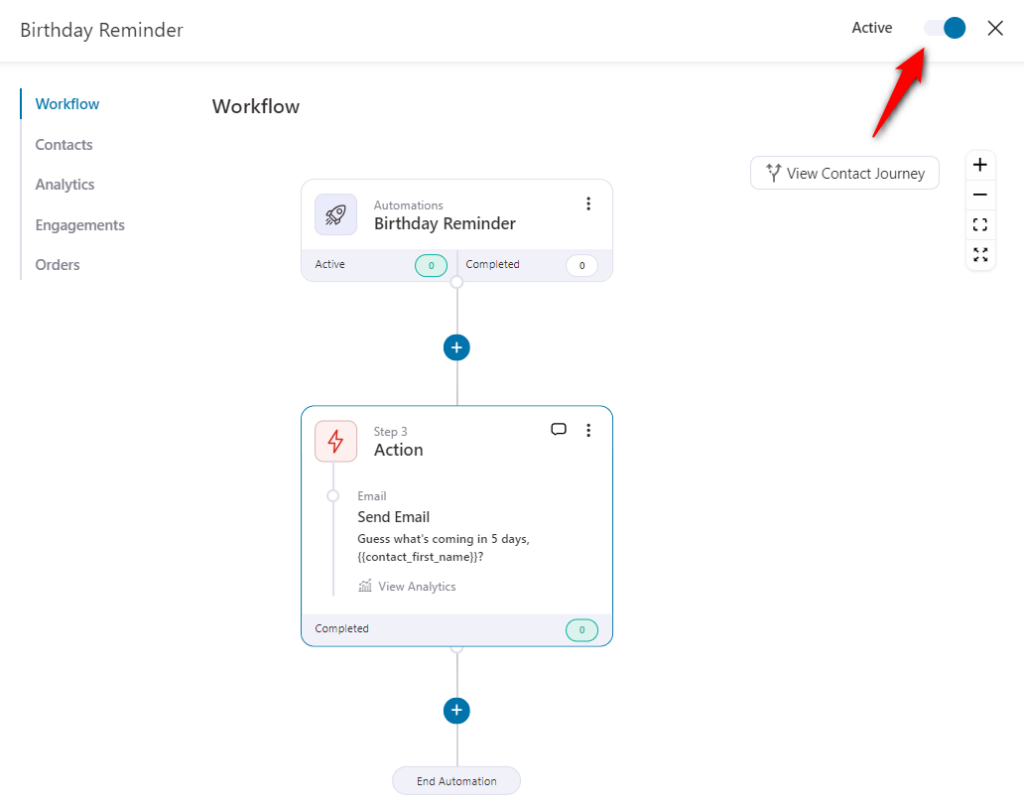
Step 5: Activate your automation
Turn the toggle active to make your automation live.
You can also send an email on their birthday by assigning the delay till the day of their birthday and sending an email after it.
This is a simple birthday reminder automation. You can set up discounts or send multiple emails by adding different action steps to your workflow.
Well done! This is how you can successfully set up a custom birthday reminder automation.


