Integrately lets you integrate your apps and set up powerful automations.
You can use FunnelKit Automations to send data to Integrately and take a specific action with an app on the platform.
In this documentation, you’ll learn how to send data from FunnelKit Automations to Integrately.
Step 1: Add an event trigger
Under Automations, add any event trigger in FunnelKit Automations.
Here we selected the ‘User Login’ event in FunnelKit Automations.

Configure this event here and enable it to run multiple times.
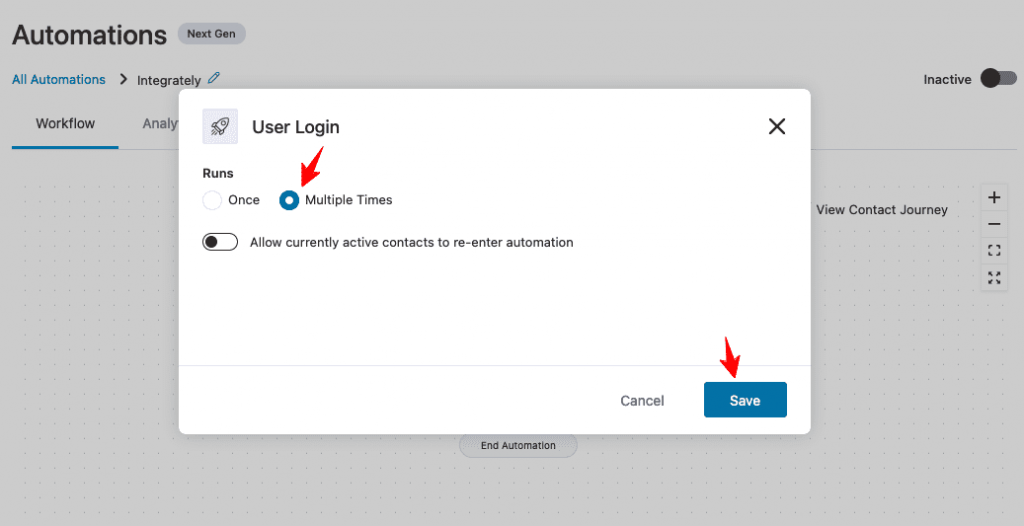
Click on Save when done.
Step 2: Select ‘Send data to Integrately’ action
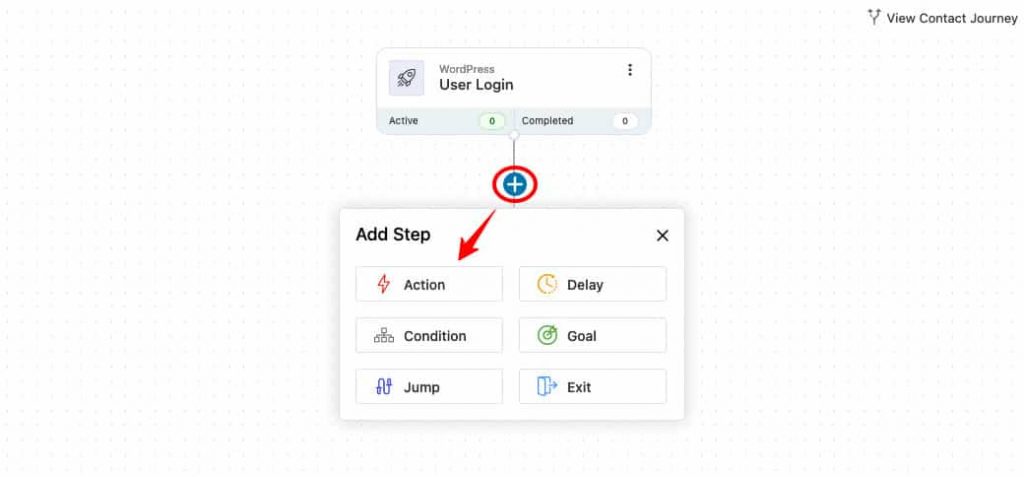
From the (+) icon, add Action to the workflow.
Now, specify the action - Send data to Integrately.
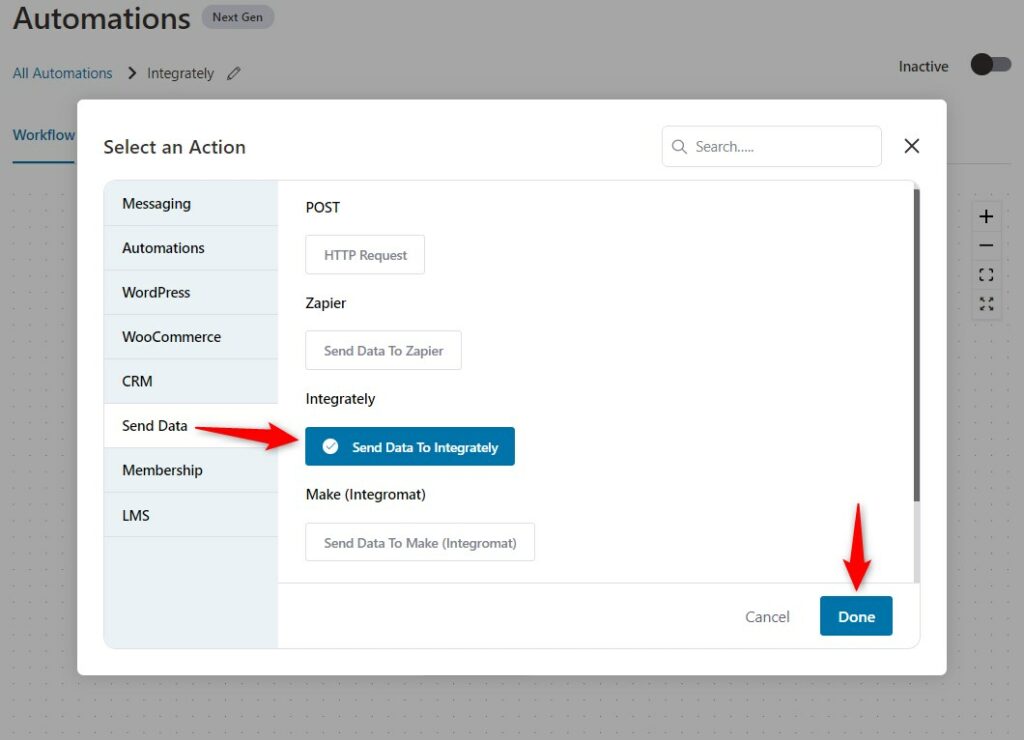
Click on Done.
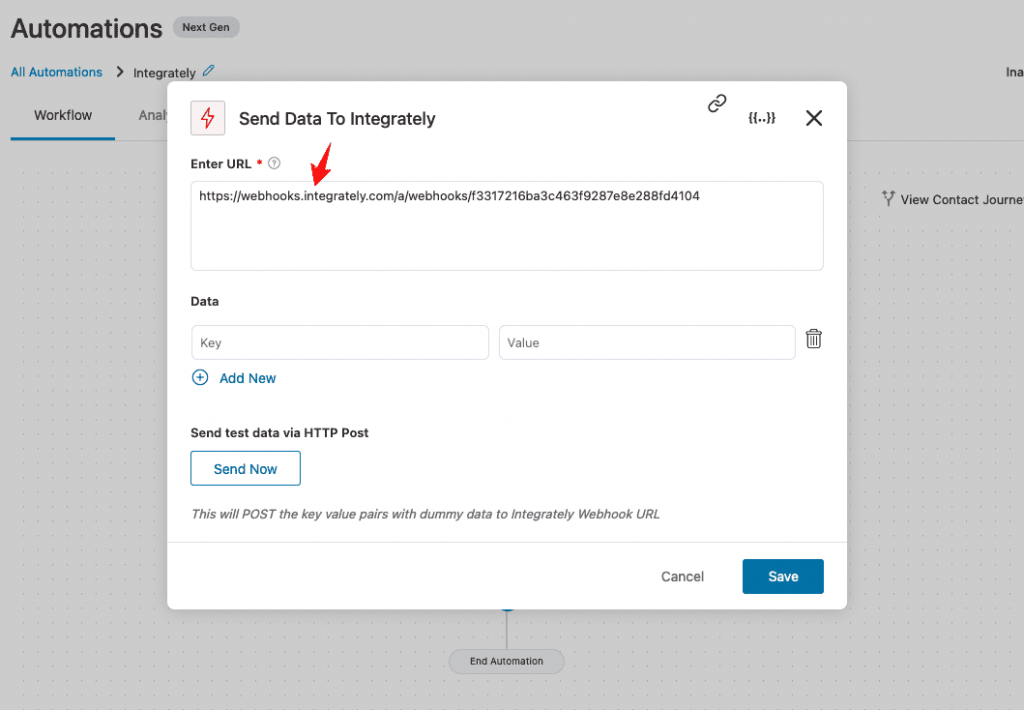
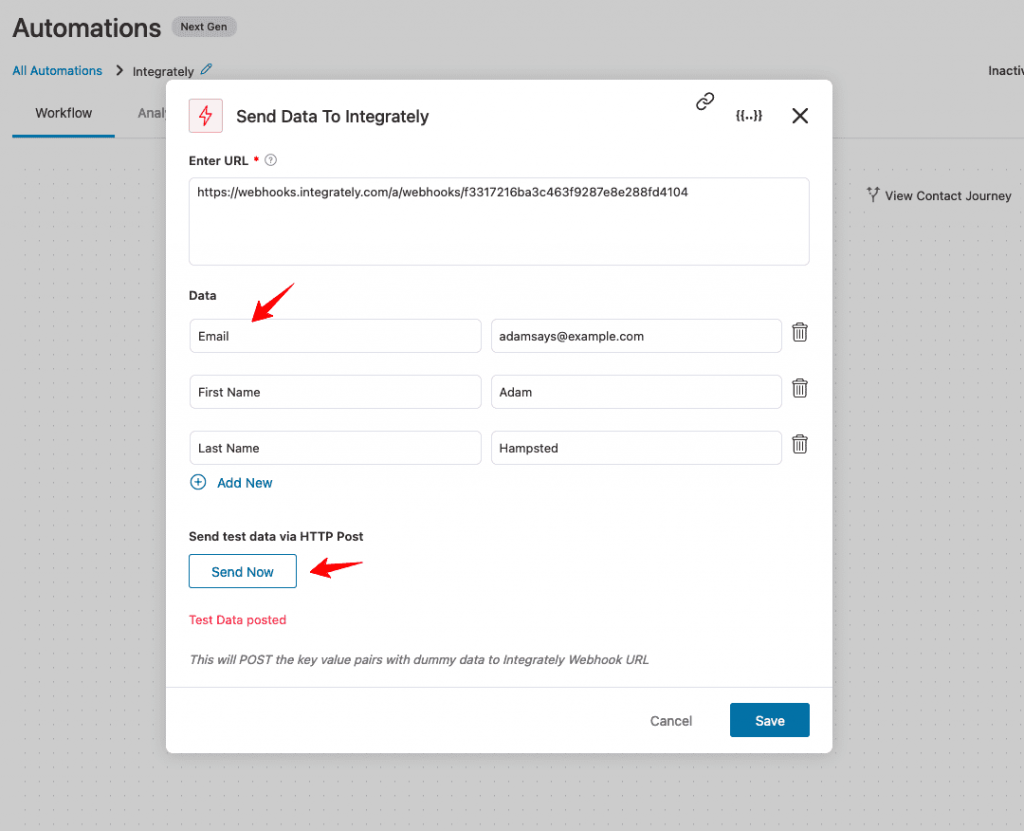
Once you add this action, the following window will appear on your screen:
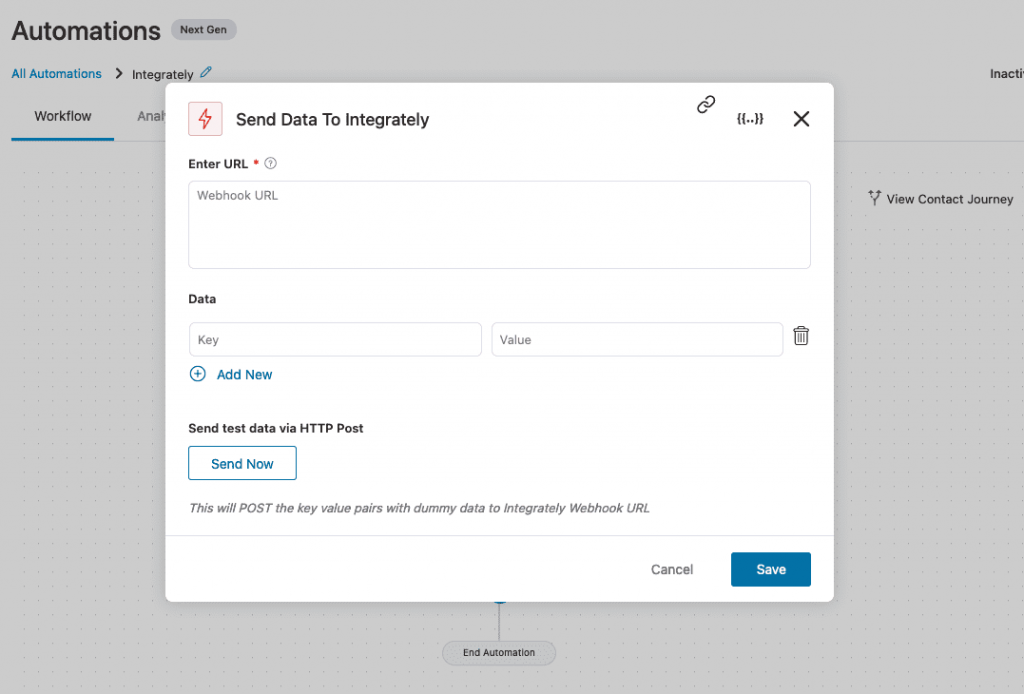
You need to enter the webhook URL from Integrately here - follow the instructions provided in the next step.
Step 3: Go to your Integrately account
Go to your Integrately account and enter the login credentials.
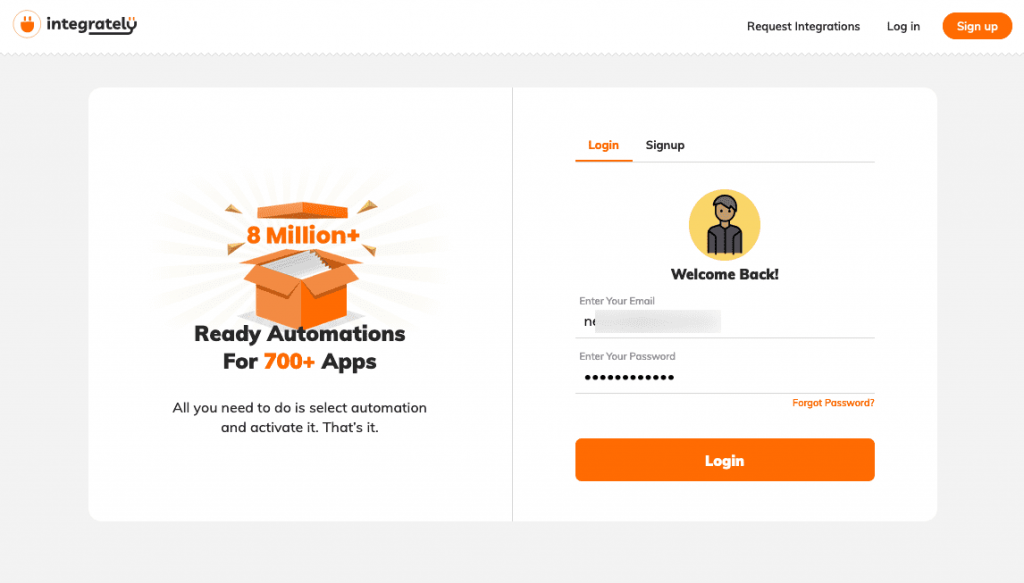
Click on Login to get access to your account.
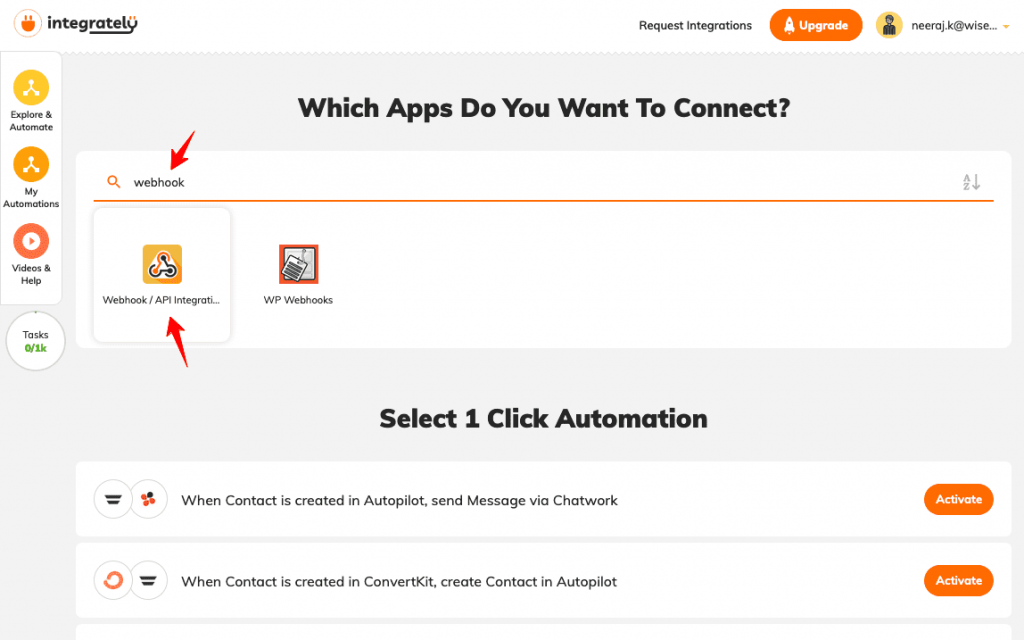
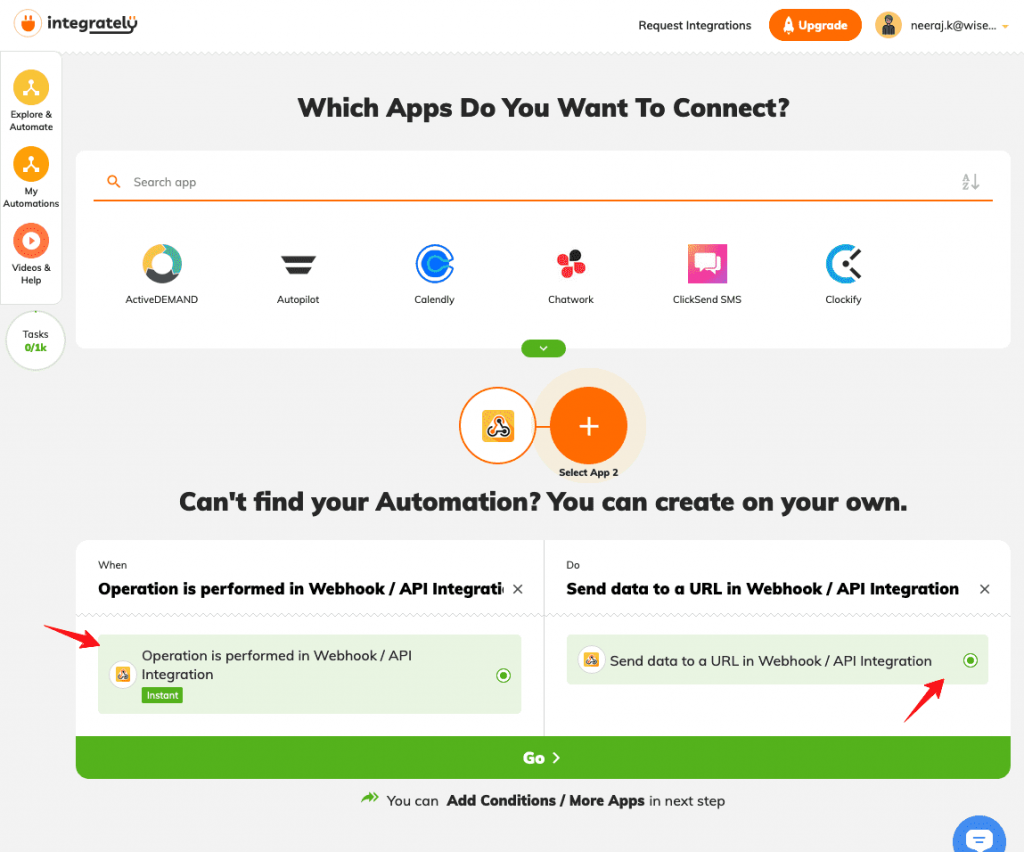
Step 4: Set up the webhook and copy its URL
Search for the webhook and click on Webhook / API Integration from here.
Next, select the event of your automation workflow.
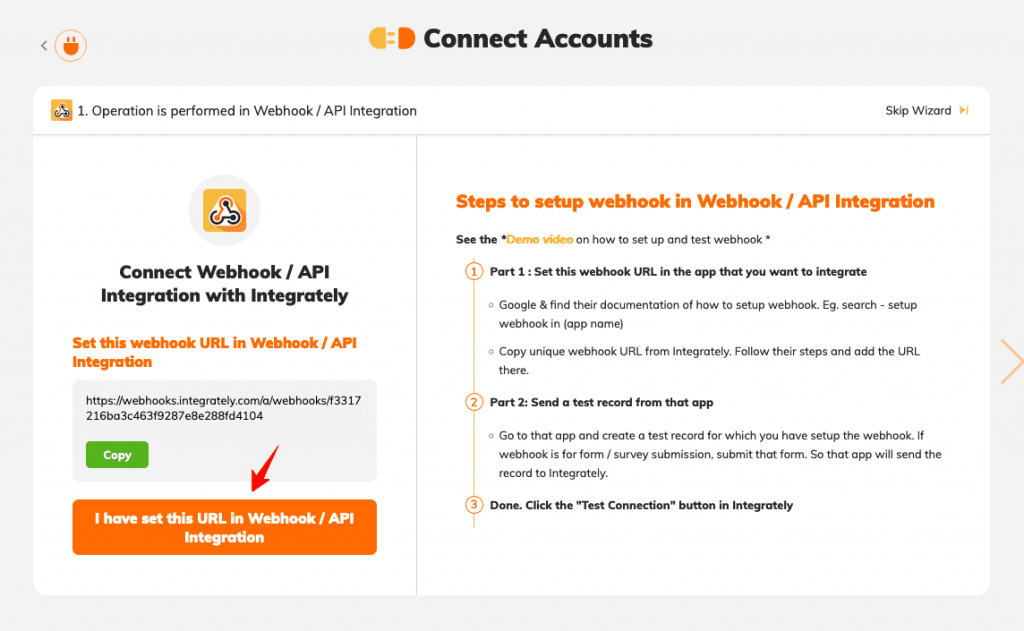
Copy the webhook URL.

Step 5: Paste the webhook URL into FunnelKit Automations
Paste the copied webhook URL in FunnelKit Automations.
Step 6: Send test data
Enter some data here and click on Send Now.
Alternatively, you can activate the automation and provide the WordPress user login information (the event which you specified above).
Step 7: View received data in Integrately
Go back to Integrately and click on “I have set this URL in Webhook / API Integration”.
It’ll take a few seconds to refresh the screen.
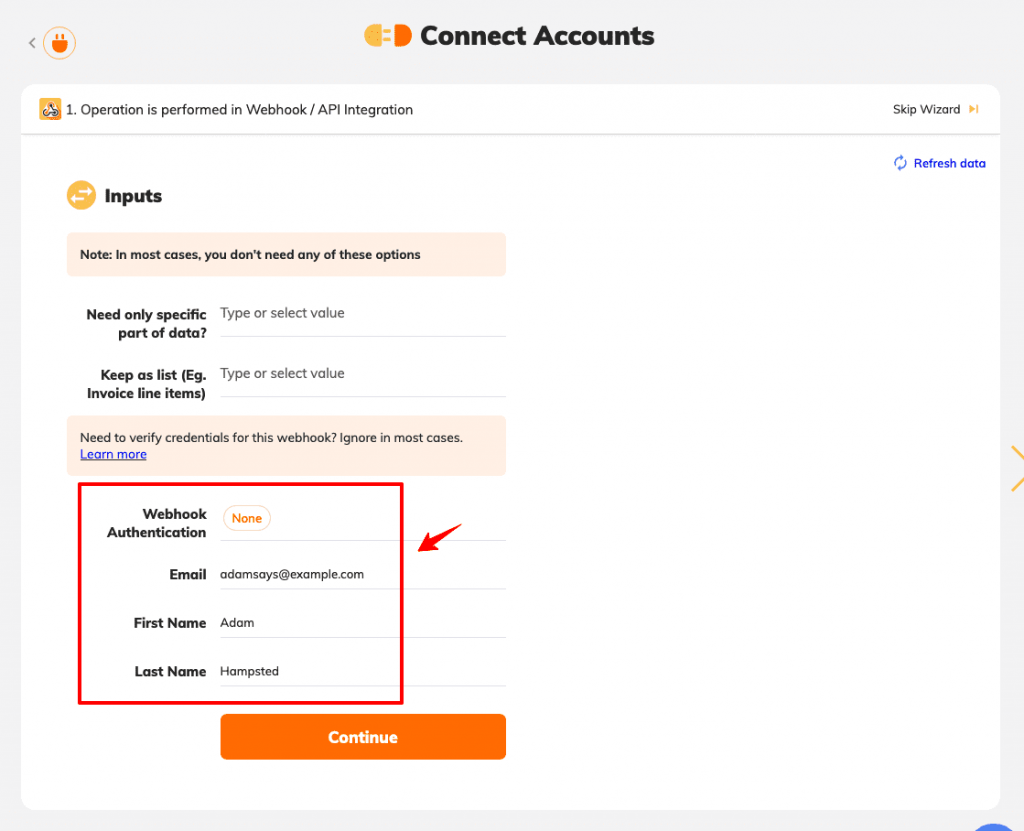
Next, click on See Test Record.
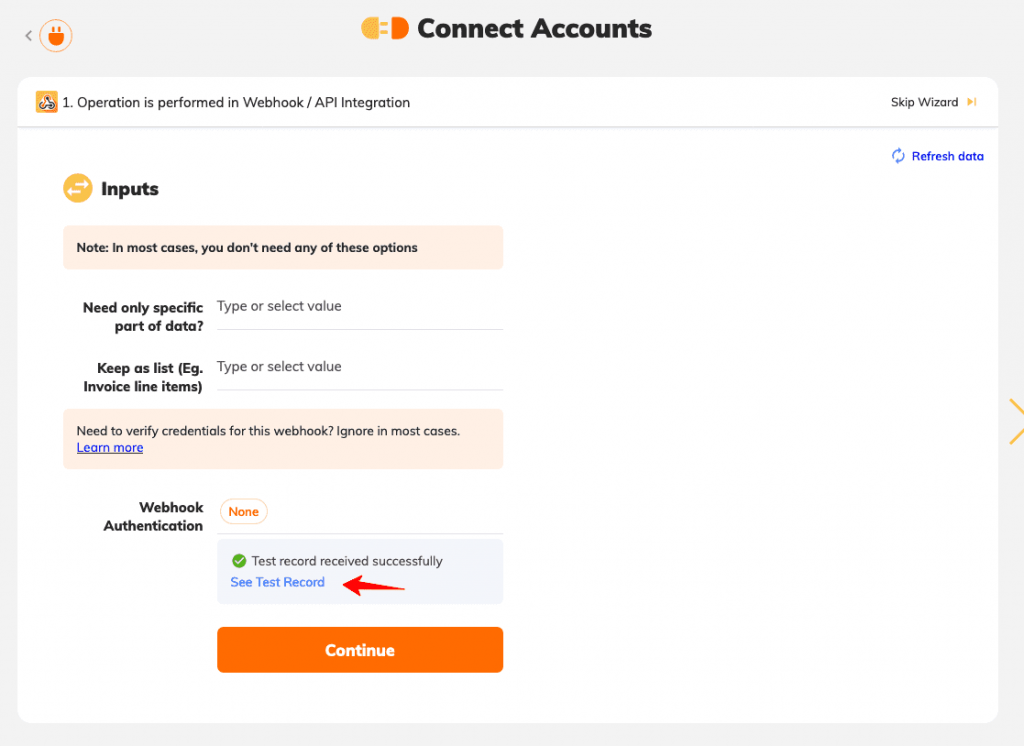
Now, you’ll be able to see the test records you sent from FunnelKit Automations here:
Step 8: Add the corresponding action
Now that the webhooks are working fine, you can complete your workflow.

Add the rest of the action to achieve your use case.
That’s it! This is all about the FunnelKit Automations - Integrately integration.


