In this doc, we’ll be creating a 3-part email sequence for an abandoned cart.
This will be a sequence in which the first email checks in with the user and encourages them to complete the purchase.
The second email offers a discount coupon code, and the final email follows up with instructions for using the coupon code.
Watch this video to learn the step-by-step process to set this up:
But first, we'll help you understand how the process works.
How the Cart Abandonment Feature Works?
You can capture the cart and customer details using FunnelKit Automations' Cart Abandonment feature.
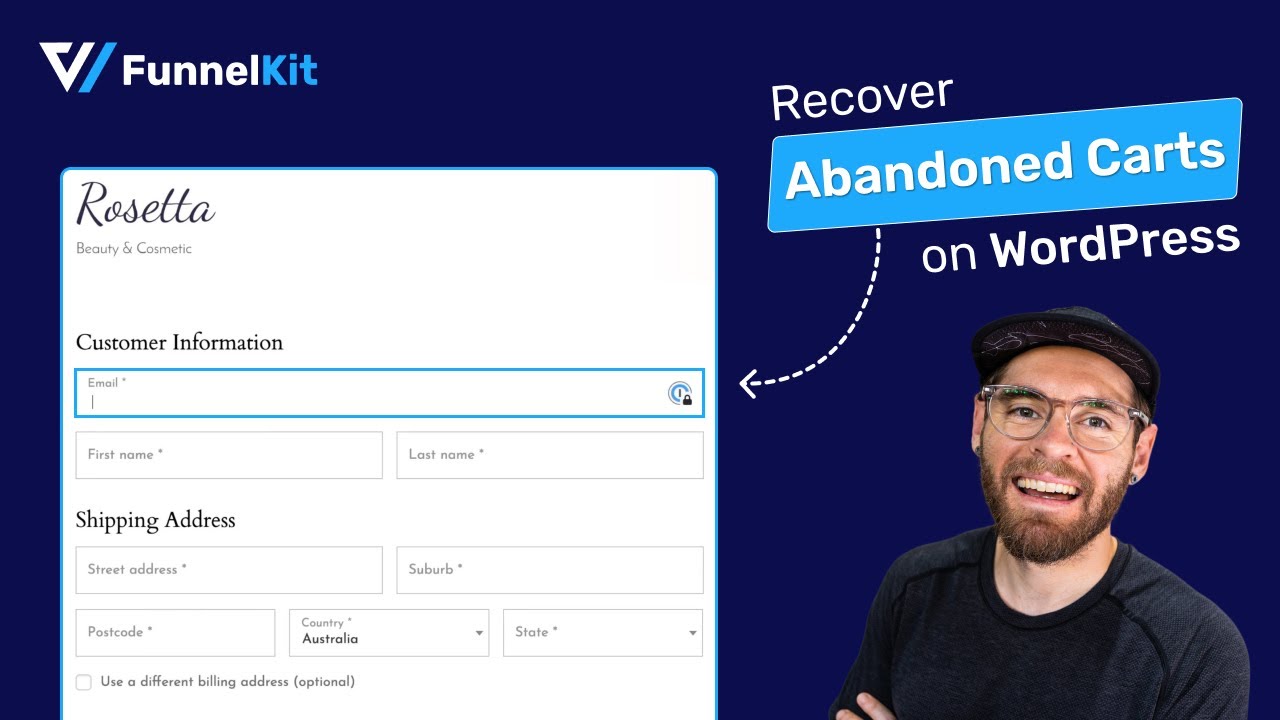
However, for this feature to work, the customer must enter at least their email address on the checkout page.
- Once the email address is entered, the cart is captured and marked as recoverable. At this point, the cart status is set to PENDING.
- After the wait period configured in the cart settings has passed, the cart status changes to IN-PROGRESS. You can refer to the cart settings document here.
- When the cart status changes to IN-PROGRESS, the customer enters the abandoned cart automation, which then executes the predefined actions.
- The automation continuously monitors whether the customer completes their purchase using the cart recovery link or directly on the website. If the order is placed, the automation automatically stops further actions for that particular contact. No additional setup is required to remove them from the automation.
- For logged-in users, FunnelKit Automations captures the carts as soon as they add a product to the cart. They don't need to visit the checkout page. Their captured cart will appear on the Recoverable Carts page.
Setting Up Cart Abandonment Automation
Follow the steps to create a cart recovery sequence for your store:
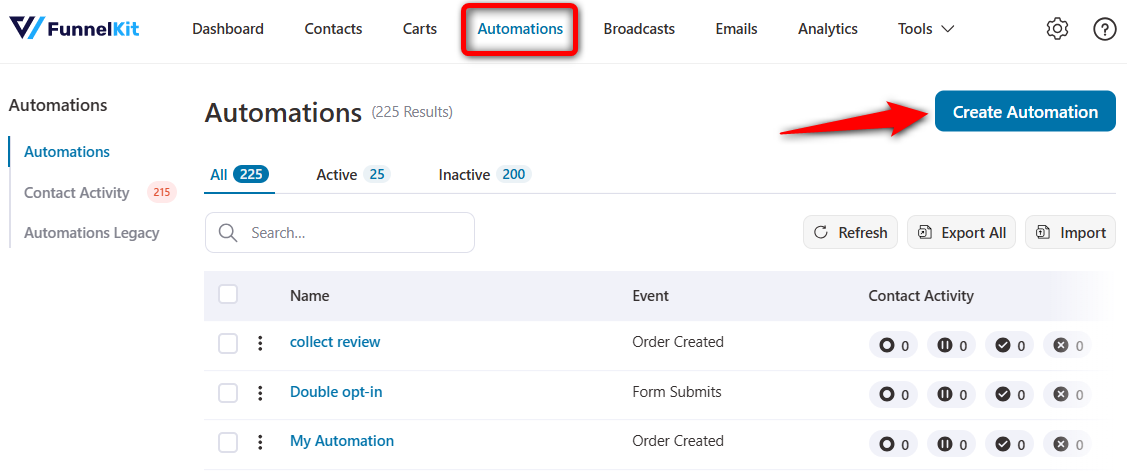
Step 1: Create a new Automation
Go to the Automations section and click on Create Automation.
Click on Start from scratch and enter the name of your automation.
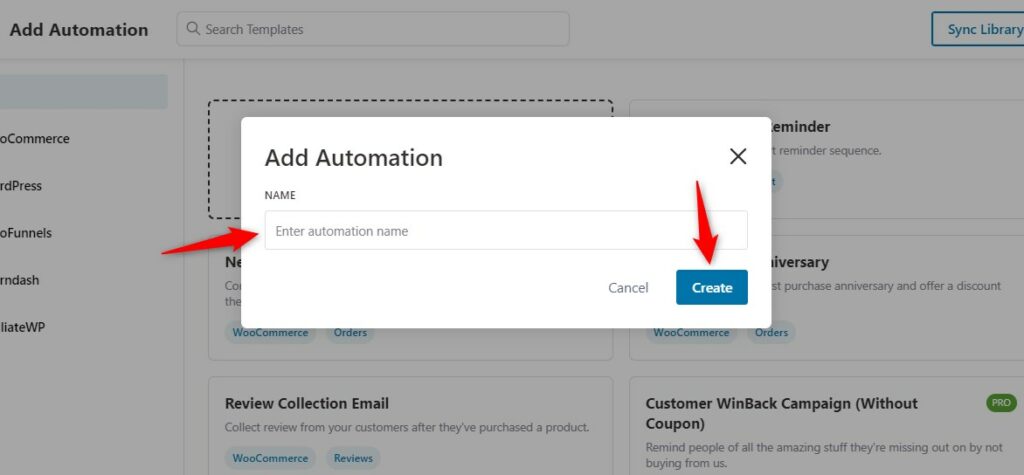
Click on Create.
Step 2: Select ‘Cart Abandoned’ as the Event Trigger
Select the Cart Abandonment under WooCommerce from the events.
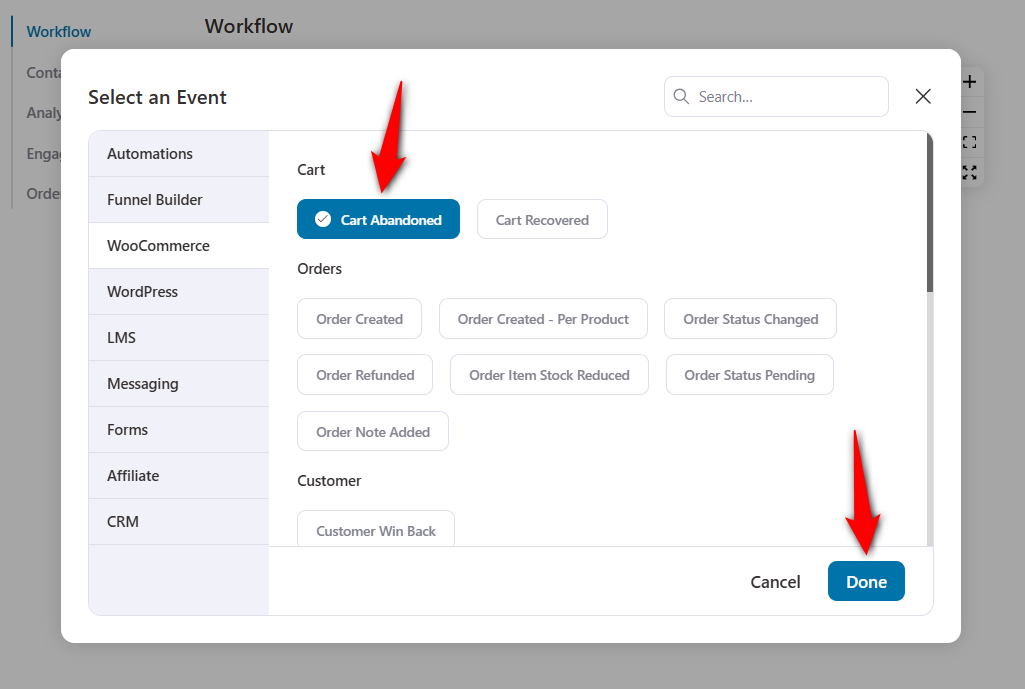
Click on Done.
When the WooCommerce cart gets abandoned, it will be recorded as an event, and the subsequent actions will get triggered.
You can configure the event trigger by assigning the automation run,s such as:
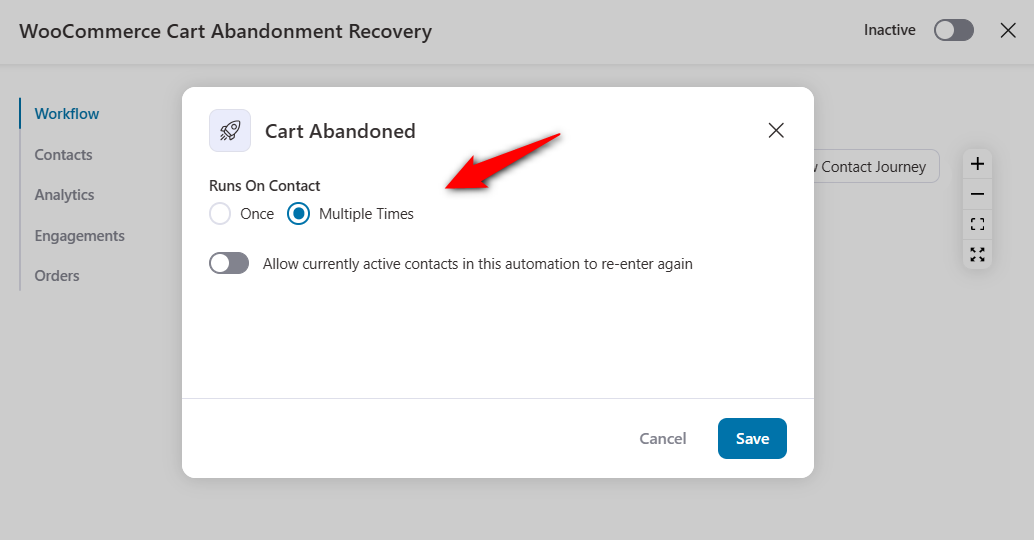
Click on Save when done.
Step 3: Add a delay
When you click on the + sign to add an action, you will see seven nodes: Action, Delay, Condition, Split Path, Goal, Jump, and Exit.
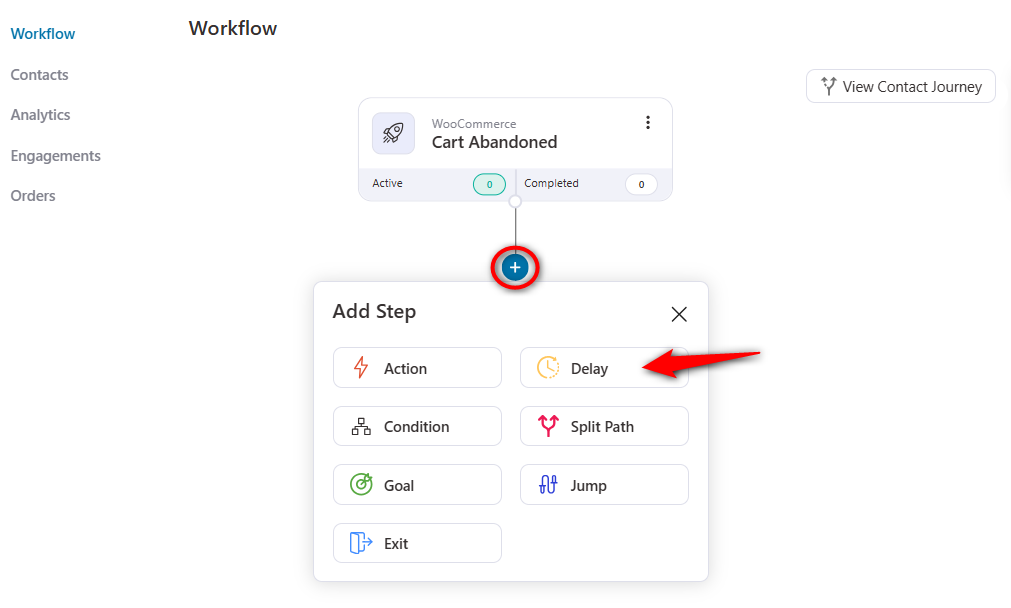
Action - When you want the action to be executed immediately
Condition - When you want an action to be executed after a specified condition is met
Split Path - A/B test multiple paths in your automation to analyze which one turned out the most profitable for your business
Goal - Set a specific goal for your automation
Delay - Specify the delay for different steps in your sequence
Jump - Move to a particular step by skipping all the subsequent nodes on your workflow
Exit - End the automation
In this case, select the delay and proceed.
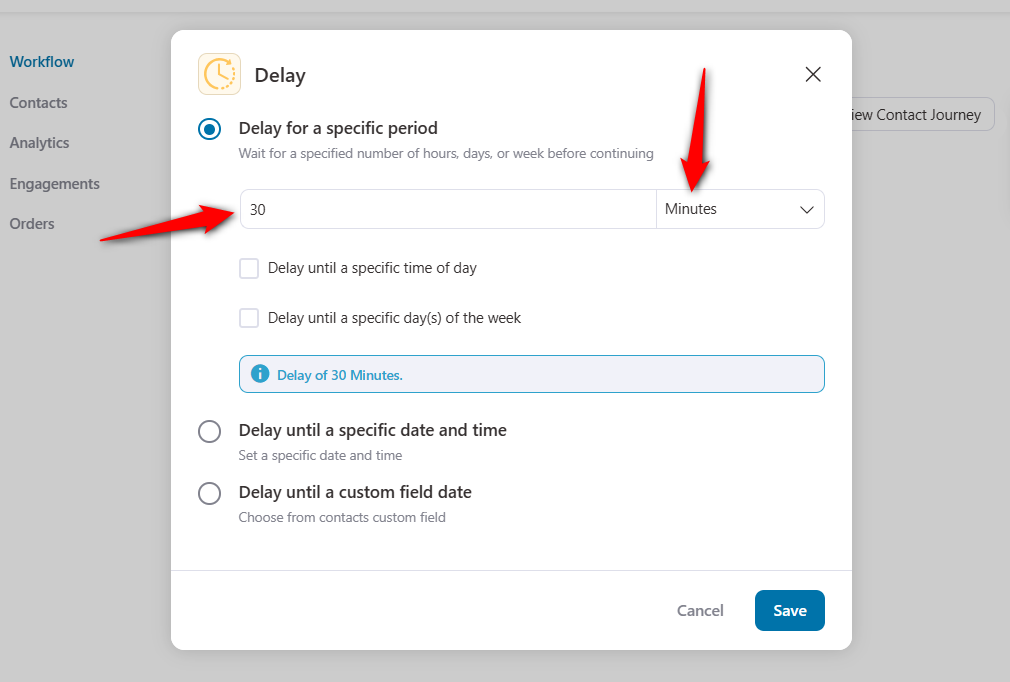
Set up the delay here and click on Save when done.
We recommend that you set the delay for your first email anywhere from 30 minutes to 4 hours after cart abandonment.
You can also delay sending the email until a specific time of day or day of the week. This feature allows you to choose your best sending times when you know that your open rate and click-through rates are the highest.
If you want your email to go out only on a chosen day of the week, delay it until that day.
So if you choose Monday and the cart was abandoned on Friday, that specific email will not go until Monday.
Step 4: Select ‘Send Email’ from the Actions
Click on the Action.
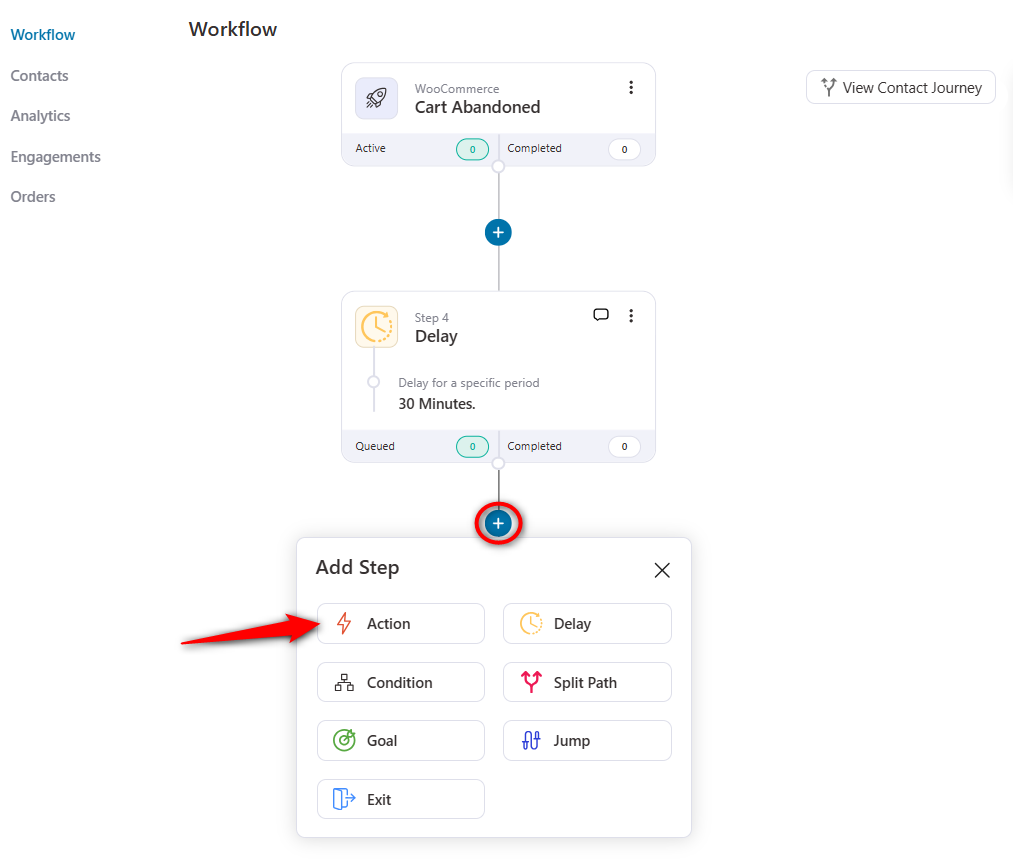
Now select ‘Send Email’ as the action under Messaging.
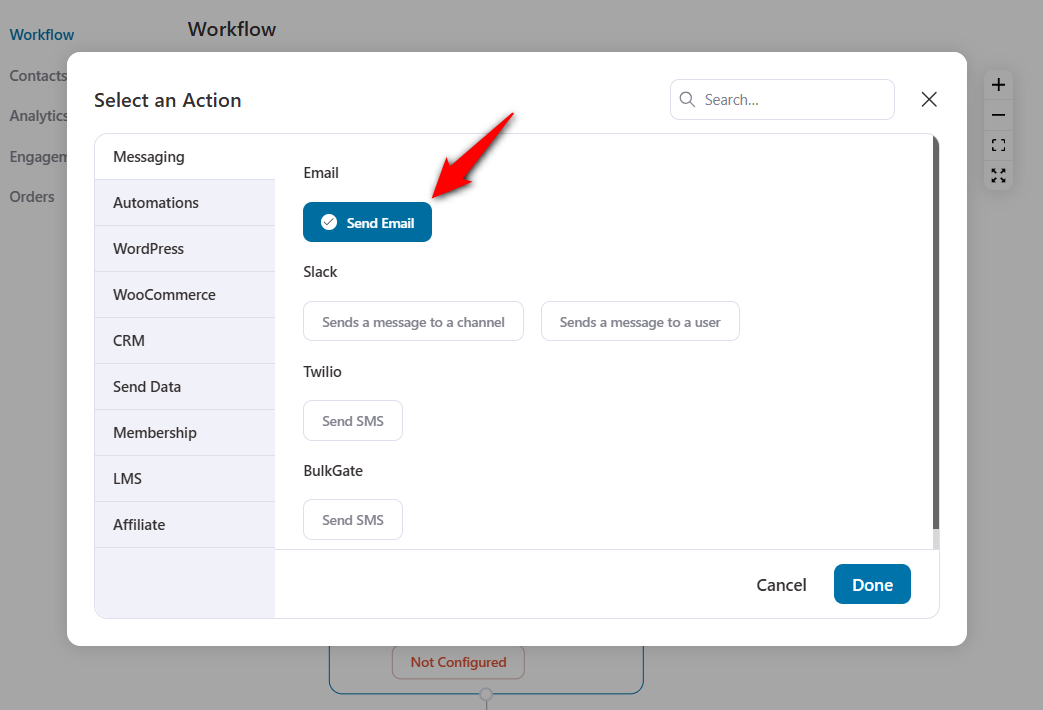
Here’s how:
This is the side panel that is displayed when you select “Send Email”:
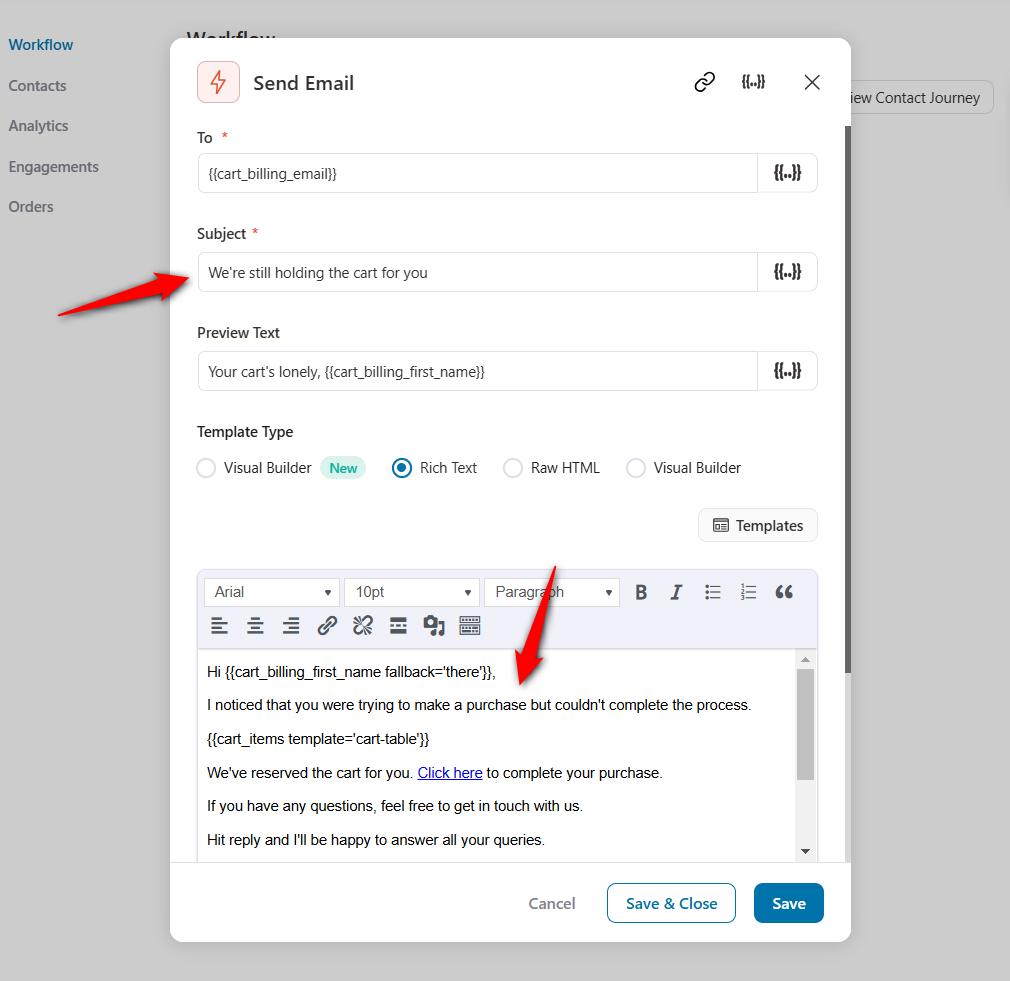
You can even use FunnelKit Automations' advanced email builder to design beautiful emails.
Step 5: Craft the Email Using Personalization Merge Tags
You can use personalization merge tags such as the first name, cart item(s) abandoned, cart total, and more to personalize your email.
Here’s where you’ll find them:
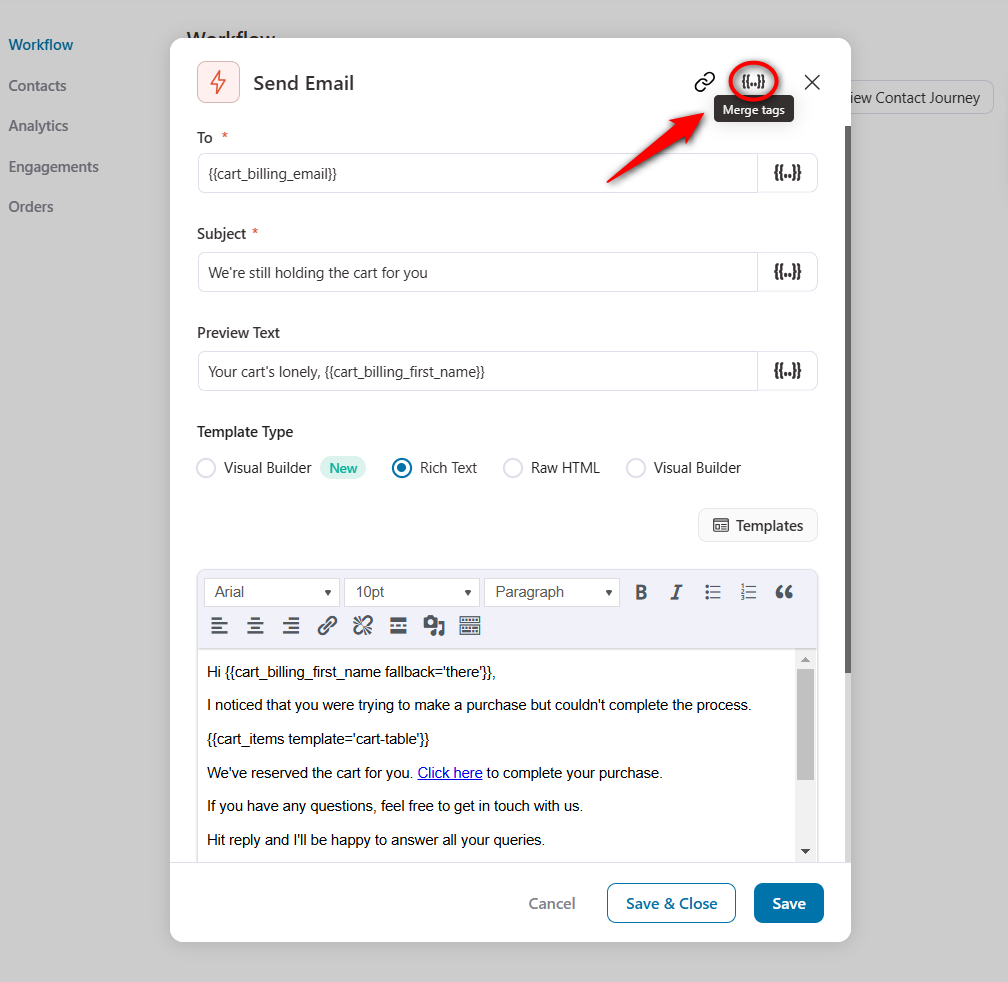
The merge tags will allow you to make your email personalized, hence increasing your open rates and click-through rates.
You can even add cart items merge tag:

You can even design abandoned cart reminders using the built-in visual email builder.
Step 6: Turn the Automation to Active
Once done, turn the toggle 'Active' to make this abandoned cart automation go live.
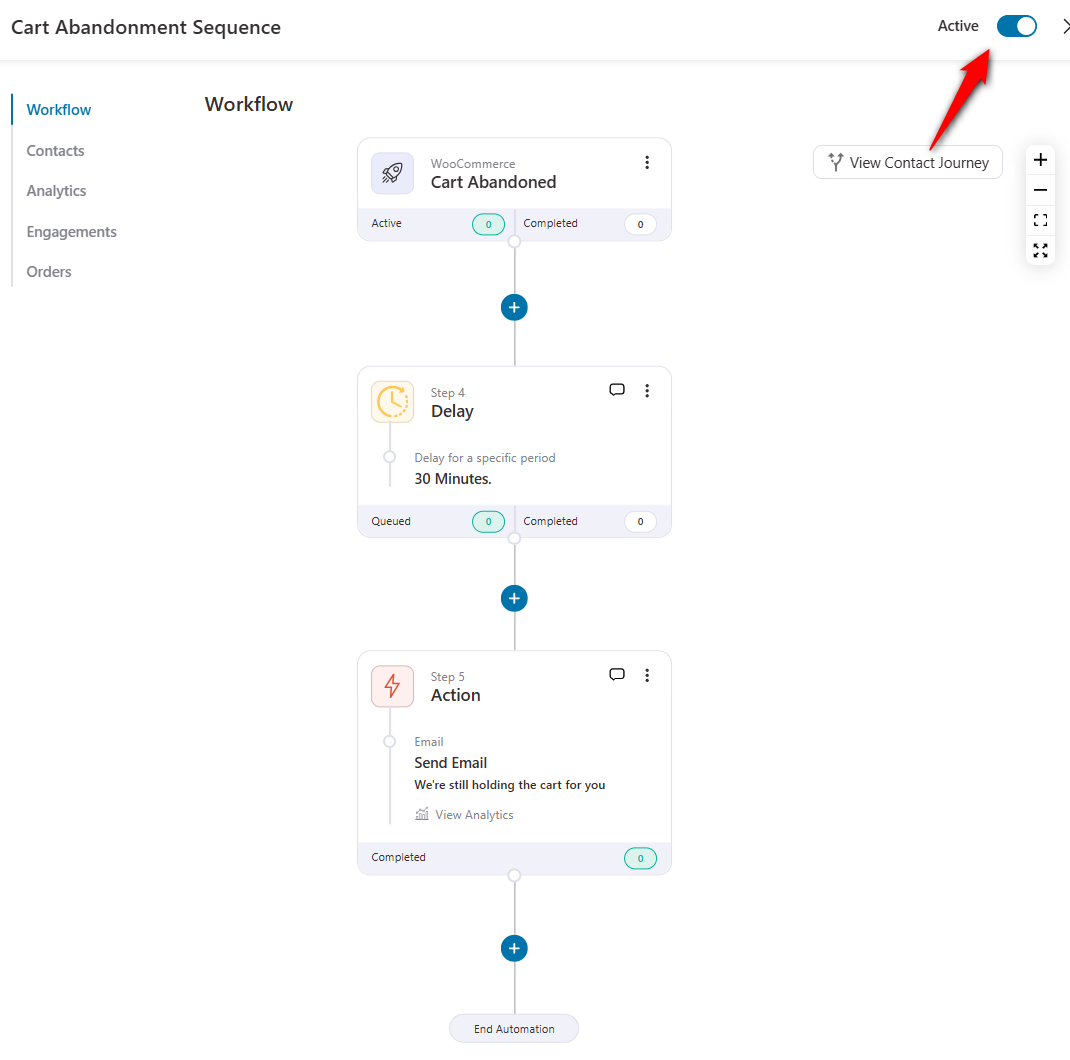
Well done! You have successfully set up abandoned cart automation for your store.
Testing the Automation by Abandoning a Cart
Add items to the cart and head to the checkout page. Next, enter your email address and close the browser window.

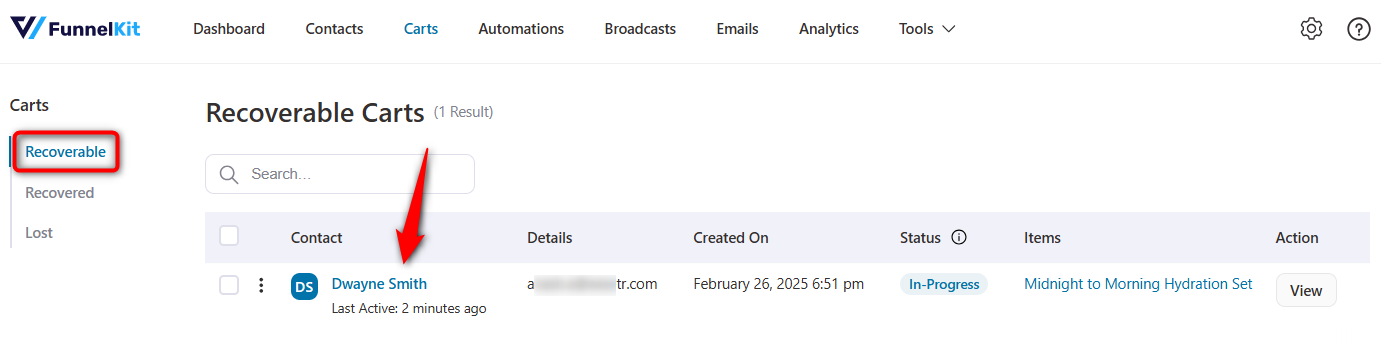
Once the wait period is over, you'll get recoverable carts in FunnelKit Automations:
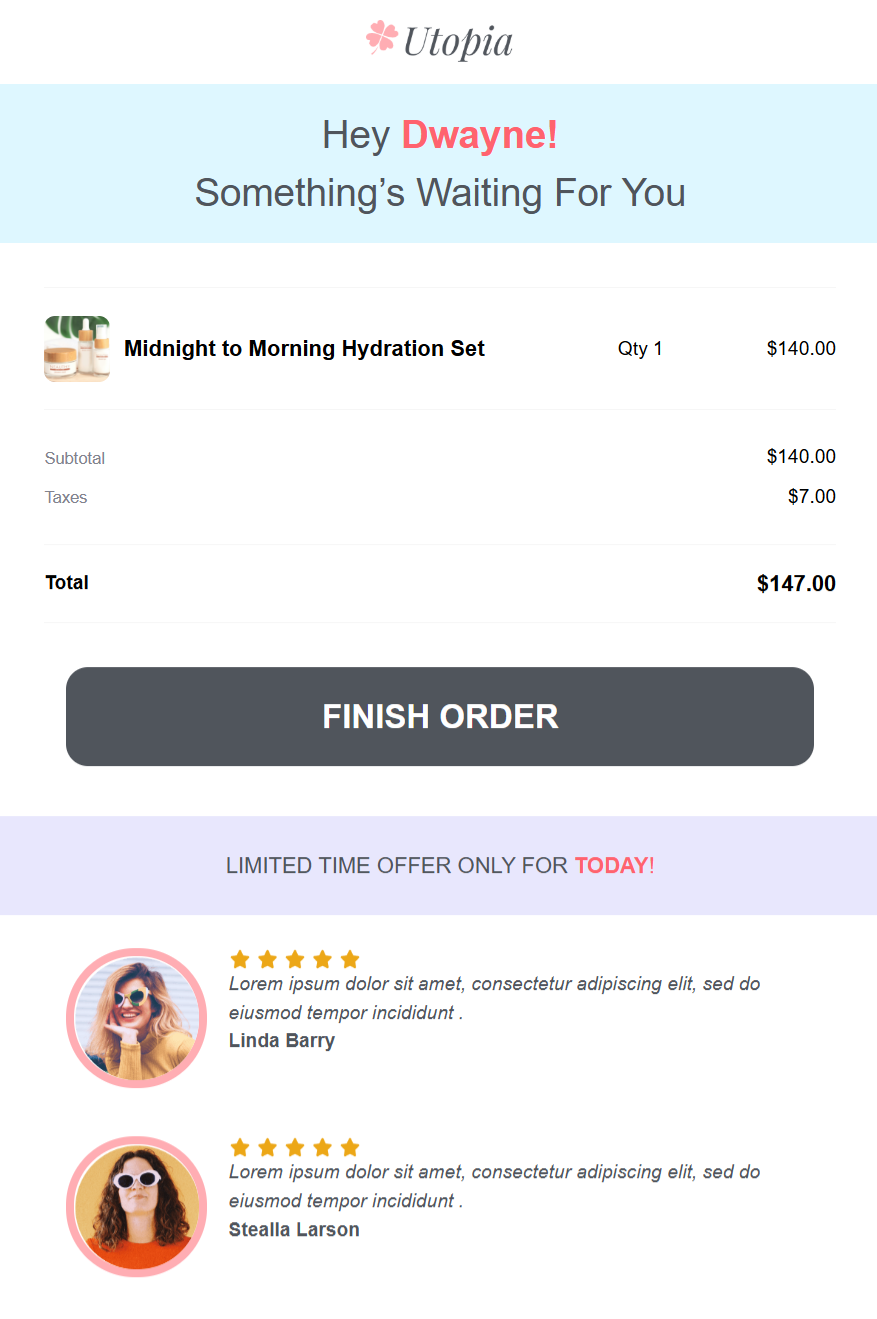
As per the delay set in the automation, the email will be sent based on the content designed:
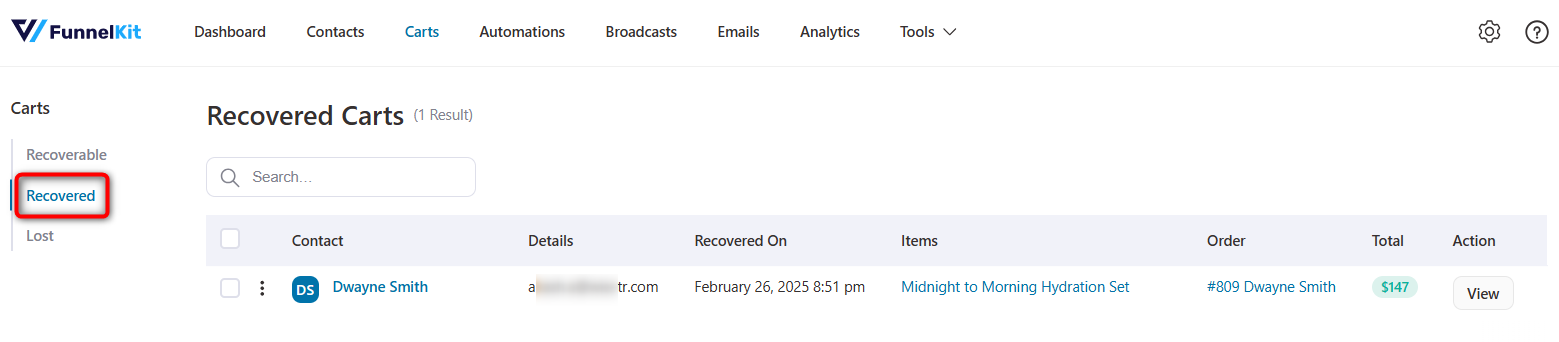
If a user successfully clicks on the recovery link and completes the purchase, their cart will be recovered.
It'll be shown in the Recovered Carts section:
In the next documentation, you'll learn how to provide coupons to your abandoned cart users to make a compelling offer.


