You can set up automations to receive SMSs and perform specific actions.
Either capture this message on a Google Spreadsheet or send them an SMS or a Slack message. Whatever it is, you can easily do it with FunnelKit Automations.
In this documentation, we will set up a receive SMS automation using FunnelKit Automations.
You’ll learn how to receive a response and:
Let’s look at them one by one.
Before that, you need to configure the webhook URL of the SMS received event.
If you are new to FunnelKit Automations, move to detailed instructions on how to create an automation.
Configuring the Webhook URL
Follow the instructions below to configure the webhook URL:
Step 1: Select the SMS Received event
Select the event - SMS Received that will trigger this automation.
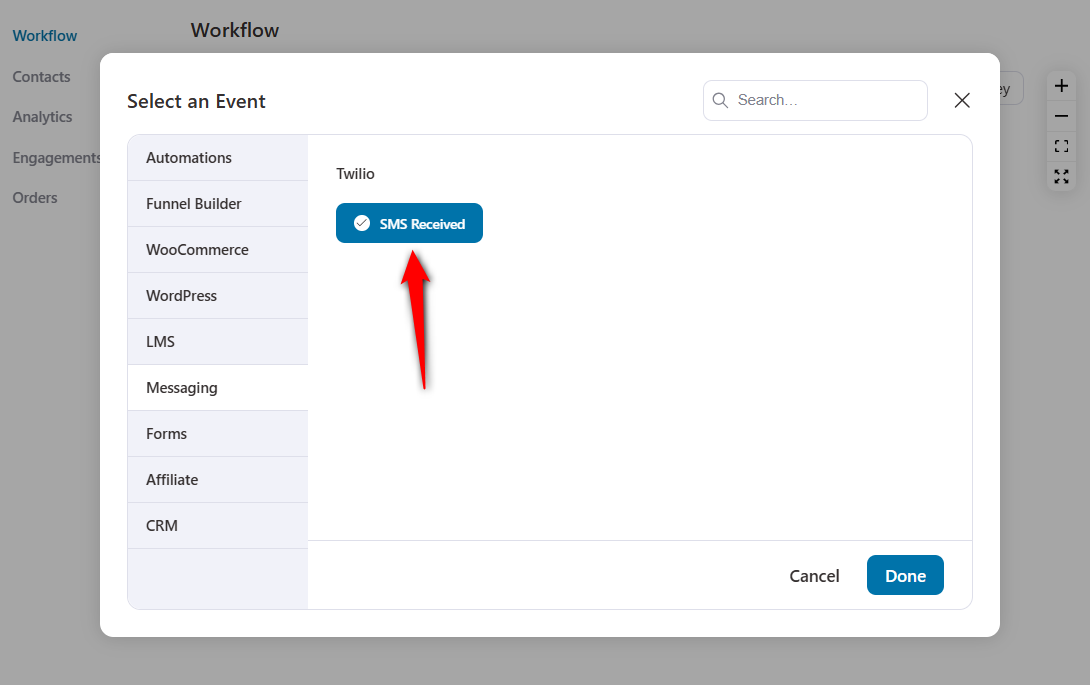
Click on Done.
Step 2: Copy the webhook URL
You’ll see the link that redirects you to the webhook URL inside FunnelKit Automations SMS settings.
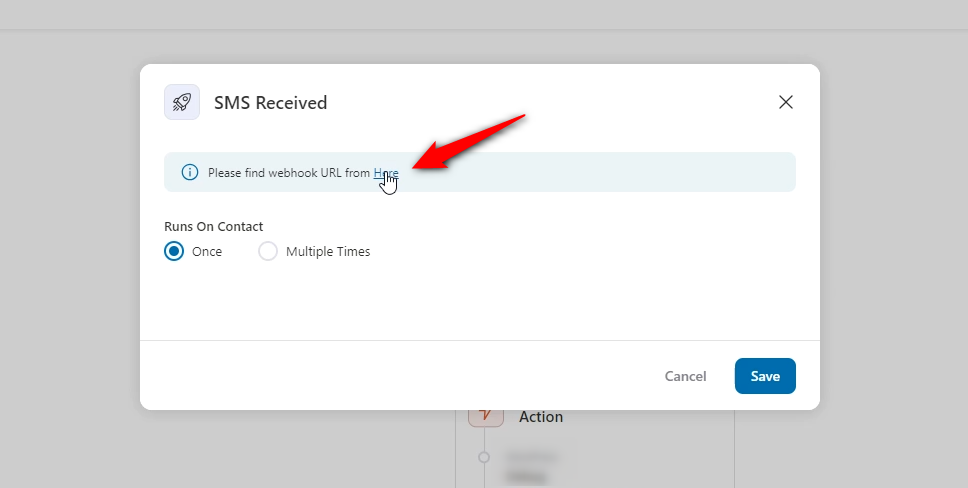
It'll take you to SMS Settings inside FunnelKit Automations.
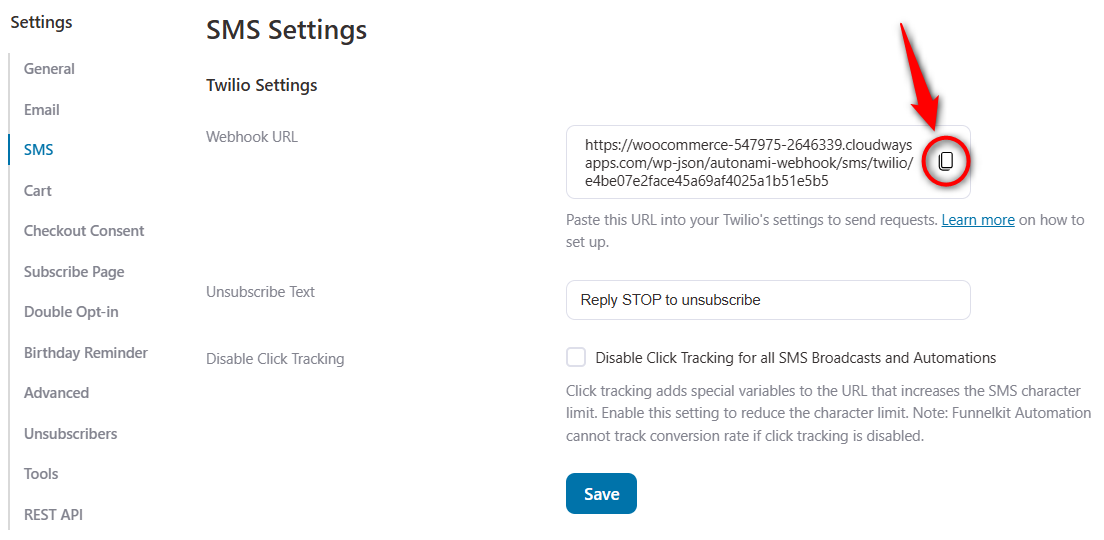
Copy this URL.
Step 3: Create a webhook trigger for incoming SMS
Now, go to your Twilio Console and click on Active Numbers under Phone Numbers > Manage.
Then, click on your phone number.
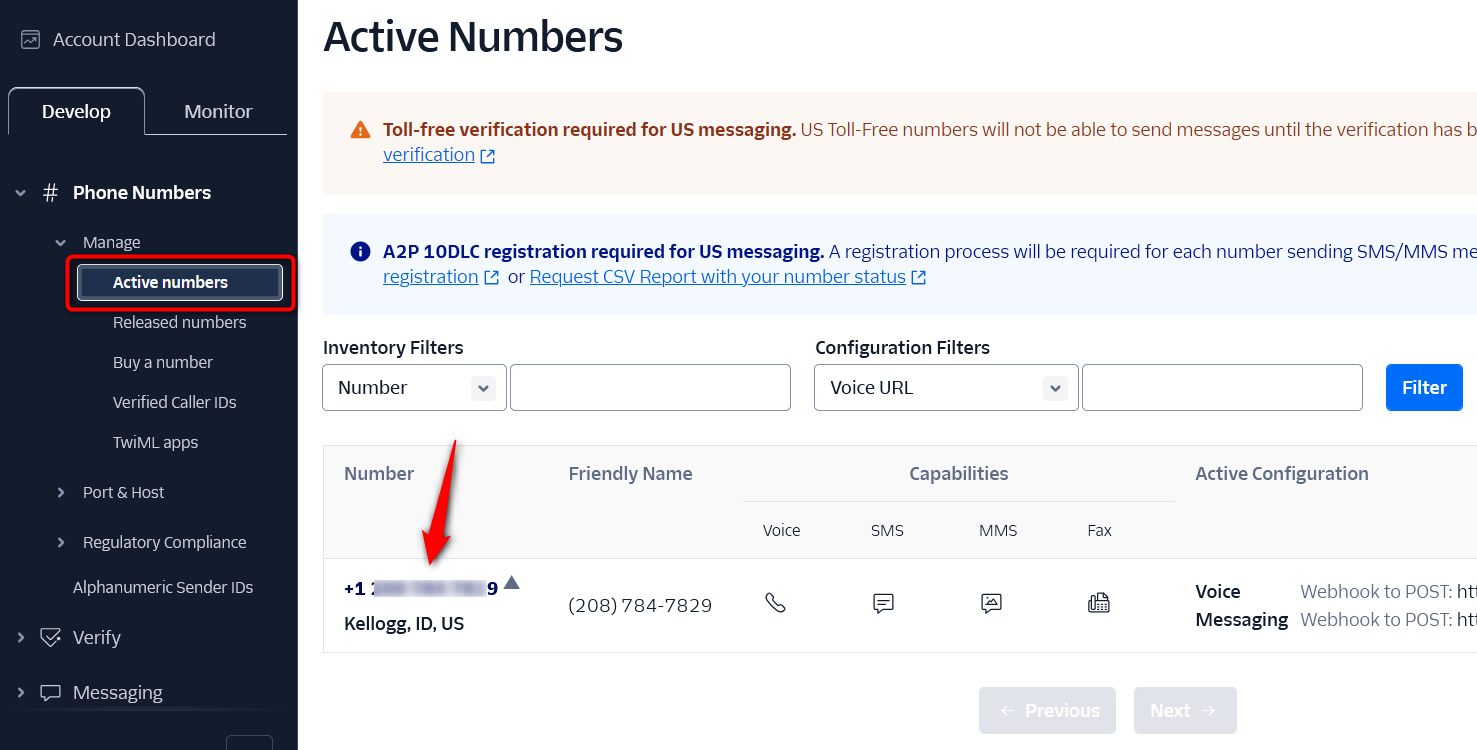
Scroll down and you'll see the following settings:
Choose a Messaging Service from the drop-down and paste the copied webhook URL.
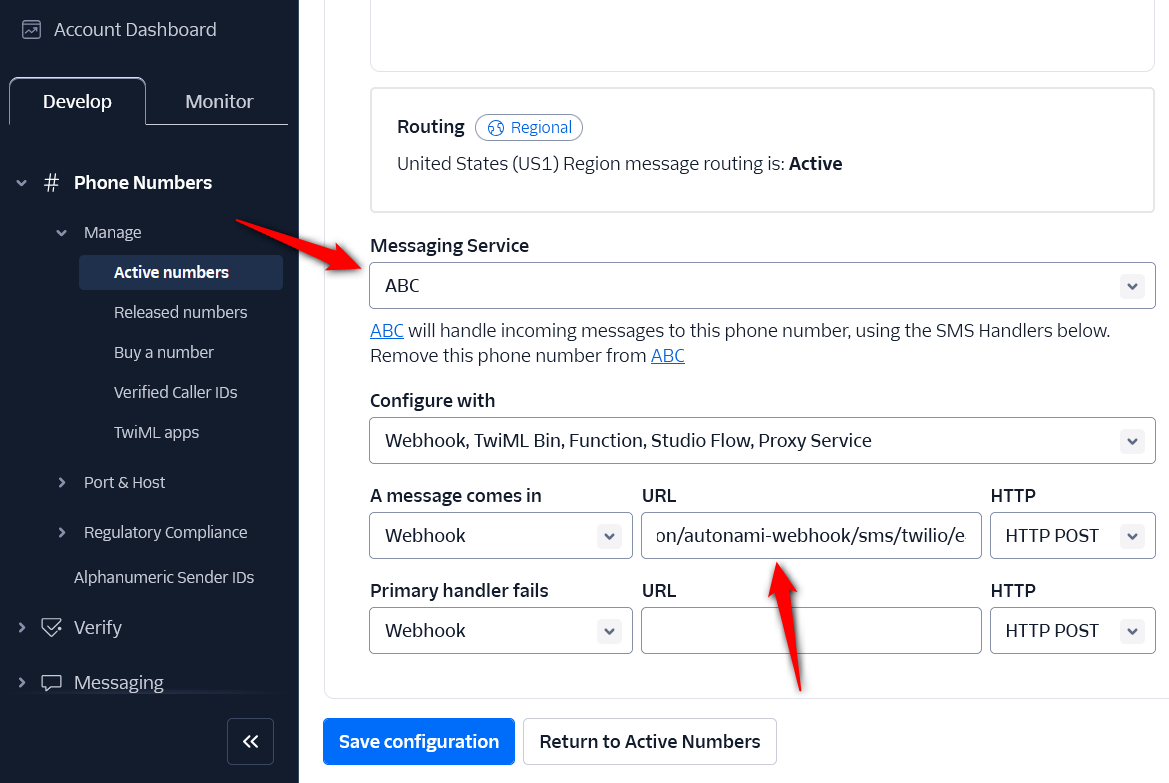
Once done, click on Save configuration.
The alert trigger will get created here:
Now that the webhook URL is configured, you can add actions to this automation.
Add to Google Sheet
Here, we will capture the message replied to by a user on a Google Spreadsheet.
To capture this message on an Excel spreadsheet, first, ensure you have connected Google Sheets with FunnelKit Automations.
Follow the instructions mentioned below:
Step 1: Select Insert Row as action
Go to FunnelKit Automations and select an action to perform when the event gets triggered.
Then, select the action - Google Sheet: Insert Row under Send Data.
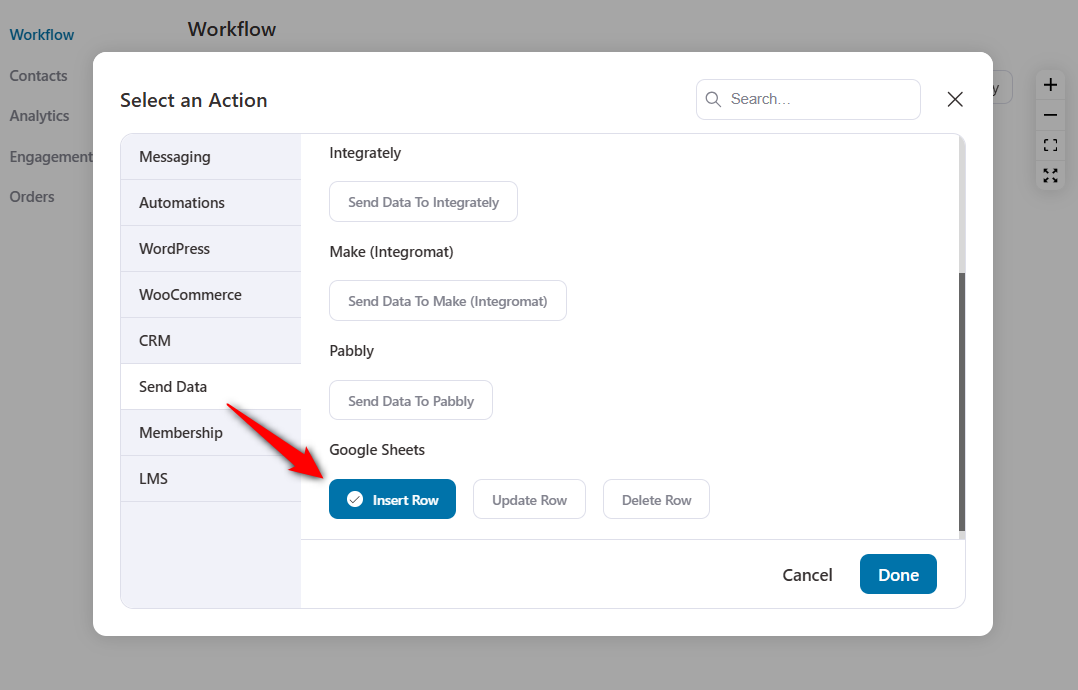
Click on Done.
Step 2: Configure the Google Sheet to capture data
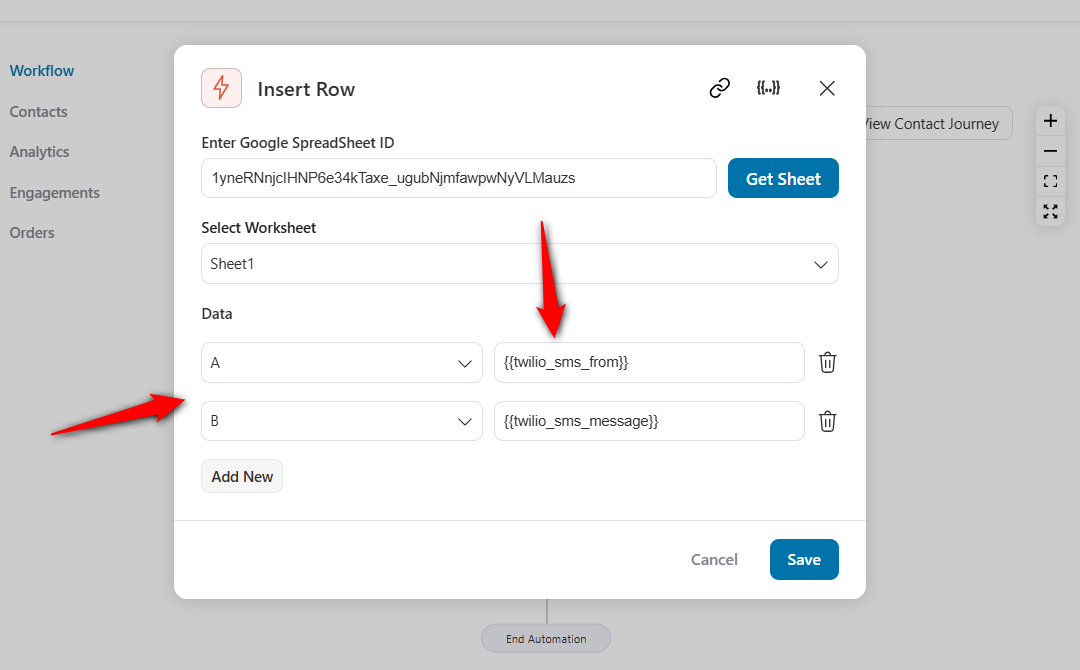
Enter the Google spreadsheet ID and click on the Get Sheet button.
To select the data to capture, click on Merge tags.
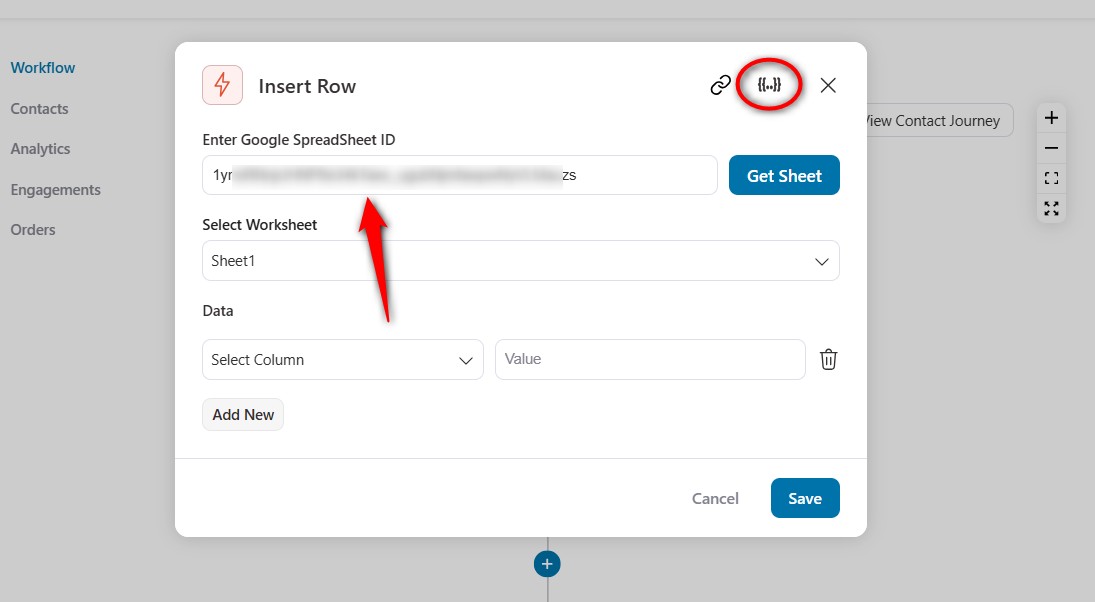
Select the phone number in the first column and the message in the second one within the sheet.
Click on the Copy button next to Twilio SMS Sender Phone.
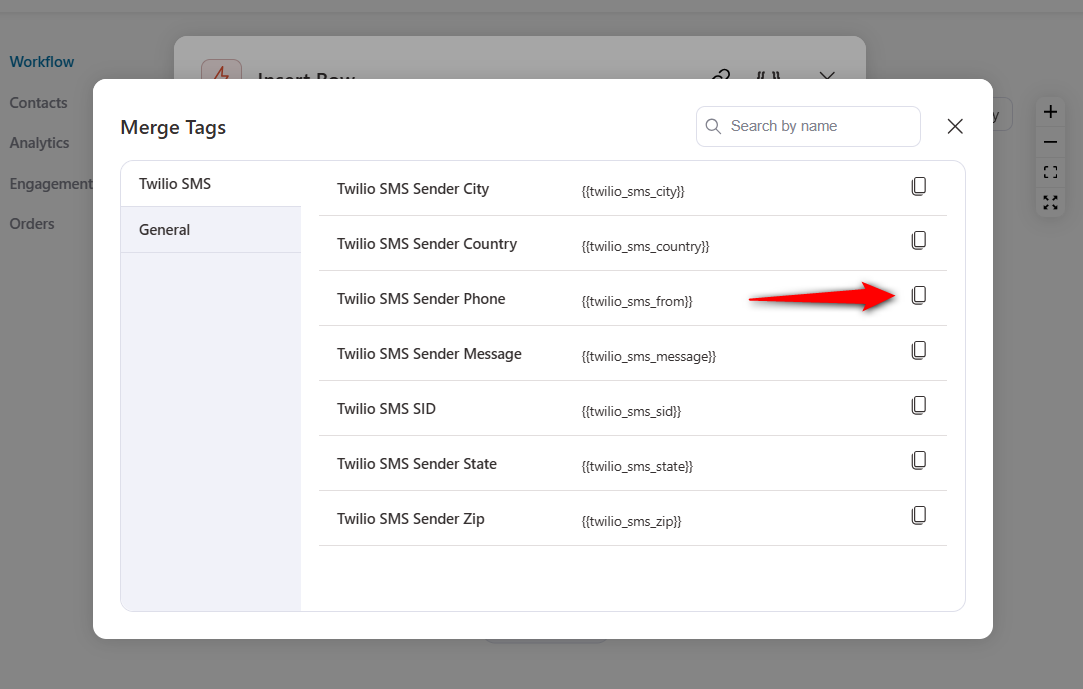
Now, paste the merge tag to the data value.
Follow the same process with the SMS message content and paste it here:
Click on the workflow to automatically save your automation.
Step 3: Activate your automation
Turn the toggle to active to make your automation go live.
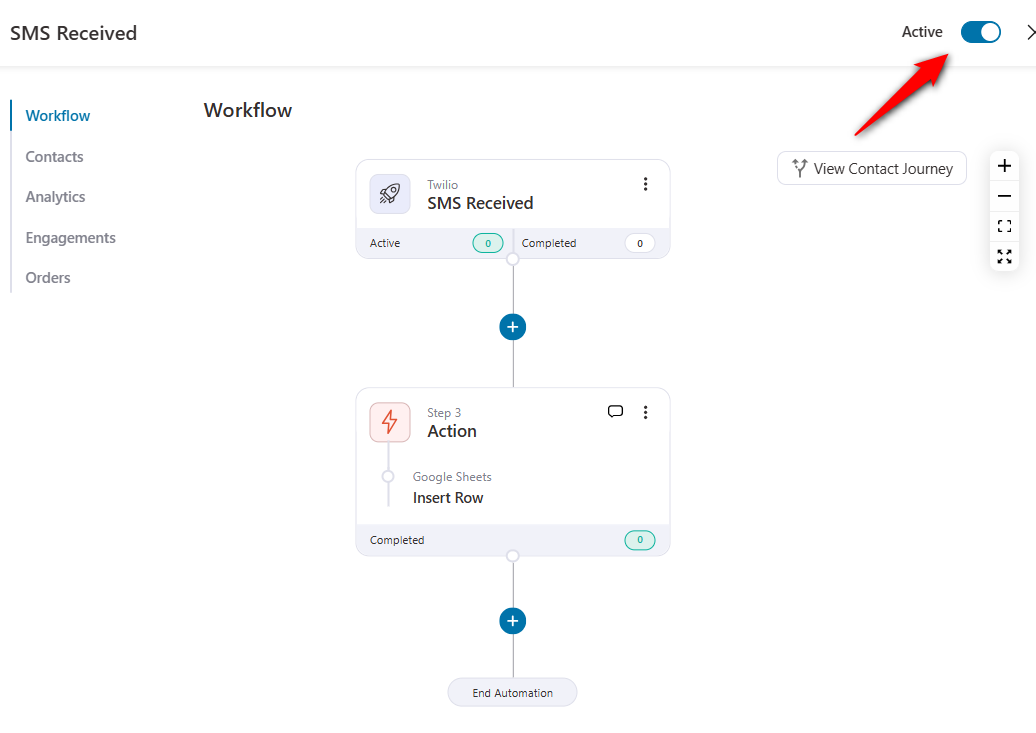
Well done! This is how you can capture the response of your SMS on a Google Spreadsheet.
Send an SMS
You can add automated sequences to send an SMS when a contact replies to your previous message or send a new one.
Follow the step-by-step instructions below:
Step 1: Select the action - Send SMS
As your SMS received event is already configured, select Send SMS as the action.
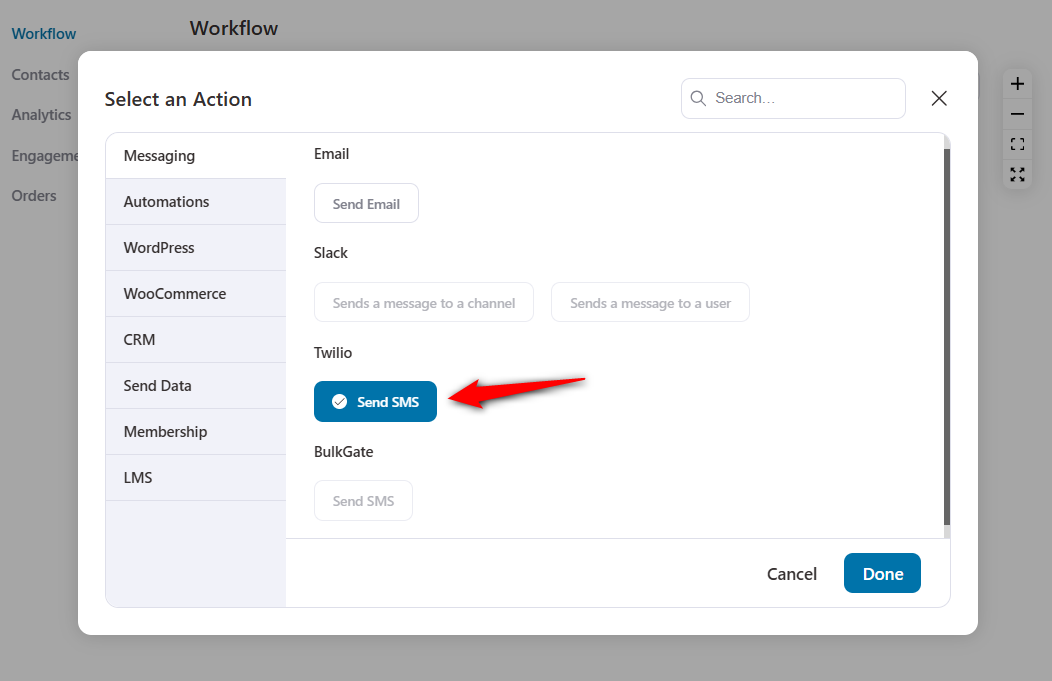
Click on Done.
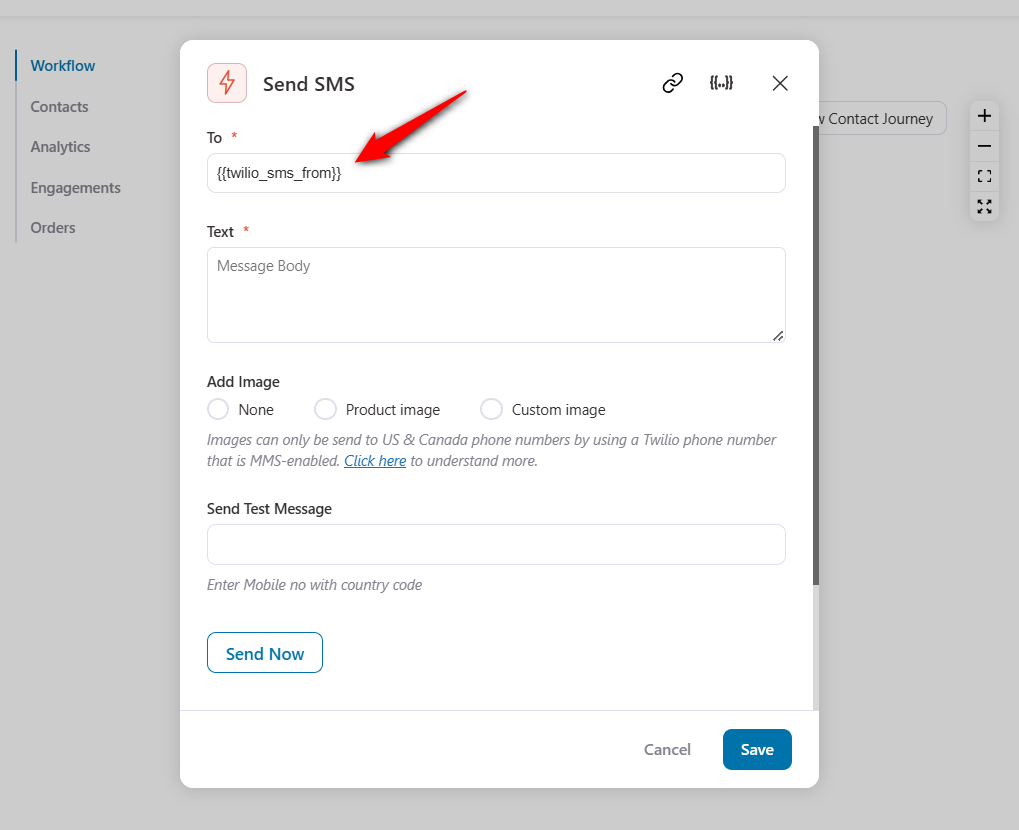
Step 2: Enter the “To” phone number
To enter the recipient's phone number, click on Merge tags.
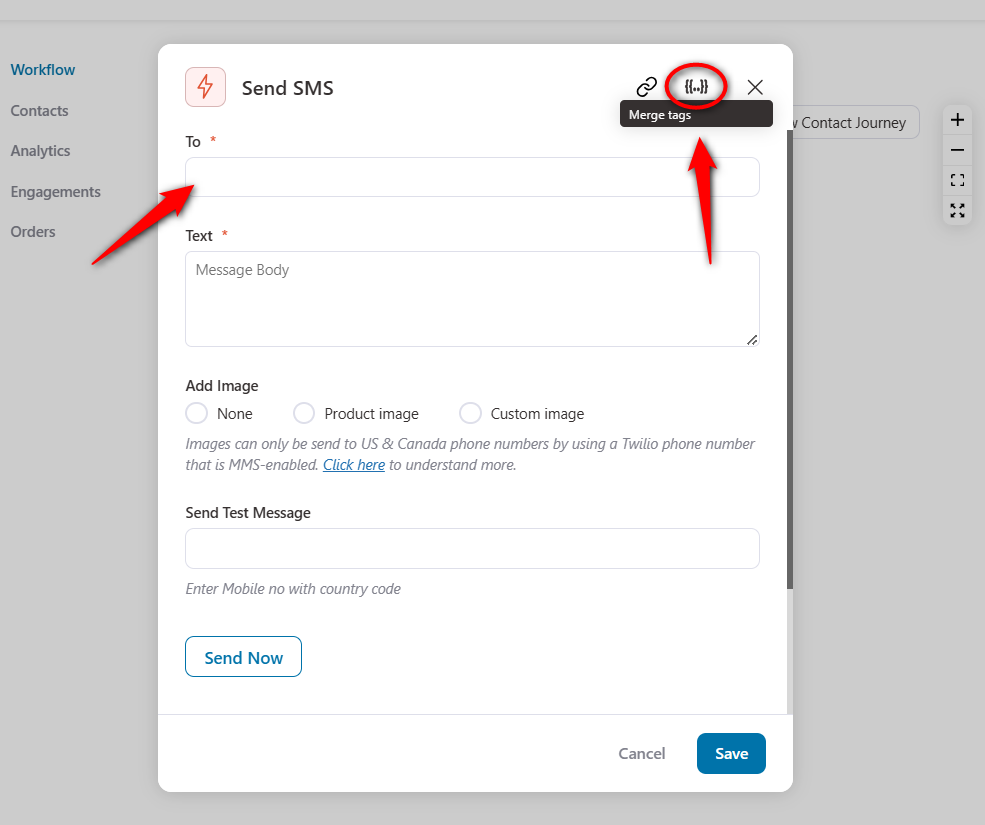
Click on Copy next to Twilio SMS Sender Phone.
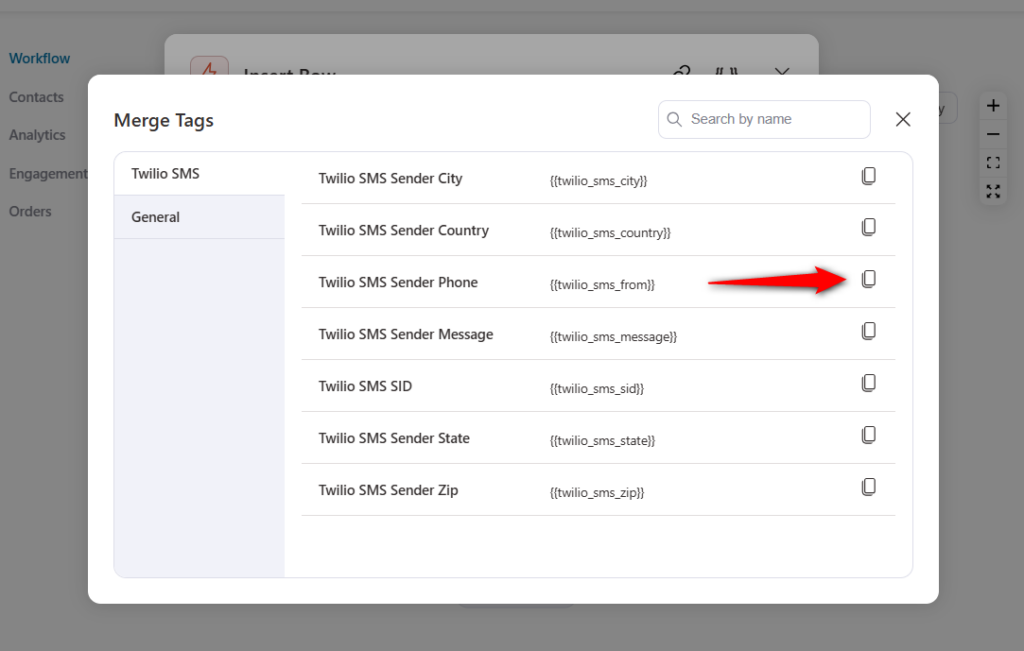
Copy the merge tag and paste it to the phone number field.
Step 3: Write your SMS content
Create the content of your SMS when you receive a reply from your contacts.
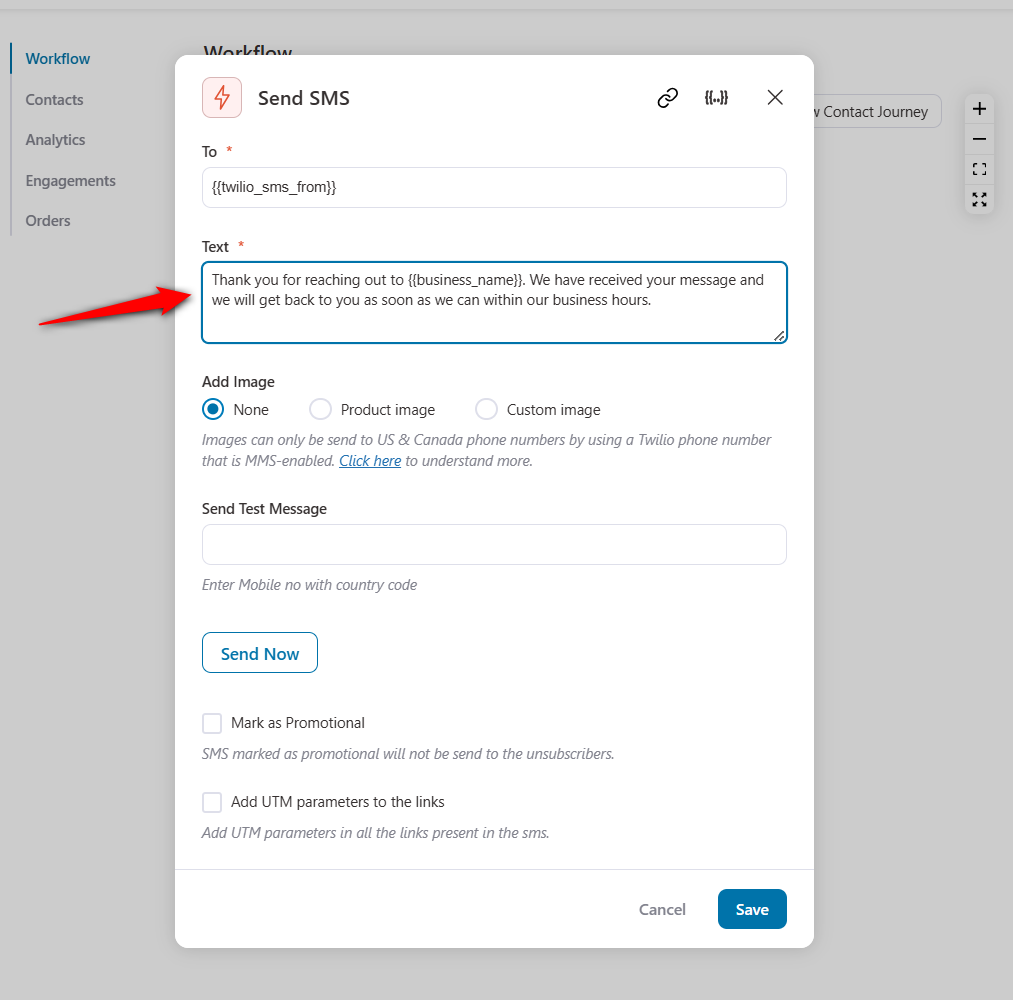
Configure additional options such as adding an image to your SMS, appending UTM parameters, or marking it as promotional.
Once done, click on the Save button.
Step 4: Activate your Automation
Turn the toggle to active to make your Automation turn live.
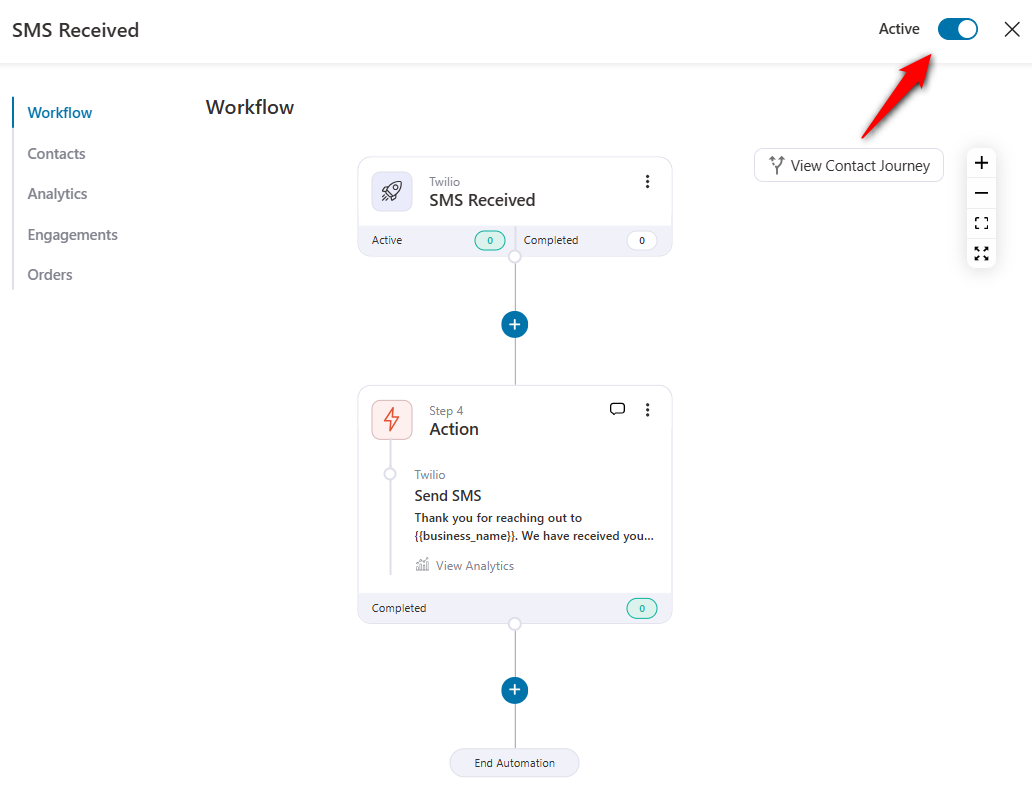
This is how you can send an SMS to your contact whenever you receive a message from them.
Send a Slack Message
If you want to notify a particular person whenever you receive a message from your contacts, you can send a Slack message with FunnelKit Automations.
All you have to do is connect Slack with FunnelKit Automations and select Slack message as your action.
Let’s show you how:
Step 1: Select the action - Sends a message to a user
After configuring the webhook URL within the SMS received event, click on the (+) icon.
Select Sends a message to a user under Slack as your action.
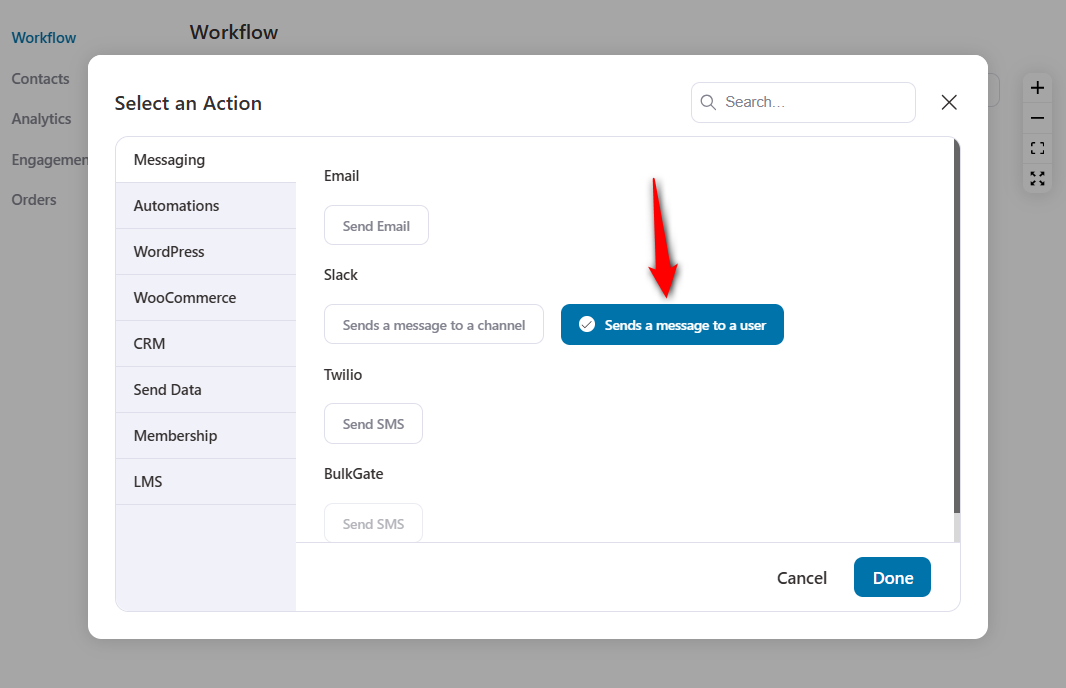
Click on Done.
Step 2: Select user you want to notify the message from your contact
Select the Slack user.
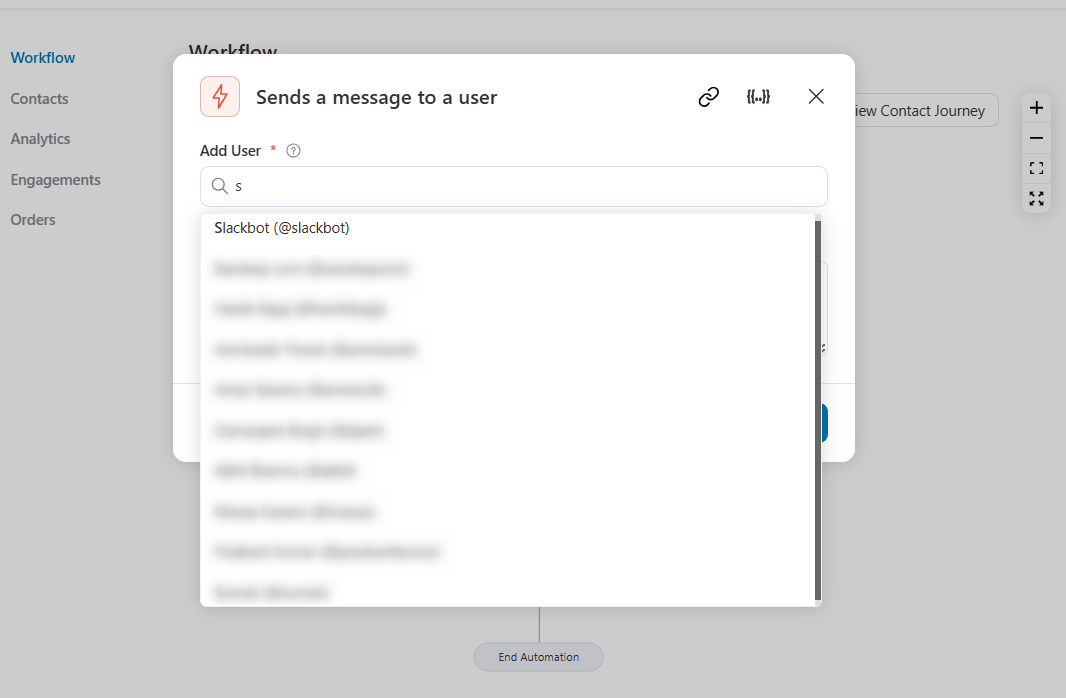
Step 3: Enter the Slack message you want to send
We will notify the sender of the actual message that we have received.
To do this, click on Merge tags.
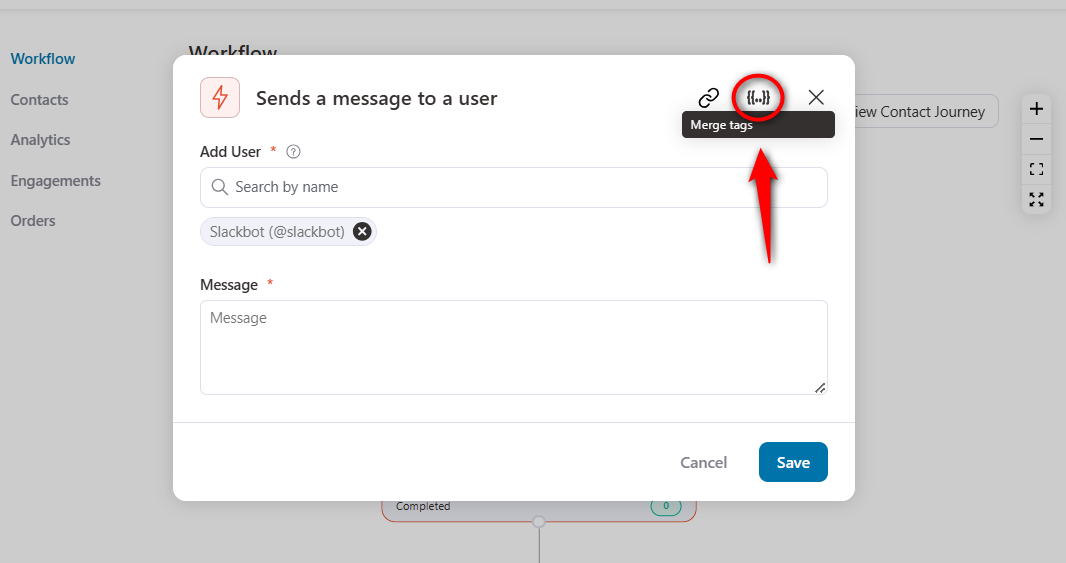
Copy the sender's phone number and message using the merge tags:
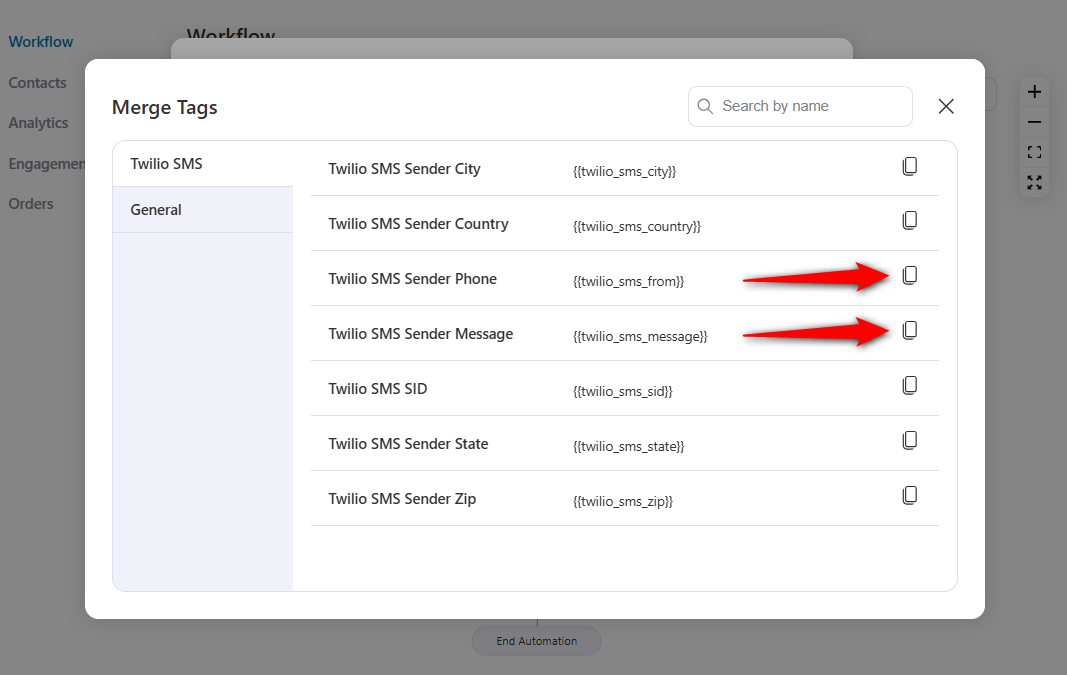
Paste it to your Slack message content:
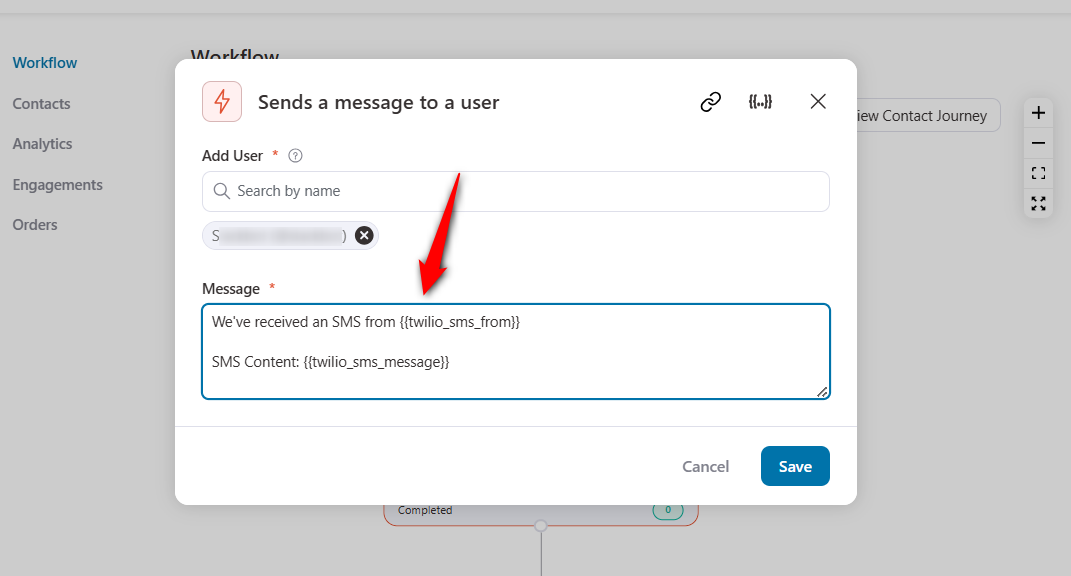
Once done, click on Save.
Step 4: Make your Automation go live
Hit the toggle active to activate your Automation.
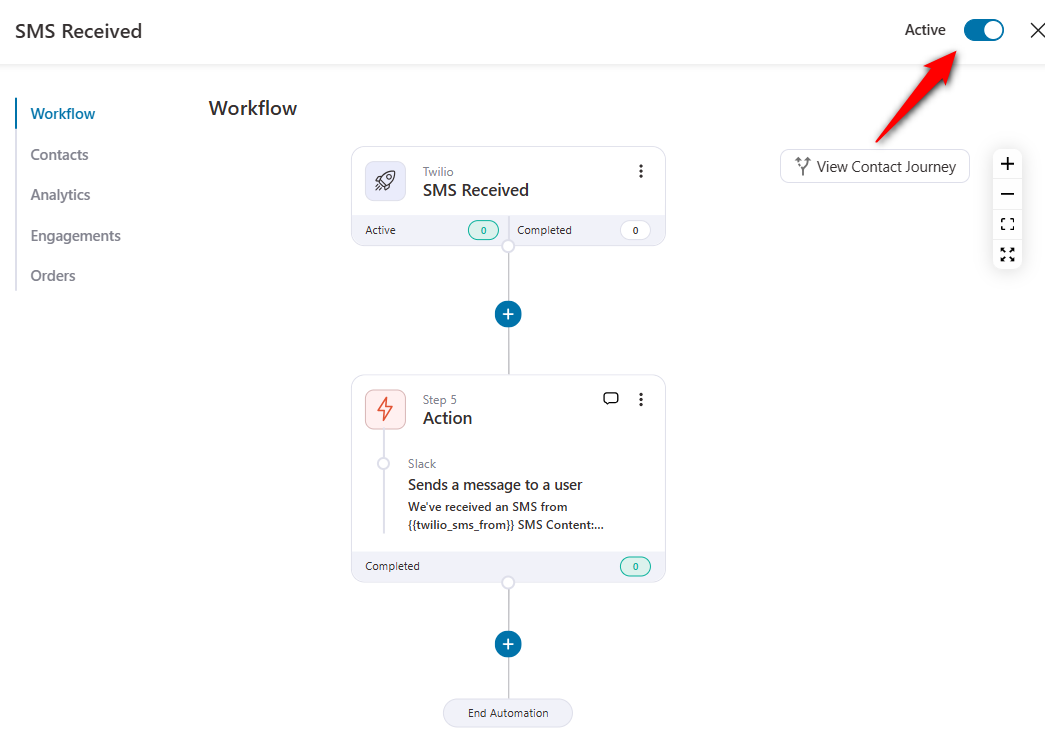
This is how you can notify users by sending a Slack message whenever you receive an SMS.
Enable Webhook Logging
There is a setting to log the data coming in from a Twilio webhook request.
To enable logging for Twilio webhook data, you need to add this constant to your WordPress configuration file (wp-config.php):
When this constant is set to true, the system will log all incoming Twilio webhook data to a file named crm-sms-webhooks.log in your designated logs directory.
This will help users troubleshoot and understand the incoming webhook requests from Twilio.


