With split path testing in FunnelKit Automations, you can A/B test and optimize your marketing automations to new levels of success.
You’ll be able to split-test your email subject lines, discount coupons, email designs, etc. and see which variation generates higher profits in your business.
FunnelKit Automations allows you to split test a maximum of three paths (i.e., three variations of your actions such as subject lines, coupon codes, etc.)
In this document, we’ll demonstrate how you can set up split path testing in your automations so you can start making more profits.
Let’s look at how we can set up split paths to test different email subject lines.
Creating Your Automation
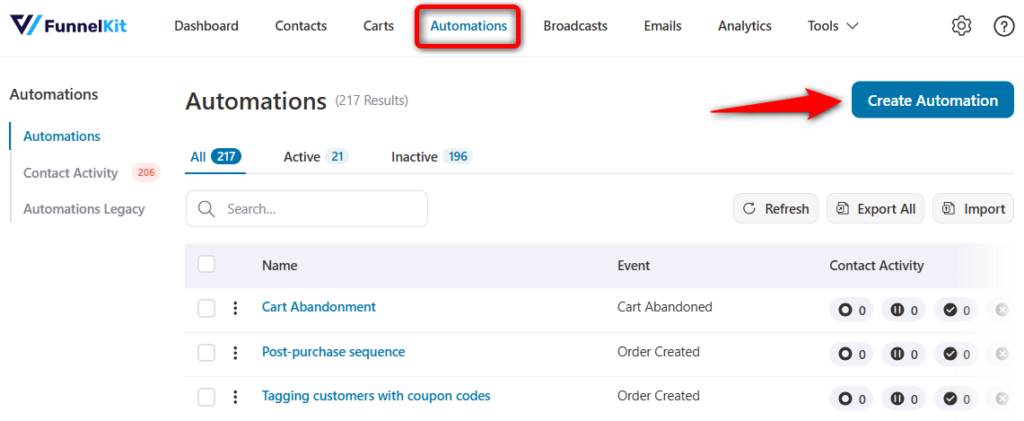
Go to FunnelKit Automations ⇨ Automations and hit the 'Create Automation' button.
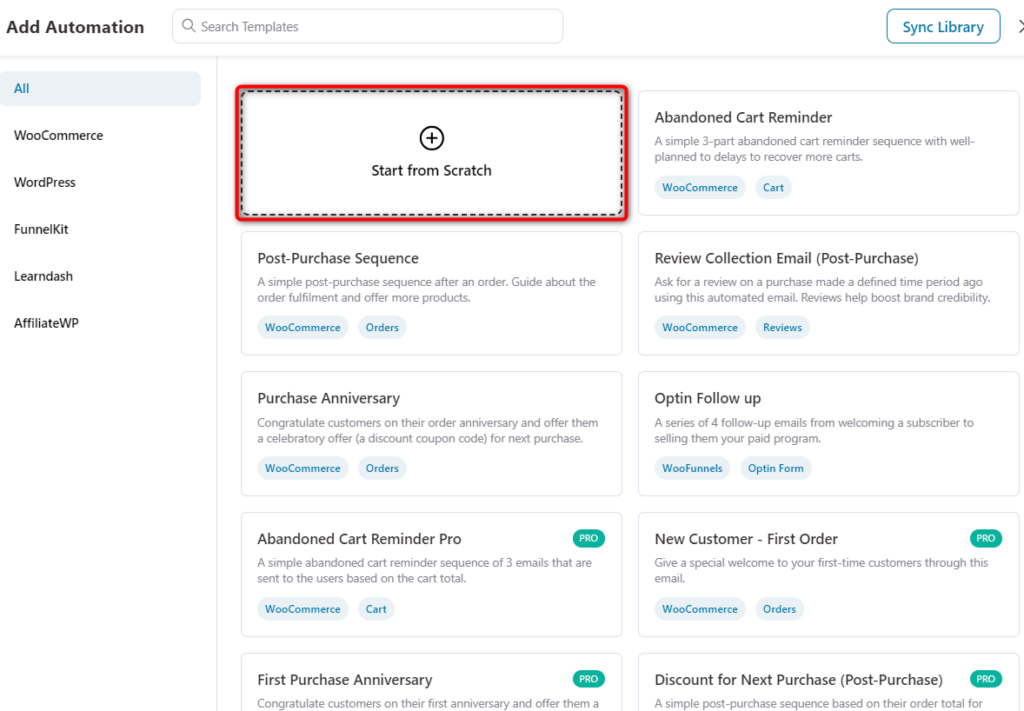
You’ll see many pre-built automated recipes here.
You can import these recipes and customize them as per your needs to start using your automations right away. Or you can create custom automation from scratch by adding events and actions.
Here, we’ll create our automation from scratch.
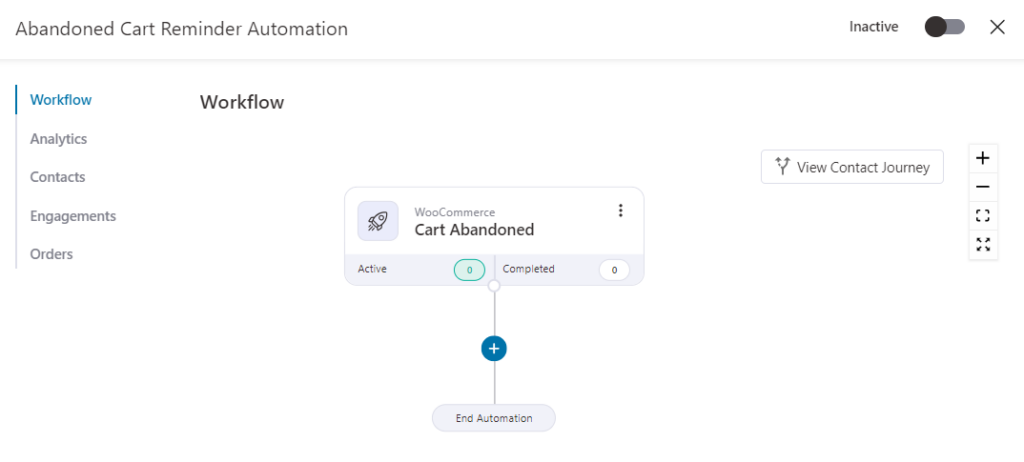
Name your automation and click on ‘Create’ to add this automation to your workflow.
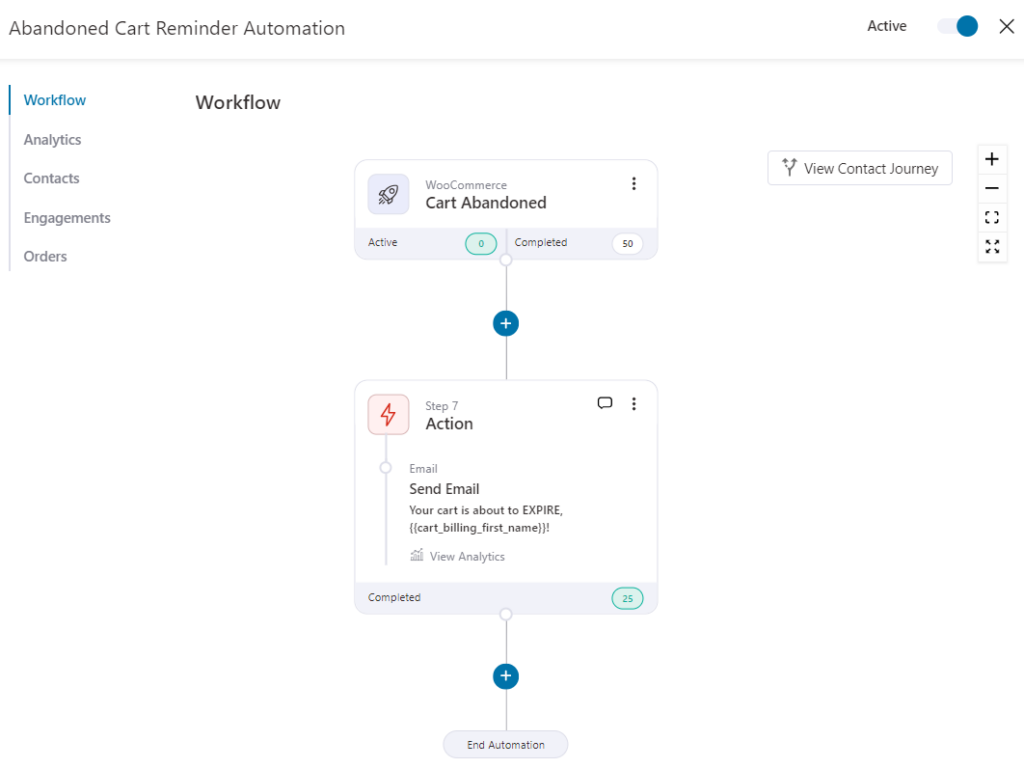
Let’s specify our event trigger as ‘Cart Abandoned’.
If you’re new to FunnelKit Automations, you can check how to set up your first automation here.
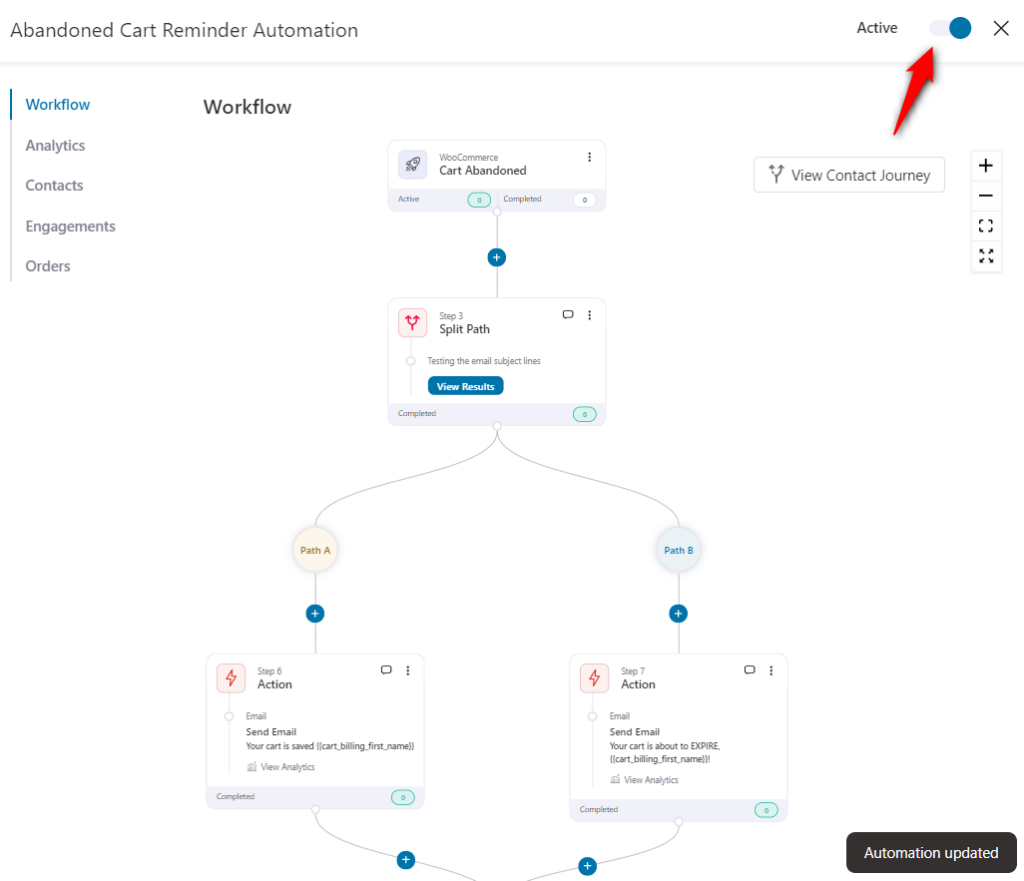
Adding the Split Path
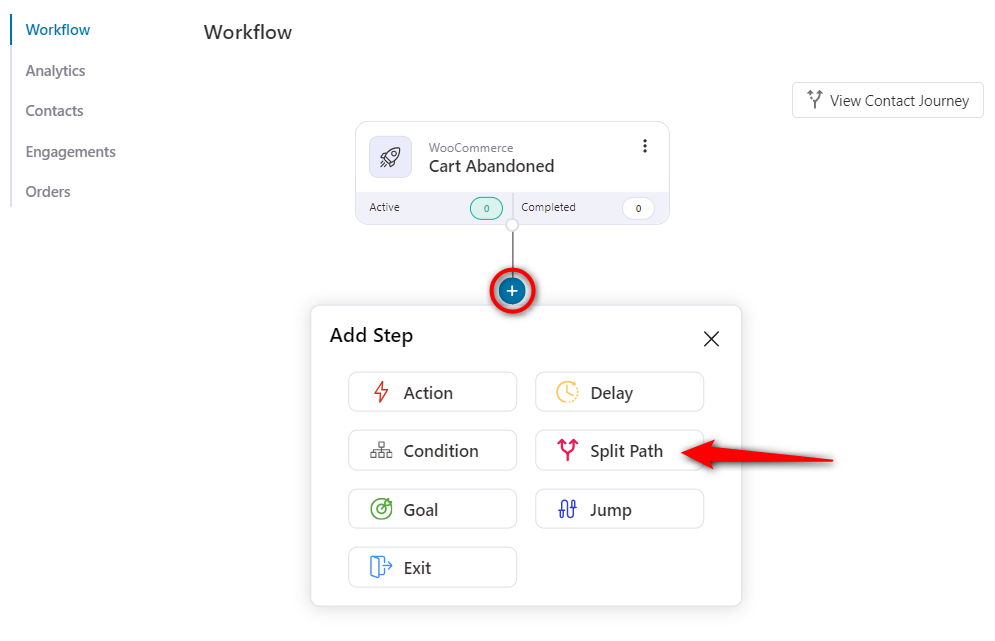
To set up your A/B testing, you need to add the Split Test step to your workflow.
For that, click on the (+) icon and select Split Test.
Next, enter the details of your split path.
- Name - Enter the name of your split path
- Number of paths - Specify the number of split paths you want (for example, if you want to test 2 variations, set the number of paths as 2, and so on)
- Description - Add a description of your split path testing for better understanding (this is optional)
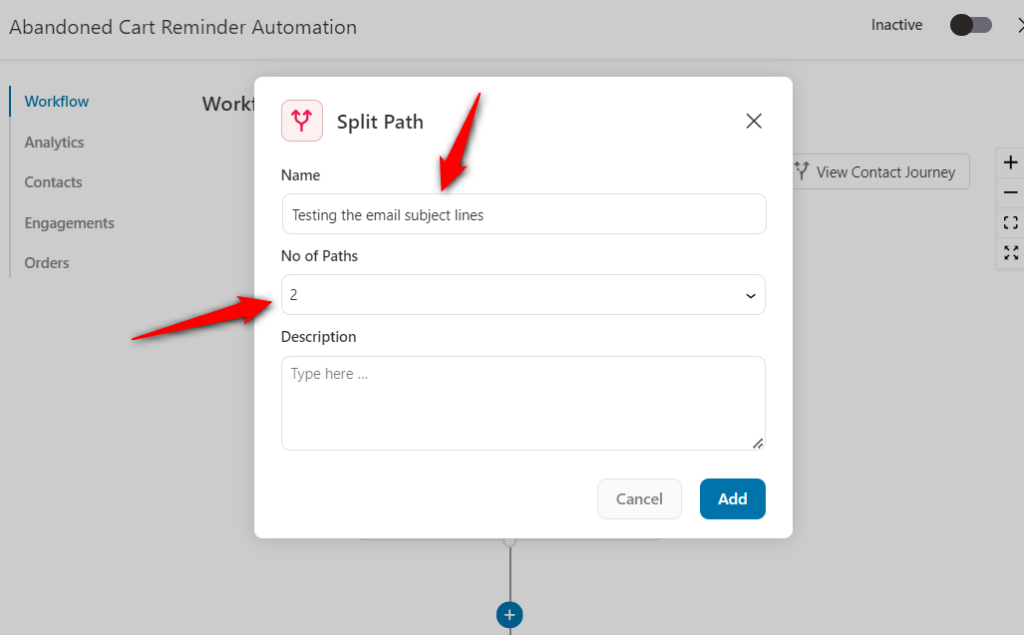
Click on ‘Add’ to add the split path step to your workflow. You’ll see a branch added to your workflow.
Next, we’ll add the Send Email action here. Follow the same process as we previously followed - Click on the (+) icon and add the action step.
Next, specify the Send Email action under the Messaging section.

Clicking on Done will show the Email window where you can write the subject lines, preview text and the email body.
Now, let’s start with our A/B split path test.
Split Path Testing for Email Subject Lines
A/B testing the email subject lines is a common practice in email marketing that lets marketers refine their messaging and optimize the performance of their campaigns.
Email subject lines serve as the initial point of contact with your audience and play a significant role in influencing the email opening rate, conversion rate, etc.
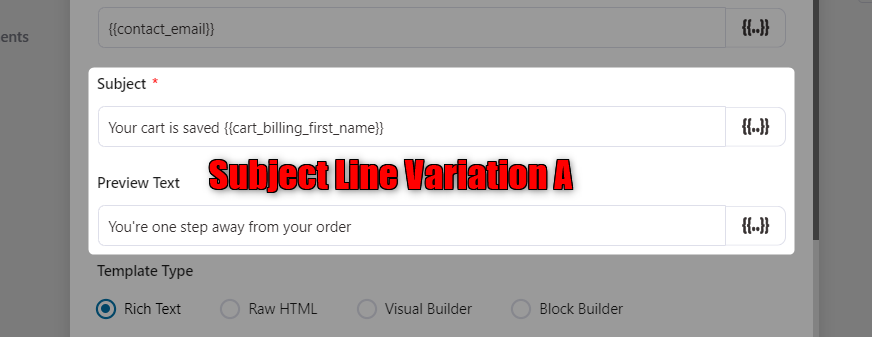
Enter the subject line of the email at path A.
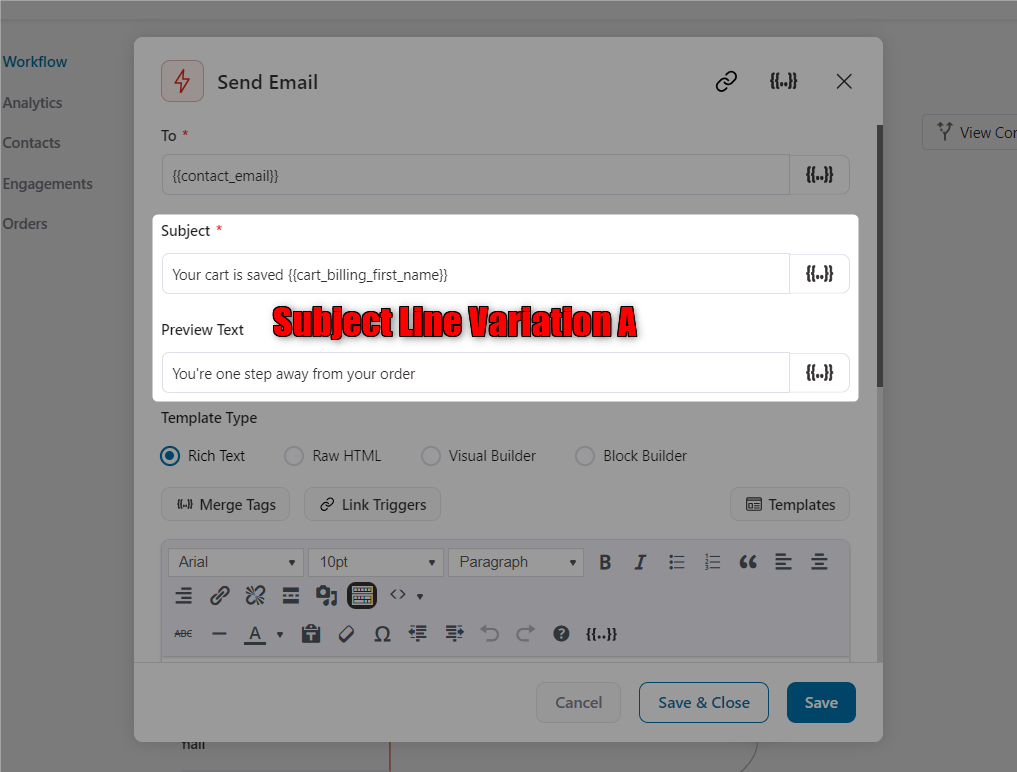
Once done, click on Save & Close.
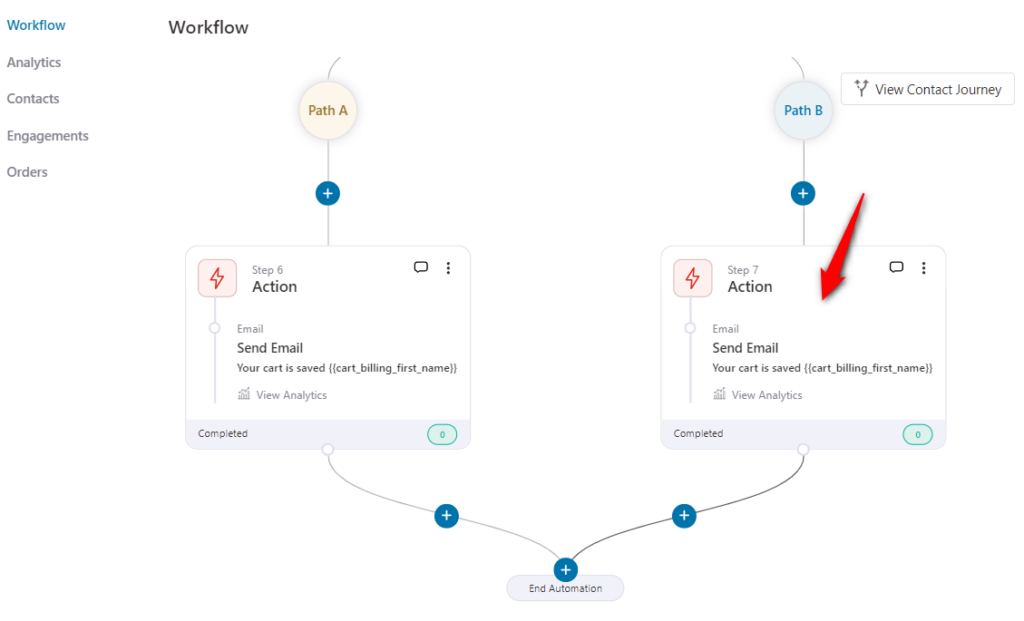
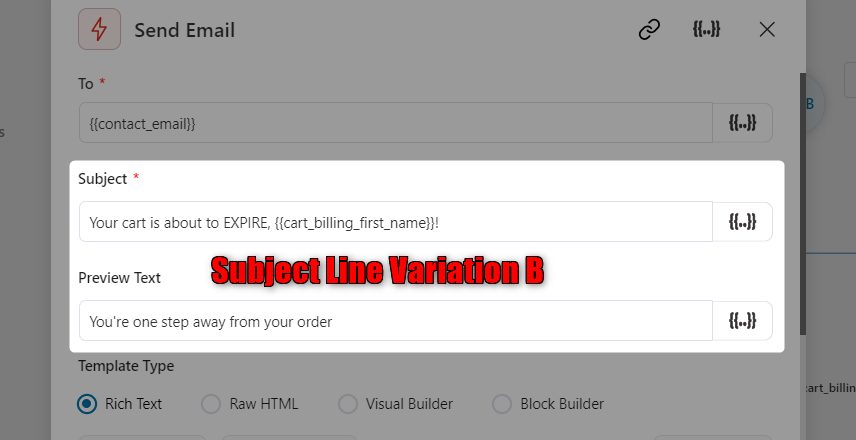
To test another variation, add the email action step or copy and paste this email action to your path B.
Now that you have pasted this action to your path B, click on the email action.
Enter the subject line variation here.
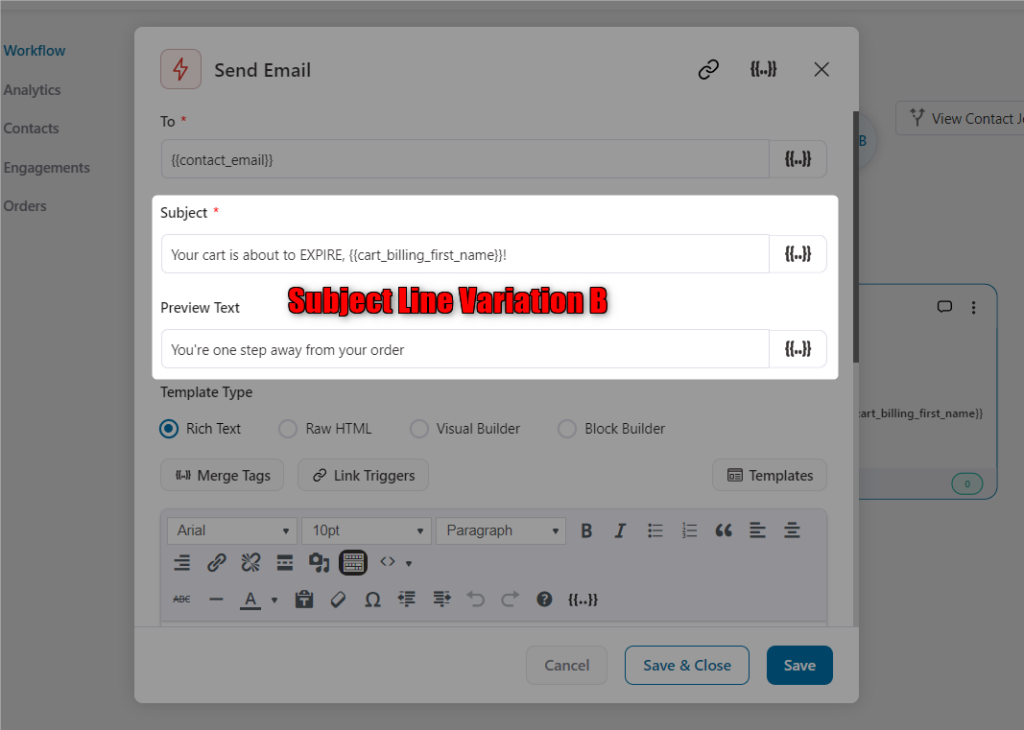
Click on the Save & Close button to return to your workflow.
Now, all you have to do is activate the automation to test your email subject lines.
This is how you can set up split path testing in your automation.
Reviewing the Stats
Now that we’ve set up our A/B split path testing, let’s analyze the data collected during this test.
As your automation runs, 50% of your contacts will see path A, and the other 50% of your contacts will see another variation in path B.
Click on View Results and these stats will be collected:
- Contacts - Number of contacts entered the automation
- Sent - Number of emails sent to your contacts
- Opened - Number of times the email got opened
- Clicked - Number of times the email got clicked
- Click to Open - The ratio of email clicked to opened
- Revenue - Revenue generated with this email
- Revenue per contact - Revenue collected per contact
- Unsubscribe - Number of unsubscription
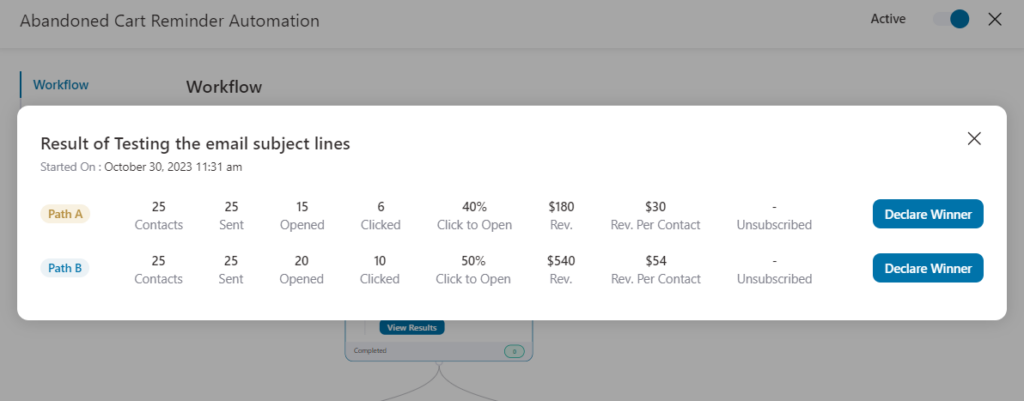
These stats will be displayed in real-time.
Once you’ve done enough testing, you can declare the winner and make a selective path your primary path in your automation. The rest of the paths will be removed.
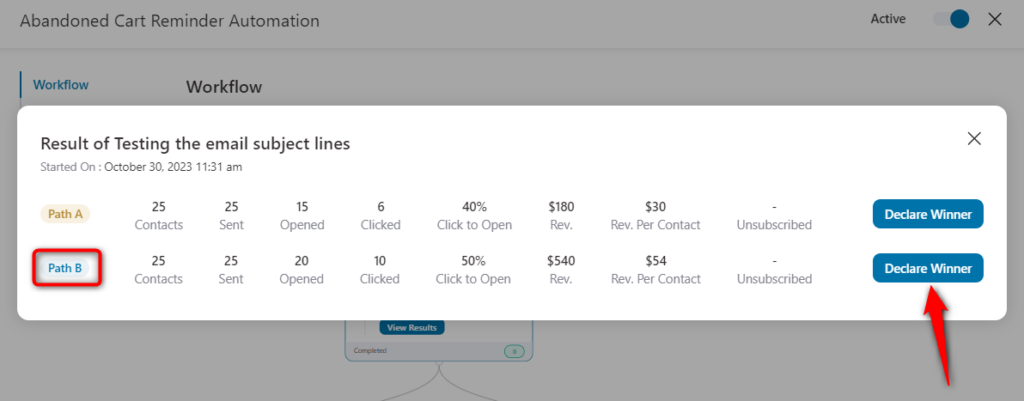
Declaring the Winner
Once you’ve enough stats, analyze the performance of your split path and determine which one has a higher open rate, click rate, revenue made, etc.
As you can see, path B is a clear winner. So, click on the Declare Winner button next to your path B.
It’ll ask for confirmation to declare this path as the winner. Click on the Declare Winner button there.
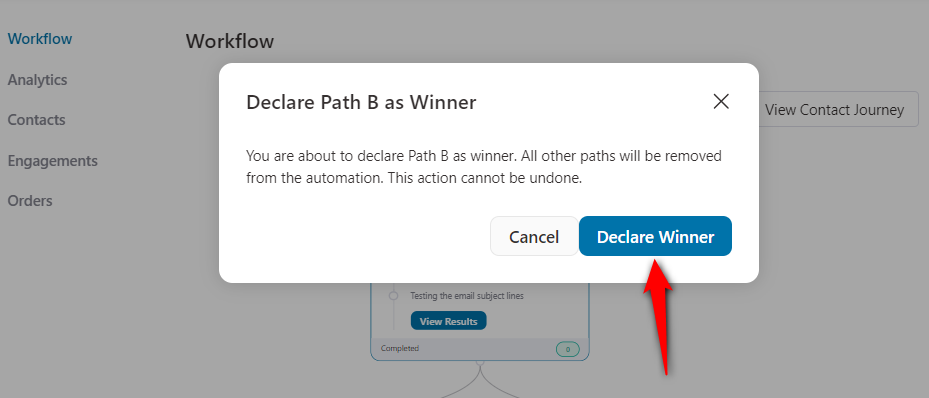
As you can see in the prompt, you’ll see path B has been declared as the winner.
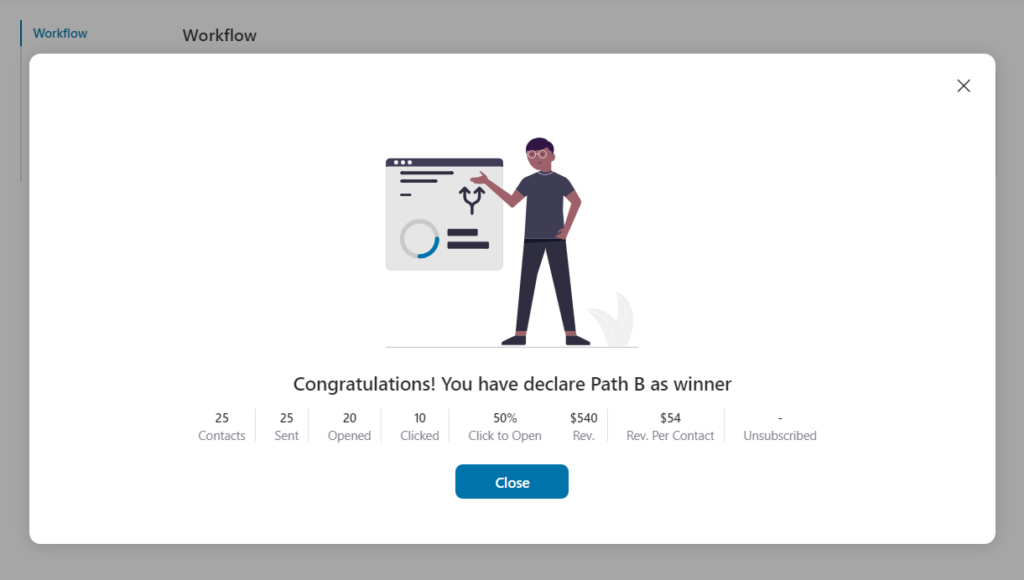
Click on Close and you’ll see the path B will be created as the main flow in your automation.
Well done! This is how you can set up split path testing for your automations using FunnelKit Automations.
This is a great way to make better decisions, enhance user experience and boost conversions while minimizing risks and maintaining a competitive advantage in your industry.
Split Path Testing Use Cases
Split path testing is a powerful tool to have in your marketing arsenal.
It has a wide range of use cases that you can incorporate to make data-backed decisions and optimize your marketing campaigns.
Let’s look at some of the use cases that you can set up right now:
1. Email Subject Lines
Email subject lines determine whether your email will be opened by your recipients or not.
Your email subject line should be short, to the point and deliver urgency.
That’s why it becomes important to A/B test your email subject lines when setting up your automated email campaigns.
Then, enter another variation of your email subject line in the path B.
Split-testing your subject lines helps improve email opens, enhance conversions and boost sales in your store effectively.
2. Email Designs
A/B testing the different variations of email designs lets you know the design elements that resonate best with your users and drive the desired actions.
You can test multiple use cases of email designs here:
- Text-based emails vs. Text-based emails
- Text-based emails vs. Design-based emails
- Design-based emails vs. Design-based emails
Let’s say, you want to test design-based emails that look visually appealing or text-based emails that feel more personal and engaging.
For that, create an email variation in the Rich Text Editor:
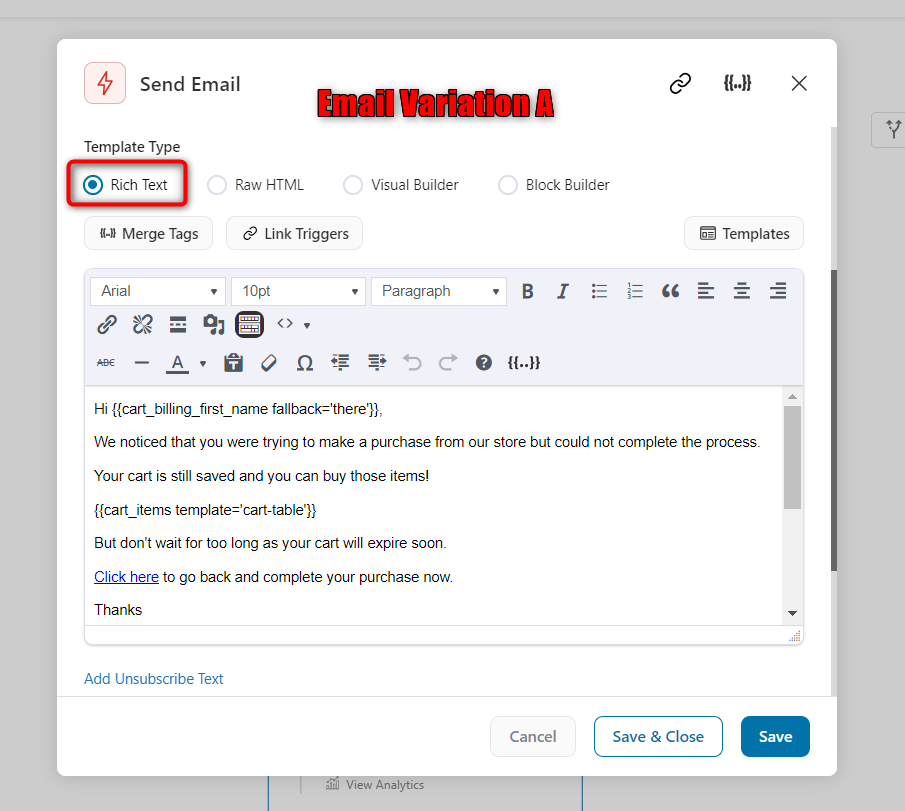
Then, create another email variation with the Block Editor:
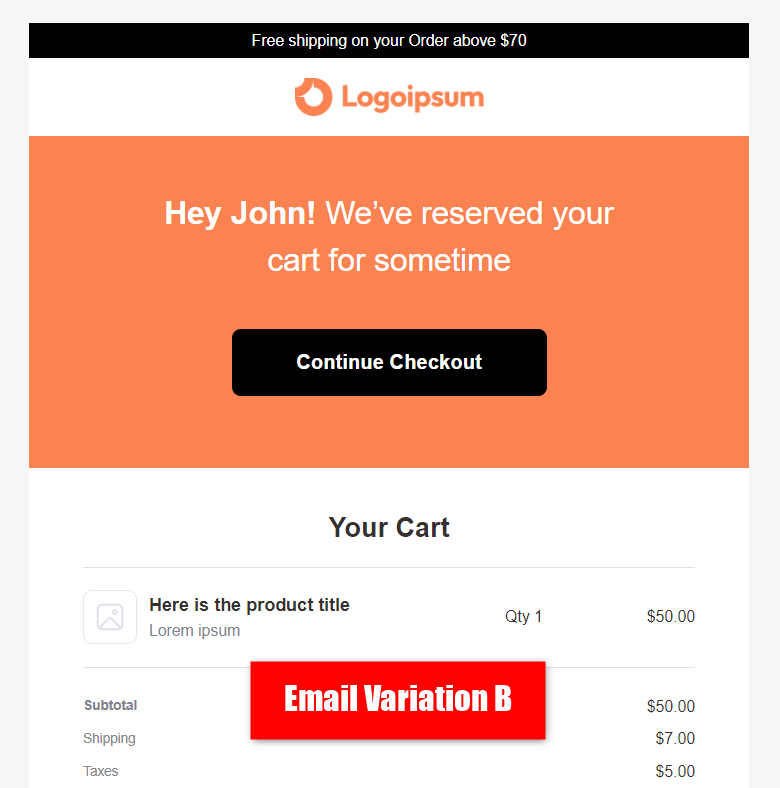
This way, you can compare two or more different email designs and determine which one better works to achieve your specific email marketing goals.
3. Discount Coupons
Split testing the discount coupons is a brilliant marketing strategy to determine which coupon offers drive customer engagement and increase sales.
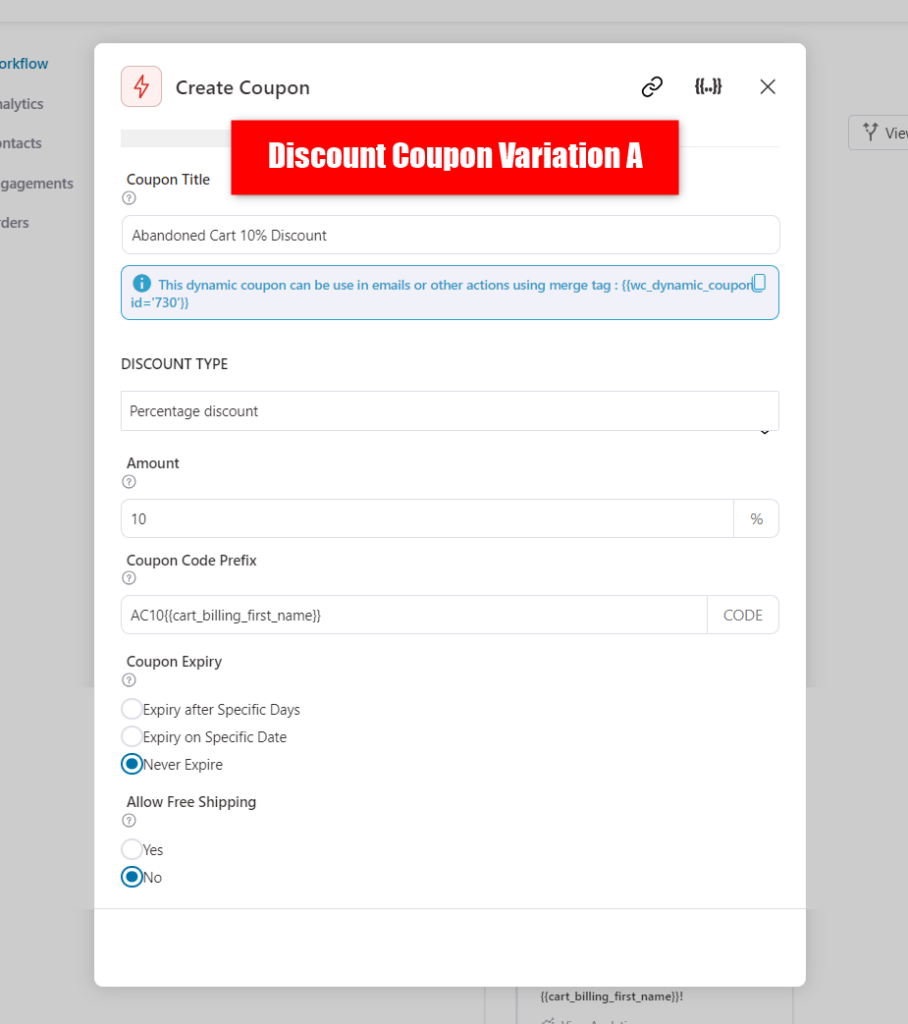
With FunnelKit Automations, you can create dynamic discount coupon codes for personalized interaction with your users.
Let’s A/B test discount coupon offers of 10% and 15% in our automation workflow.
In one variation, create a discount coupon of 10%.
Create a discount coupon of 15% in another path and send it within emails to your users.
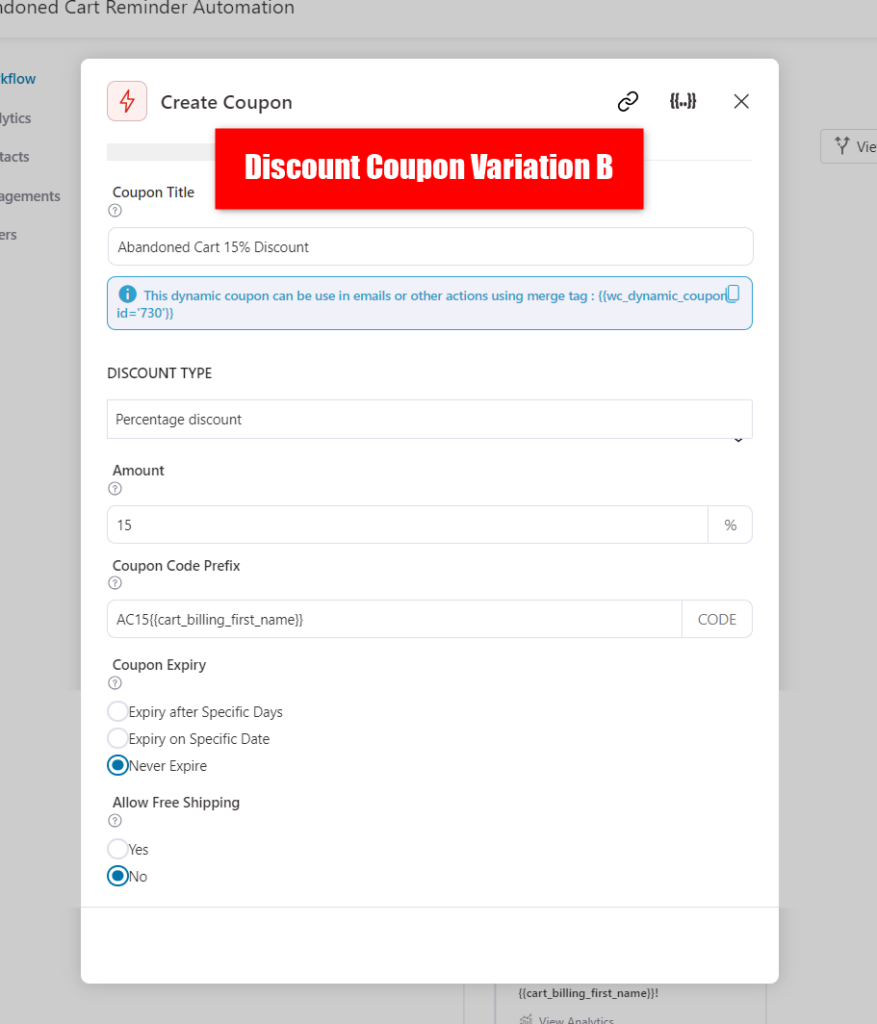
This way, you can compare different discount coupon offers and determine which one drives better sales and conversions.
4. Send Times or Delays
This A/B testing technique helps you to optimize the timings of your automated campaigns.
It further ensures that the communication with your users is well-timed and effectively maximizes the impact of your marketing campaigns.
Let’s test sending the coupon code with a delay of 15 minutes and 30 minutes (another variation).
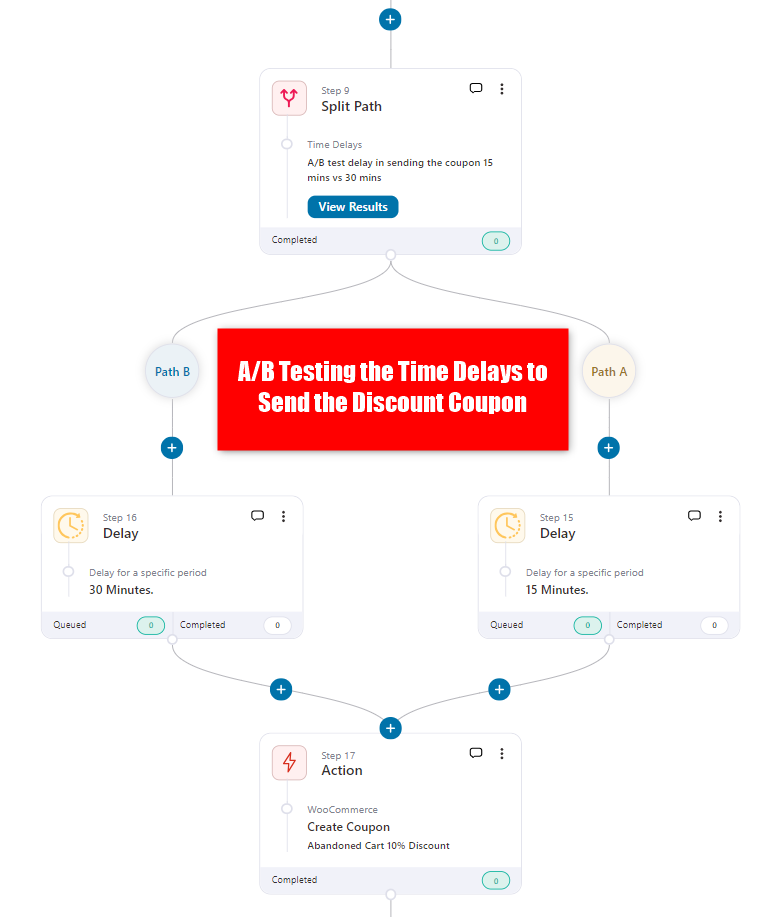
Split testing the time delays helps you to communicate with your audience effectively. This way, you can continuously improve your customer engagement and relationship-building efforts.


