Unsubscribe Link allows your contacts to stop receiving promotional emails from you if they are not interested. However, they’ll continue to receive transactional emails.
As per the GDPR compliance, it’s mandatory to include unsubscribe links in all your promotional emails.
In this documentation, you’ll learn how to provide unsubscribe links to a broadcast and set up an unsubscribe page.
Configure Unsubscribe Page
First, you need to have an Unsubscribe page. This will be the page where users will be redirected to confirm further whether they want to unsubscribe or not.
Once they unsubscribe, their subscription status will be marked as Unsubscribed in FunnelKit Automations.
Step 1: Go to Settings in FunnelKit Automations
Go to Settings and click on Subscribe Page.
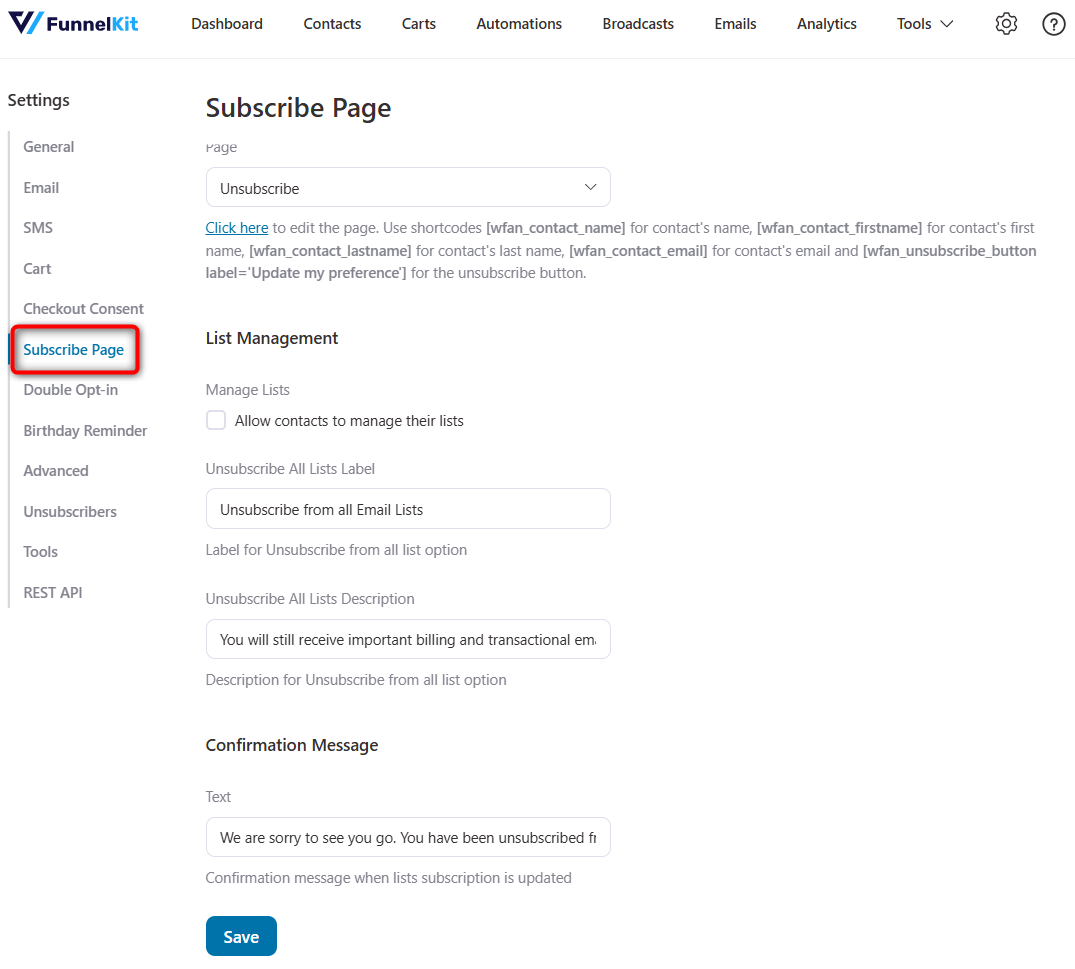
Step 2: Select an Unsubscribe Page
If you don’t have any page, you can create it from scratch and use these shortcodes written below.
For more information, you can go through the Subscribe Page settings section.
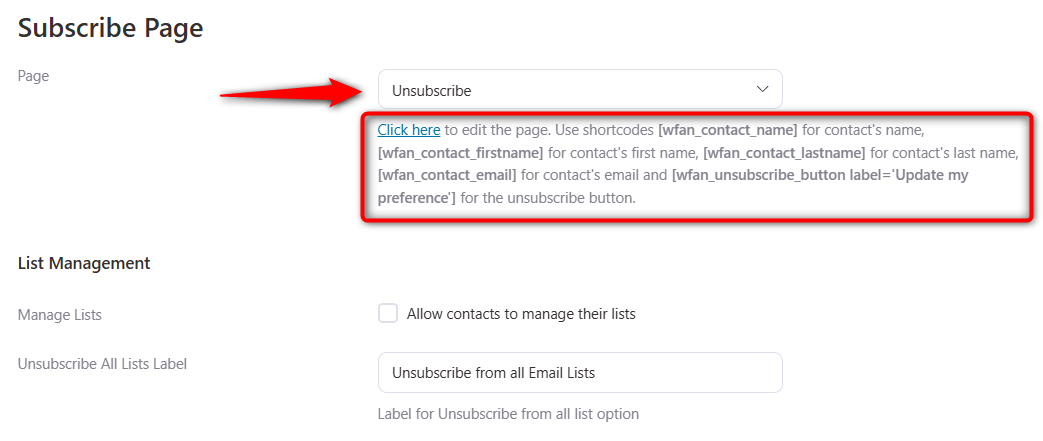
Step 3: Use these shortcodes to create your Unsubscribe Page
Edit the page and insert these shortcodes. Once done, click on Update to save all the changes.

This is how you can create your Unsubscribe Page.
Set up the Unsubscribe Link on the email body
Step 1: Create your email body
If you’re new to FunnelKit Automations, we advise you to visit this link for detailed information on creating broadcasts.
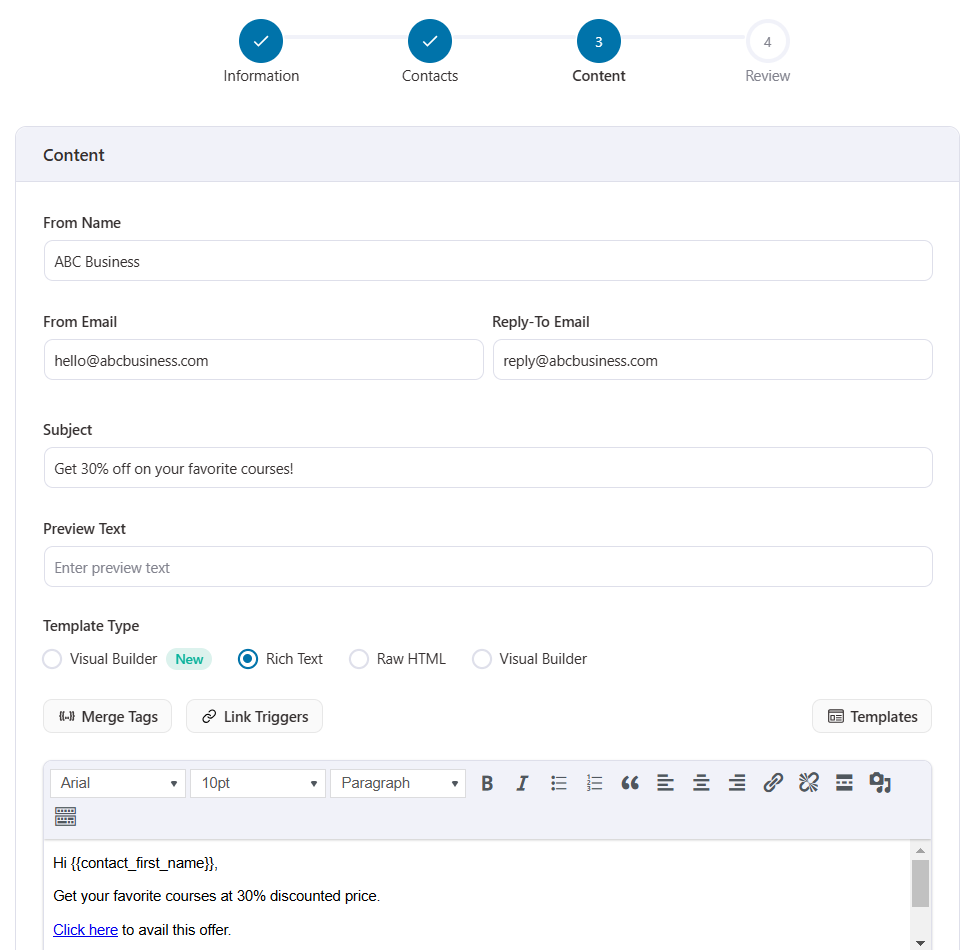
Step 2: Insert unsubscribe link
Click on Add Unsubscribe Text to add an unsubscription link to your email content.
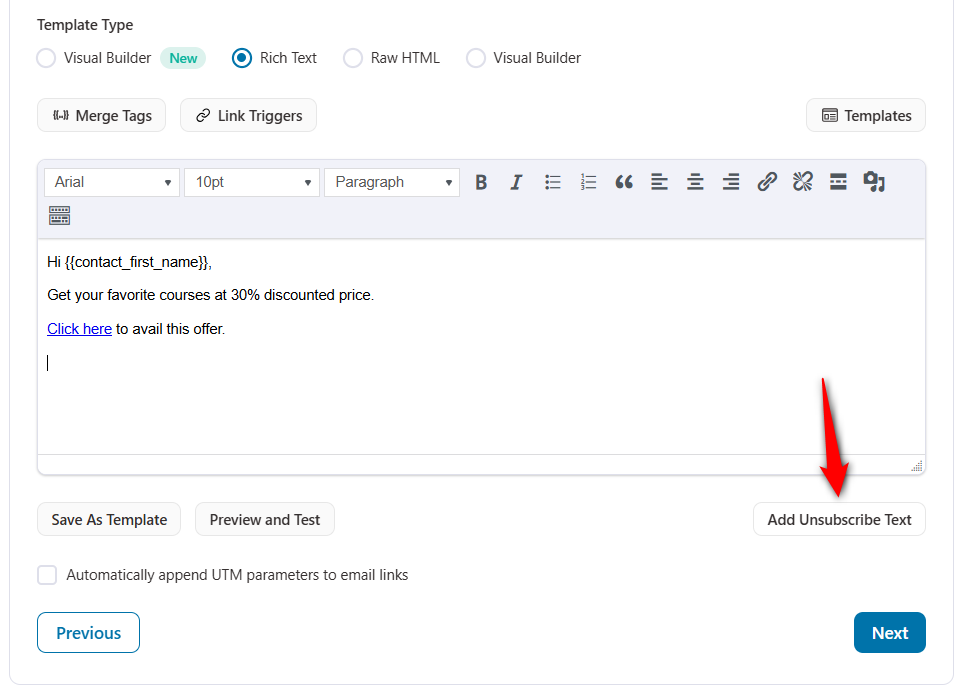
The unsubscribe link will be added here.
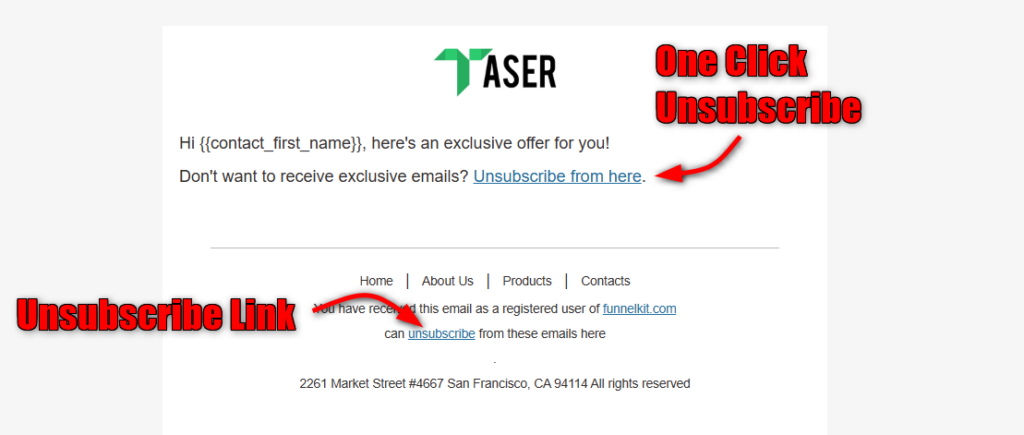
Unsubscribe text in an email redirects contacts to the Subscribe or Preferences Page where they can choose to opt-in from any email lists.
While one-click unsubscribe link allows recipients to unsubscribe from your emails instantly by simply clicking a link, updating their contact status to "Unsubscribed" in FunnelKit Automations.
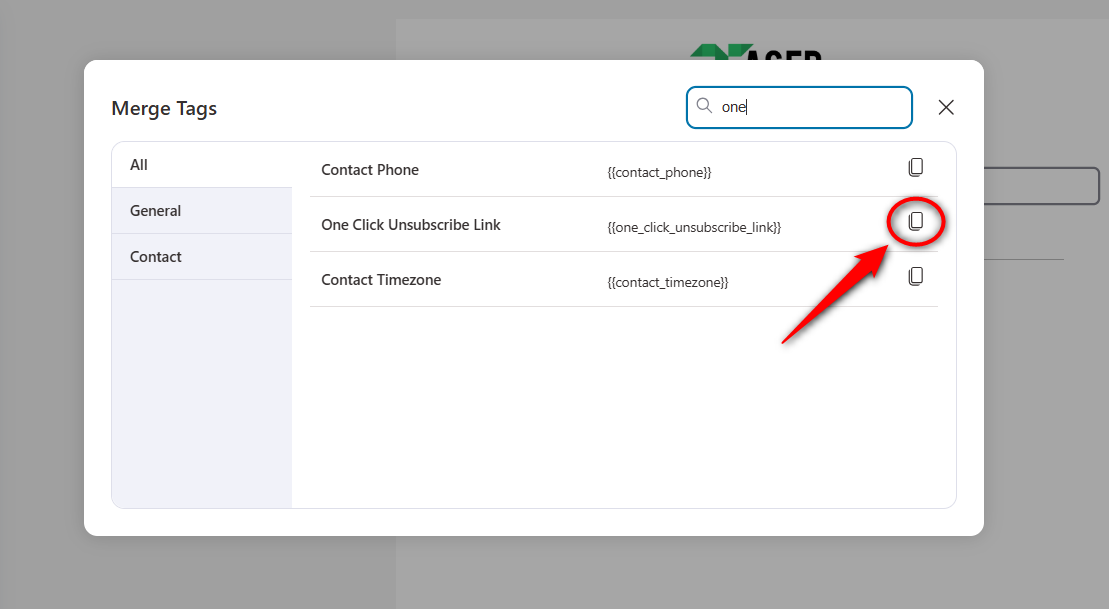
To add one-click unsubscribe, copy the One Click Unsubscribe Link merge tag.
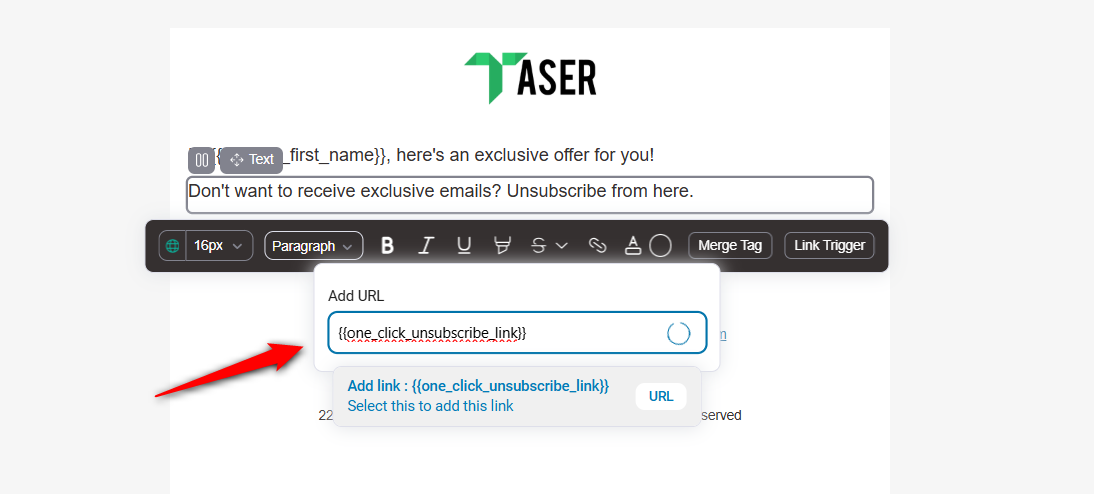
Paste the copied merge tag into your content:
We hope you've now understood the difference between One-Click Unsubscribe option and Unsubscribe text link in an email.
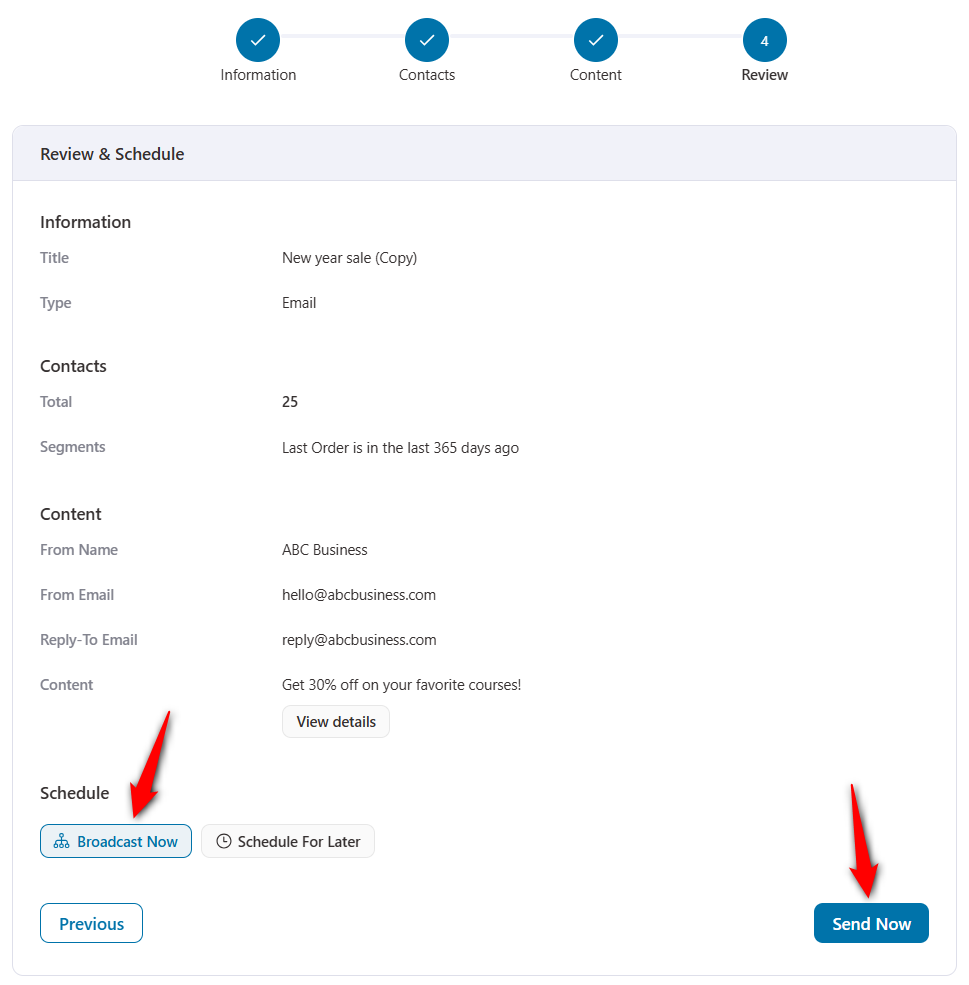
Step 3: Broadcast your email
Click on Send Now to broadcast your email immediately.
Testing the Unsubscribe Link
We have sent this email to a subscriber. This is his subscription status:
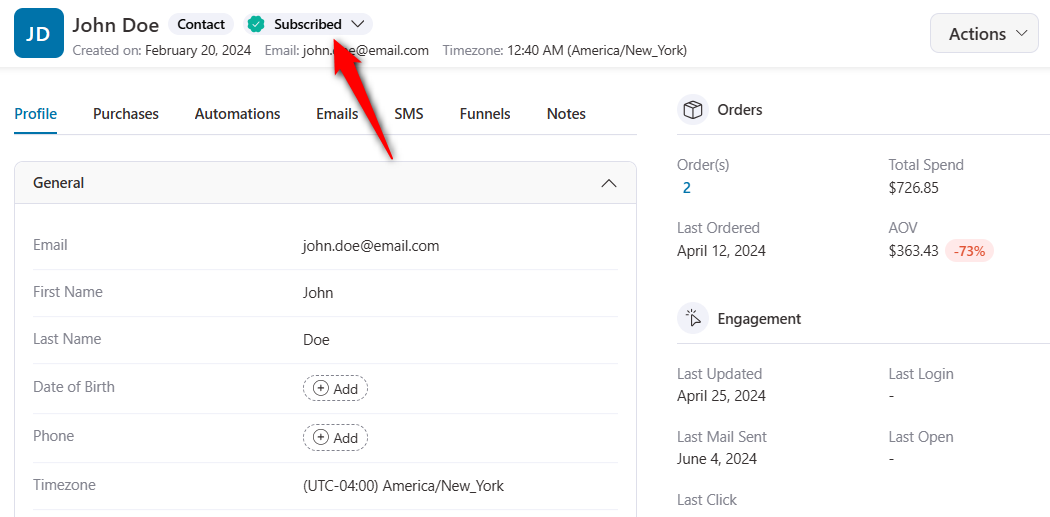
When the user clicks on this link on this email:

They will then be redirected to the selected Unsubscribe page.

Once the user clicks on Unsubscribe and their preference is updated, they’ll opt out of all the promotional emails.
If you check their subscription status now, they’ll be marked as Unsubscribed.
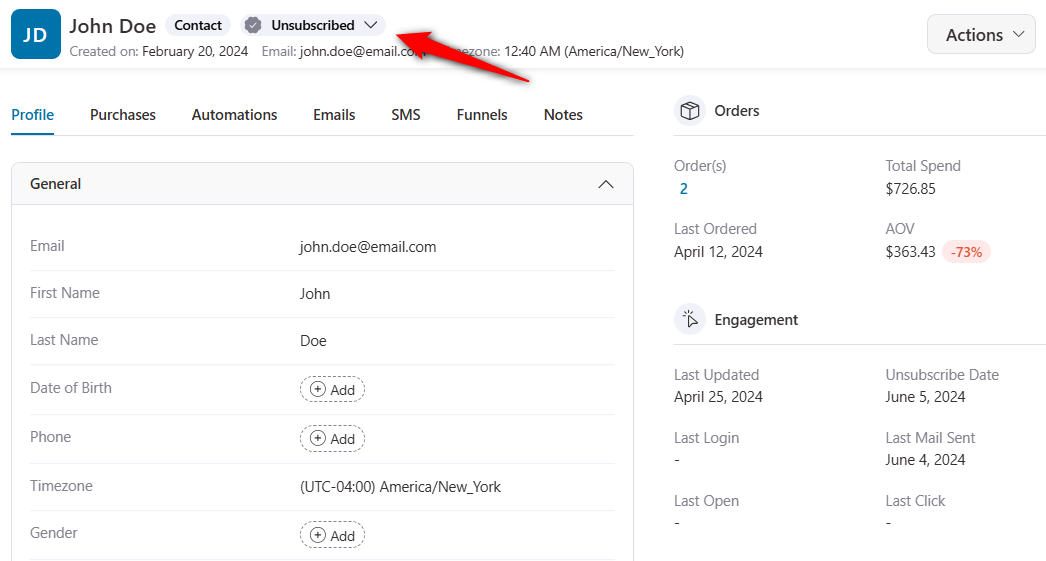
This is how the Unsubscribe Link works in FunnelKit Automations.


