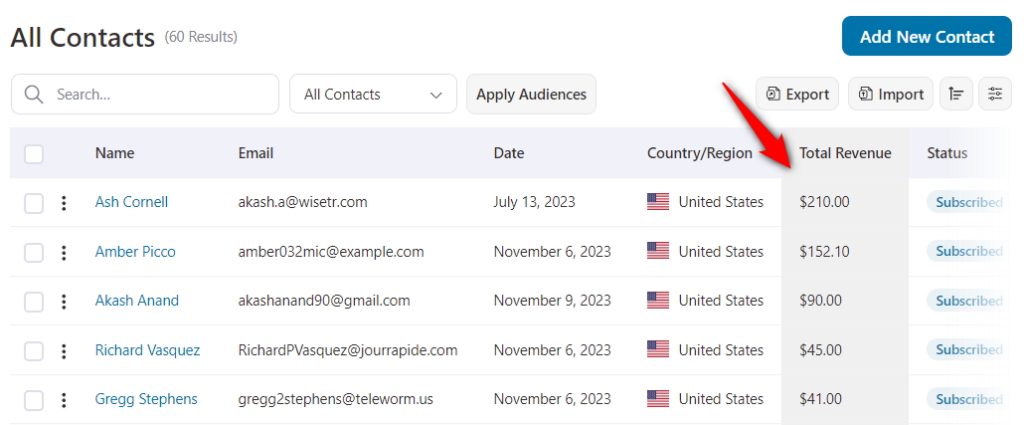
FunnelKit Automations provides a great way of viewing contacts and even sorting them. You can filter and view all the contacts added in one place.
You can see your all contacts’ information here:
- Contacts’ name (first and last name along with the date when the contact was added)
- Details (email address and phone number)
- Location
- Tags added to them
- Lists they’re a part of
- Total purchases made in revenue and number of orders, and much more.

Segregate Your Contacts
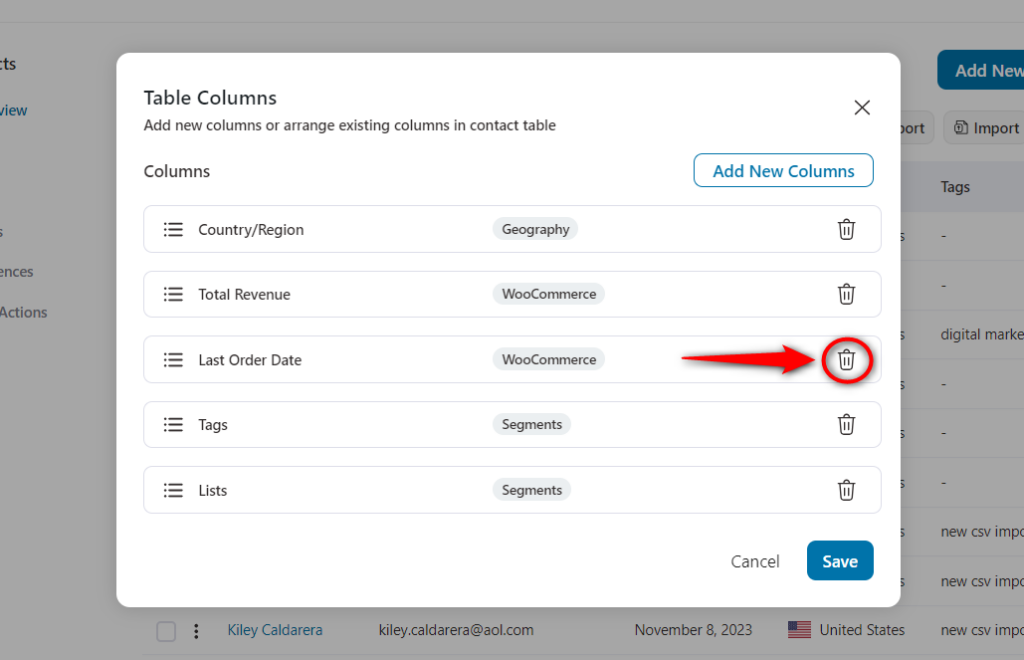
FunnelKit Automations allows you to segregate information (field columns) and only view the ones you might need.
So just enable/disable the particular fields by clicking on the Columns button.

Here, you’ll see the default columns on your Contacts screen.
From here, you can rearrange the columns with a simple drag-drop feature and click on Save.

Now, the columns will get arranged in the way you want them on your Contacts screen.
You can further delete the ones which you don’t want by clicking on the Remove button.
Let’s suppose, you want to display any other column such as the status or the country of your contacts on your screen.
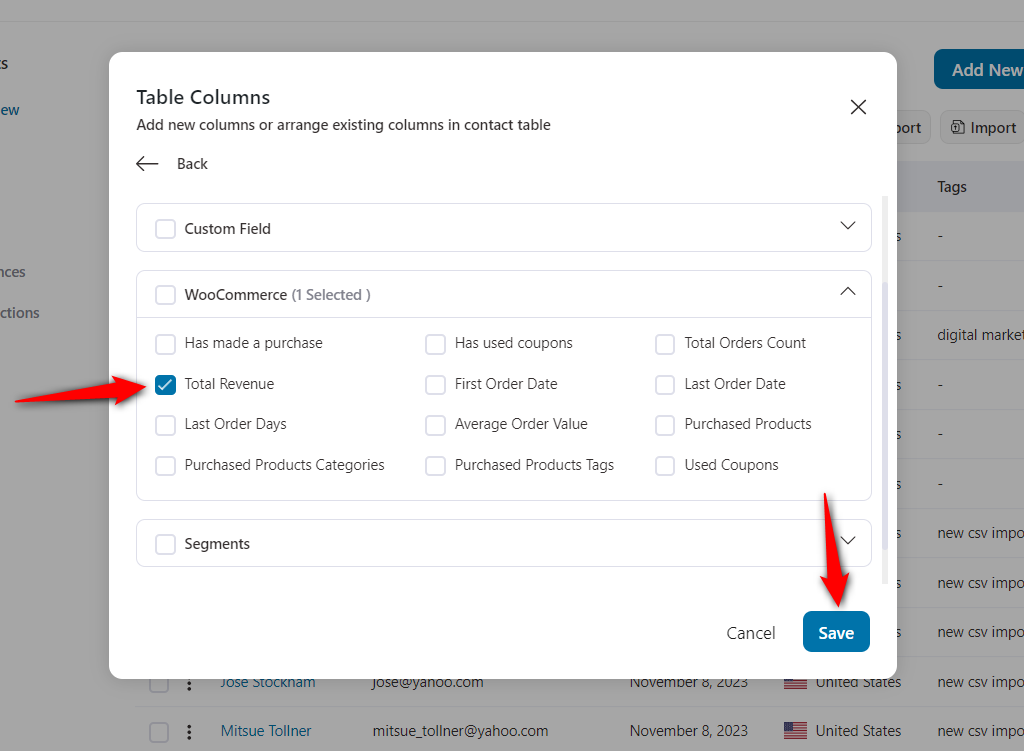
Click on Add New Column.

It’ll show you a table of columns to select such as Contact Details, Geography, Custom Field, WooCommerce, Segments and Engagement.
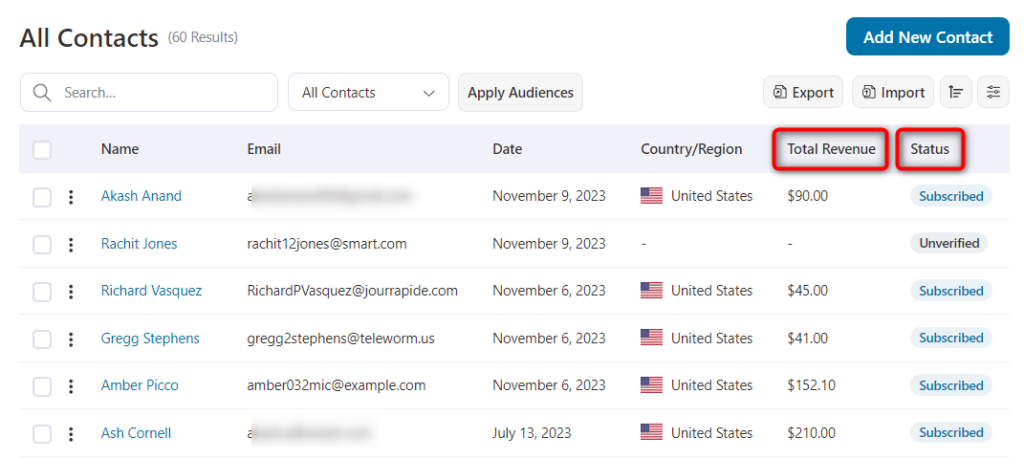
Let’s enable the Total Revenue column under WooCommerce as well as the Status column under Segments.
Now, only these two columns, along with your contact’s name and detail, will be visible on your screen.
This is how you can add, remove and rearrange the field columns on your Contacts section in FunnelKit Automations.
You can also Apply Audiences to view some specific filters that you saved as an audience. To create audiences, you should check the Adding Audiences section.
Sorting Your Contacts
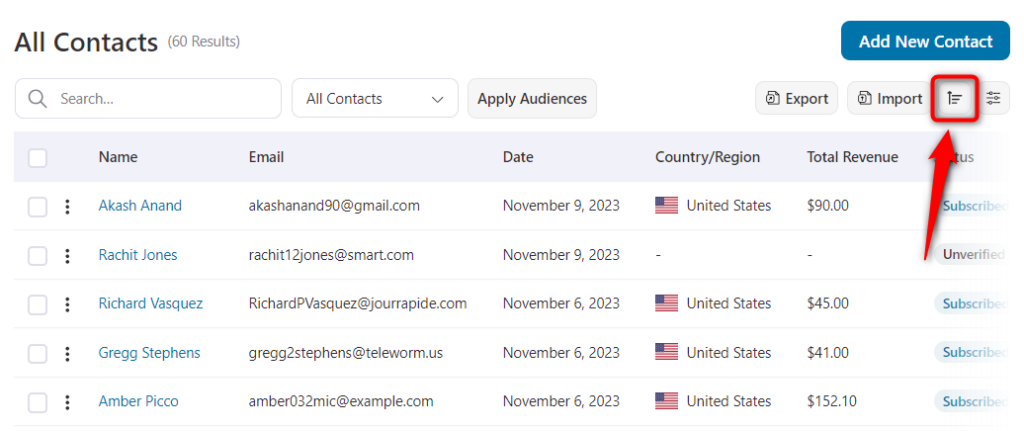
FunnelKit Automations lets you sort the contacts into ascending or descending order.
Let’s say you want to sort your Total Revenue column into descending order to see your high-value customers.
Simply click on the Sort button.
Here you can sort the following fields into ascending or descending order:
- Contact Name
- Creation Date
- Last Updated
- Country
- State
- Orders
- Total Spend
- Last Order Date, etc.
Choose the Total Spend column and select DESC. Then, hit Update.
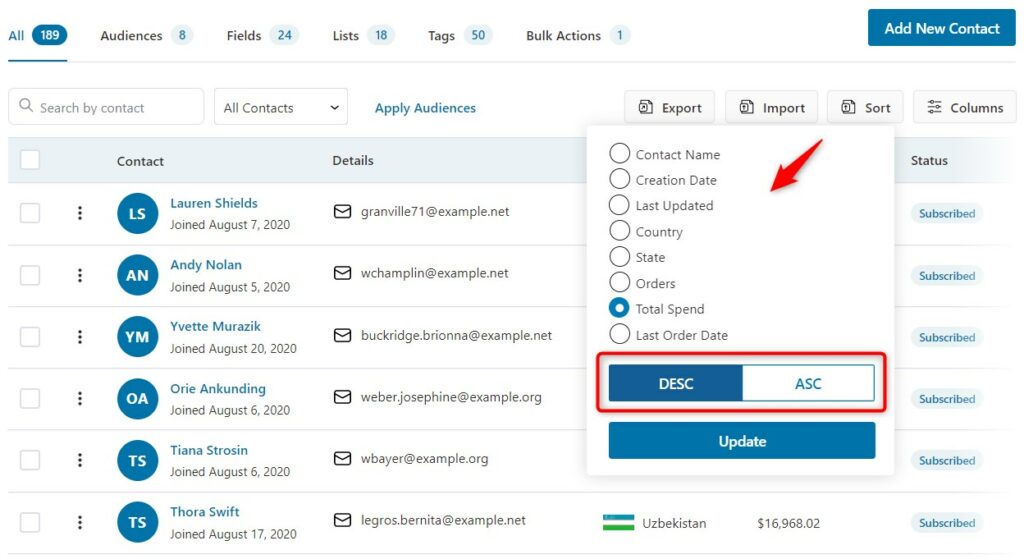
The total revenue column will be sorted in descending order.
The contact on top is your highest value customer.
This is how you can sort your contact’s fields in FunnelKit Automations.
Contact Pagination
You can choose how many contacts are displayed per page while browsing through the contact list. Use the navigation controls at the bottom to move between pages easily.

You can also jump directly to a specific page just enter the page number and press Enter.

Searching a Contact
You can search your contacts by name through the search bar. Start typing the name and FunnelKit Automations will automatically suggest the contacts matching this name.
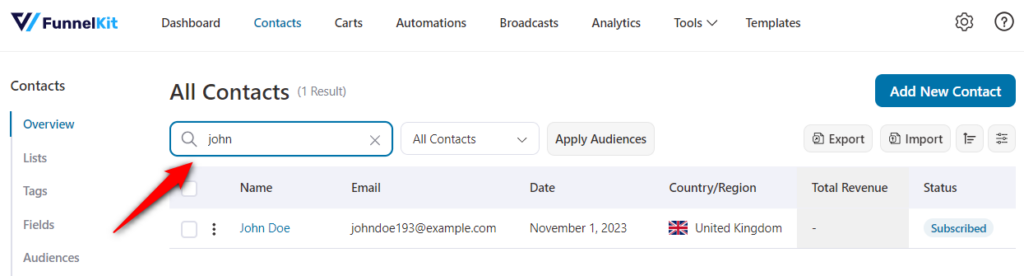
When you click on the correct contact, it will open their profile, which we have discussed in the next section.


