If you use the SendGrid email service, use this documentation to set up bounce handling with FunnelKit Automations.
Step 1: Login to your SendGrid account
Go to your SendGrid account and enter your login credentials.
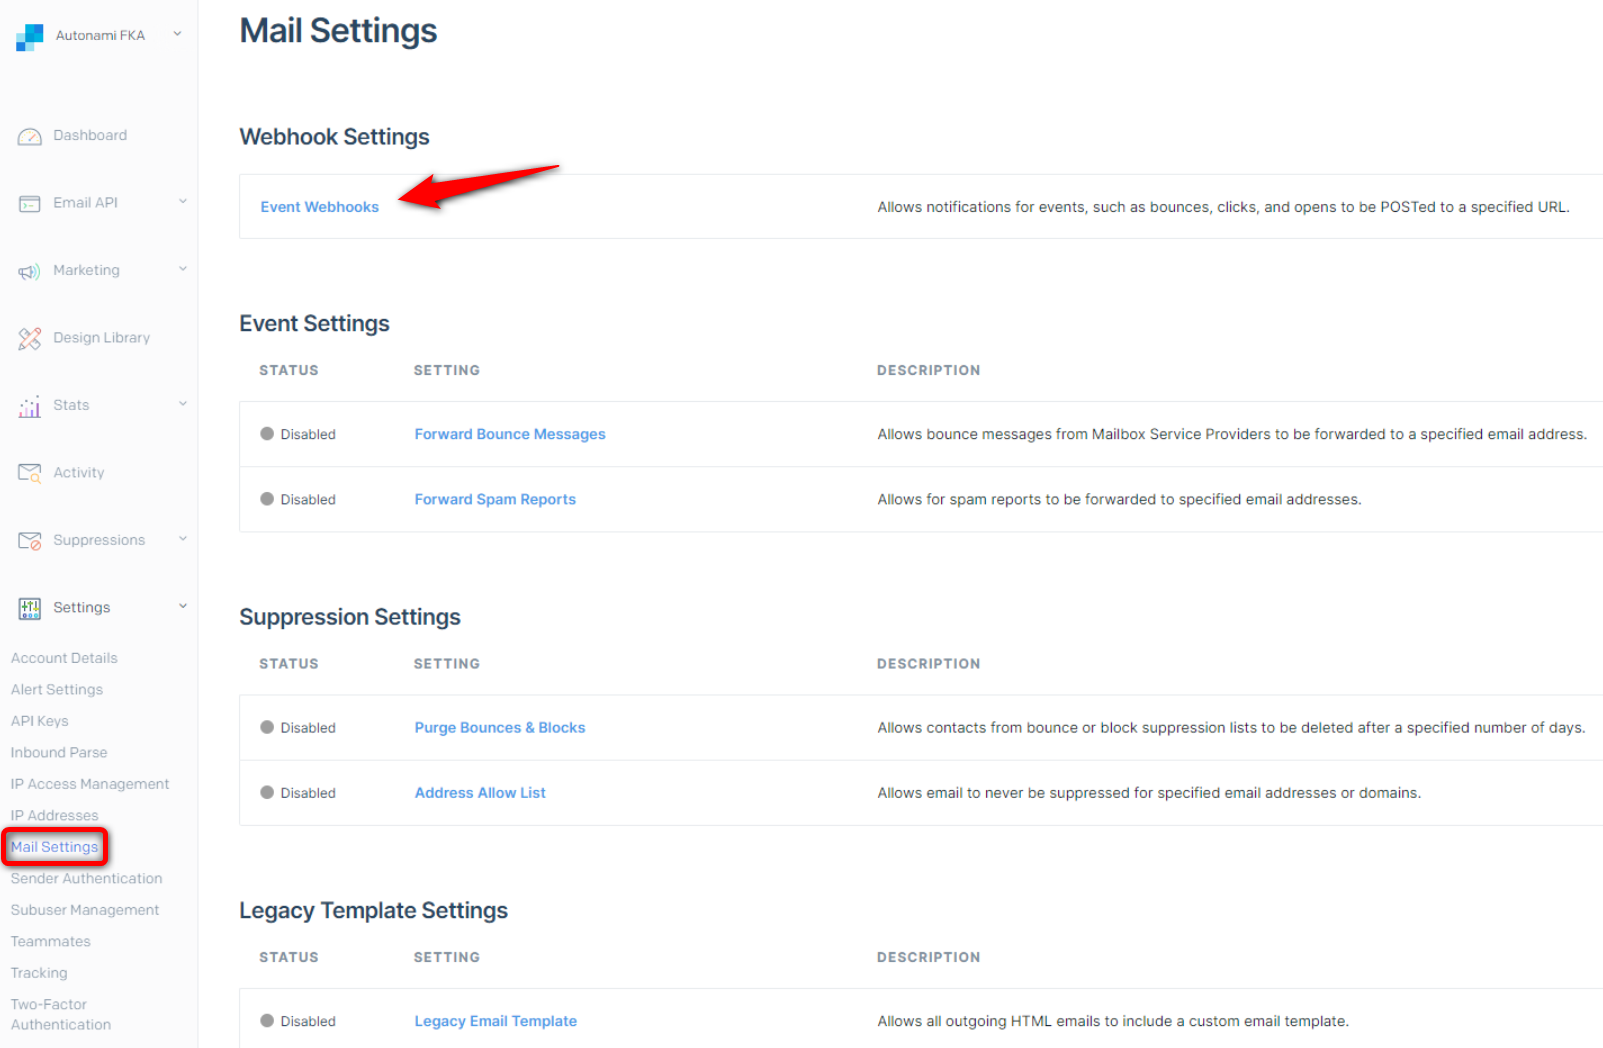
Step 2: Create a New Event Webhook
Go to Settings ⇨ Mail Settings and click on the Event Webhooks.
Now, we need to create a new event webhook.
For that, hit the 'Create new webhook' button.
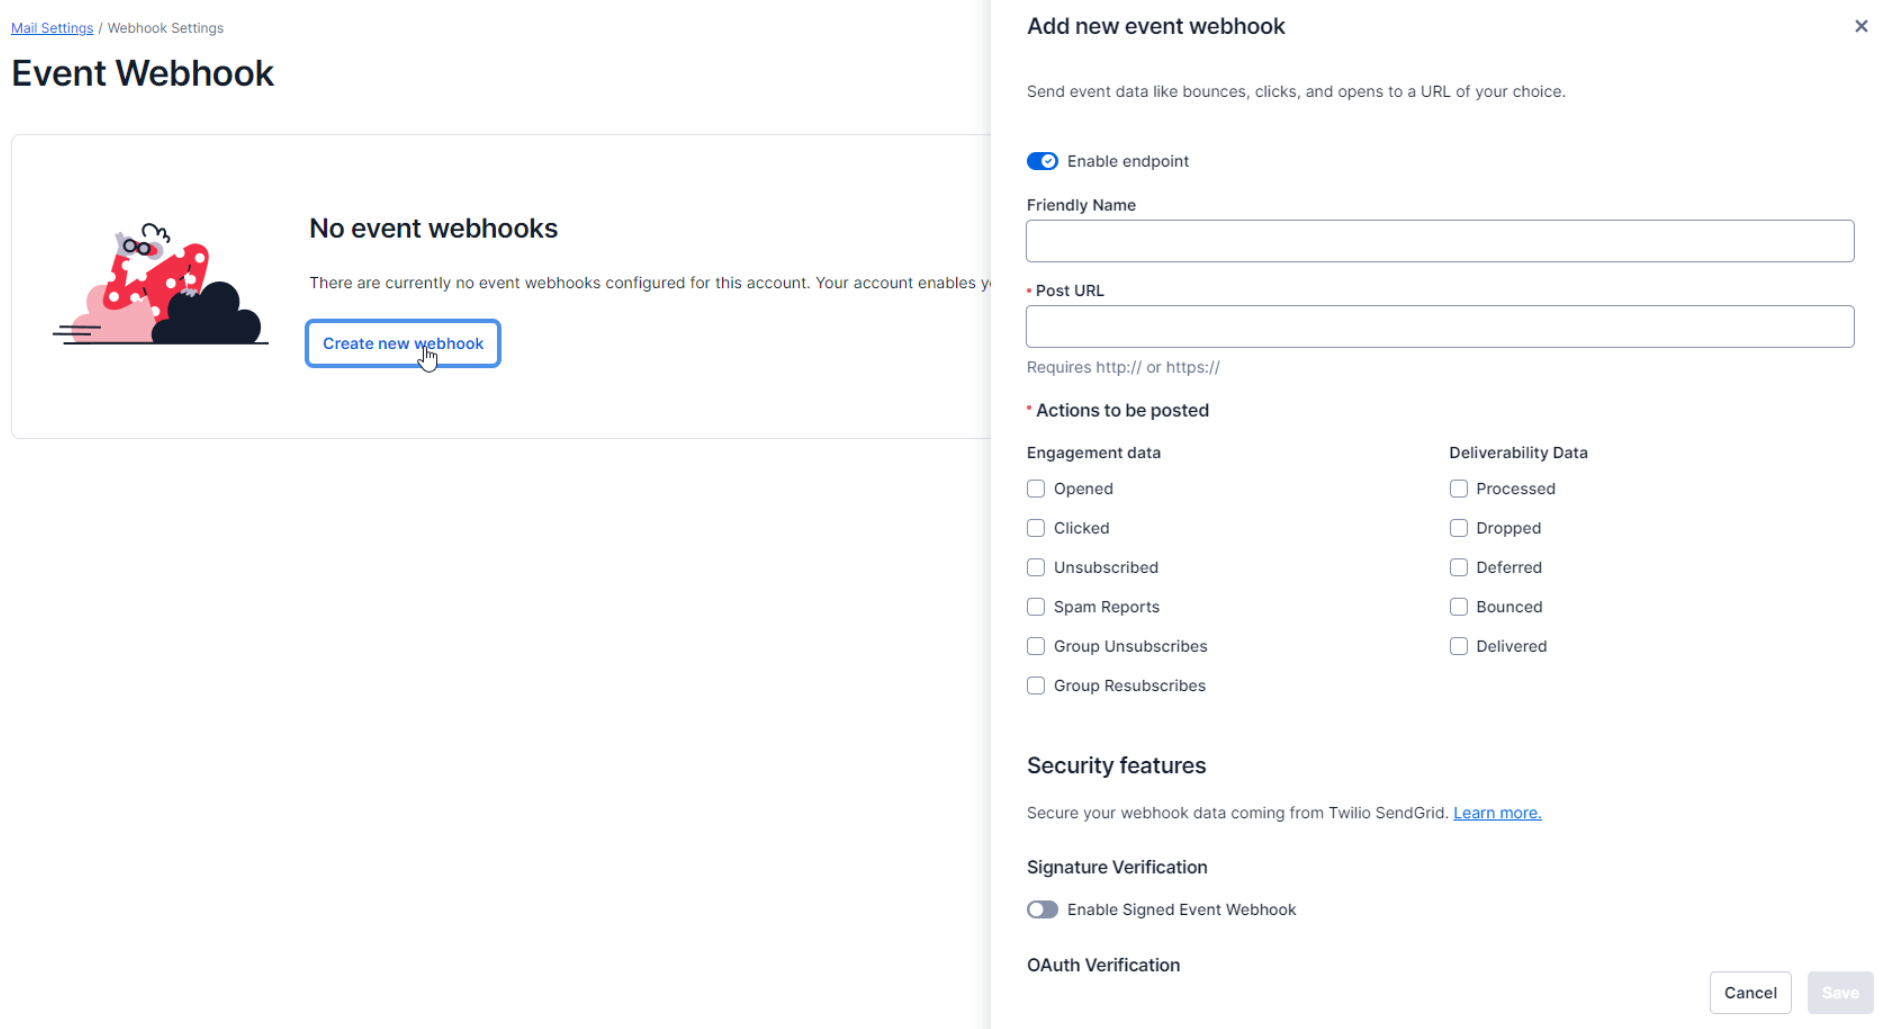
Now, enter the name, Post URL and mark the 'Bounced' action under Deliverability Data.
You will get this URL by going to FunnelKit Automations Settings ⇨ Email.
Then, scroll down to enable the Bounce handling for Sendgrid:
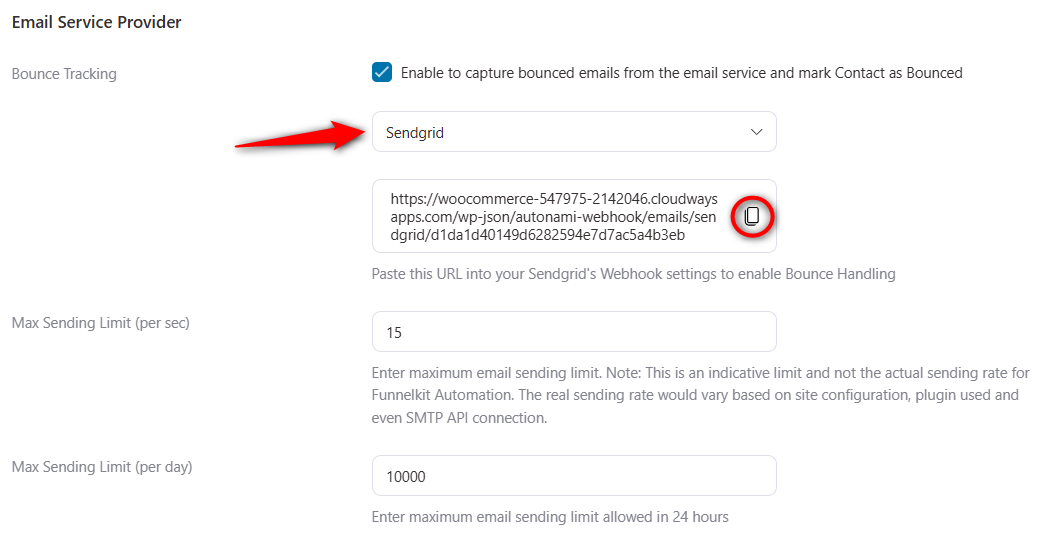
Copy the URL and paste it over here.
🔔 Quick Note: The same webhook handles both bounce and complaint events.
Next, check the actions to be posted, like Dropped, Deferred, Bounced and Spam Reports.
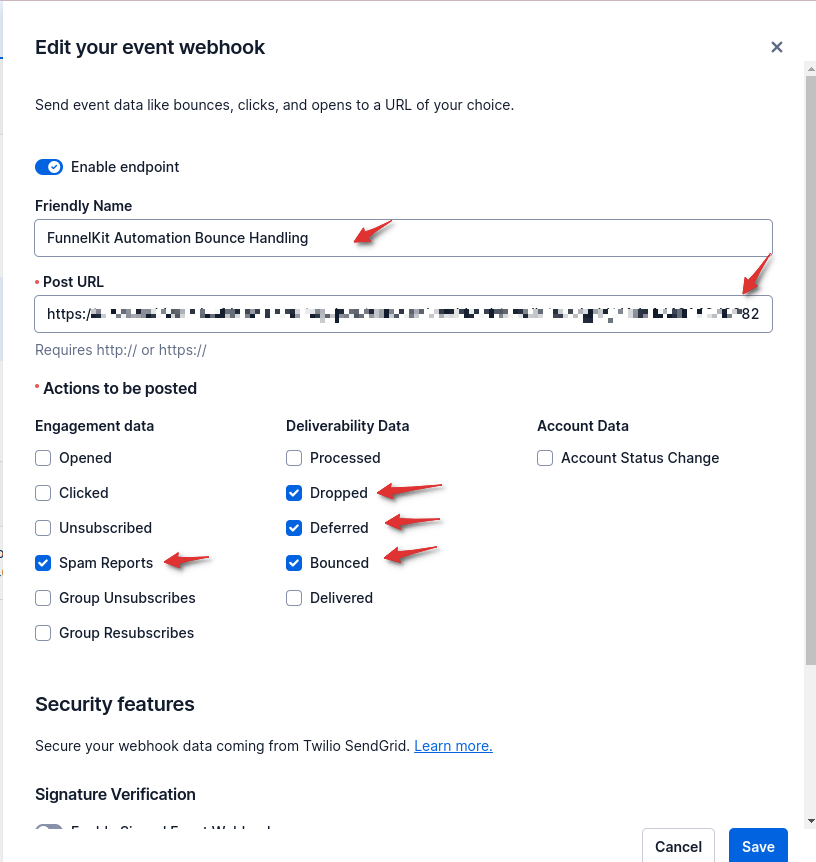
Click on 'Save' when done to create your event webhook for bounce handling.

That’s it! You have successfully set up bounce handling for SendGrid.


