FunnelKit Automations can filter and handle your email bounces.
It uses a custom set of rules and extracts the recipient's addresses, allowing you to send your message or take them off your list.
Before we go ahead and set up bounce handling, let's look at why emails bounce.
Why Do Emails Bounce?
Here are some common reasons why emails bounce:
- The recipient email address entered was wrong
- The sending IP address is blocked
- The email you've sent gets blocked by the server
- The receiving server is unavailable or overloaded
- The receiving mailbox is full
- The sender's email has been blocked by the recipient
- The recipient has enabled the auto-responder
To avoid the route to bounced emails, here's how you can set up bounce handling.
How Does Bounce Handling Work?
FunnelKit Automations provides you with a special way to do bounce handling.
It integrates with different service providers and generates a unique link that listens to all the bounces that happen.
Once a bounce is detected, FunnelKit Automations marks them as "Bounced". You can see this contact as status marked as bounced.
Of course, you can manually edit and change the status of your contacts anytime you want.
How to Set Up Bounce Handling?
We have provided step-by-step instructions on how you can set up bounce handling for different email service providers below:
Click on the links of your respective providers to set up bounce handling using FunnelKit Automations.
How to Set Up Bounce Handling for Other Email Sending Providers?
If your email service provider (ESP) isn’t listed in our bounce handling documentation, you can still manage bounces using a simple workaround.
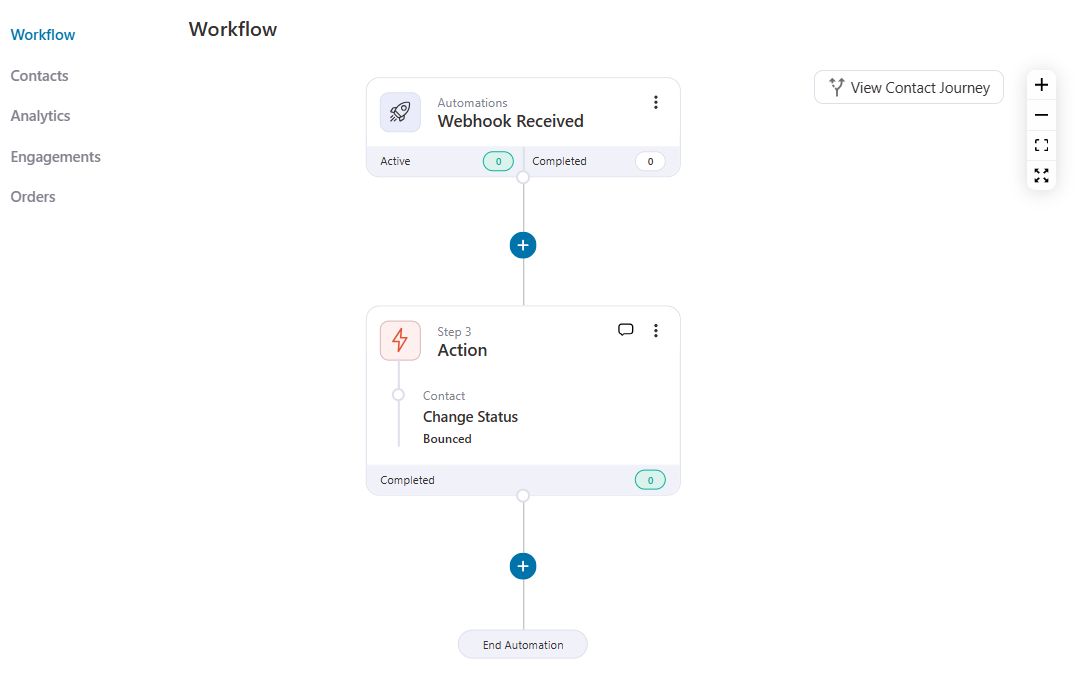
1. Create an Automation in FunnelKit Automations:
Use the Webhook Received event as the trigger.
Add a Change Status action and set the status to Bounced.
2. Configure Your ESP to Send Bounce Data:
Set up your ESP to send the email address information to the webhook URL whenever an email bounces.
Once the ESP marks an email as bounced, FunnelKit Automations will receive the email data and automatically update the contact’s status to Bounced.
This ensures your email list remains clean and improves deliverability.


