Gravity Forms is a WordPress plugin that allows you to build forms for your website.
FunnelKit Automations’s integration with Gravity Forms enables you to create and run automations based on the submission of a form.
Let’s now consider a scenario - when someone submits a form and selects a particular option, we’ll send them an email.
For example, when someone leaves 4 or more ratings on your feedback form, we want to send an appreciation email.
When you install Gravity Forms for your WordPress site, you’ll see it listed here:

Here’s how you can set it up:
Step 1: Create a form using Gravity Forms >> Click on ‘Forms’ >> Add a new form
When you click on the ‘Add New’ button, a popup appears. Take a look:
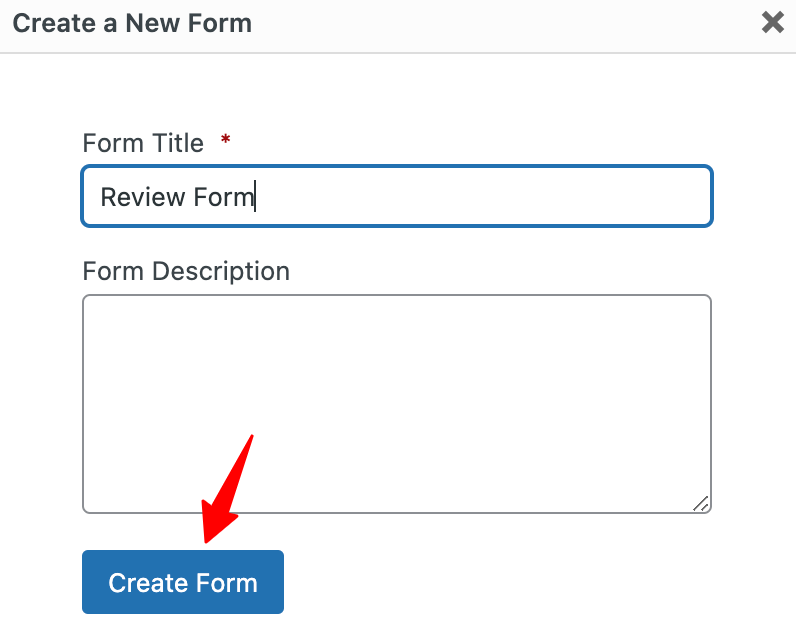
Enter your form name and description here, then hit the ‘Create Form’ button.
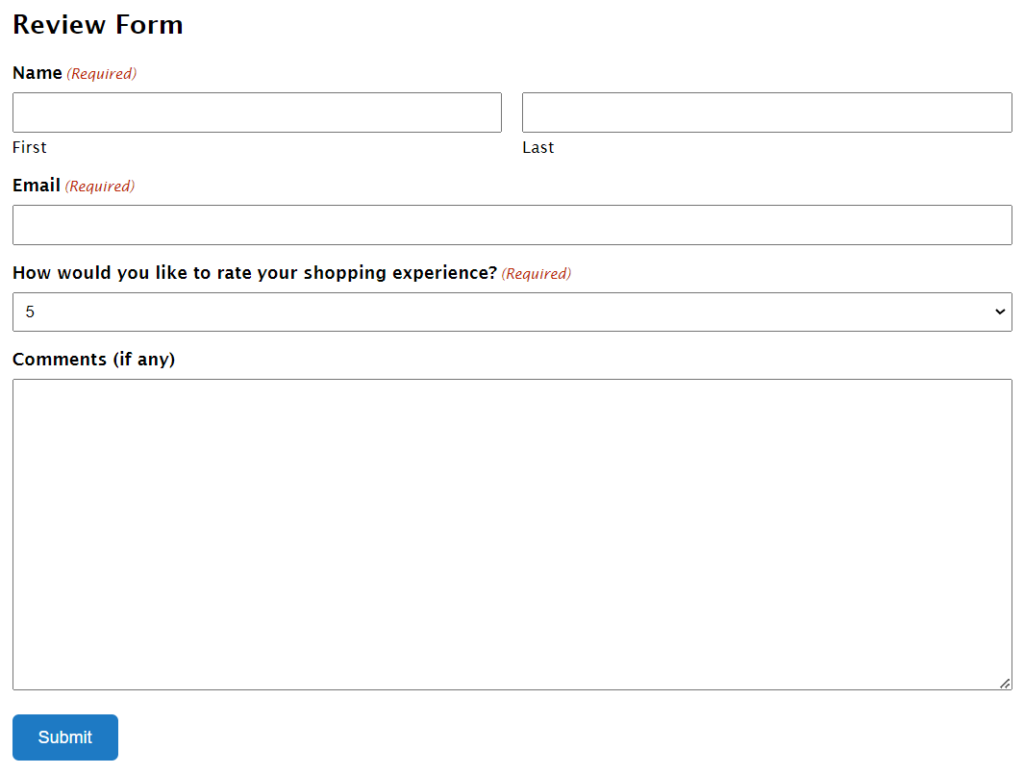
Pick multiple elements and design a form like this:
Step 2: Create a new automation and set up the form submission event
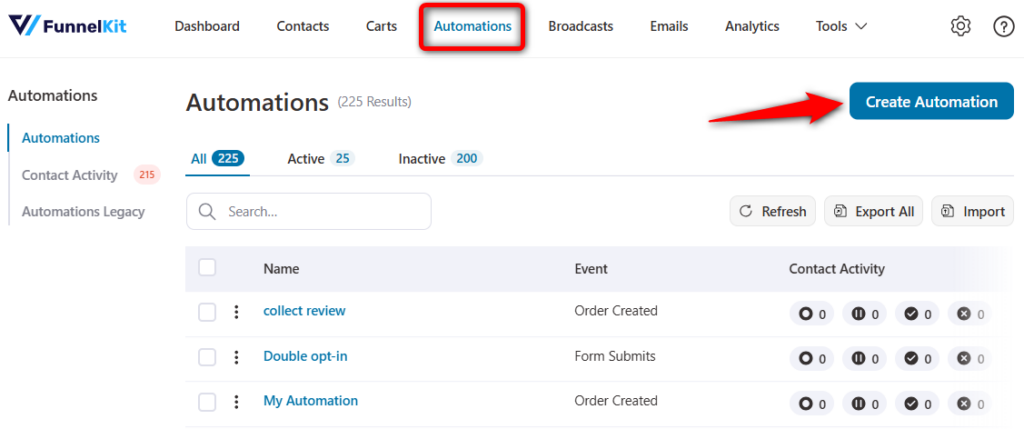
Start from scratch and enter the name of your automation.
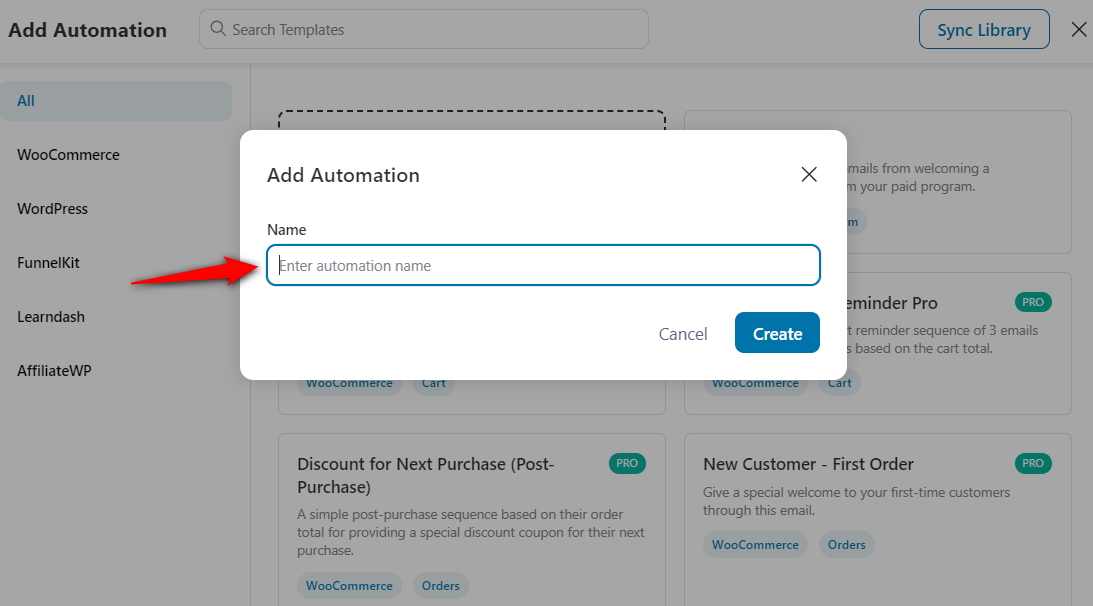
Click on Create.
Now, add a trigger - Form Submits under Gravity Form.
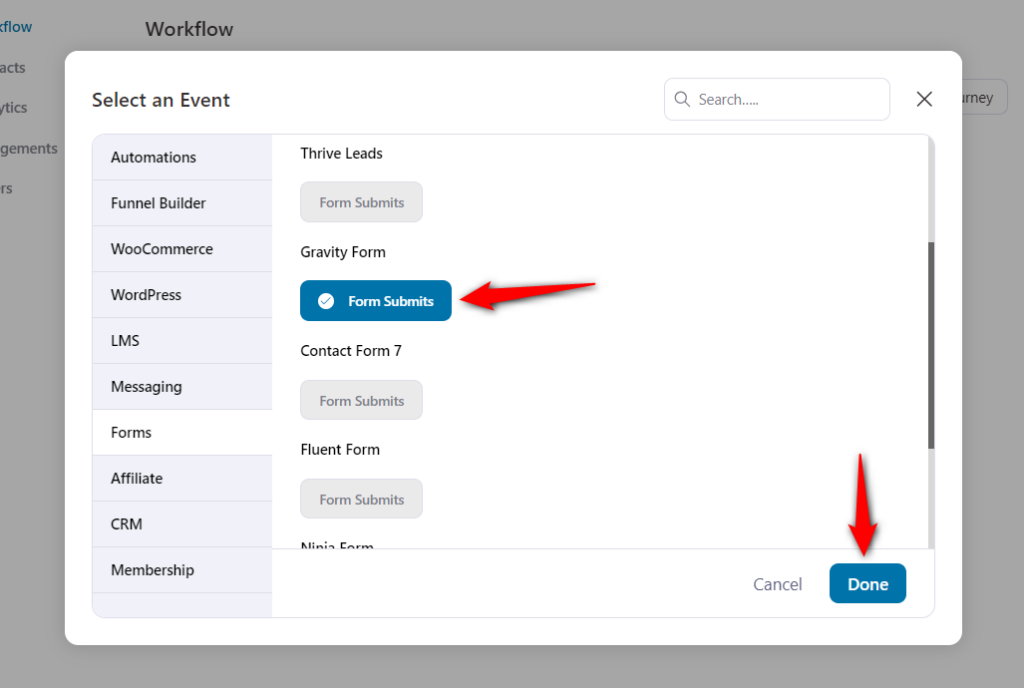
Once done, hit the ‘Done’ button.
Step 3: Select your form and map the fields
Next, select the form that you just created from the drop-down that appears.
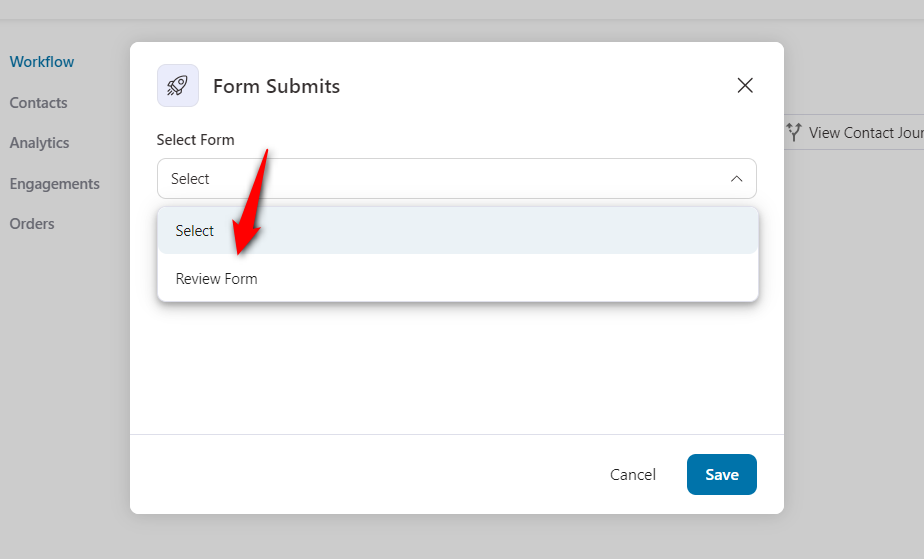
Next, map the fields on your form.
Here’s how:
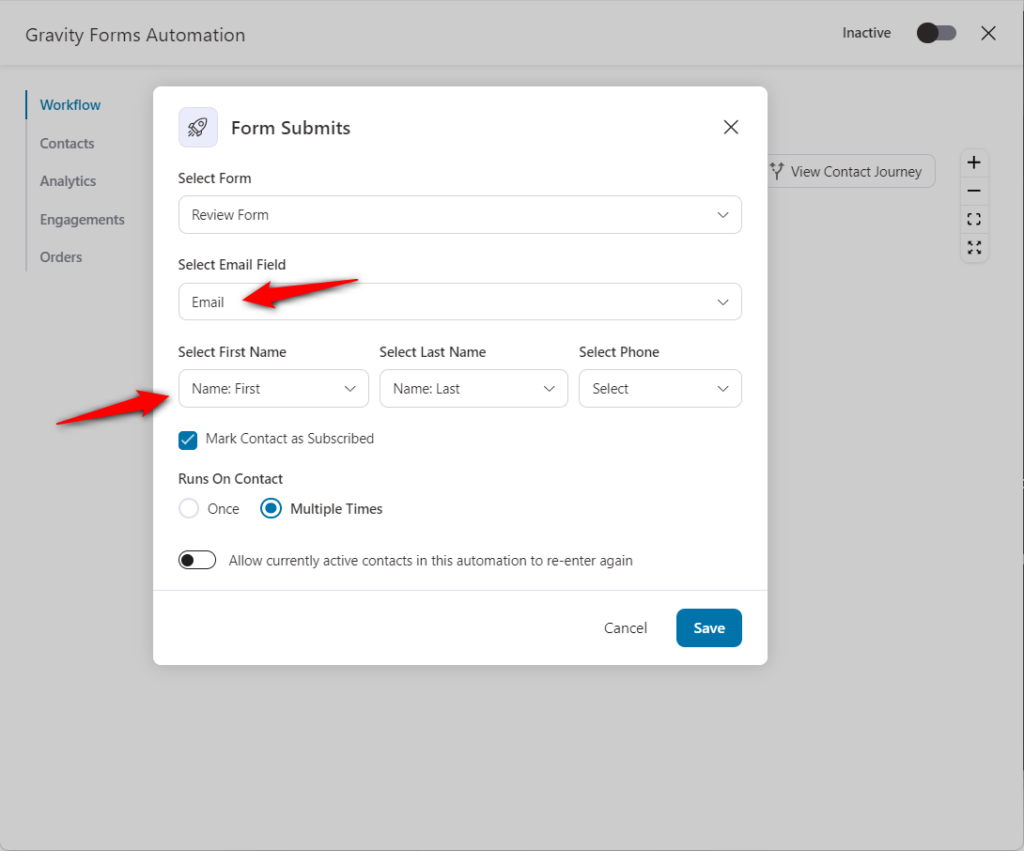
Once done, click on Save.
Step 4: Select ‘Condition’ and set up rules for your automation
When you save the event, the '+' icon will appear - allowing you to add the next step to your sequence.
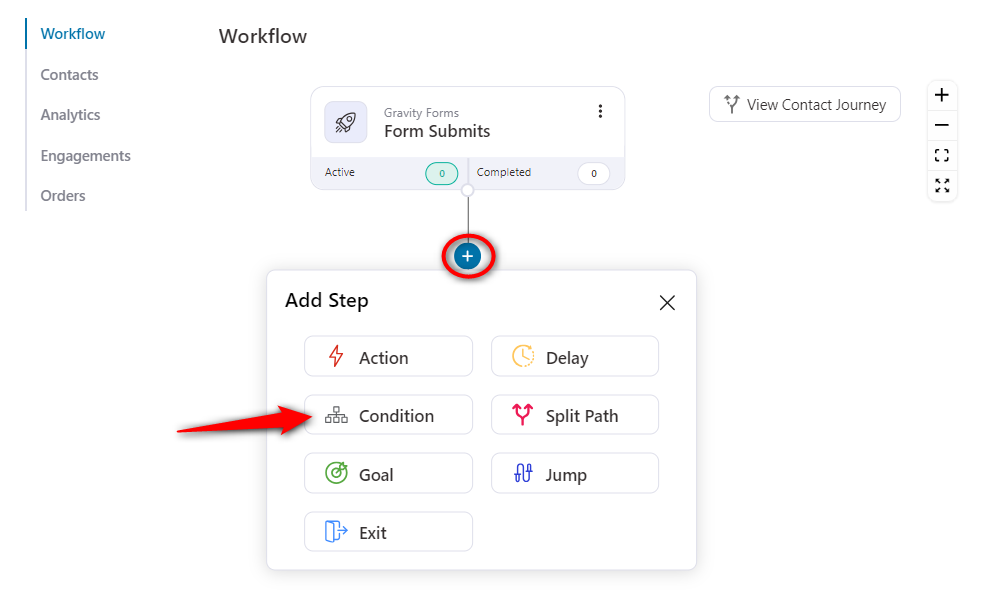
When you select the conditional action, you’ll see the ‘IF’ section on the right side.
Select the rule ‘Form Field’ from the drop-down.
Take a look:
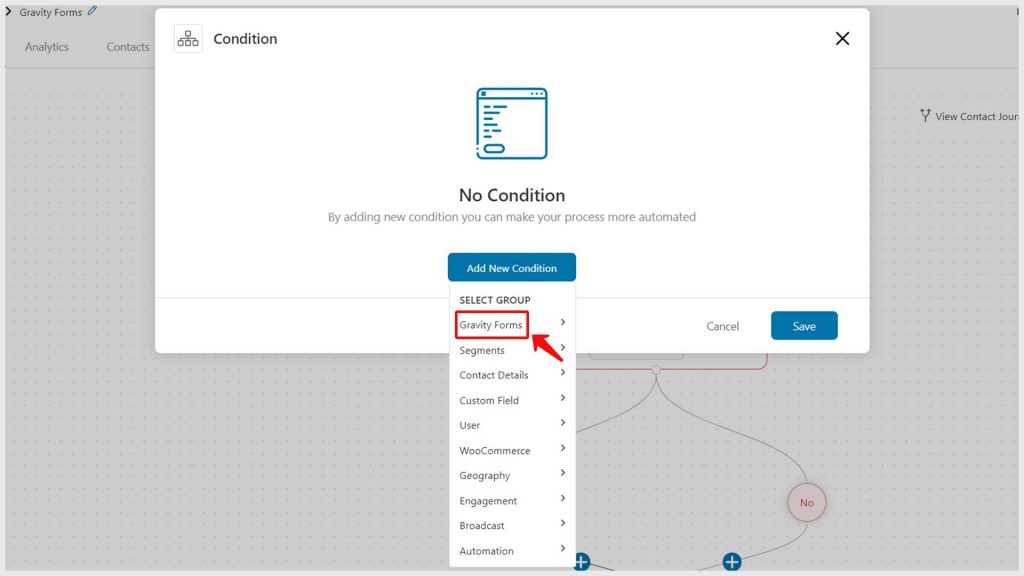
Click on the Form Field.
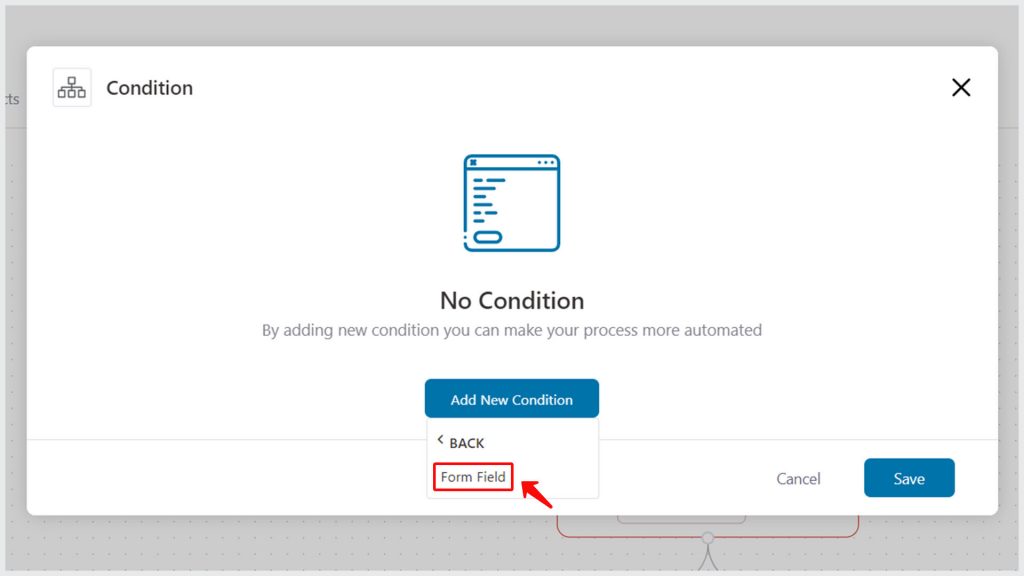
Next, select the field from the drop-down for which you want to set the rule. In our case, it's the question 'How would you like to rate your shopping experience with us?'
Since in this example we’ll be taking 2 rating values ‘4’ and ‘5’, hit the ‘Add another condition’ to create 2 conditions - one for rating = ‘4’ and the other for rating = ‘5’.
Take a look:
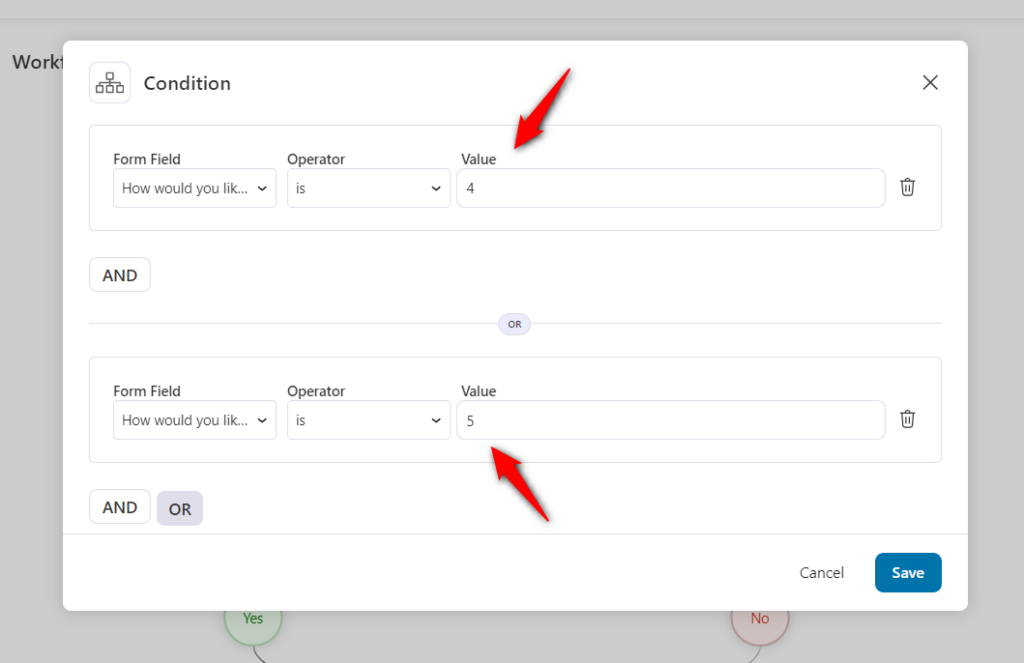
This means that your automation will run when either of these conditions is met: rating = ‘4’ or rating = ‘5’.
Step 5: Select ‘Send Email’ as your action
Next, add the corresponding action under the 'YES' condition. You’ll find this option here:
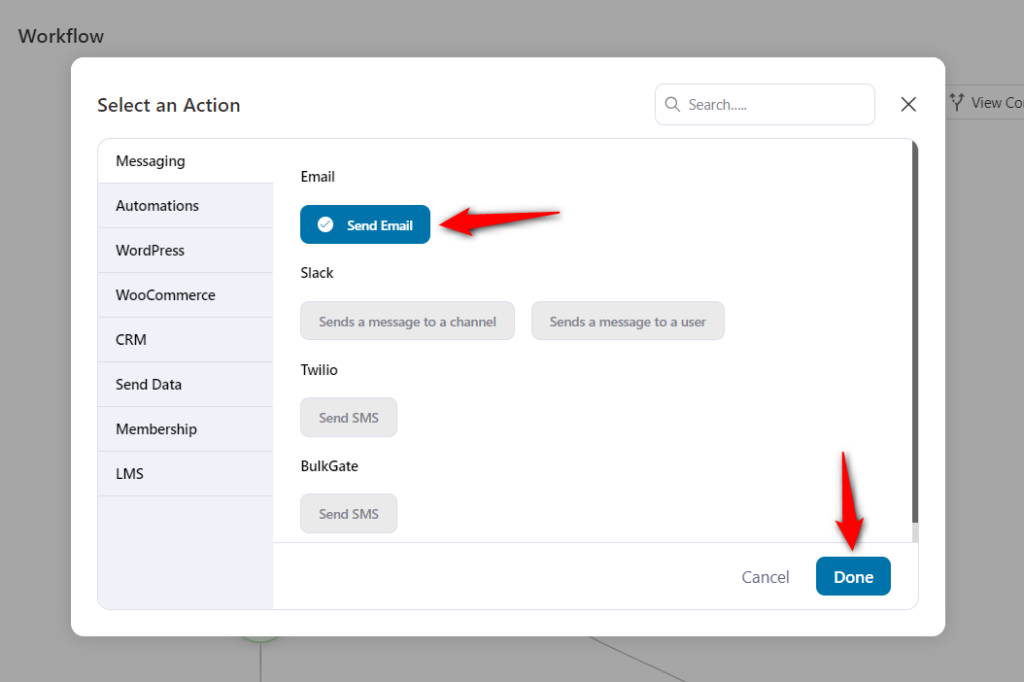
When you do so, you’ll see the email customizer will get popped up on your screen.
Next, craft your email body, and personalize the content using merge tags.
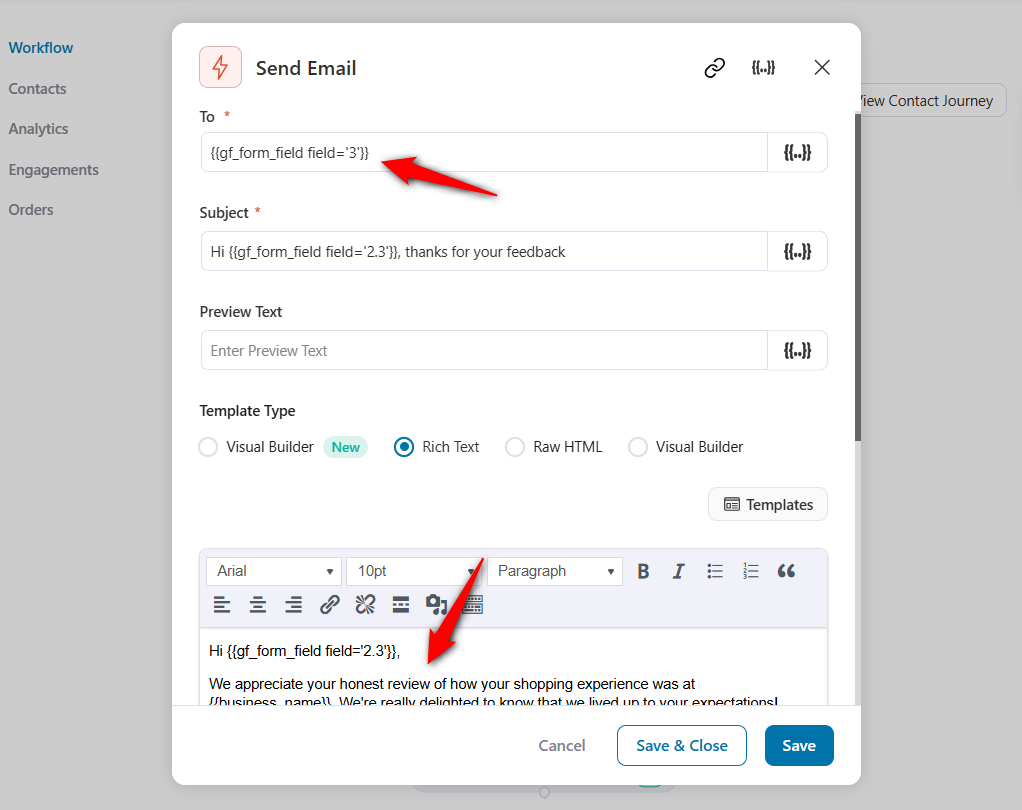
Click on Save & Close when done.
Step 6: Make your automation live and test it out
Hit the toggle button at the top right corner of the FunnelKit Automations interface.
Once you do that, you’ll see the color change to blue.
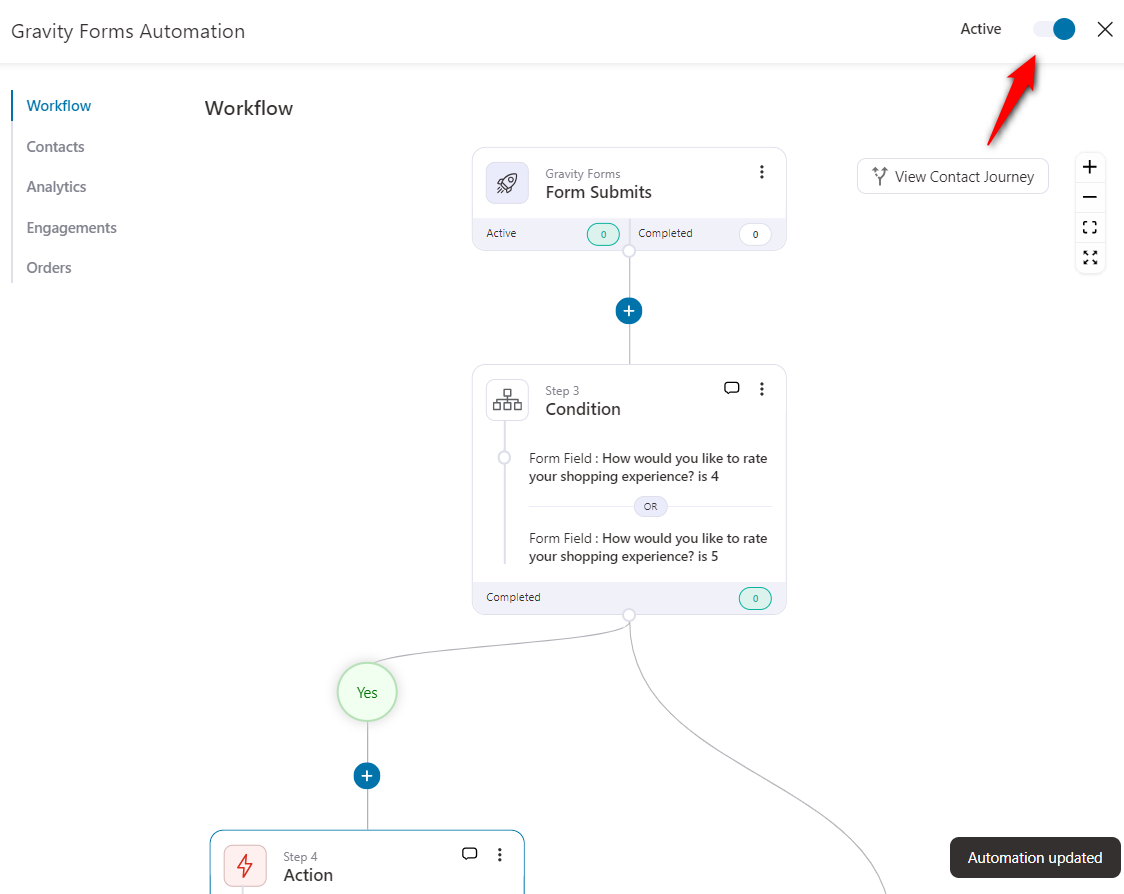
This means that your automation is now live and running. Let's now test it out.
Next, go to ‘Form’ in your WordPress dashboard >> Preview the form

When you hit the ‘Preview’ button, the form opens up. Next, enter a valid email address so that you can check it when you receive an email.
Select the rating as ‘4’ or ‘5’ in your form.
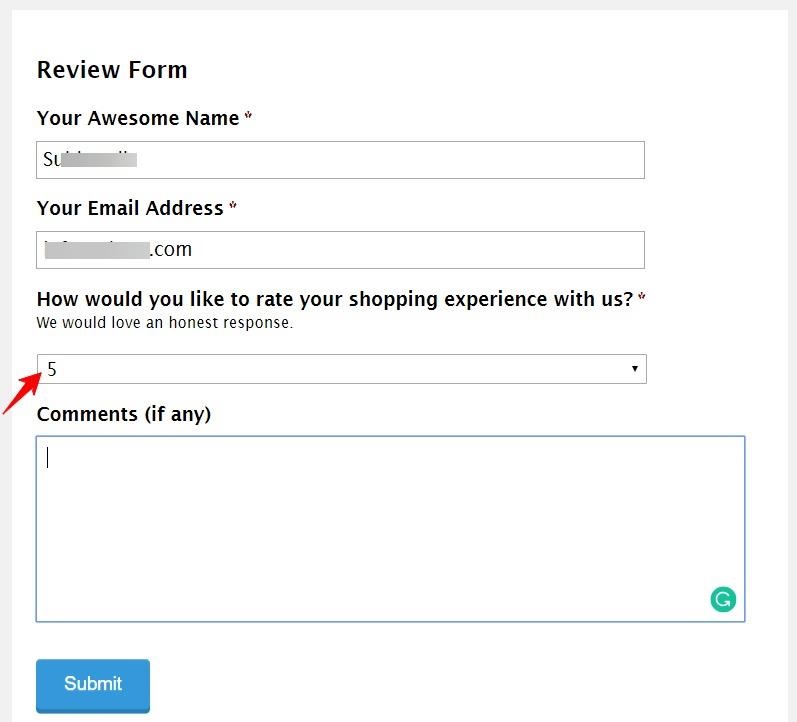
When you’re done, hit the ‘Submit’ button.
You’ll receive the appreciation email as we set it up in FunnelKit Automations:

So this was one use case of FunnelKit Automations’s integration with Gravity Forms. You can create many other automations using multiple rules and actions as per your requirements.


