You can save the data from your Funnel Builder’s checkout page to the custom fields right here in FunnelKit Automations.
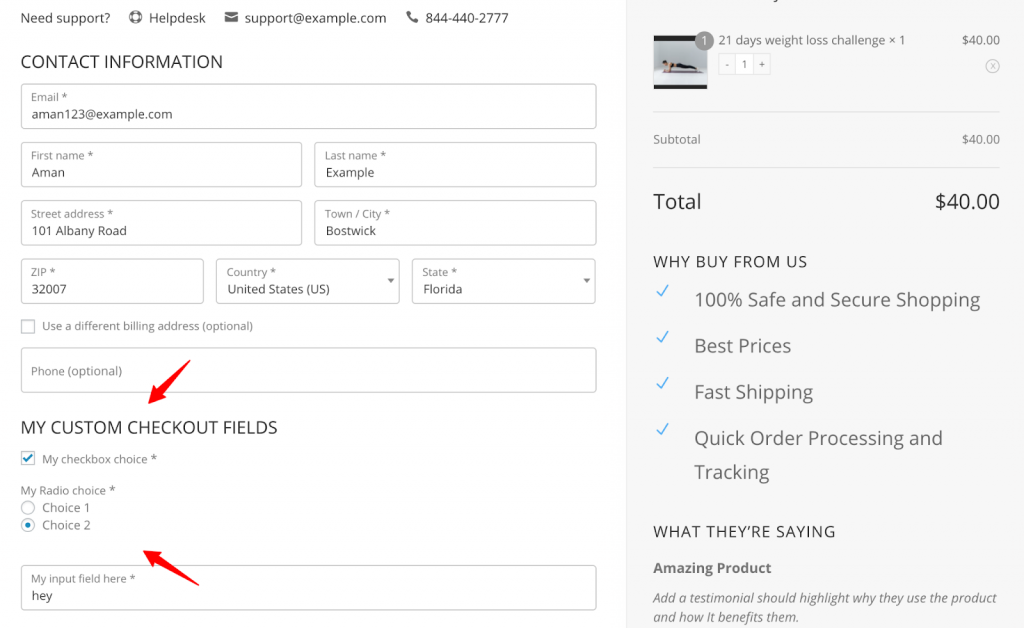
For example, we have three custom fields on our checkout page like this:
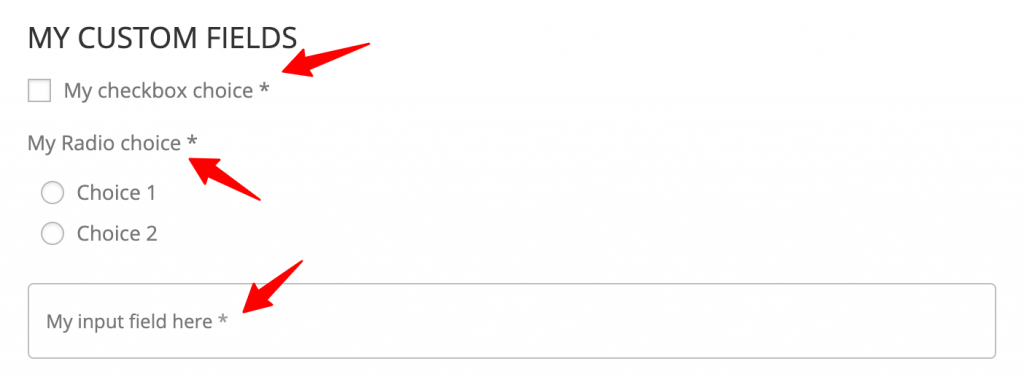
And now if we want to save the data coming through it, we need to create an automation in FunnelKit Automations.
Here's how to do it.
Step 1: Create the same set of fields in FunnelKit Automations
To save your data on custom fields from the checkout page to FunnelKit Automations, ensure that you create the same set of fields at both places.
Make sure to create the fields containing the checkbox, radio choices, and input field.
Creating the same set of fields will be helpful if you want to manually change these fields later in any case. For simply storing the values, you can use text inputs.
To create new fields in FunnelKit Automations, click here.
Step 2: Copy the custom field ID
Go to the checkout step on your funnel.
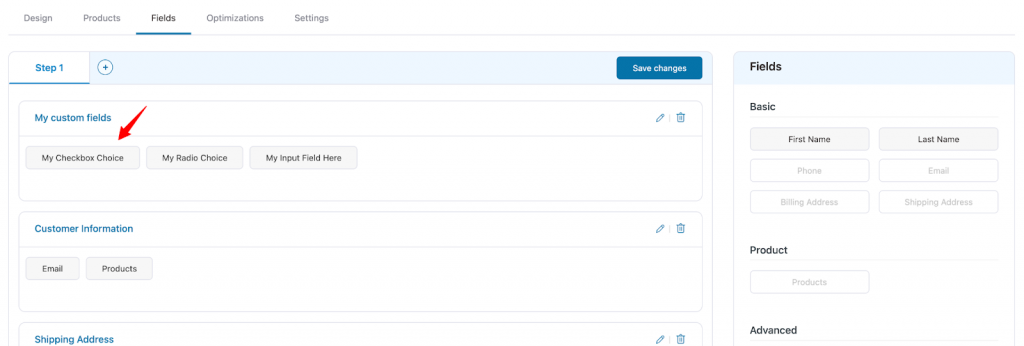
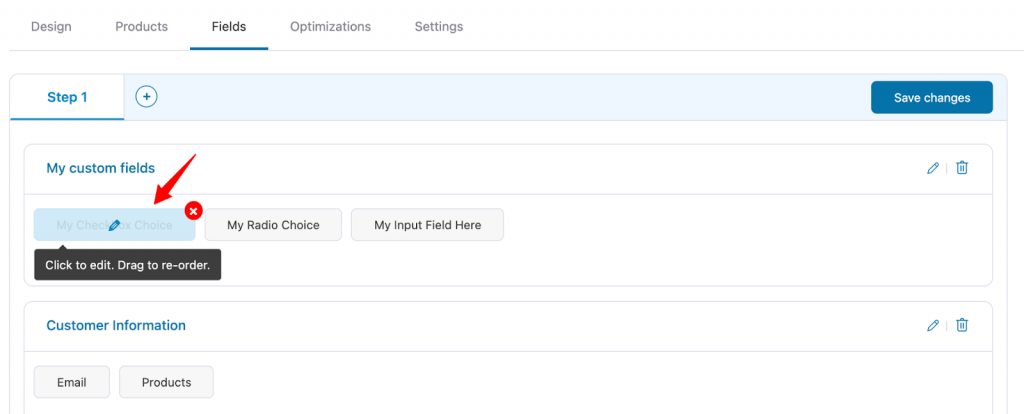
Click on your custom field.
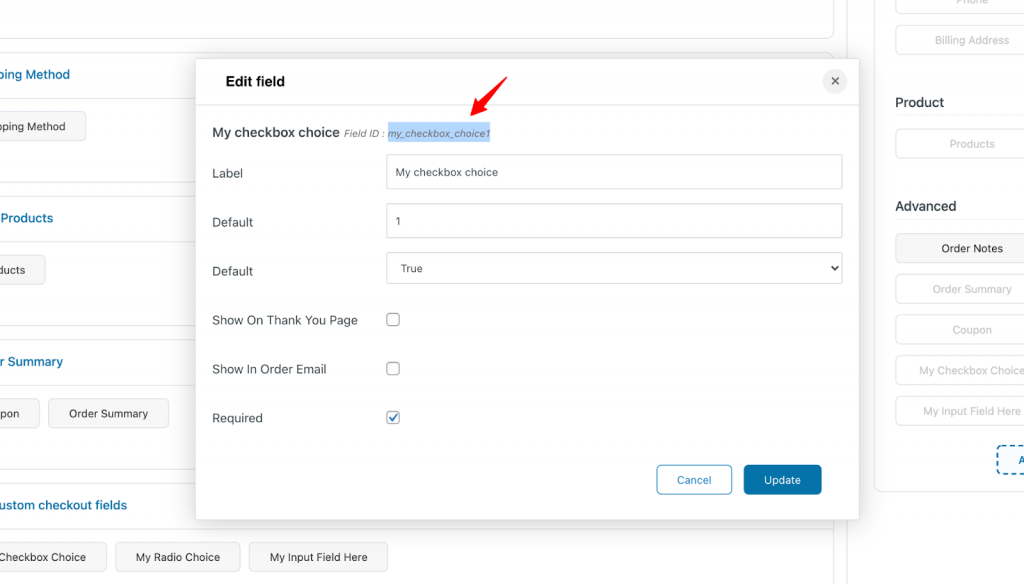
Now copy the field IDs of the custom fields you have created on your checkout step.
Now, we will trigger the event of order creation.
Step 3: Select the event
Click on Order Created under WooCommerce as the event trigger.
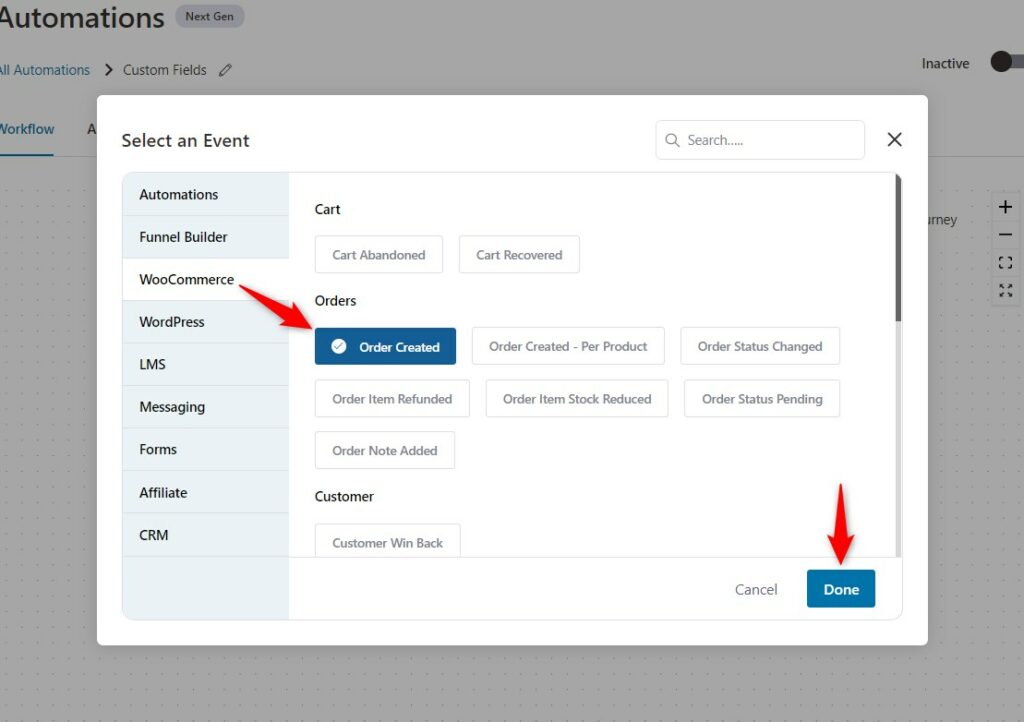
Click on Done.
Step 4: Select the action
Now, choose Update Fields under FunnelKit Automations as your action.
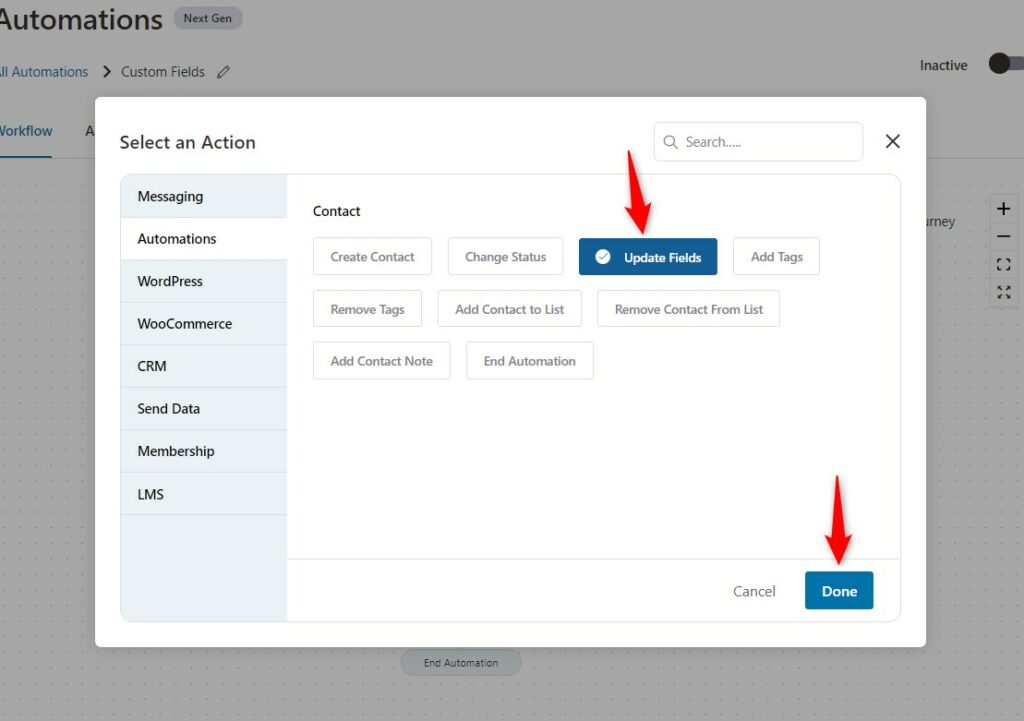
Click on Done.
Step 5: Enter the custom field key data using merge tags
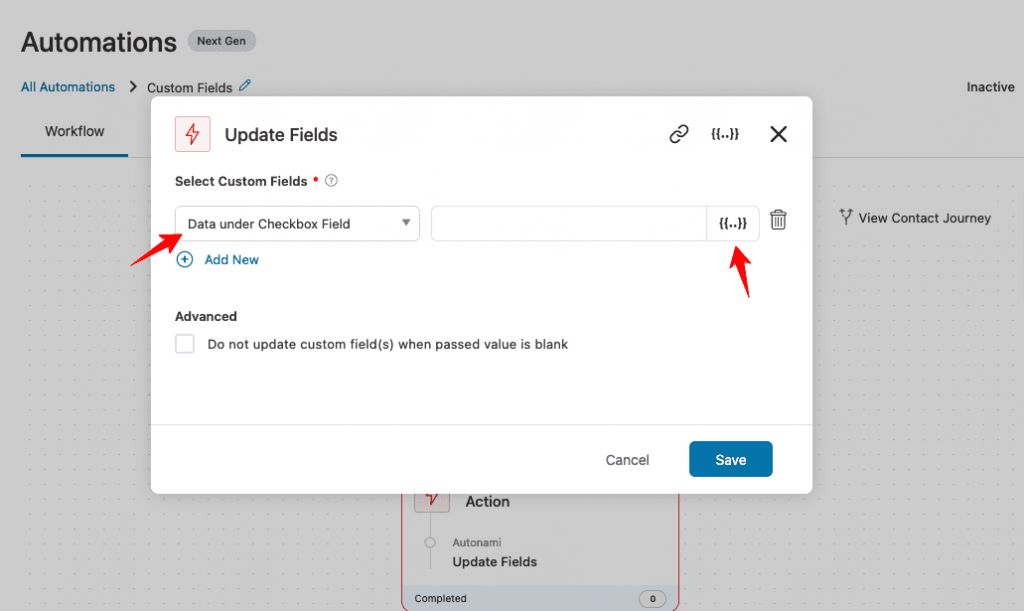
Enter the fields of FunnelKit Automations in which you want to store your data.
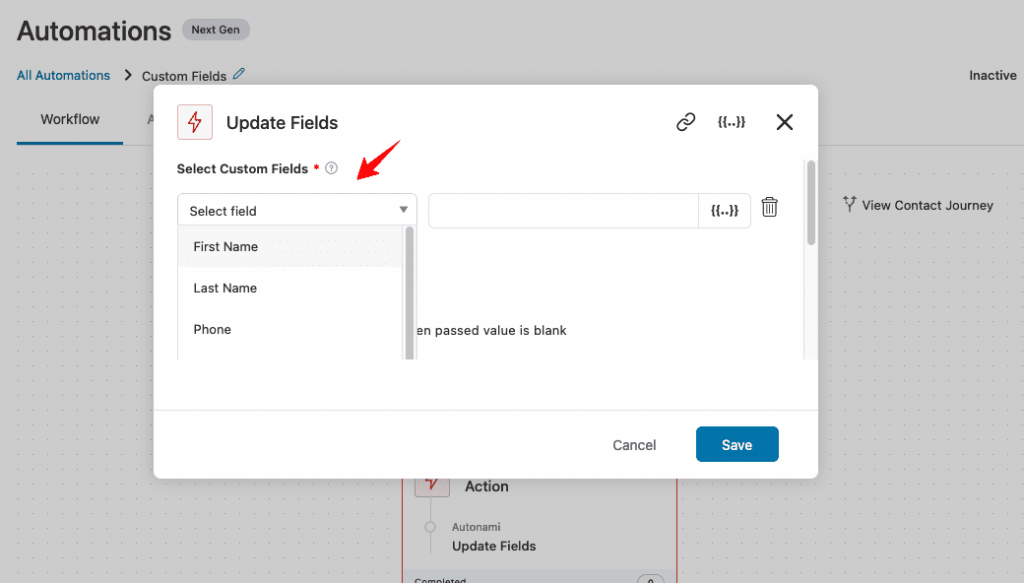
Now click on Merge tags.
Click on Configure next to Order Data.
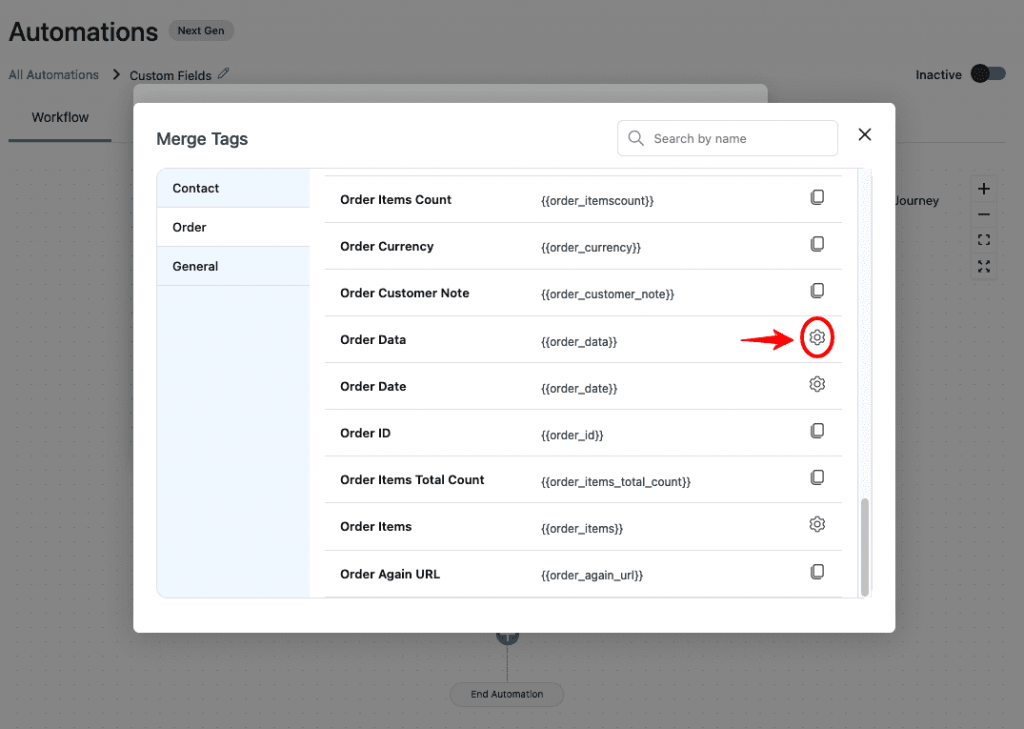
Paste the field ID you copied from your funnel’s checkout step.
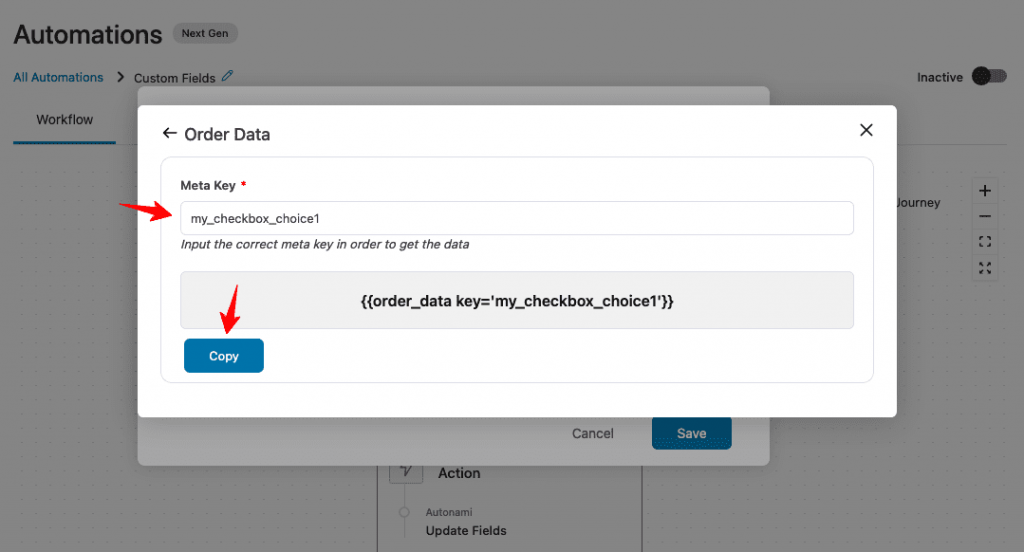
Once done, click on Copy.
Now, paste the copied meta key to your automation.
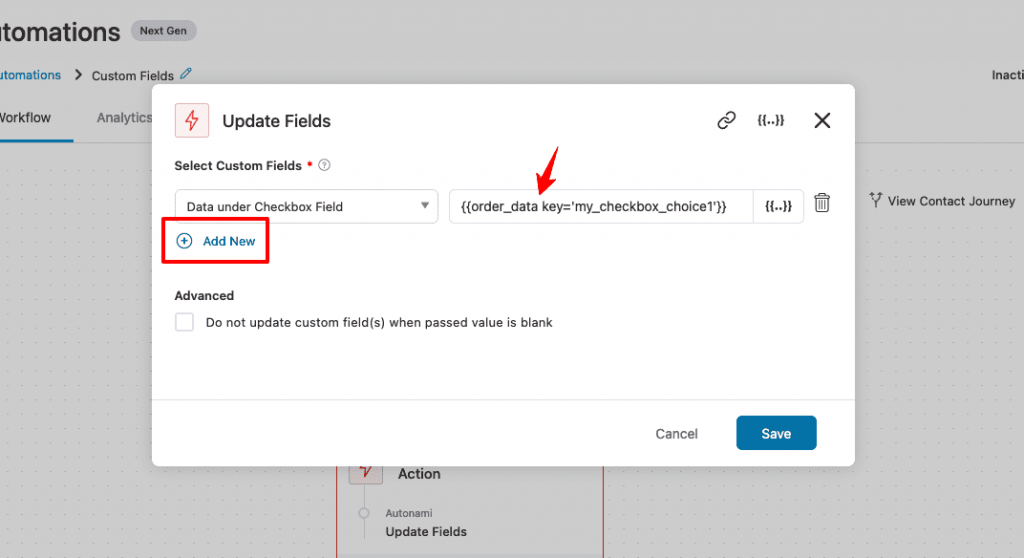
Click on Add More to enter more custom fields.
Now, enter all the fields you want to load your data to.
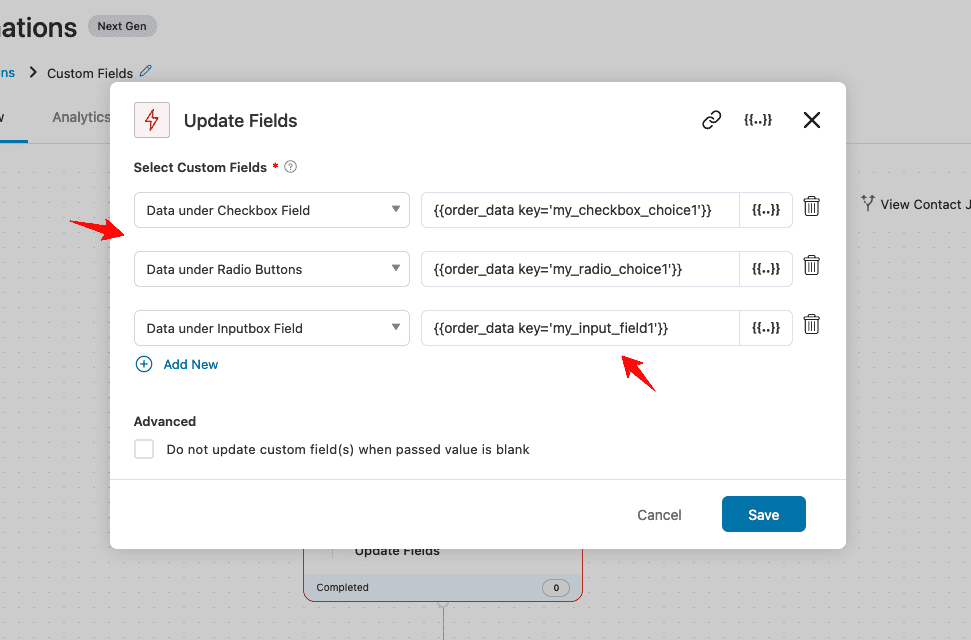
Click on Save when done.
Step 6: Make your automation live
Turn the toggle to active to make your automation go live.
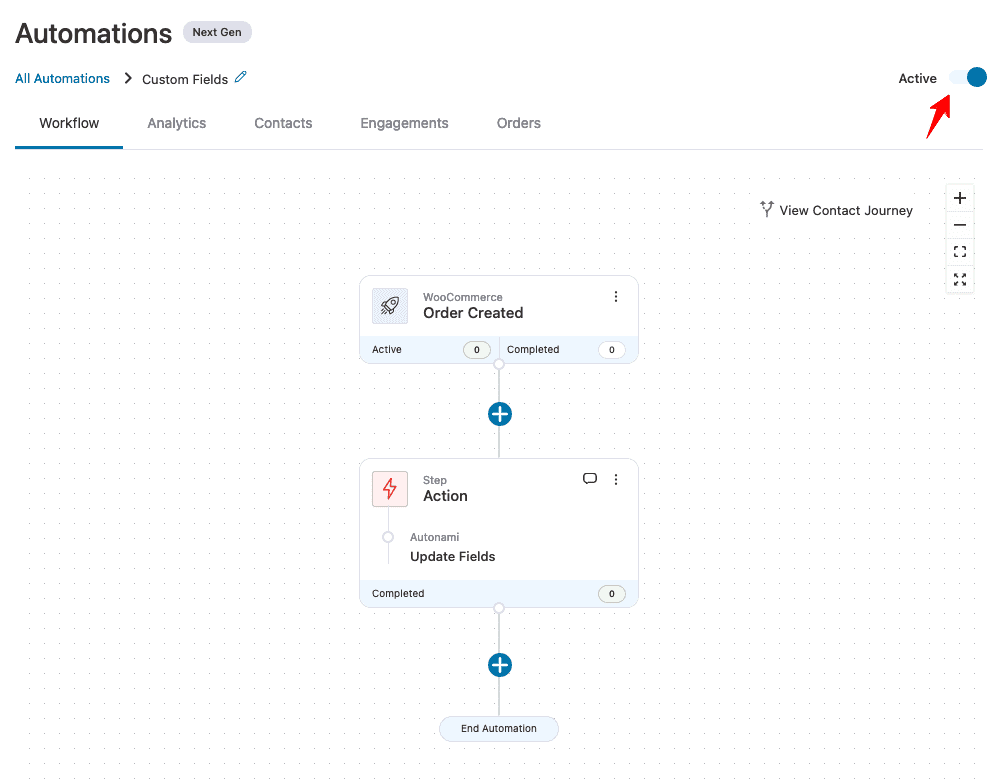
Well done! You have created the automation to save your checkout data to custom fields.
Now, whenever a user places an order by entering the values on the checkout page:
You can see the data getting populated under this contact’s profile:

This automation successfully works!


