In this section of the documentation, we'll help you set up your first automation.
If you're new to FunnelKit Automations, you'll have two options to set up your first automation:
- Create a new automation
- Import an automation
In this document, you'll learn how to create a new automation. We recommend you visit this documentation if you want to import your automation.
Follow the step-by-step instructions below.
Step 1: Add a new automation
Go to Automations and click on Create Automation.
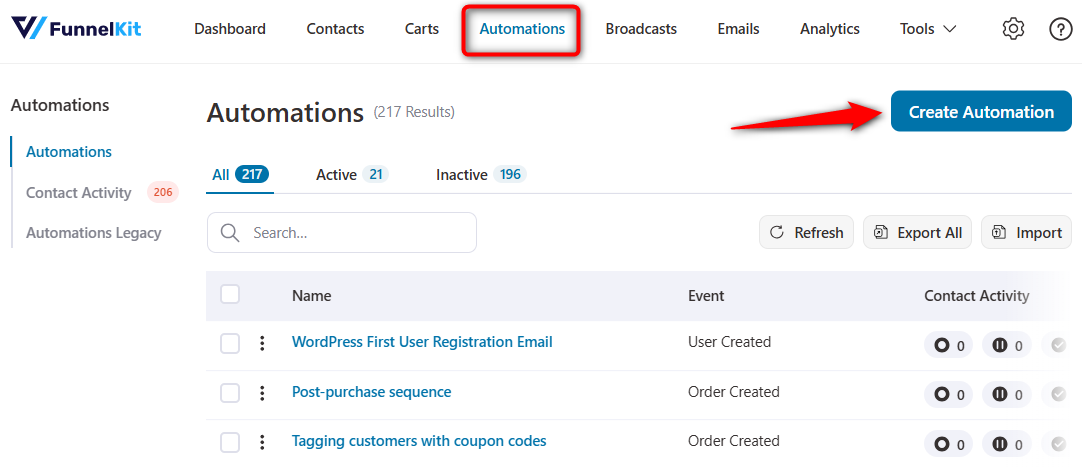
You’ll see the pre-built automation recipes that FunnelKit Automations has in its library.
Click on Start from scratch to build your automation from scratch and enter the name of your automation.
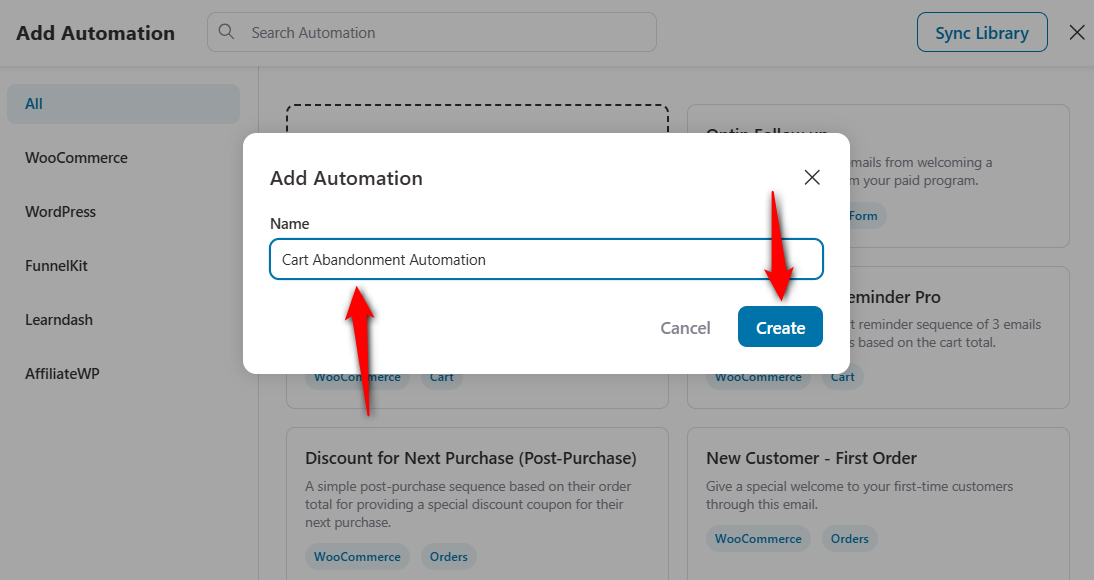
Then, click on Create.
Step 3: Assign a trigger
It'll show you the following screen.
The title you have entered will come under All Automations.
You'll be shown a Select Trigger box where you can select an event to trigger your automation.
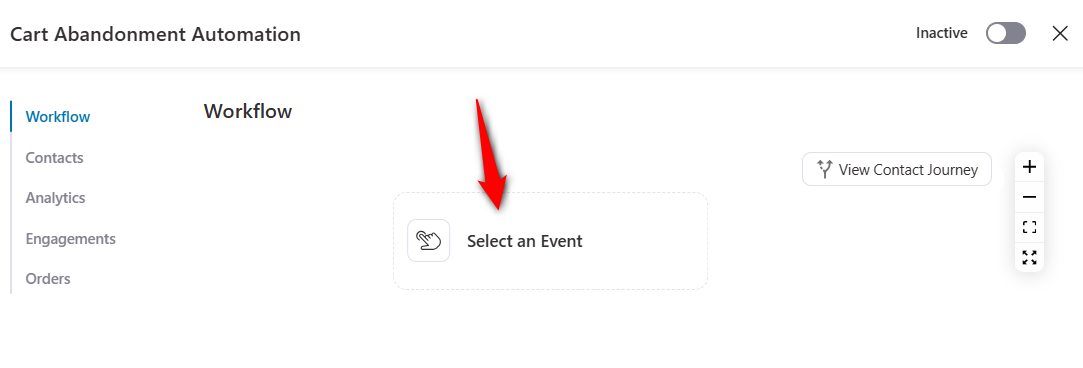
Now, select your trigger.
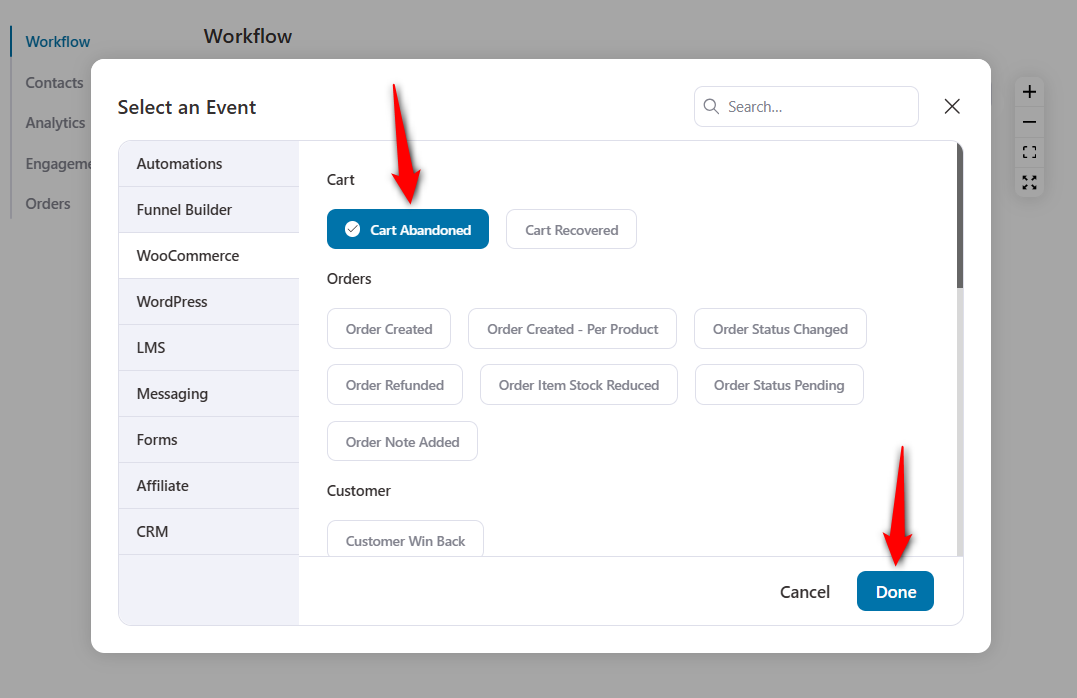
You'll get the option to select the event trigger.
Here, we are creating abandoned email automation. Therefore, we have selected "Cart Abandoned" as the event under WooCommerce.
Step 4: Add the action by clicking on the + button
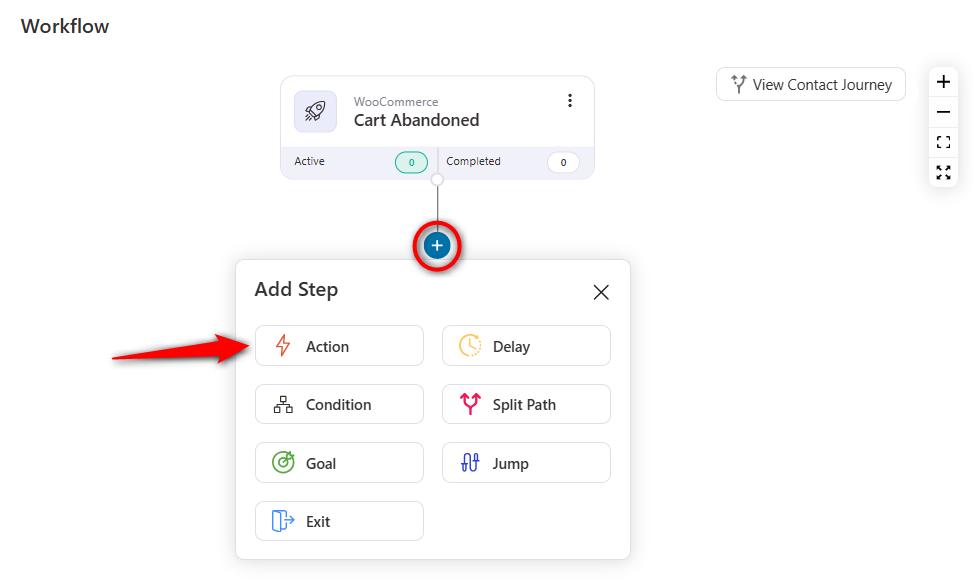
Clicking on the (+) icon will give you six nodes to choose from Action, Delay, Condition, Split Path, Goal, Jump, or Exit.
- Action - Specify a direct action to be performed when the event gets triggered
- Delay - Set a specific delay for particular actions
- Condition - Add conditional actions under if-then-else statements to your workflow
- Split Path - A/B multiple paths in an automation to analyze which path profited you the most
- Goal - Specify an end objective of your automation
- Jump - Jump to a particular node by skipping the steps on your workflow
- Exit - Directs to end the automation
Here, we will select the Action.
A pop-up window will appear where you have to assign an action.
Here we have selected "Send Email" as the action.
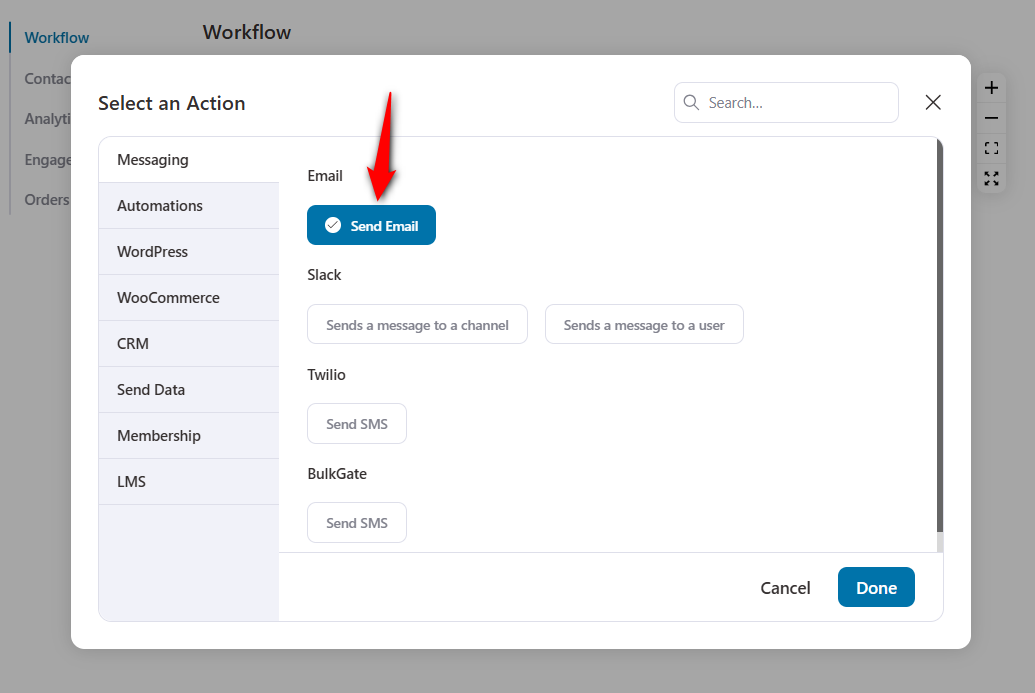
Click on Done.
Step 5: Compose your email
You can design your email with the enhanced visual builder, rich text editor, raw HTML editor, and previous-gen email builder.
Let's create a simple email for now.
Go through different options such as Template, To, Subject line, Body content, send a test email, add UTM parameters, etc. and fill out the respective information.
By default, it’ll add your prospect’s email address while live capturing the data on the checkout page.
You can even use merge tags to personalize the email copy by adding your prospect's first name, email, cart recovery email, and more to the content.
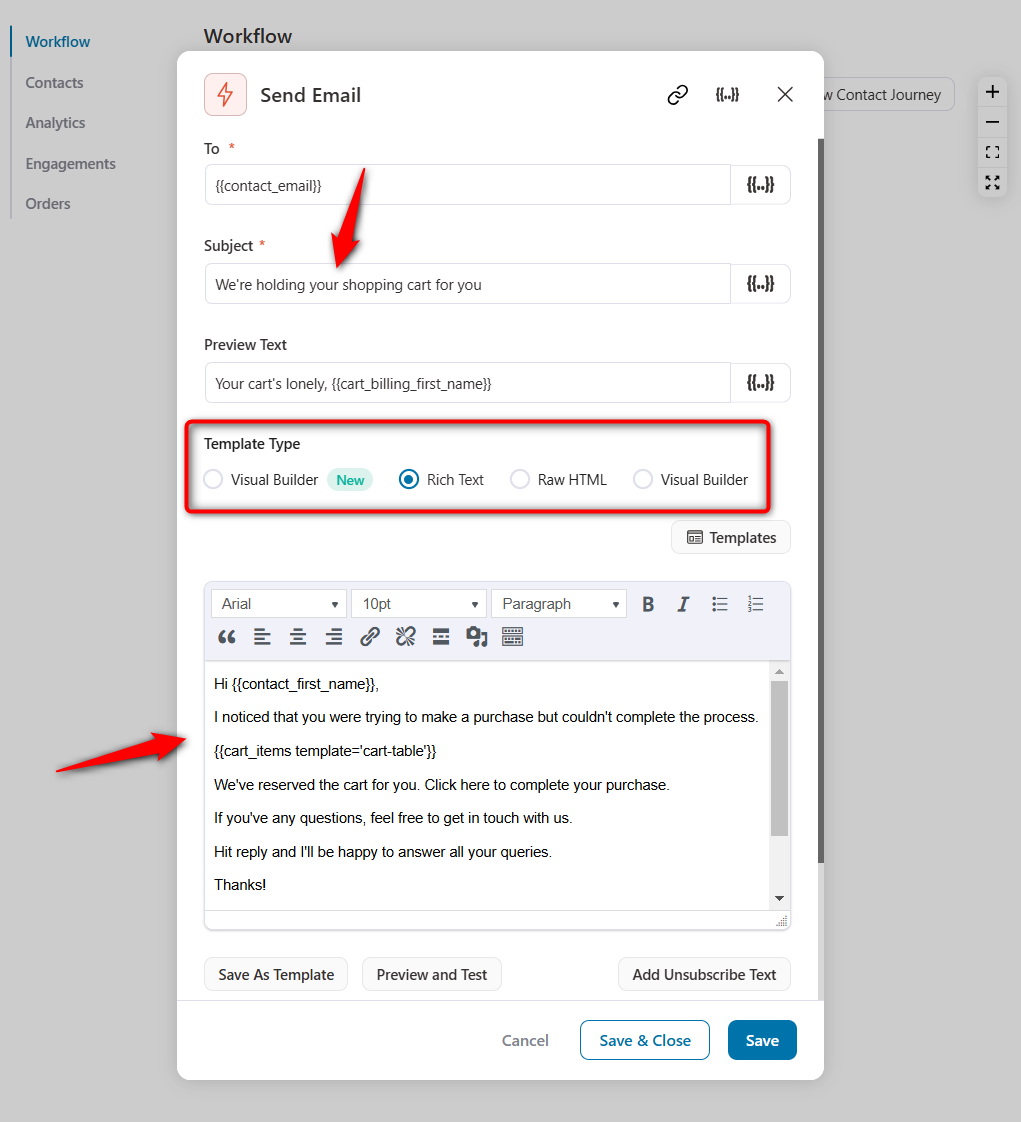
Once you've completed editing your email, click on the Save & Close option.
Step 6: Turn the automation active
You have to switch it to Active with a simple tap on this toggle.
This toggle button will activate your automation in FunnelKit Automations. So if your user abandons their cart, they’ll receive a Cart Abandoned Automation email from you.
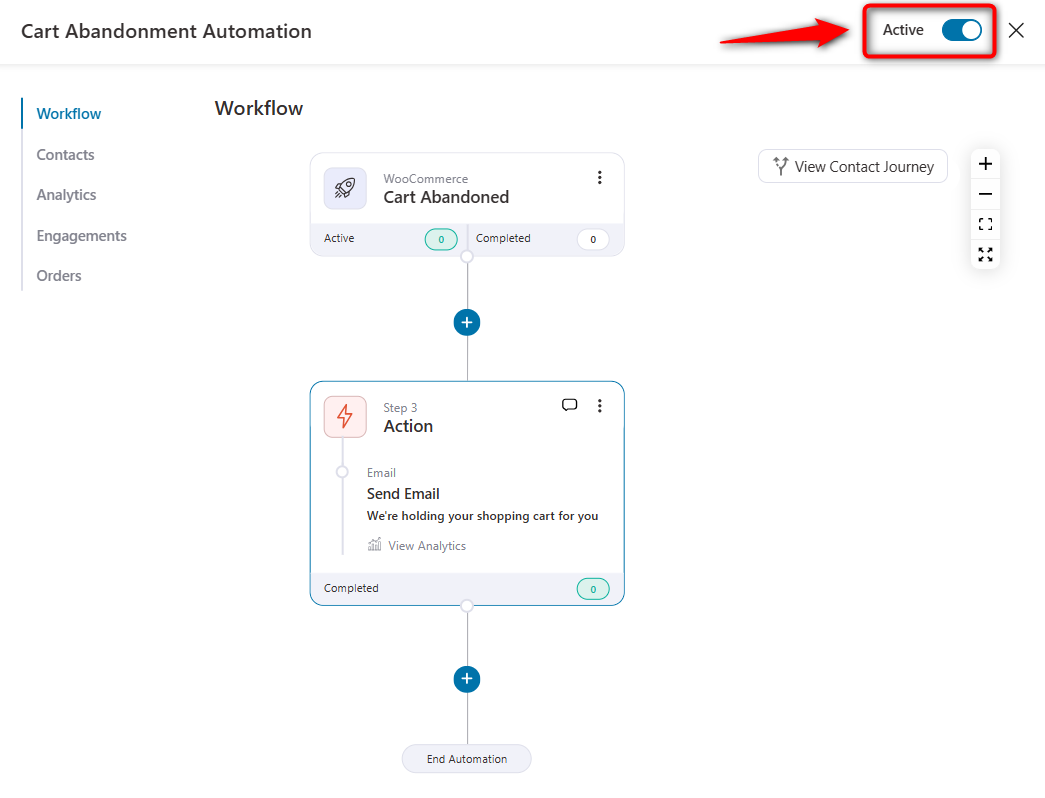
If you want to add more actions, you can repeat the above steps and choose appropriate actions to make effective automation.
That's it! You have now set up your first automation.


