Here’s how you can set up automations in FunnelKit Automations and perform specific actions within your Keap account.
You’ll see the following actions once you’ve connected Keap to FunnelKit Automations.
- Create contact
- Add tags
- Remove tags from a contact
- Update contact fields
Learn how to connect Keap to FunnelKit Automations here
Creating an Automation
Let’s create an automation that will create a contact when your customer places an order.
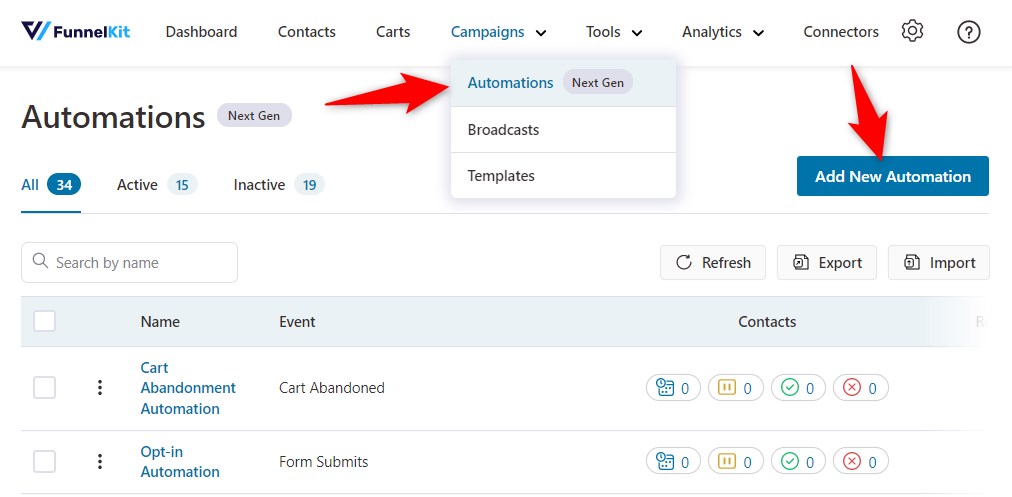
Step 1: Create a new automation
Go to Automations (Next Gen) and then click on Add New Automation.
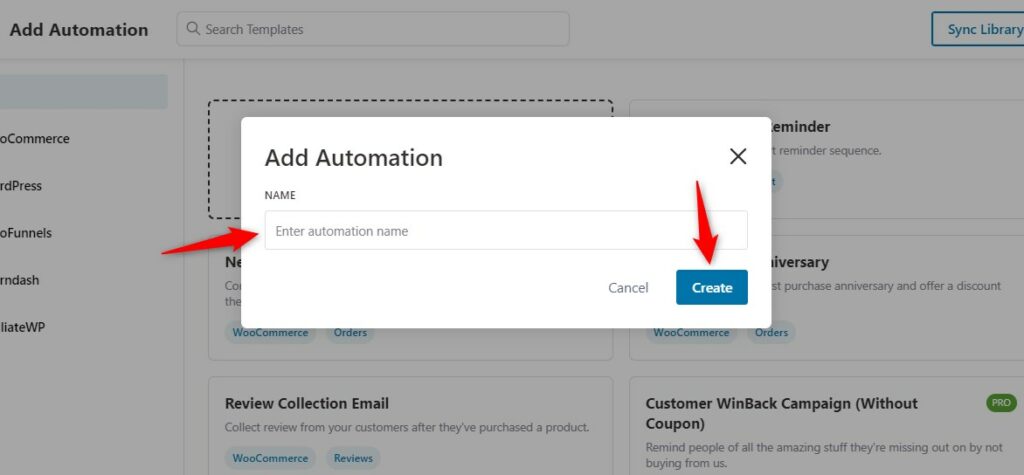
Hit Start from scratch and name your automation.
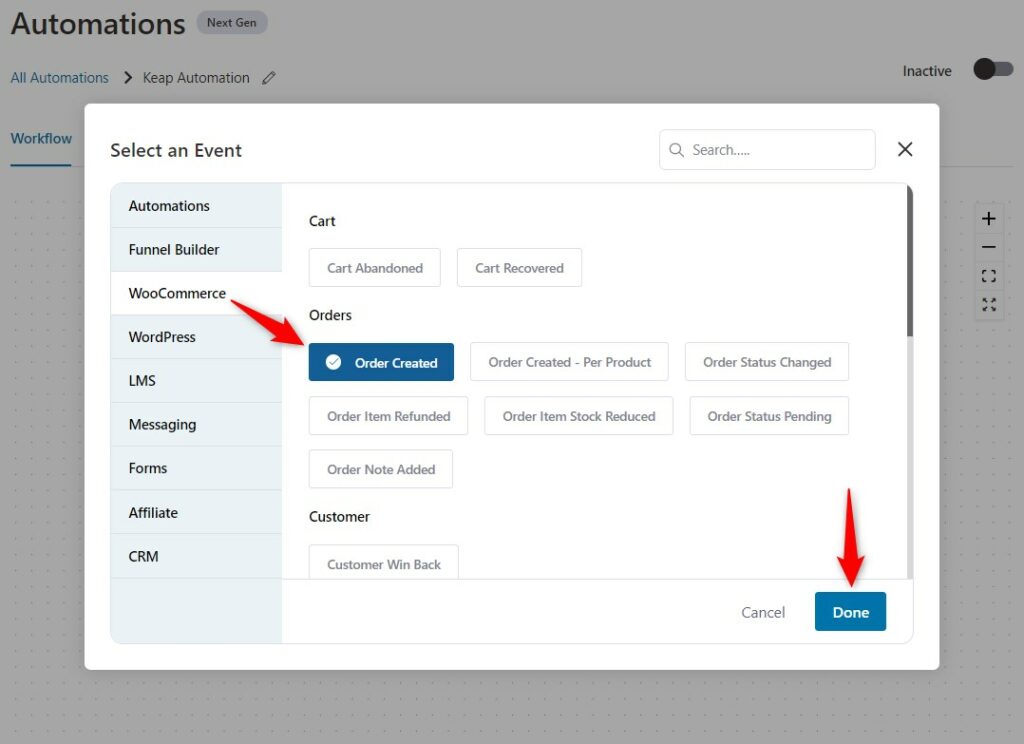
Step 2: Select a trigger
Here, we will create the trigger called WooCommerce order created.
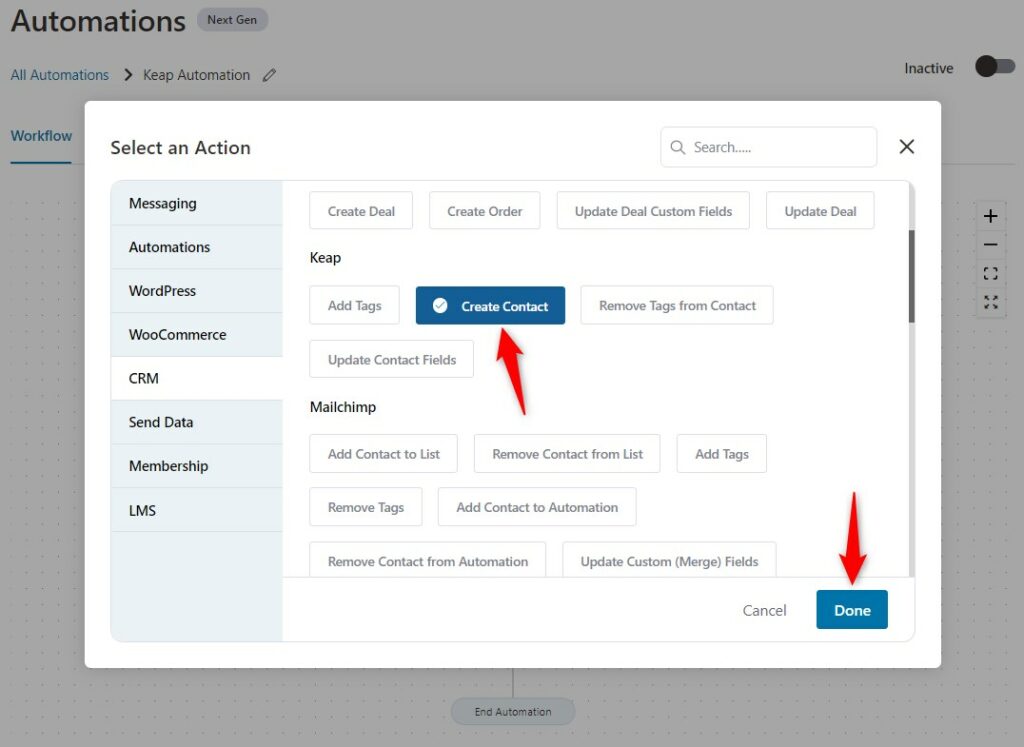
Step 3: Set an action
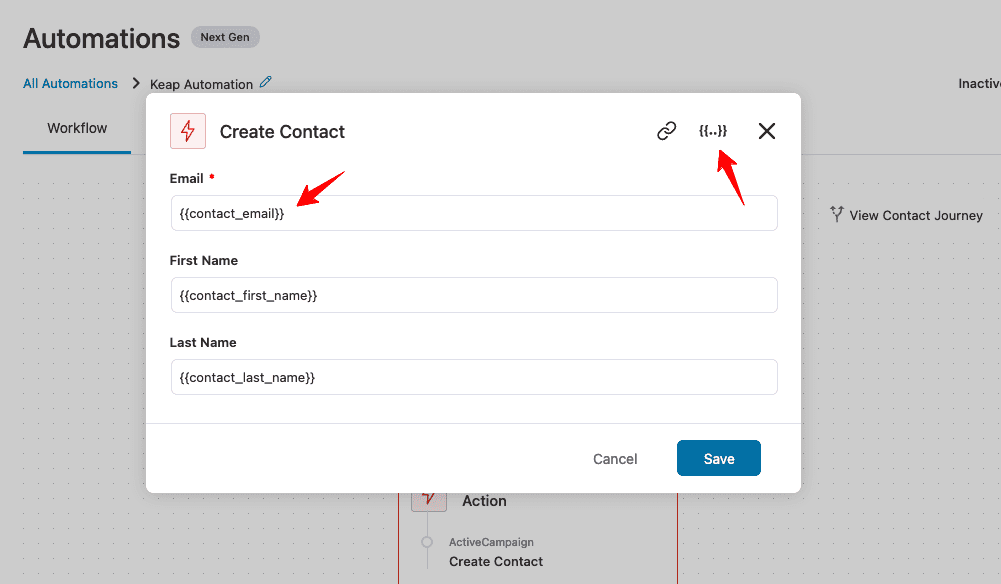
Now, add the action “Create contact” under Keap.
Step 4: Set the merge tags to be added
Now, add the merge tags of your customer’s email. This will create a contact using their email address.
Click on the workflow to automatically save the automation.
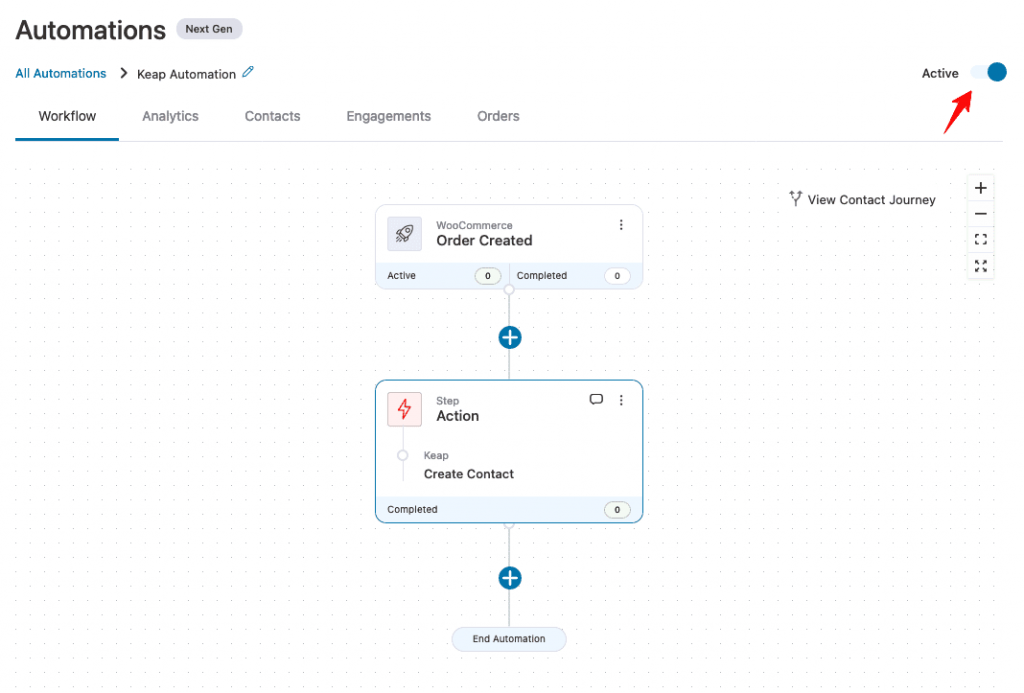
Now, when your customer places an order, it will create contact into your Keap account. You can go to your Keap account and check the details of your created contact.
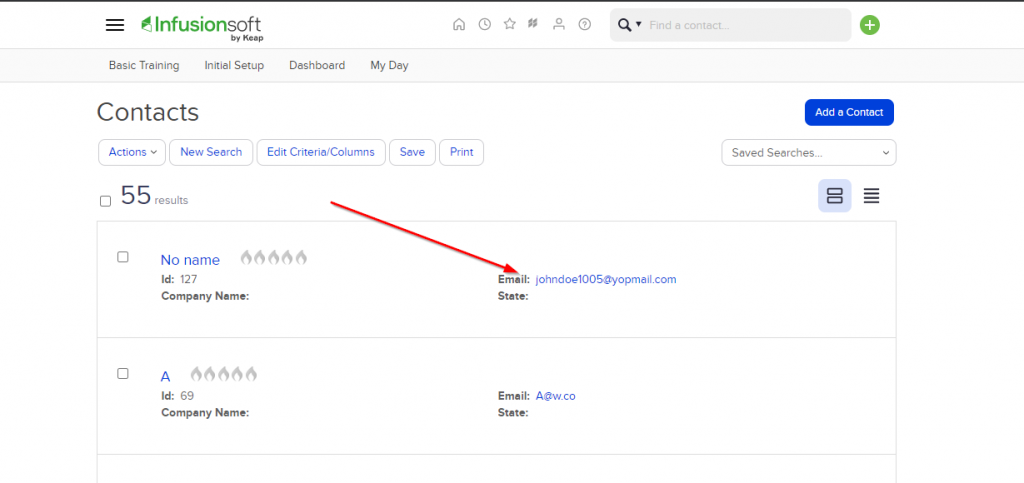
See, that’s done!


