Follow the steps below to set up bounce handlers in Amazon SES:
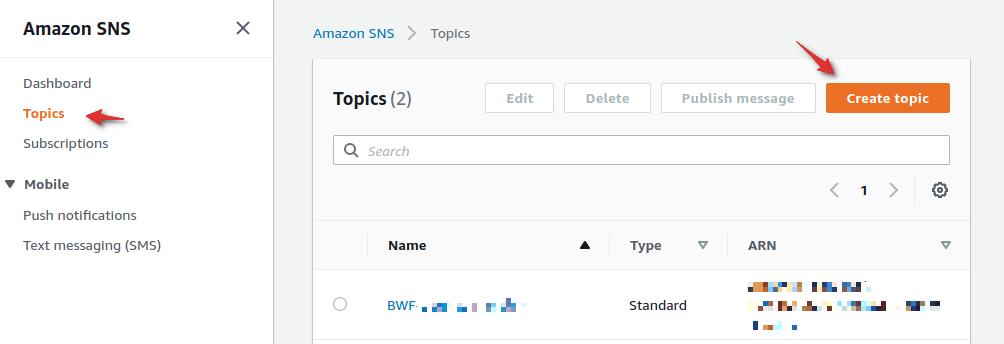
Step 1: Log in to Amazon SNS Console
Go to Amazon SNS Console and log in to your AWS account.
Step 2: Create a topic
Go to Topics and click on the Create Topic button.
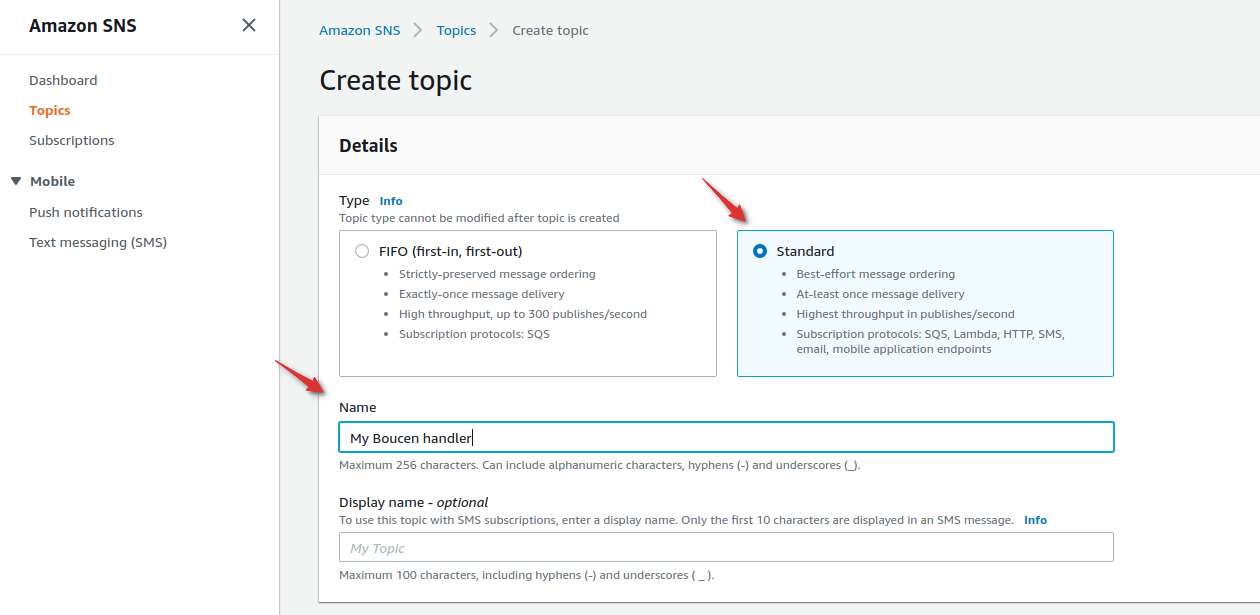
Step 3: Name your topic
Select the topic type as Standard. Now, enter a name for your topic.
Here, we have named our topic "My Bounce Handler".
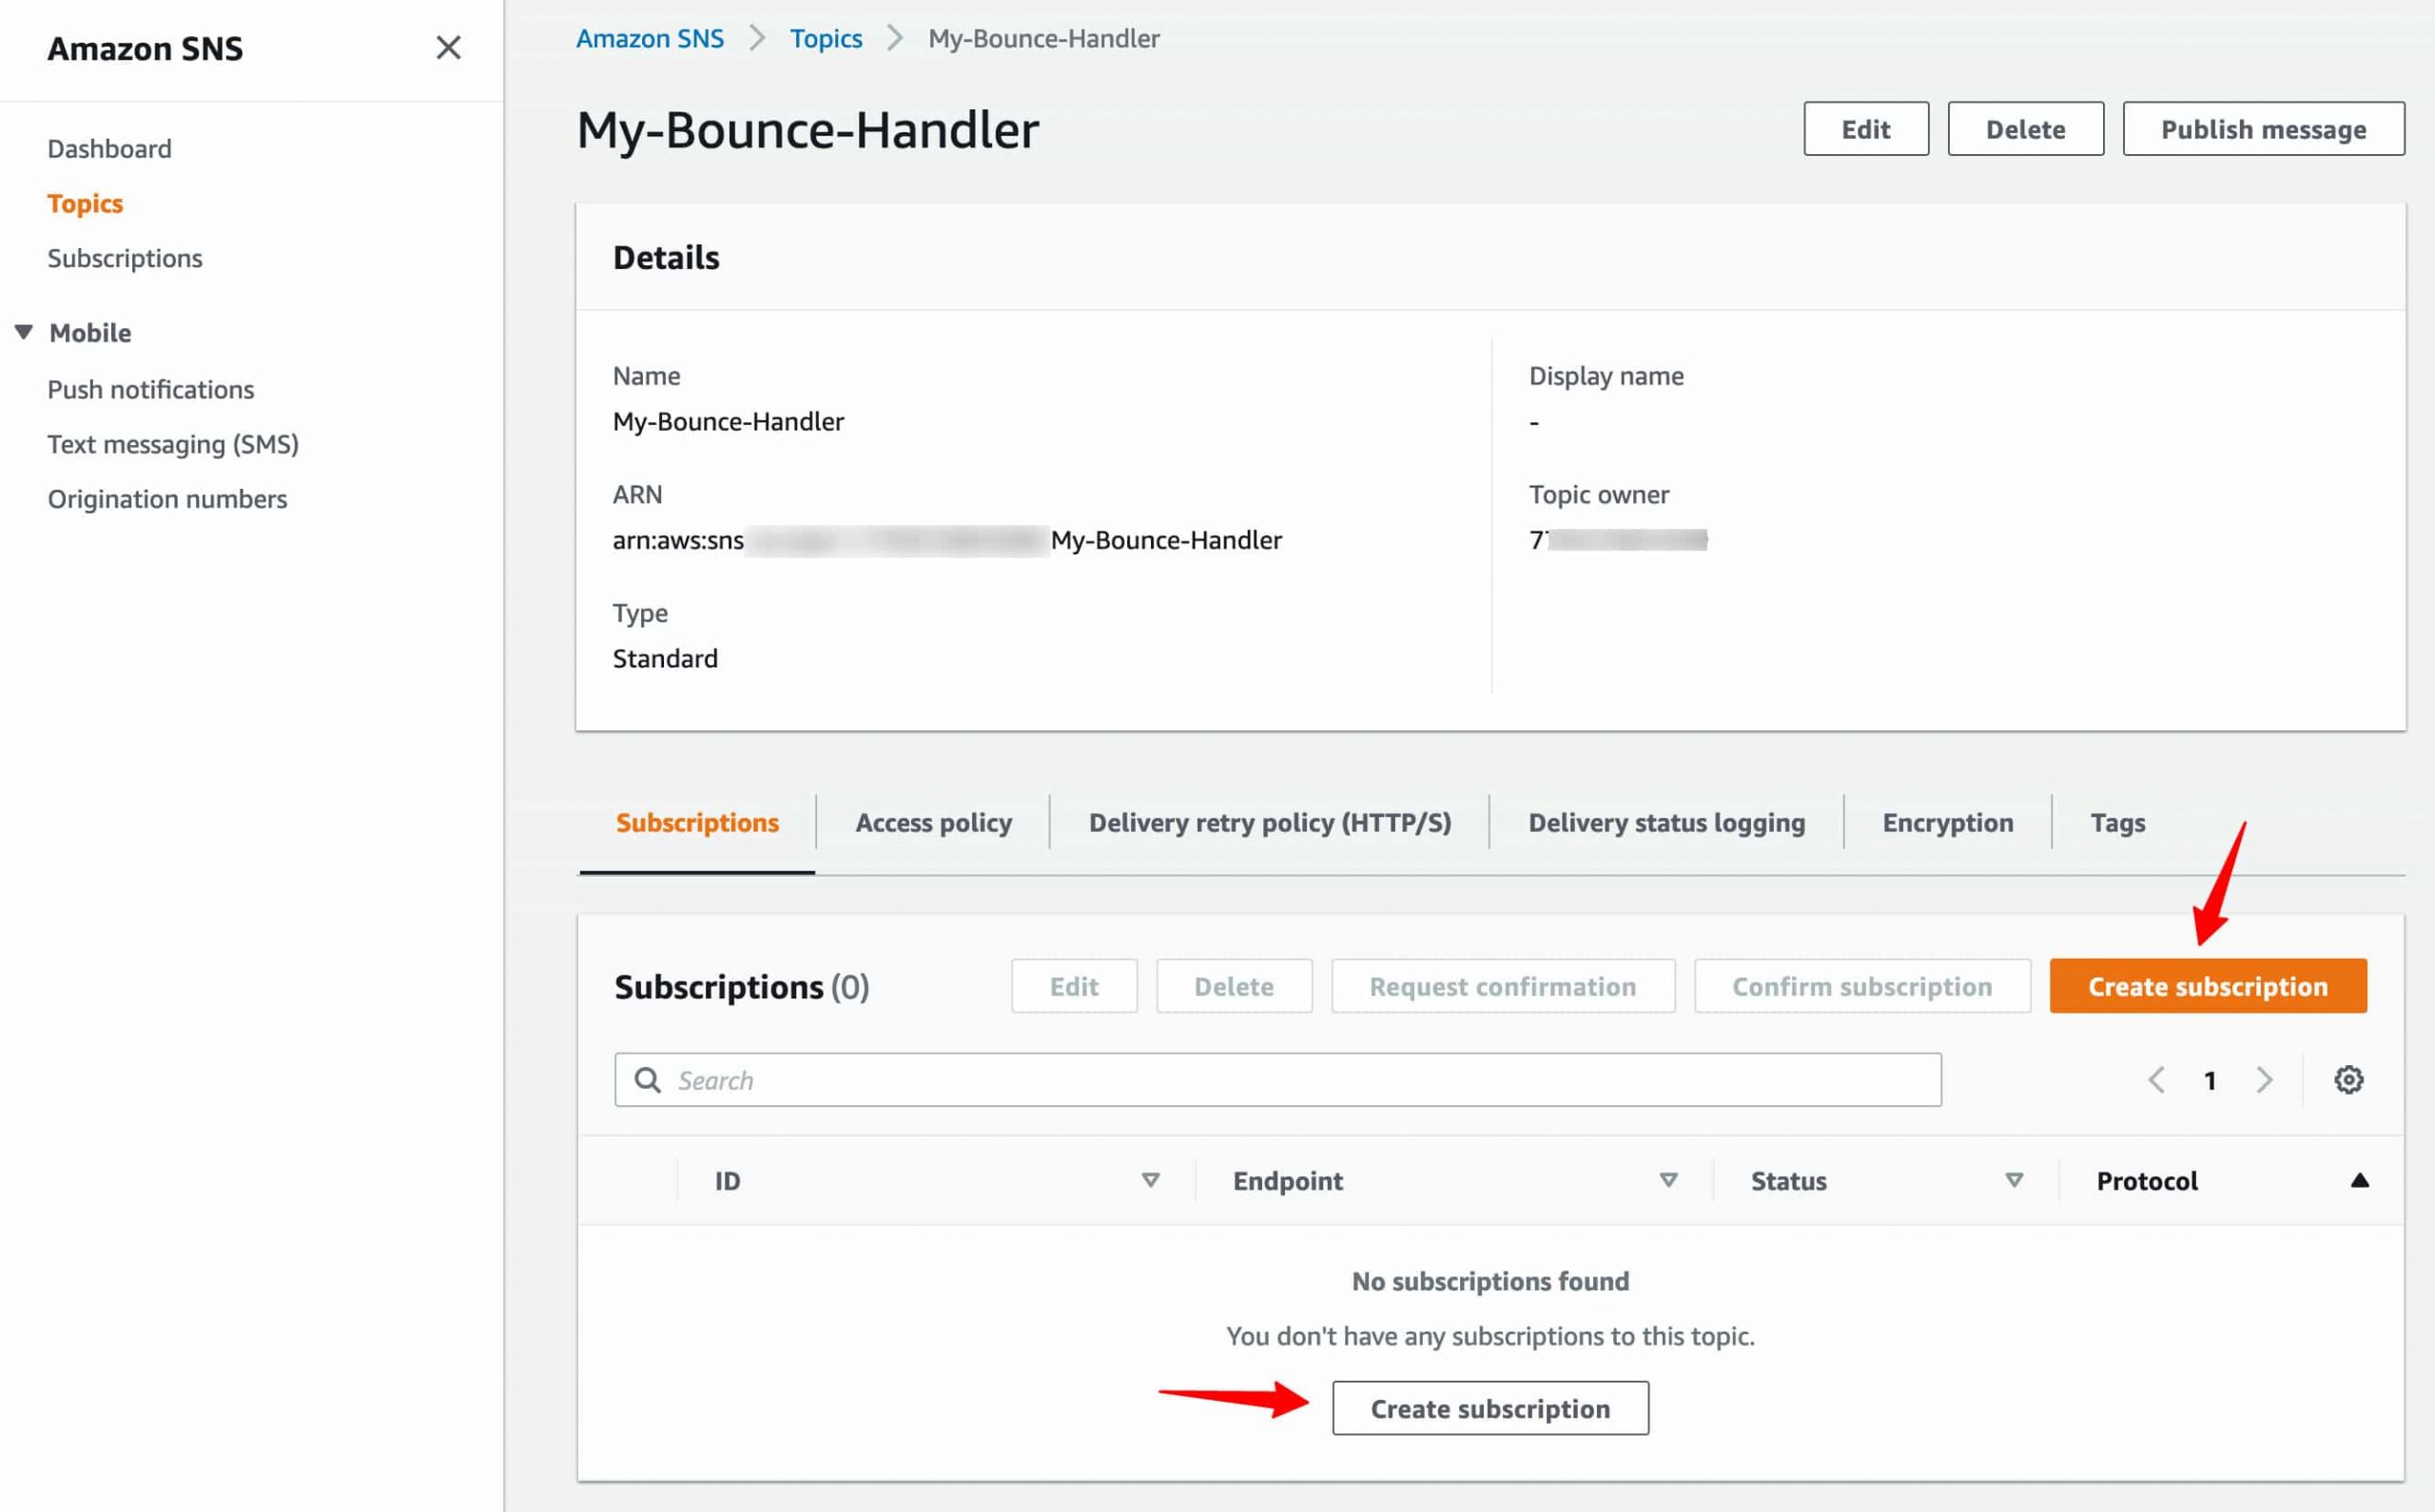
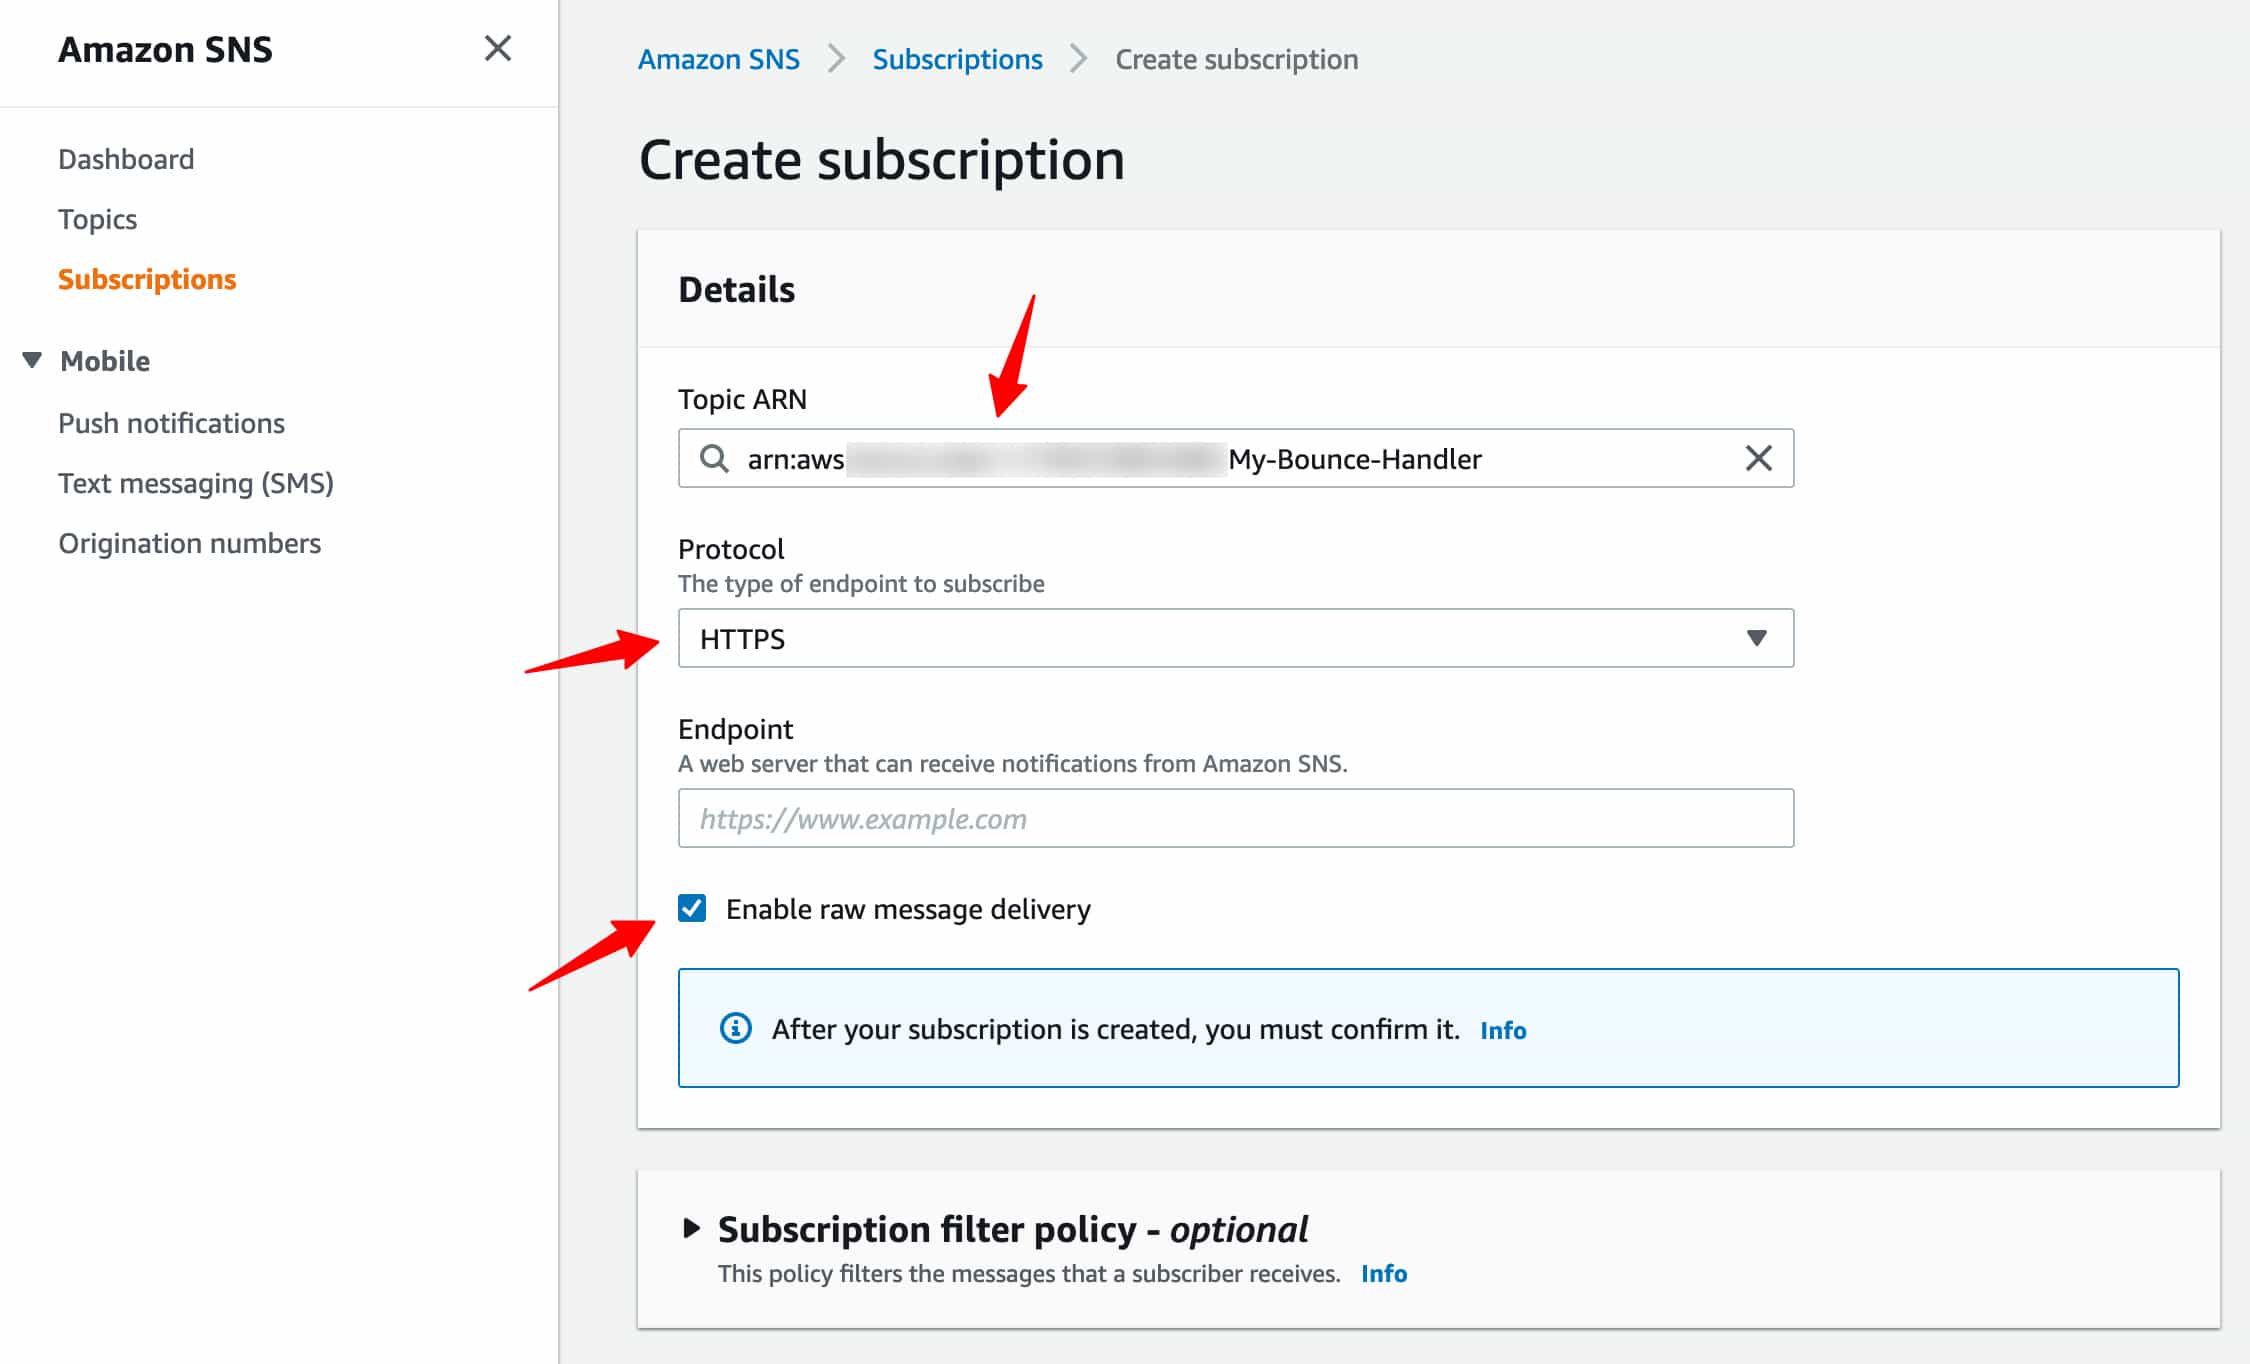
Step 4: Create a new subscription
You'll now get directed to a detailed view of your topic.
From here, click on the Create subscription button.
Choose the HTTPS protocol and check the option to enable raw message delivery.
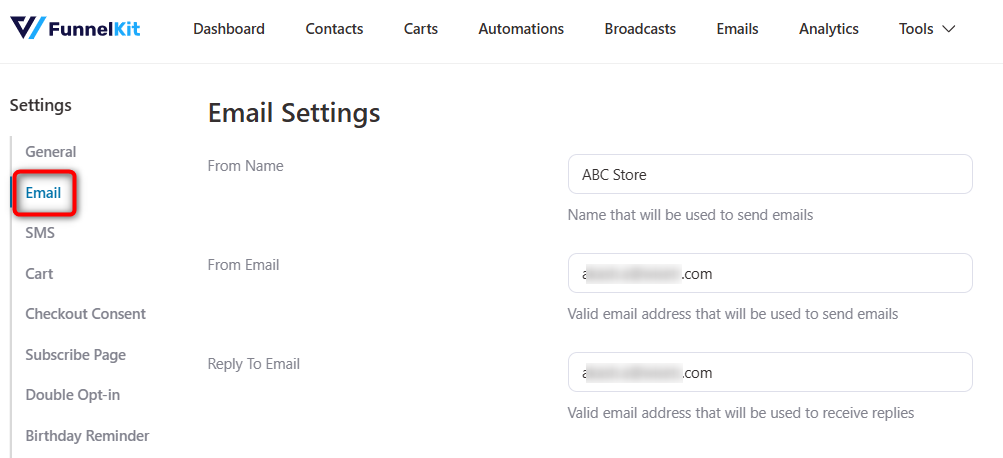
Step 5: Go to FunnelKit Automations ⇨ Settings ⇨ Email
Open FunnelKit Automations and click on Settings.
Now, go to the Email section.
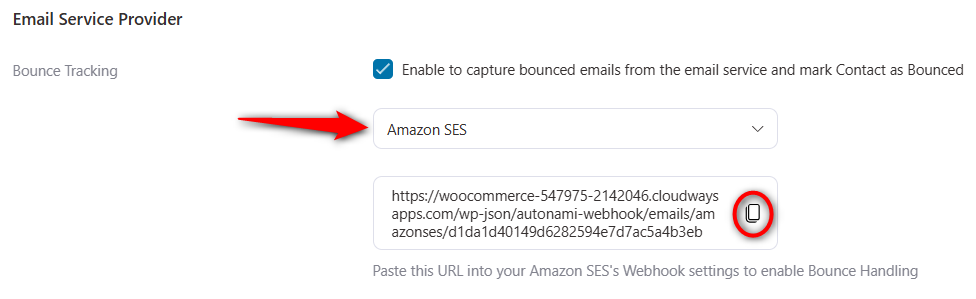
Step 6: Enable the bounce tracking settings
Scroll down and check the box under “Enable to capture bounced emails from the email service and mark Contact as Bounced”.
Select “Amazon SES” and copy the webhook URL.
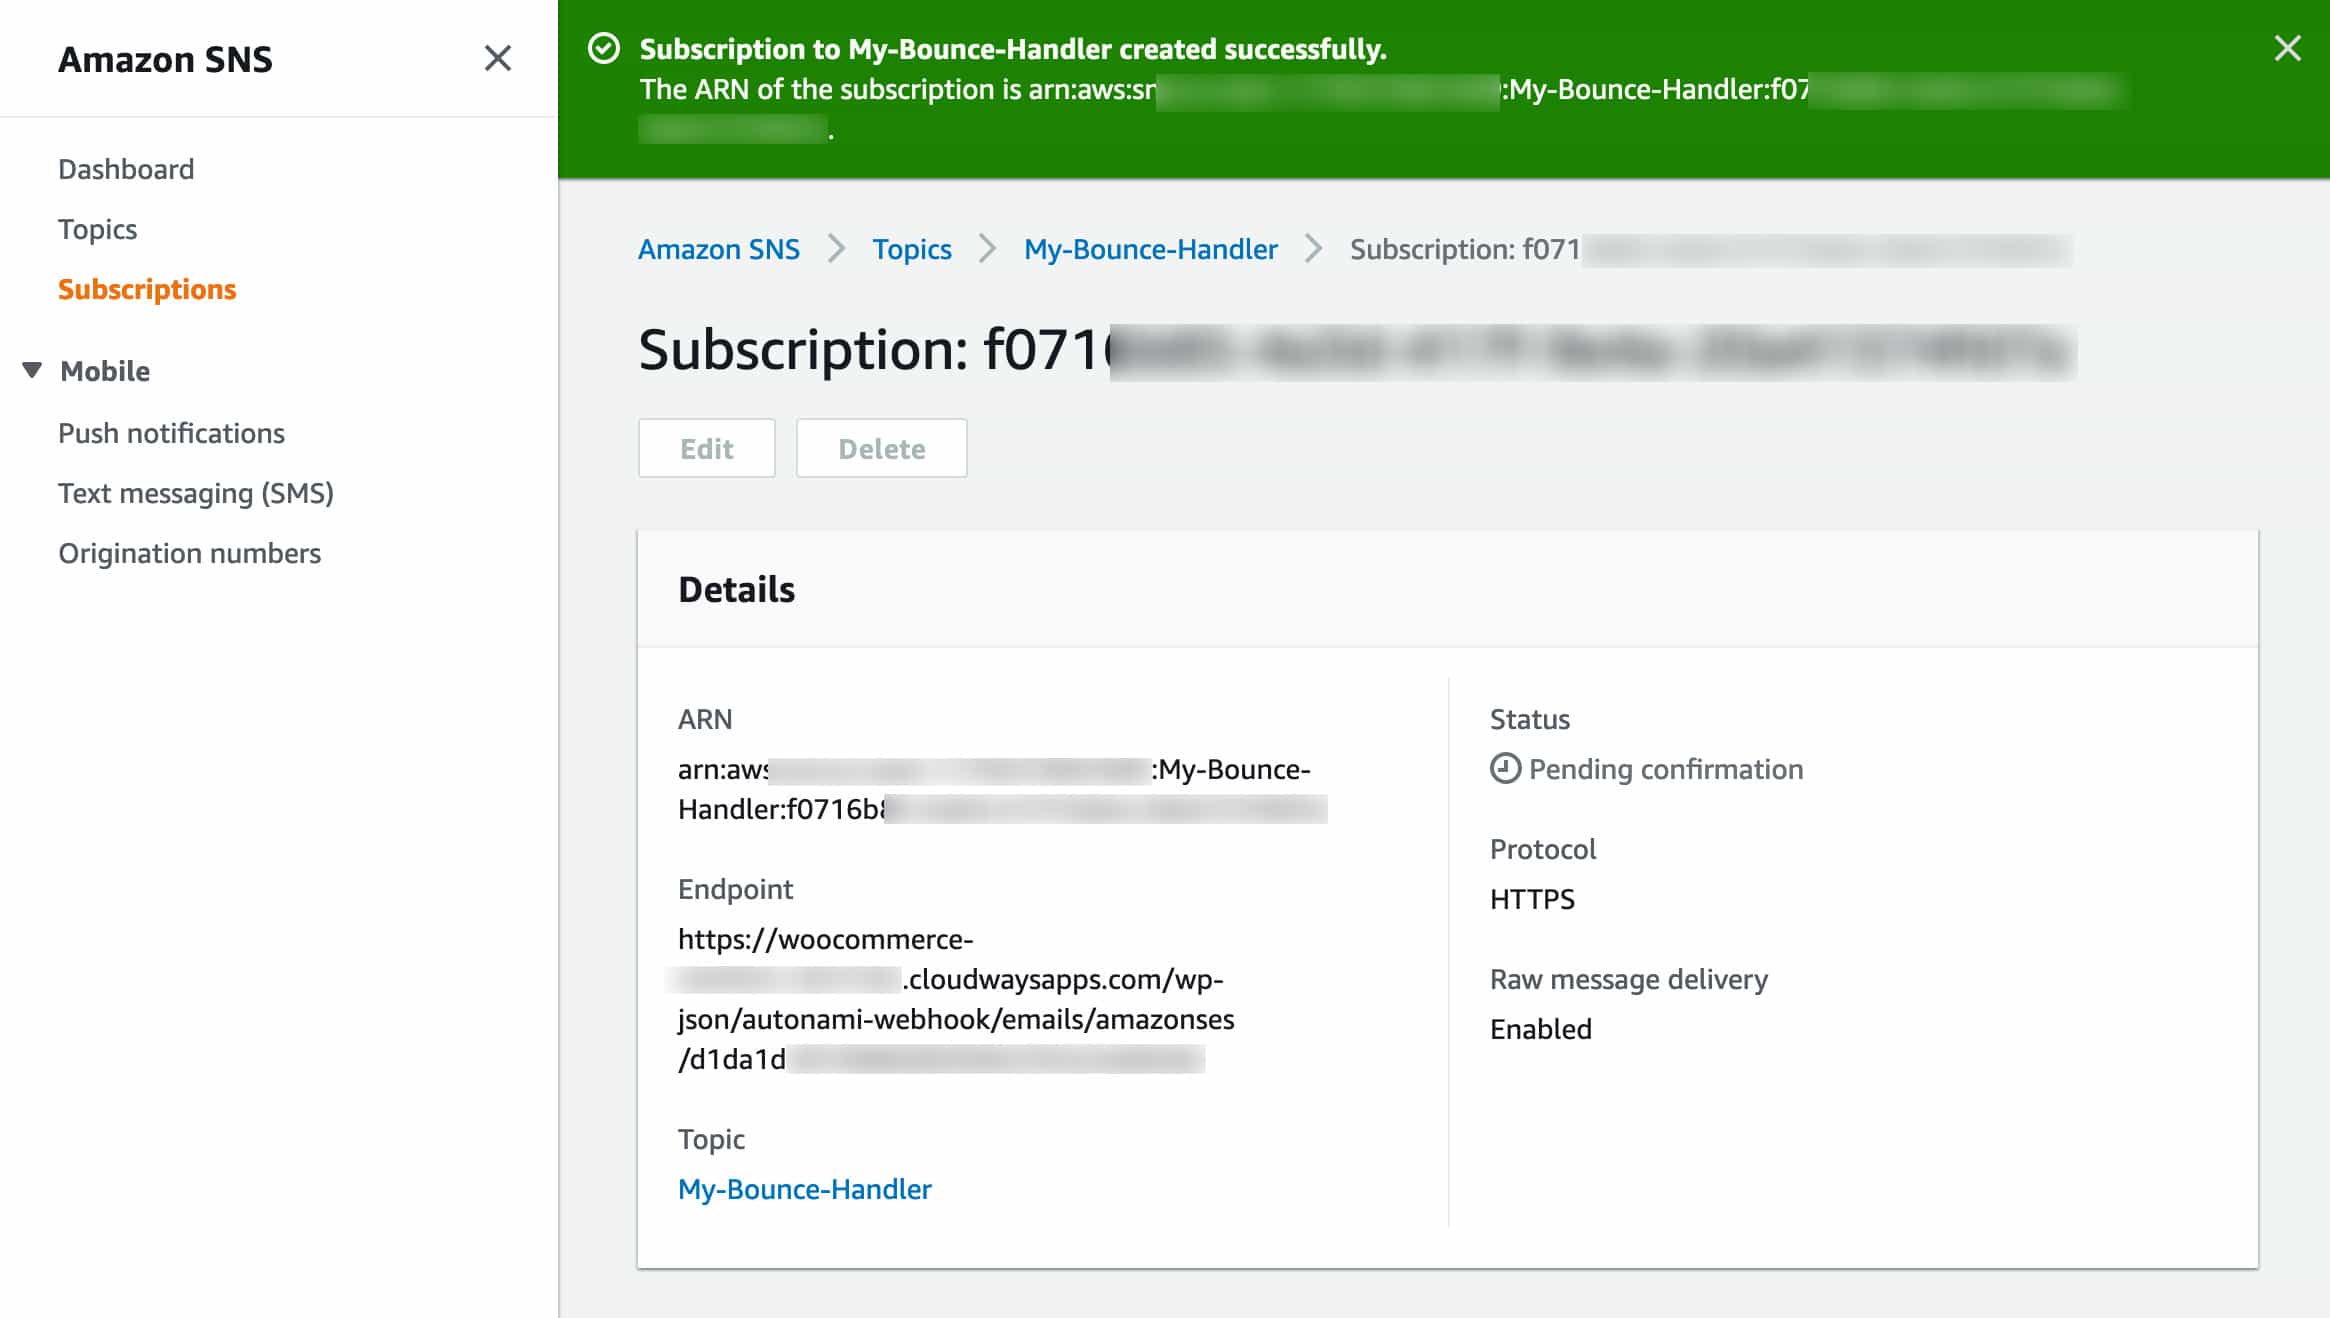
Step 7: Configure your Amazon SNS subscription
Choose protocol ‘HTTPS’ and paste the FunnelKit Automations webhook URL.
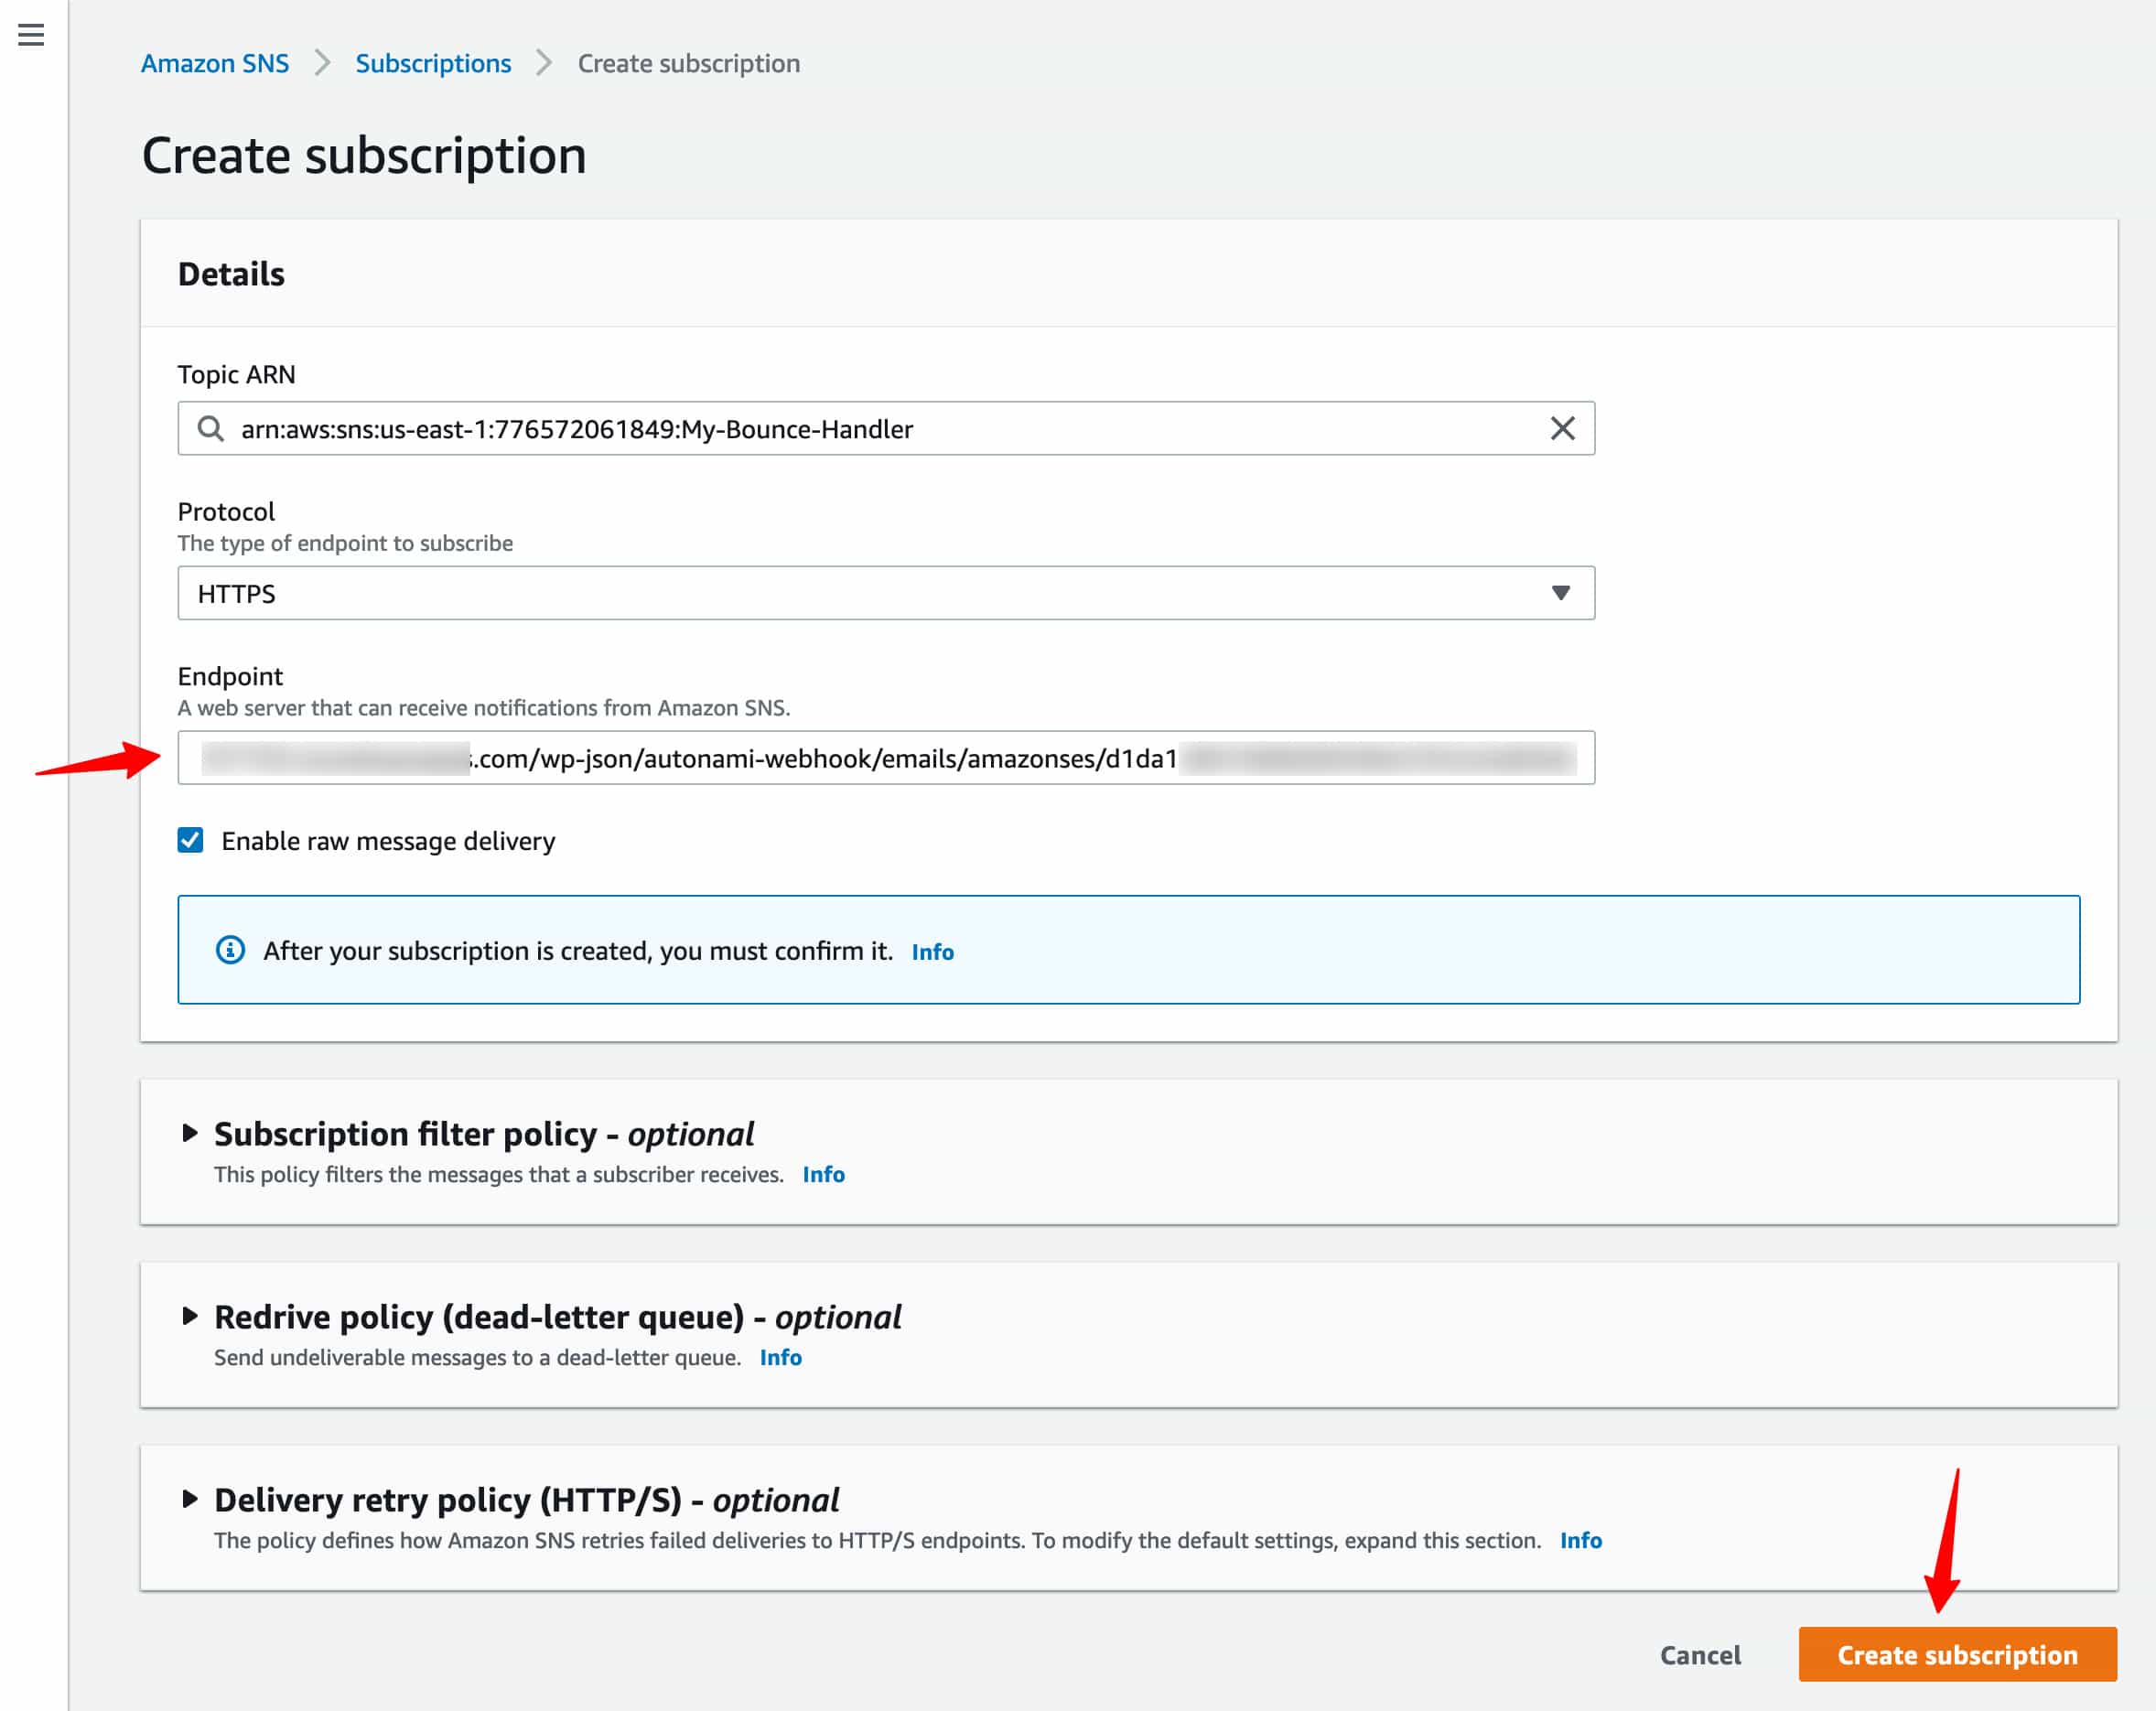
Once done, click on Create subscription.
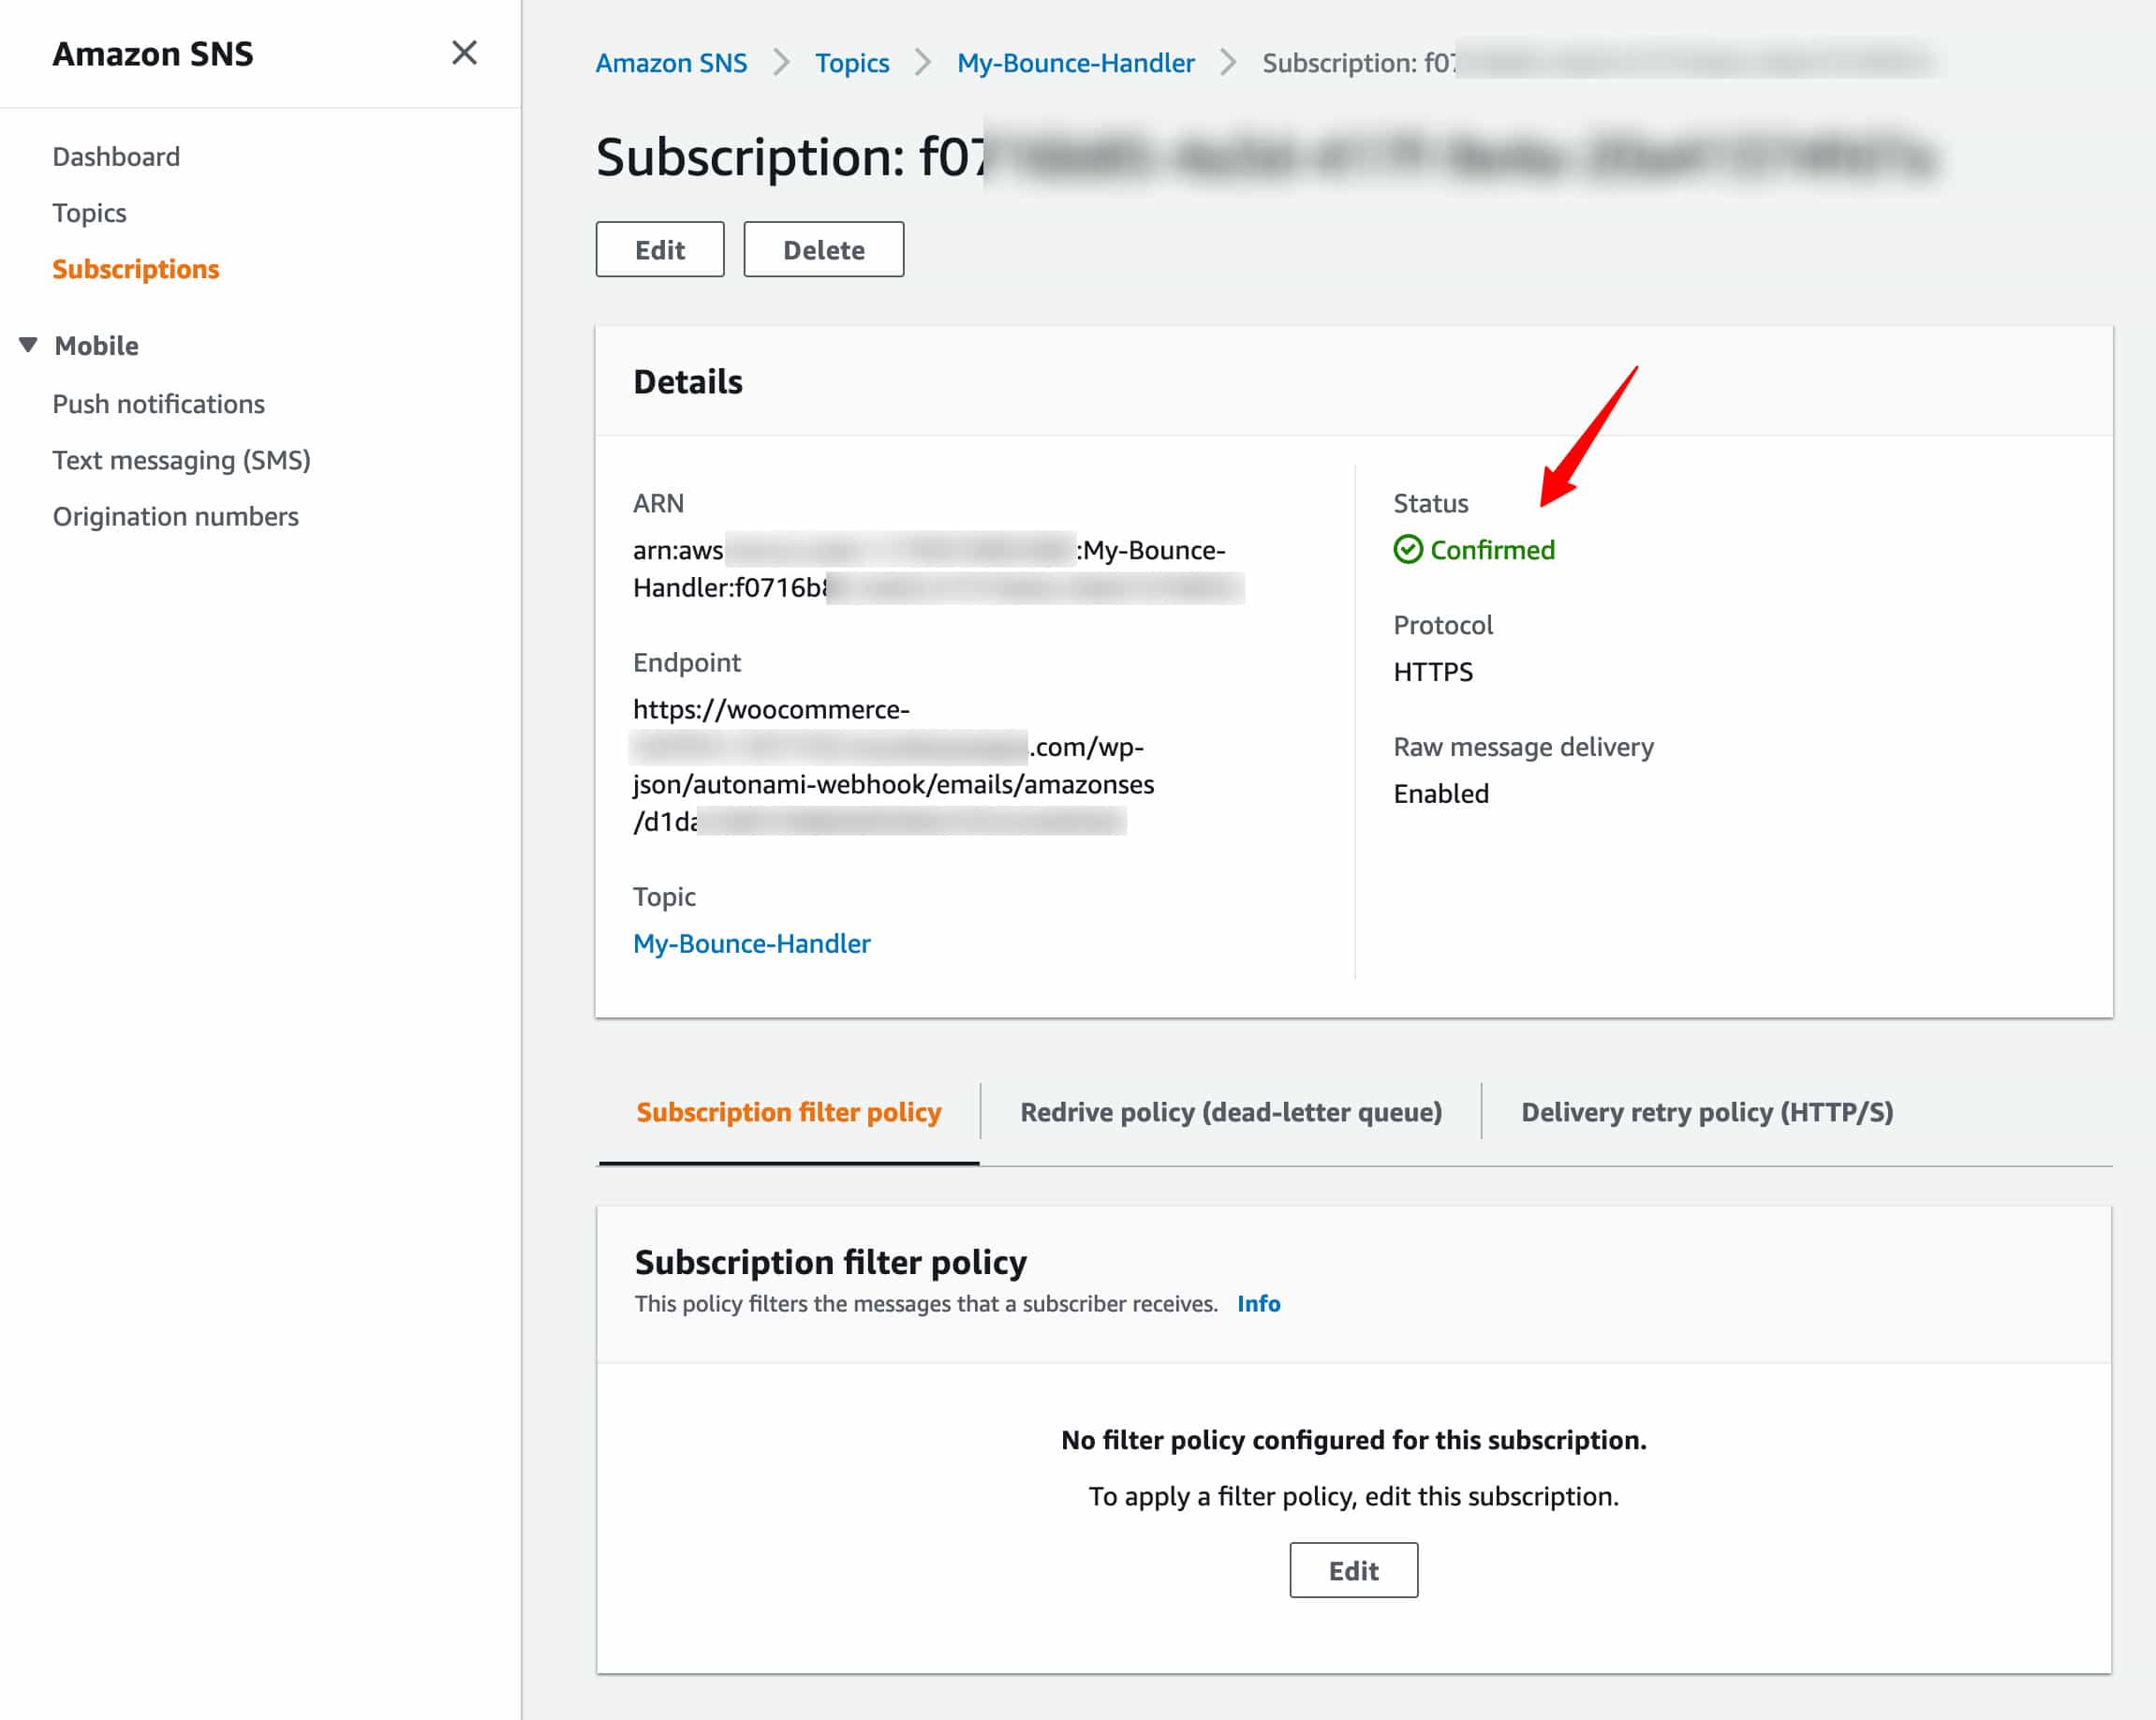
After your subscription is successfully created, you’ll be redirected to the subscription detail page.
Refresh the page after a couple of minutes, and it’ll update the status as Confirmed.
Step 8: Configure the Settings on the Amazon SES Console
Navigate to Verified Identities from your Amazon SES dashboard.
Here, you'll be able to see all the domains and email addresses that have been verified from your ownership.
🔔 Quick Note: If you are looking to set up notifications at the Domain Level, then you don't have to add individual email addresses.
If you already have the domain set up with bounce notifications, the individual email addresses will override the domain settings.
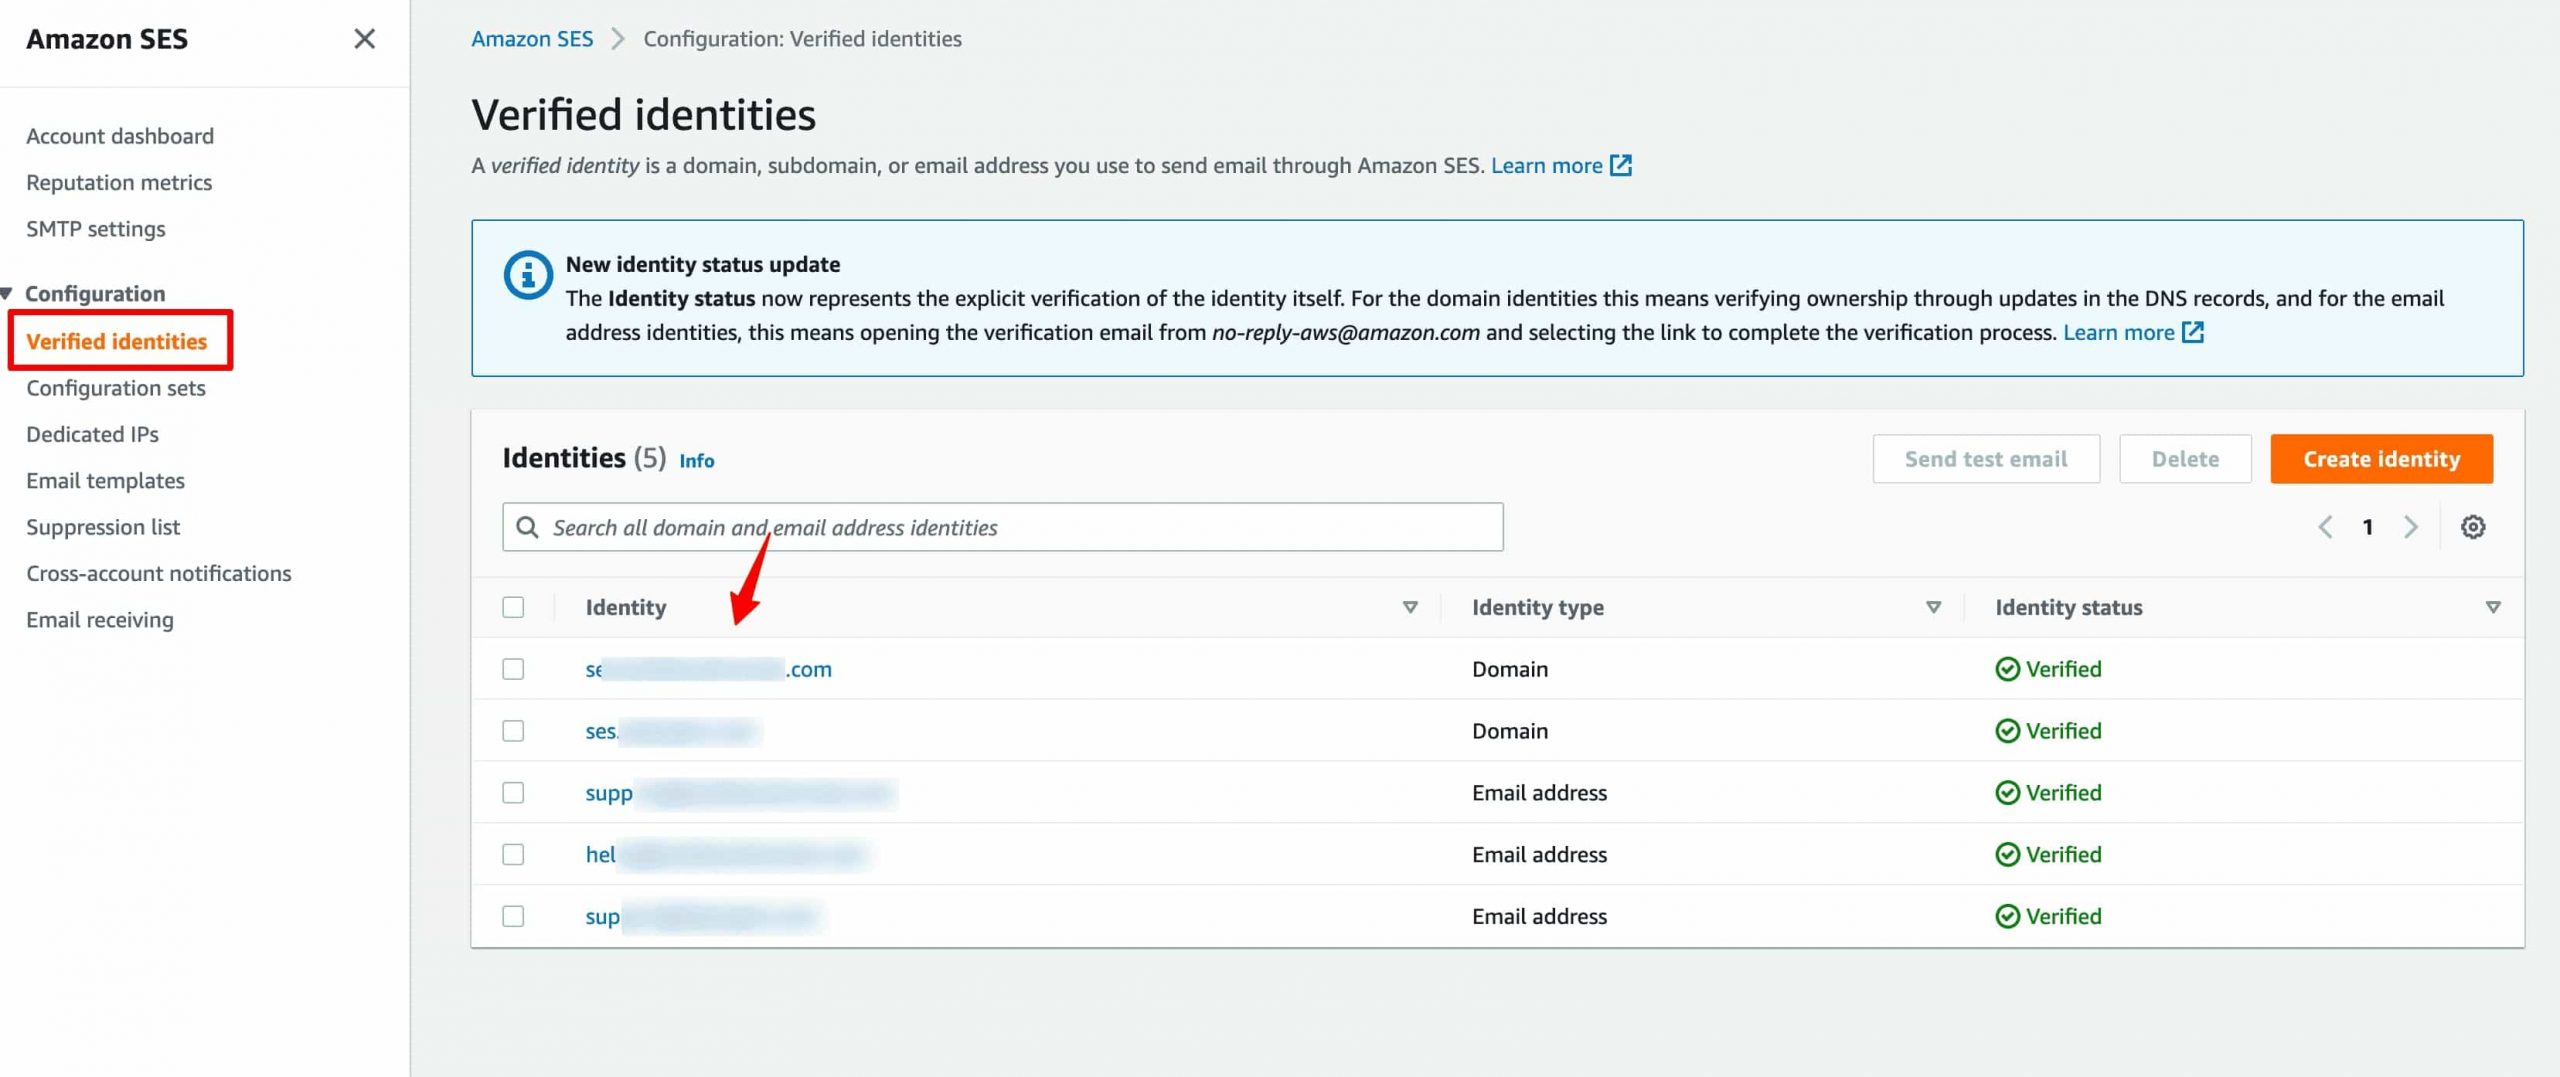
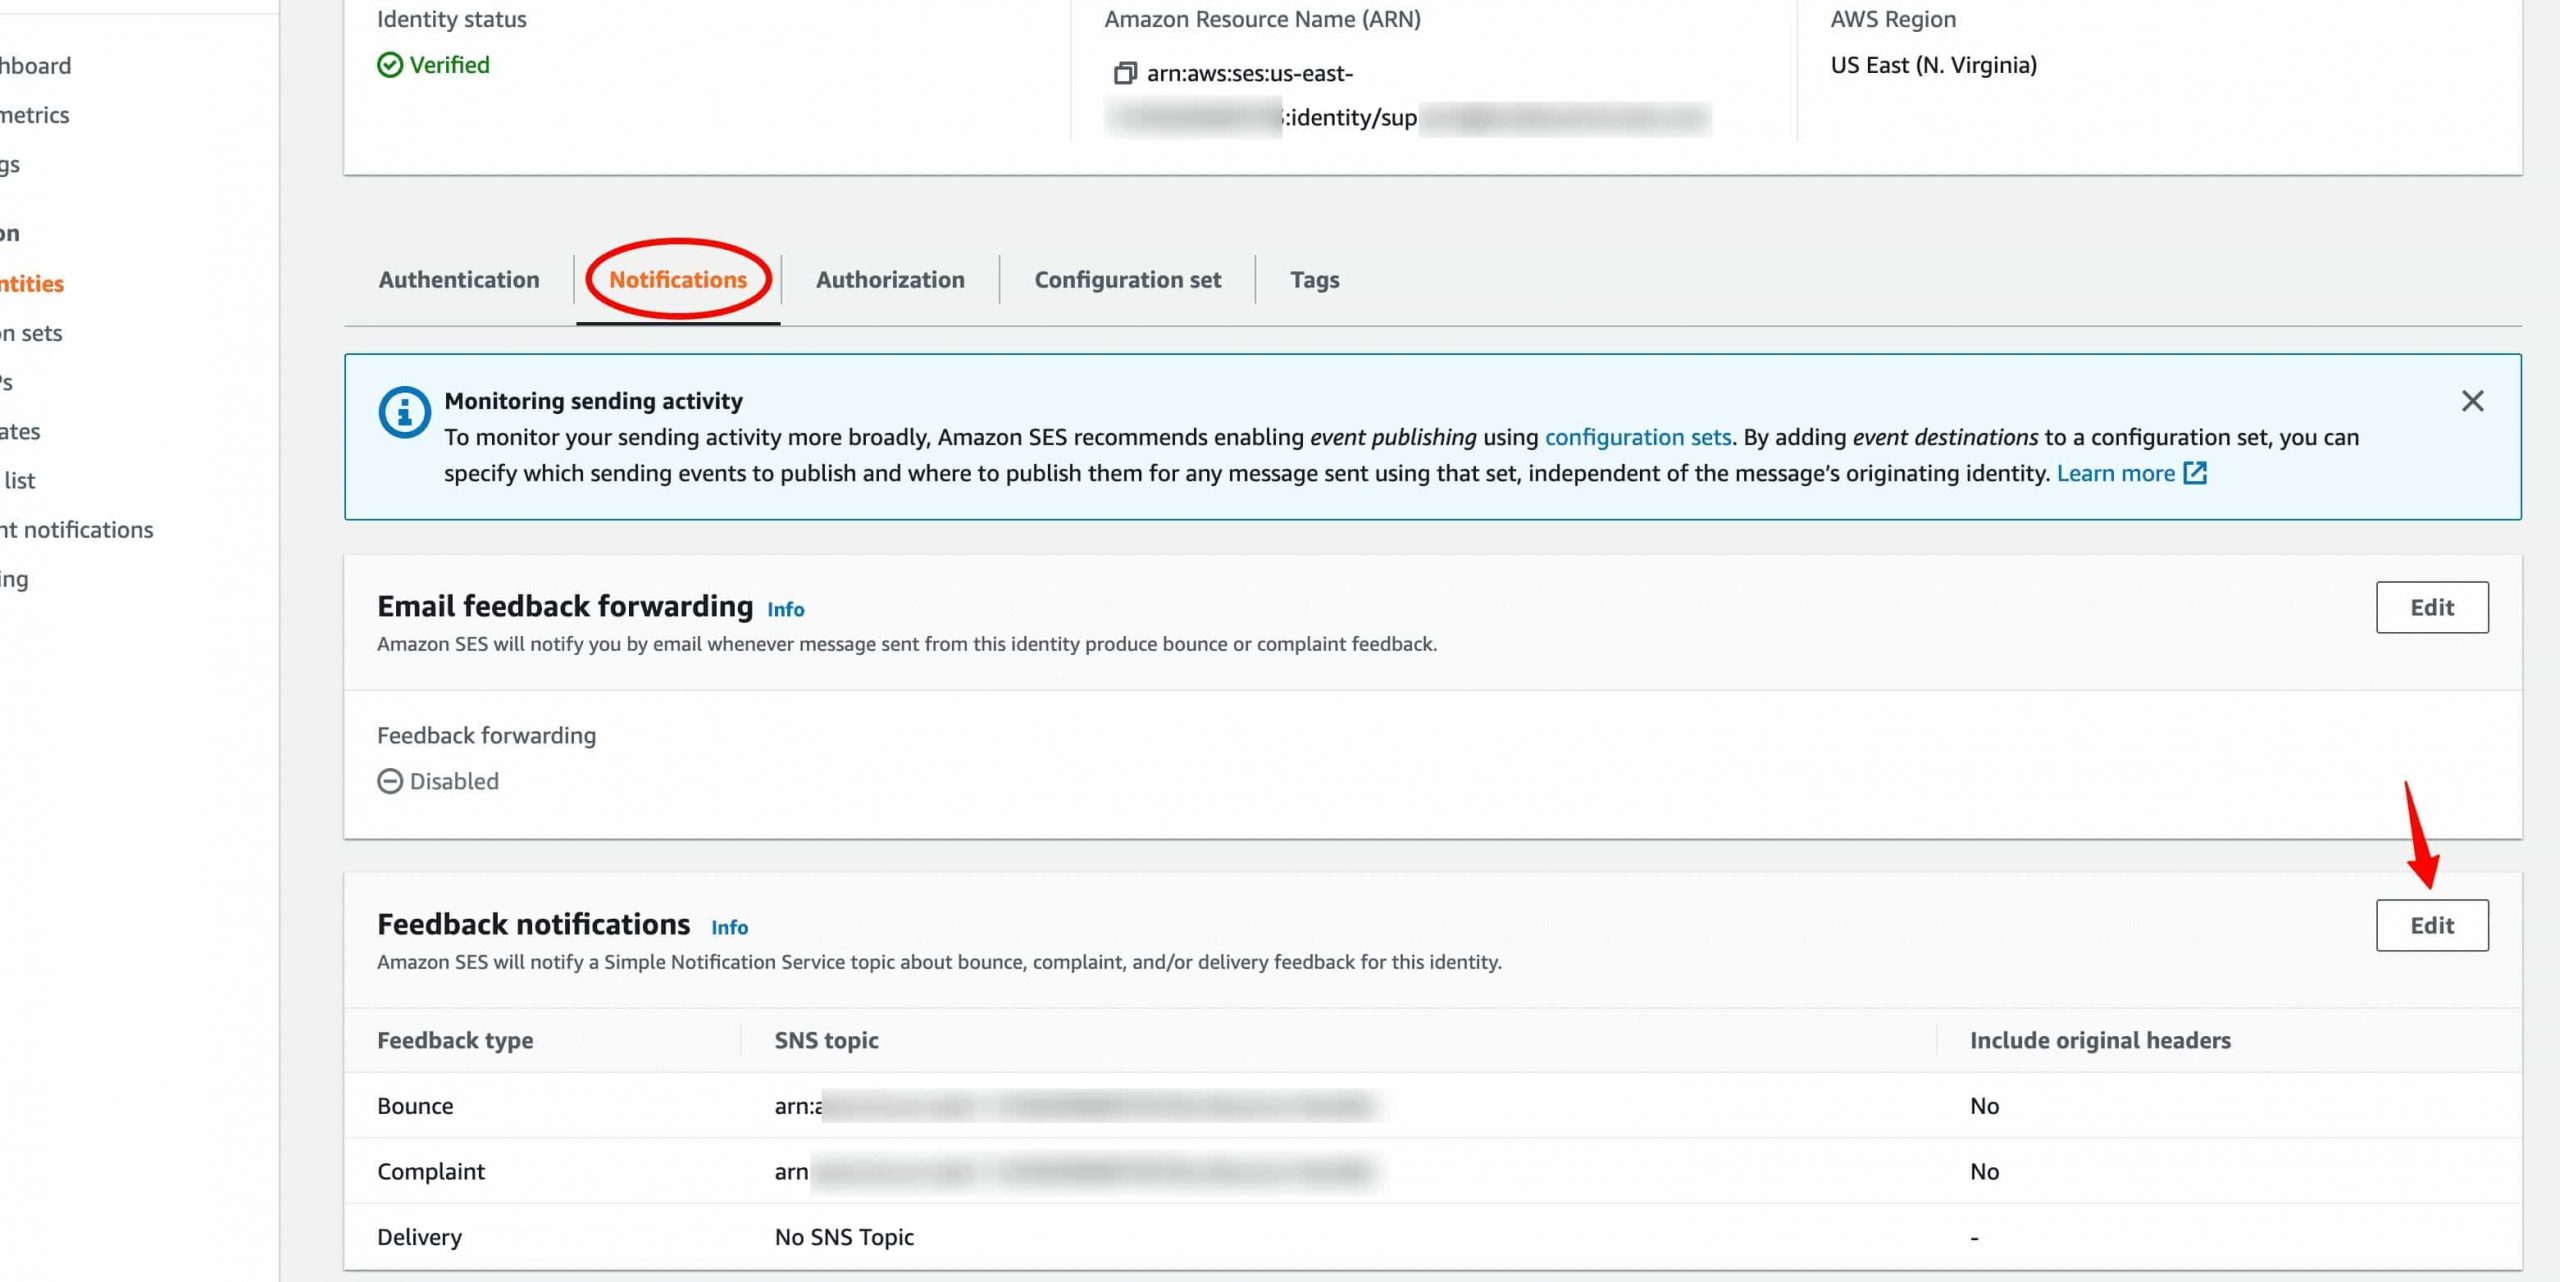
Click on the email address you want to configure the bounce handling for.
You'll get directed to the details of that verified email address.
From here, click on the Notifications tab.
Click on Edit next to the 'Feedback notifications' section.
Next, assign the Amazon SNS topic under the Bounce and Complaint feedback fields.
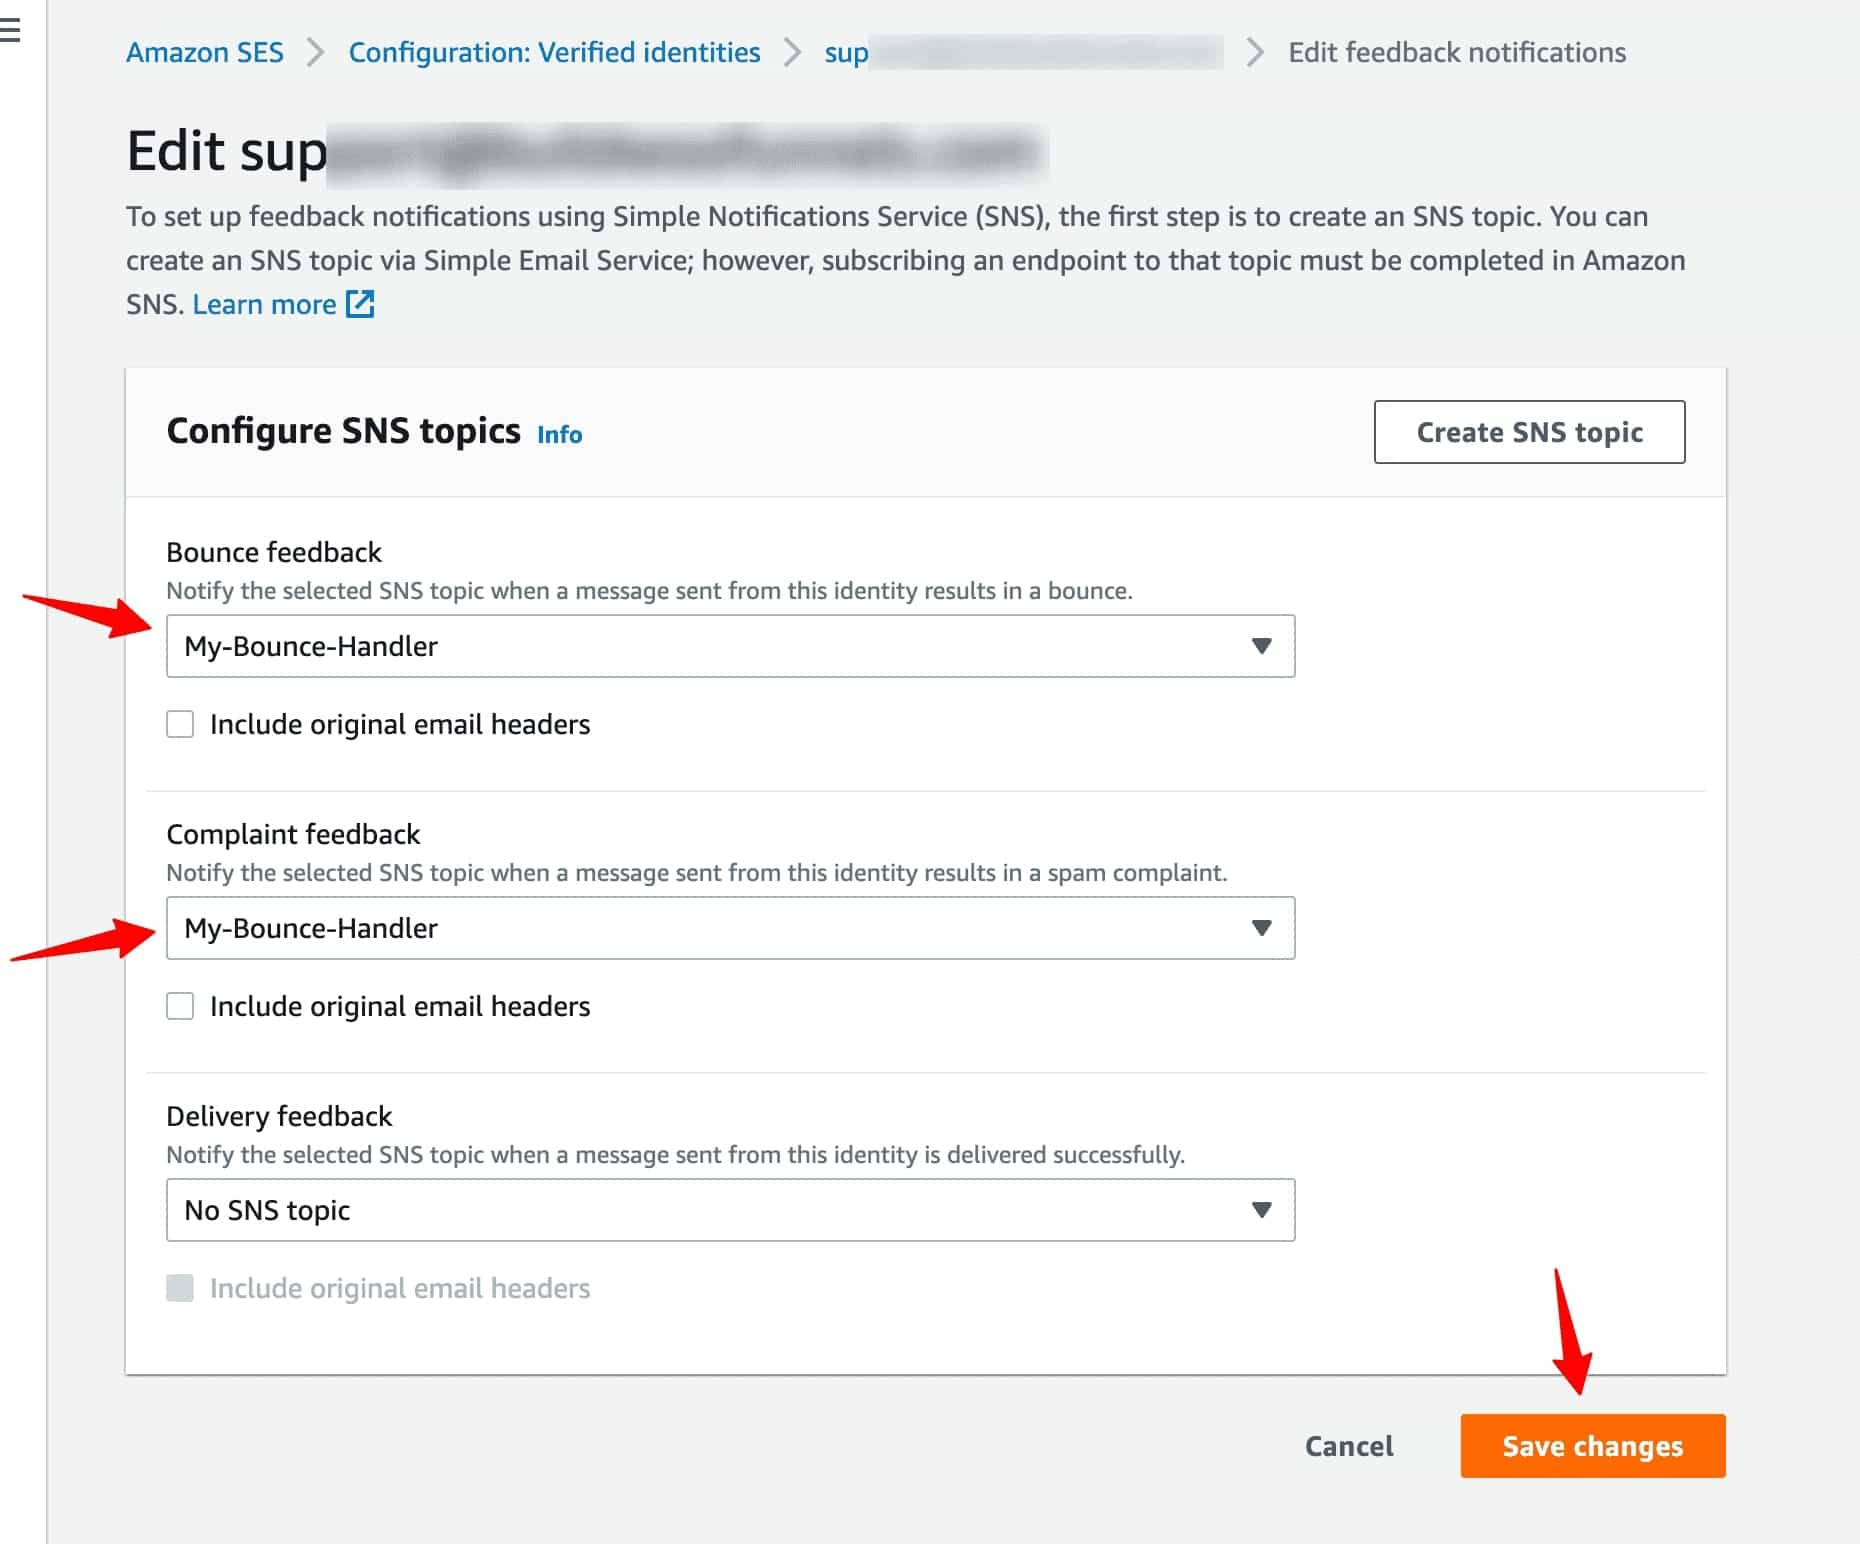
Click on the Save changes button when done.
🔔 Quick Note: The same webhook handles both bounce and soft bounce events.
Add a new contact in your system with the [email protected] email address. The simulator will mark this email as soft bounced to replicate a real-world scenario.
Step 9: Test your settings
To test, create a contact in your CRM with this email ‘[email protected]’. Send an email to it. It will bounce back, and the status of this contact will change to Bounced.

Complaint Contact
Similarly, follow the same process and create a contact with this email '[email protected]'. Send an email to it, and the status of this will change to Complaint after confirmation.
That’s it! You have successfully configured bounce handlers in FunnelKit Automations.


