Follow the step-by-step instructions to set up bounce handling with Pepipost using FunnelKit Automations:
Step 1: Log in to your Pepipost account
Go to your Pepipost account and log in.
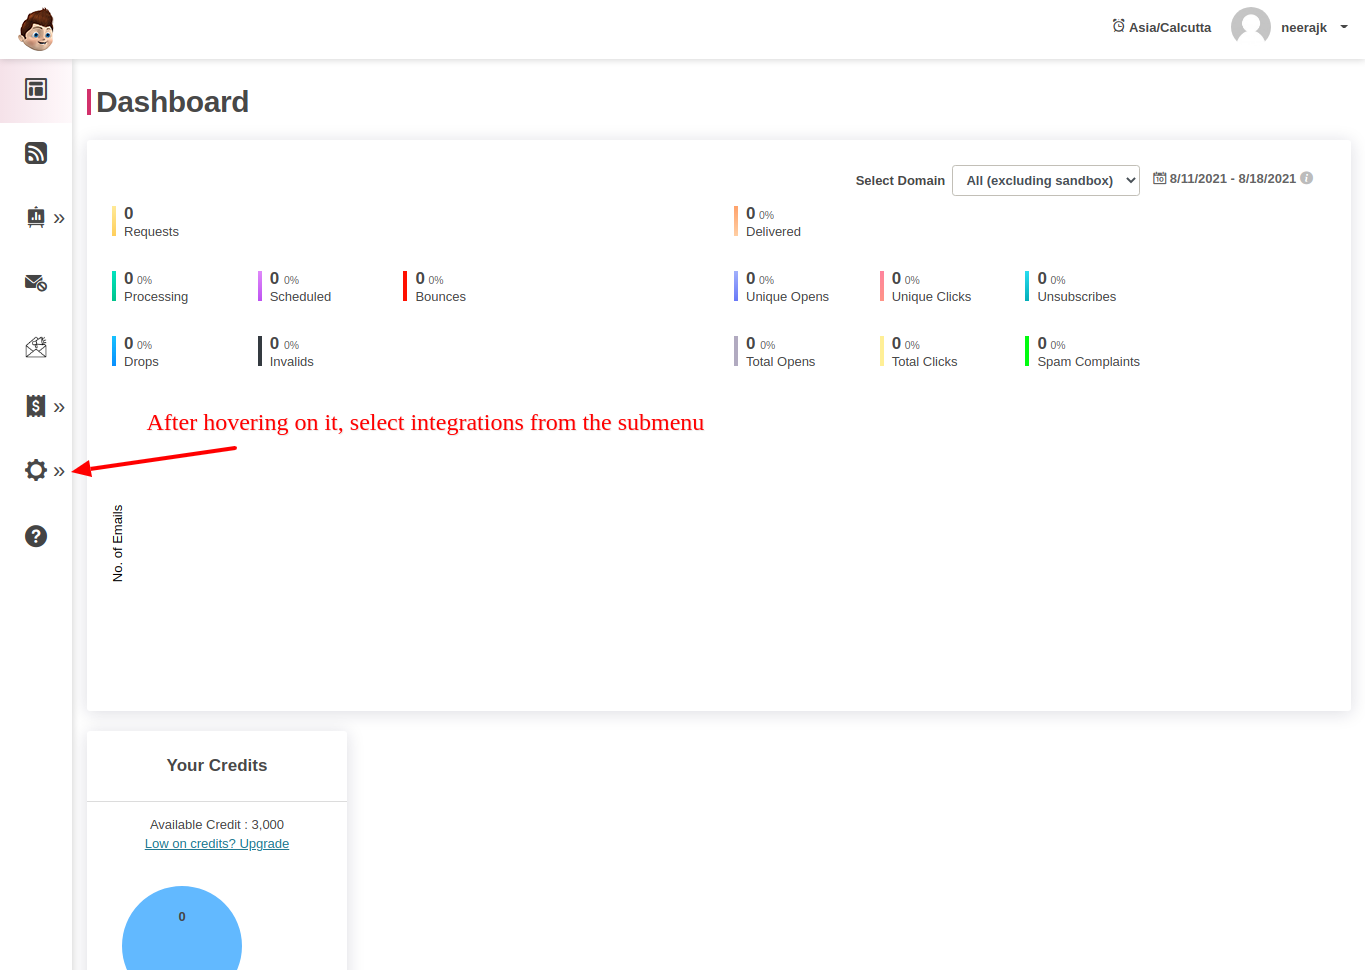
Step 2: Go to Settings
You'll be directed to your dashboard once you log in.
Click on the Settings (gear icon).
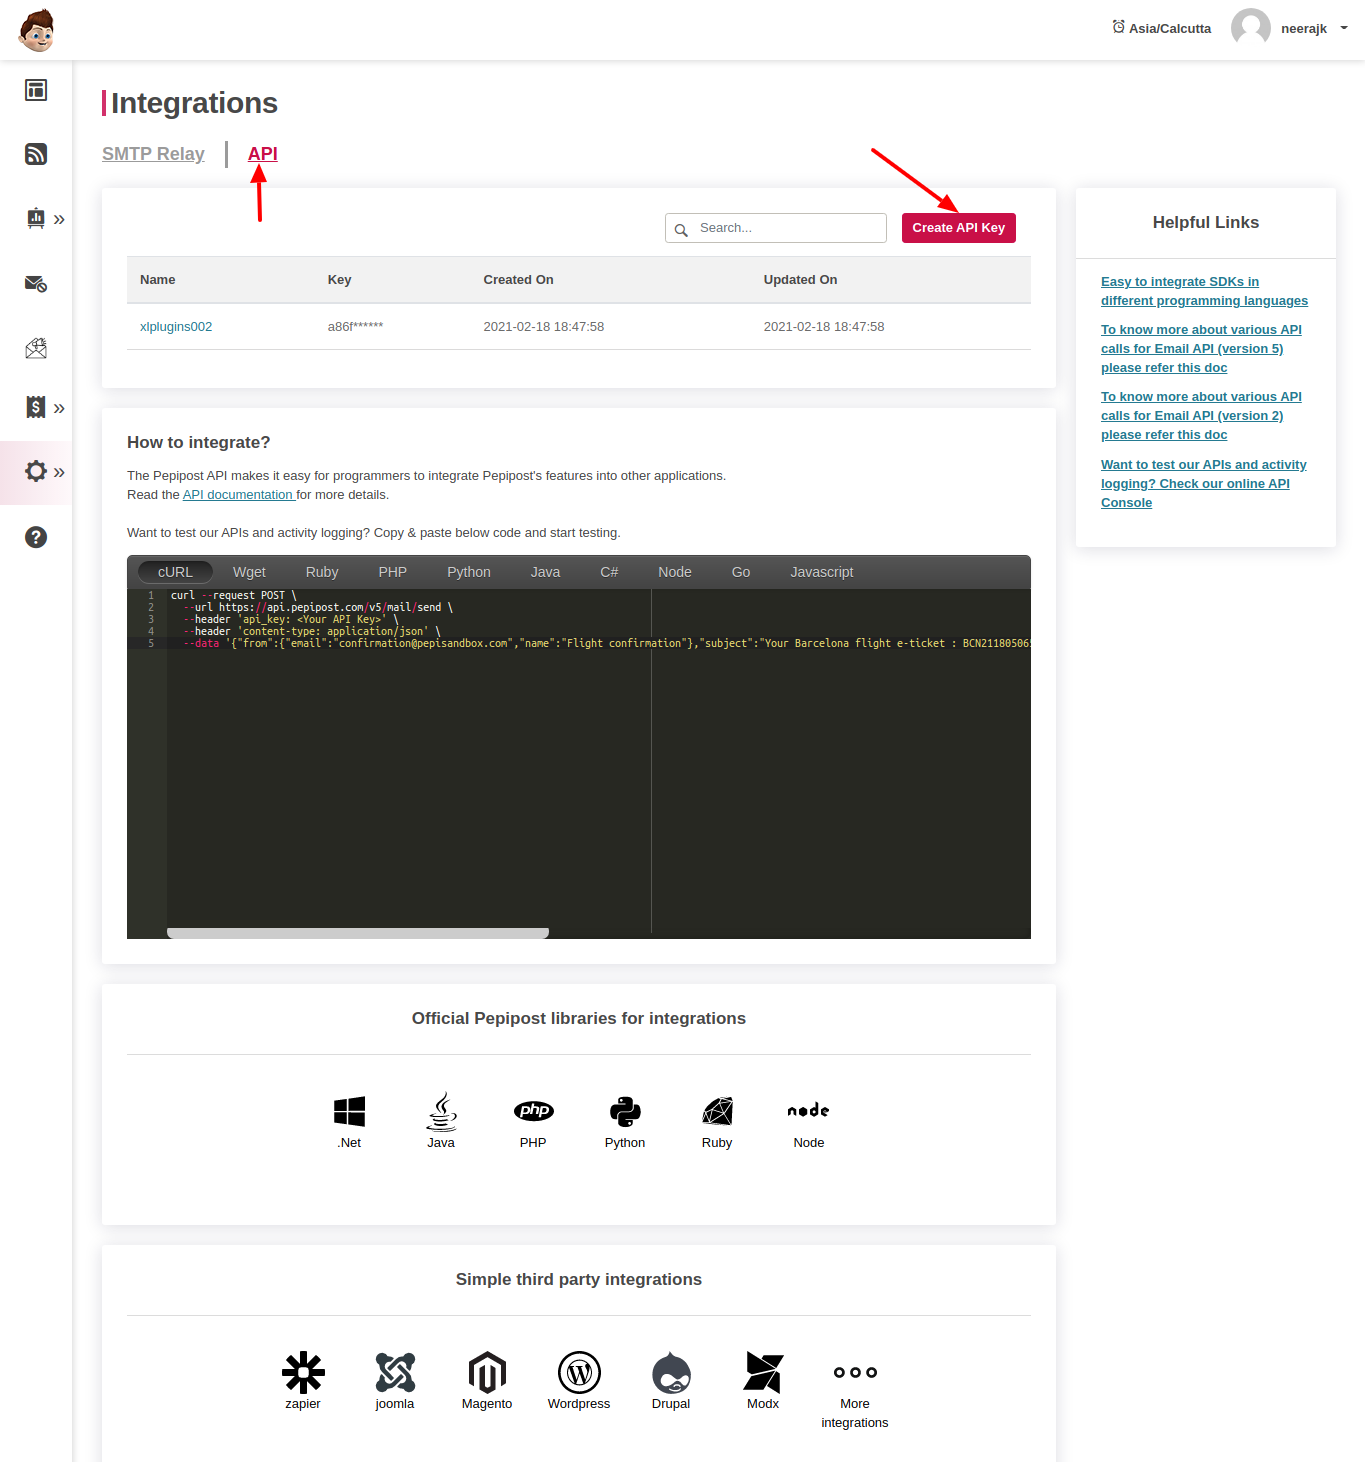
Step 3: Create an API Key
Under API, click on Create API Key.
Enter the details of your Global API here.
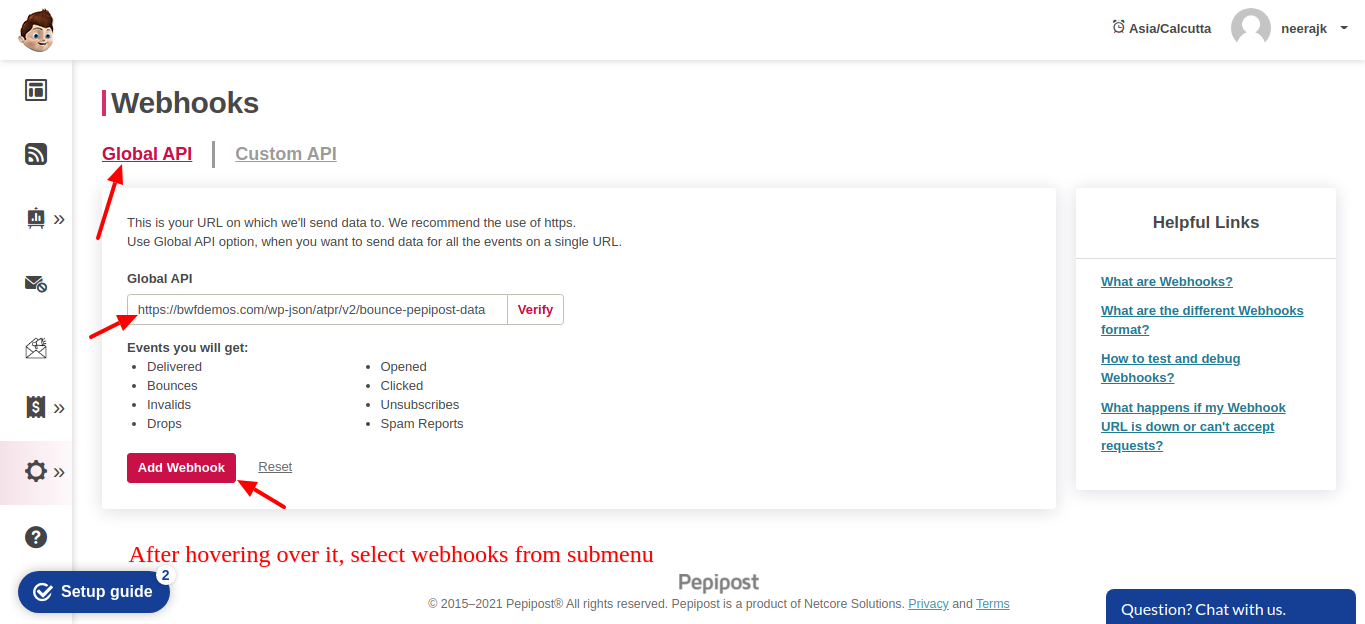
Once done, click on Add Webhook.
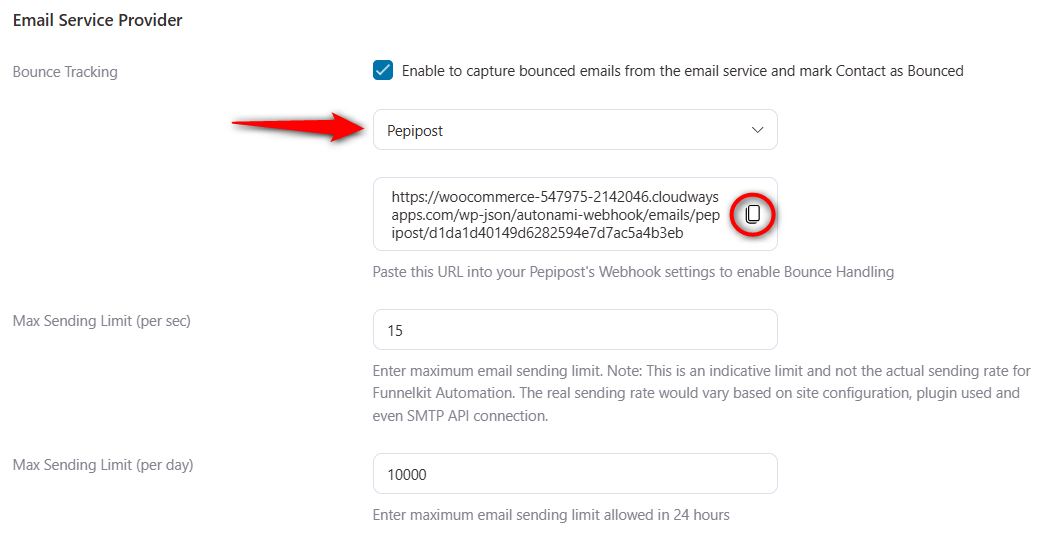
Here you have to enter this webhook URL from FunnelKit Automations' email settings to enable bounce handling.
There you go! You have successfully enabled bounce handling for Pepipost.


