Enabling the double optin or email notification allows FunnelKit Automations to send a confirmation email to the leads that submit the form. If they click on the link in the email to confirm the subscription, the contact's status is marked as 'subscribed'.
After the Mapping, this step will appear:
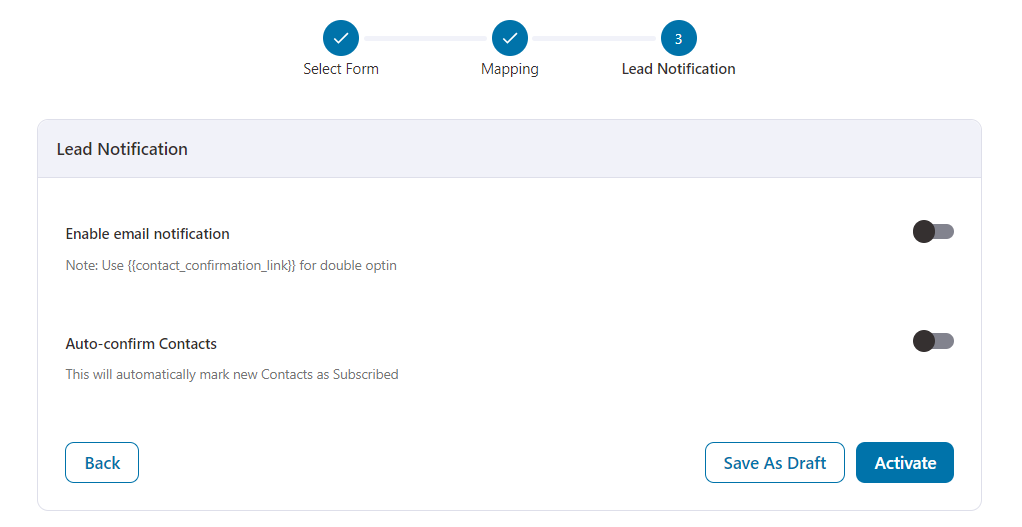
- Enable email notification - This option will allow you to send confirmation subscription emails to your newly signed-up users.
- Auto-confirm Contacts - Enabling this option will automatically mark your signed-up leads as your new subscribed contacts.
Let's go through the enable email notification in detail here.
Sender Details
Enter the sender details.
Specify the sender's name, email, and reply-to email address.
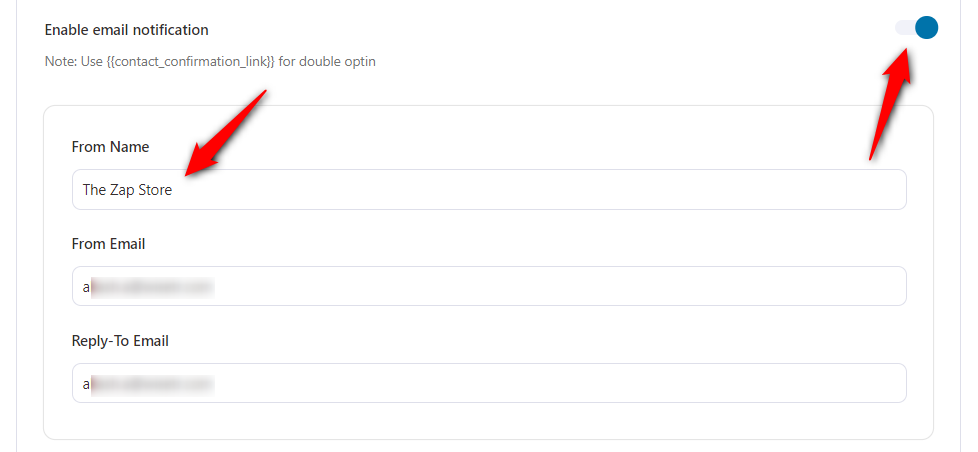
Scroll down once you have entered your details.
Email Settings
Compose your email
Enter the subject line and the preview text.
You can start composing your email here or even use a previously saved template from the My Templates option.
Or take advantage of the Link Triggers.
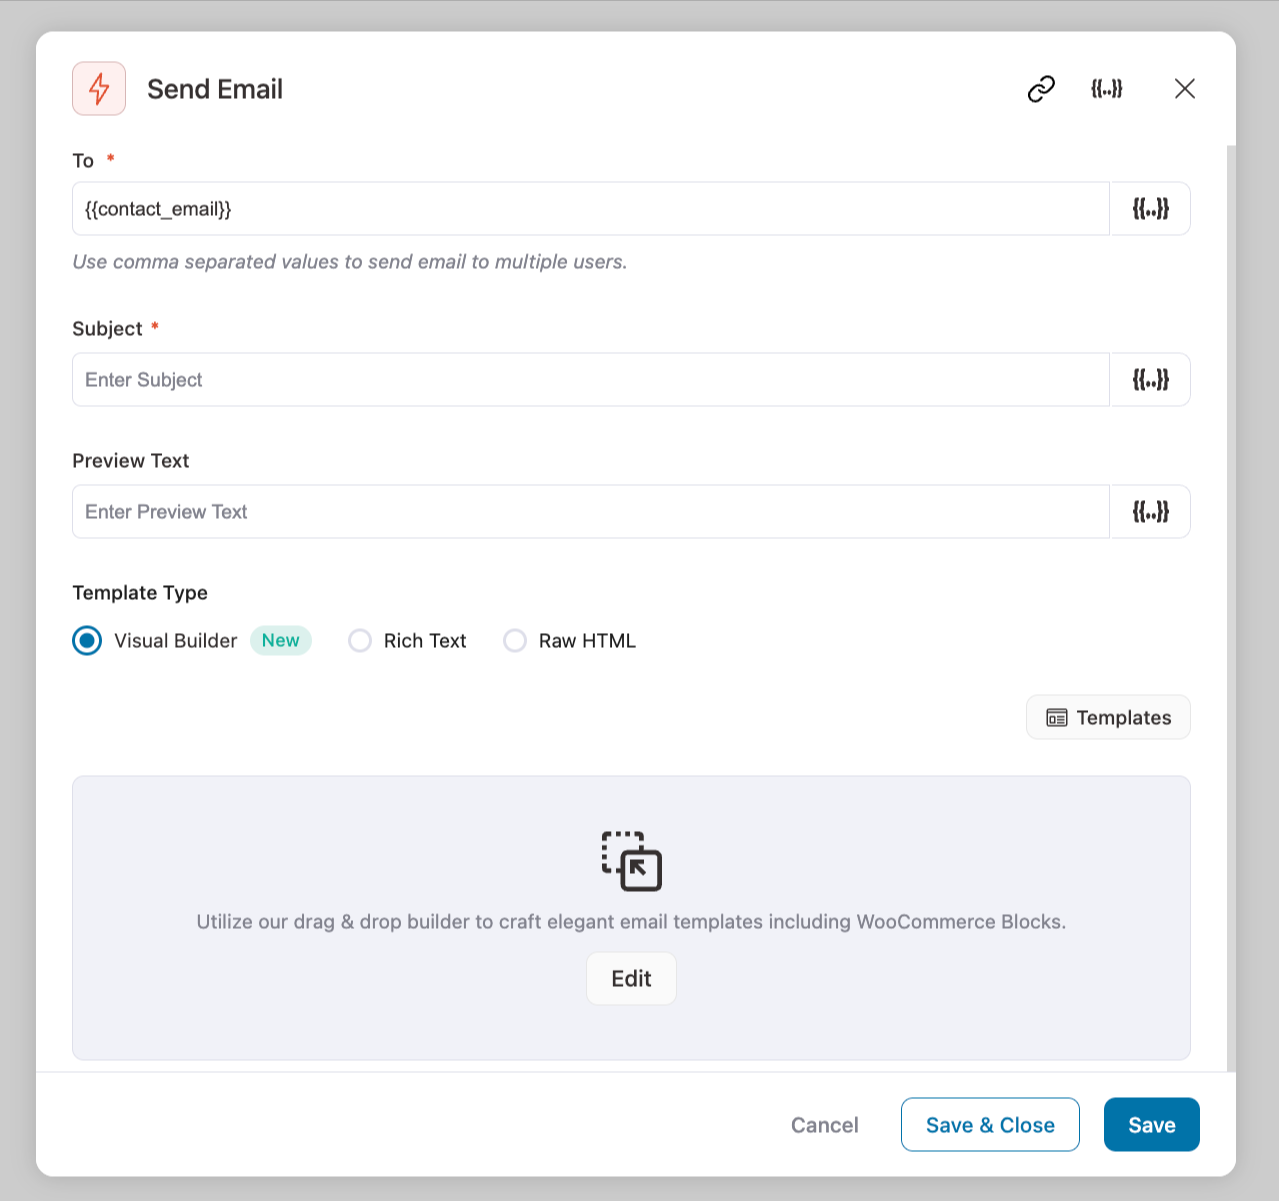
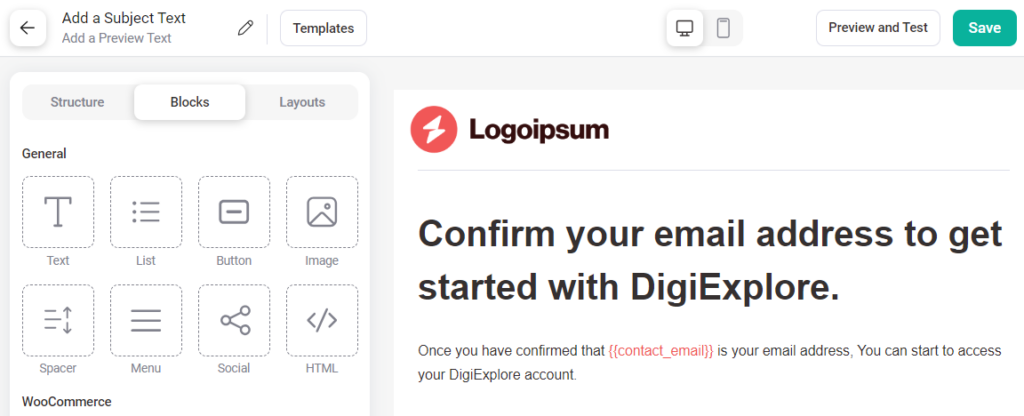
Click on Start to launch the enhanced visual email builder.
You'll get directed to the pre-built email templates.
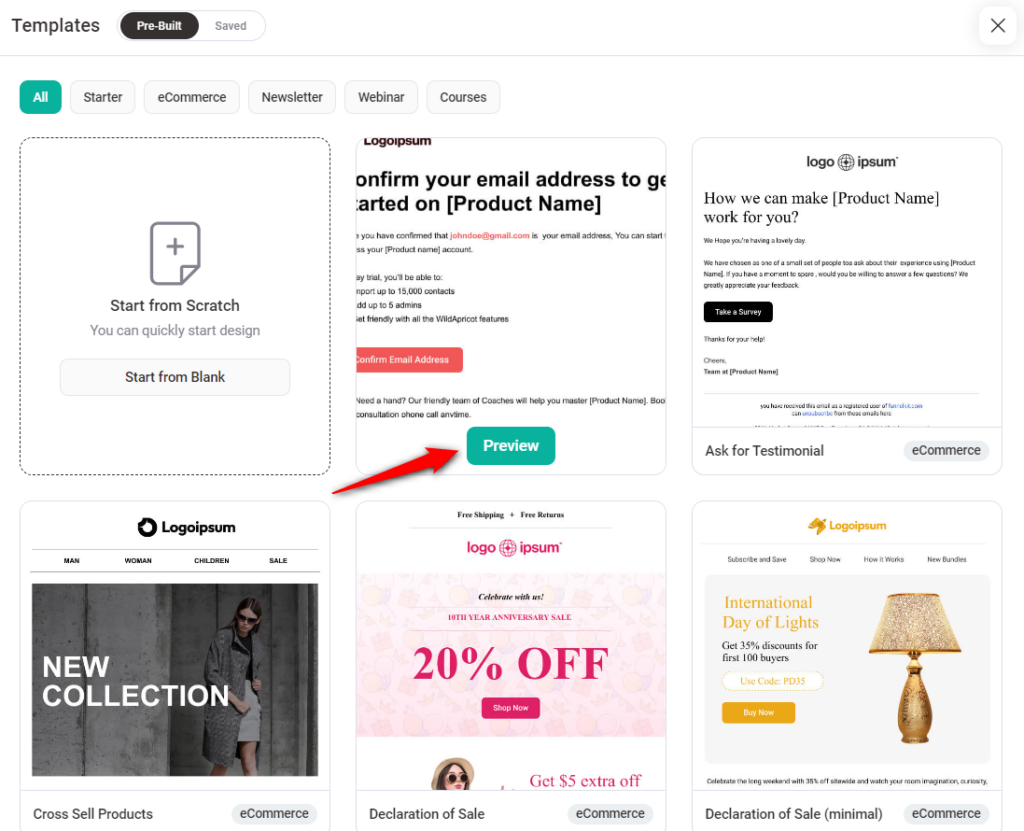
Click on any email you want to import.
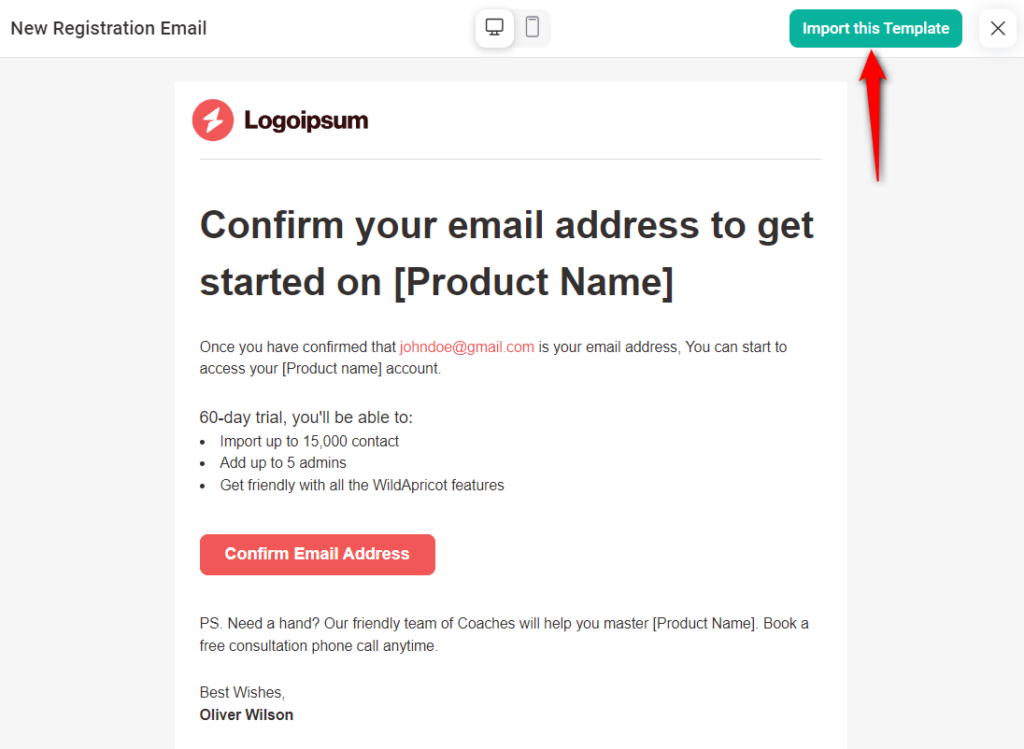
Hit the Import this Template button to import your email template.
This is an example of a good confirm subscription email.
Personalize your emails
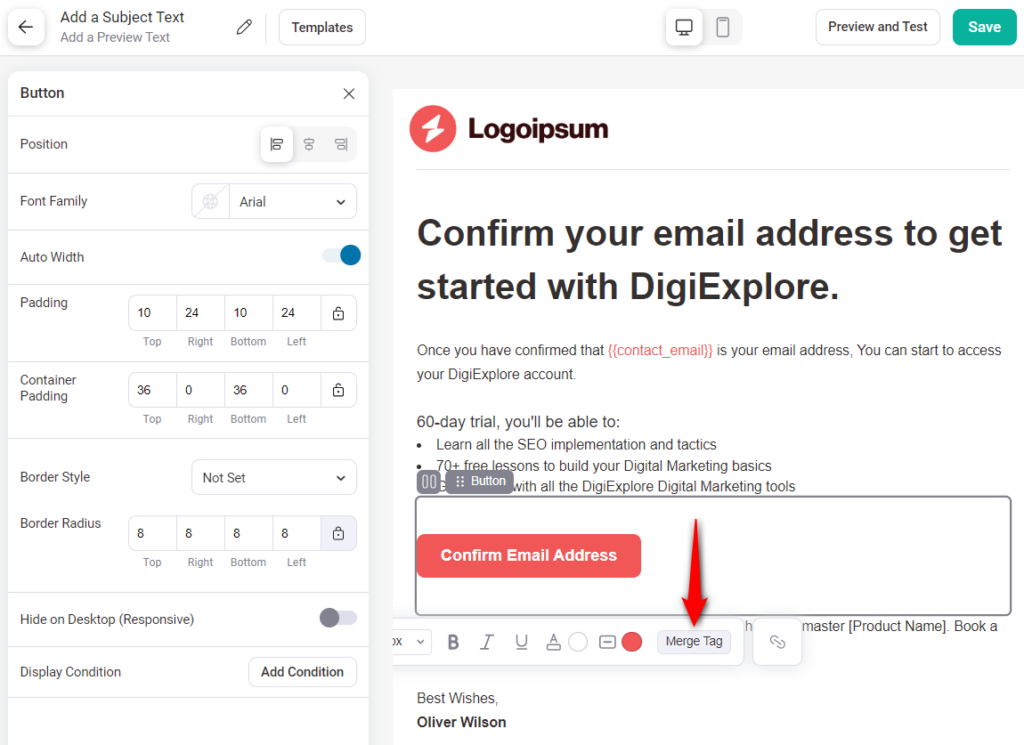
If you want to want to create a double opt-in confirmation link, you can easily do it using the merge tags.
Click on merge tags:
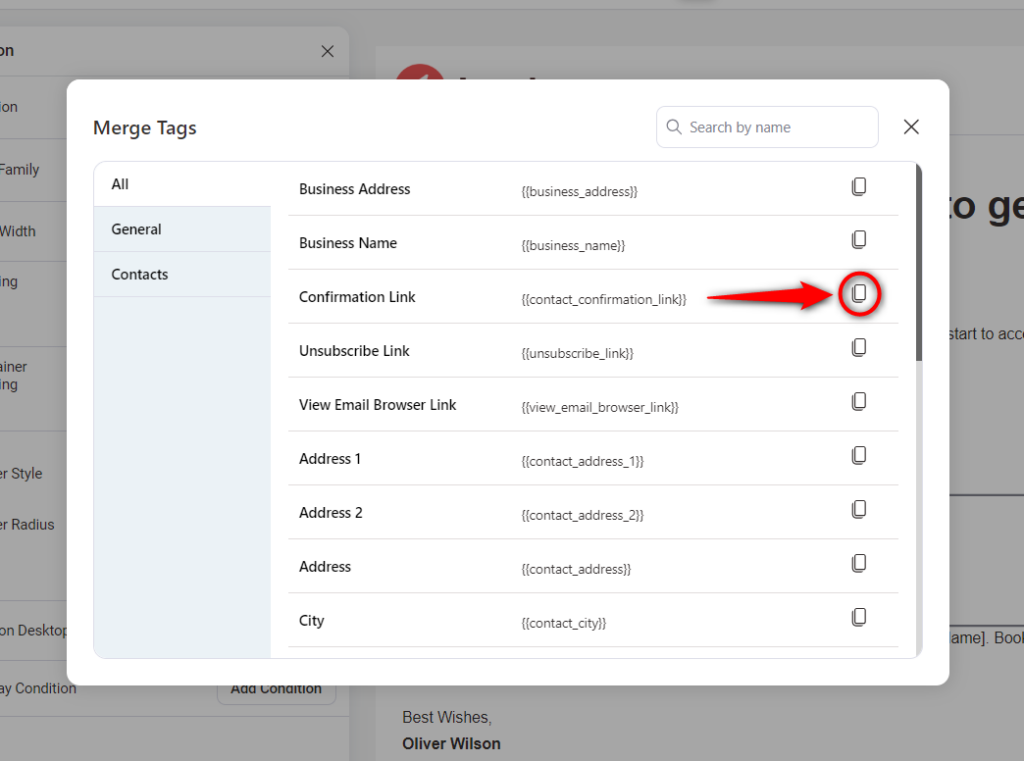
Now, click on Copy next to the Confirmation Link merge tag.
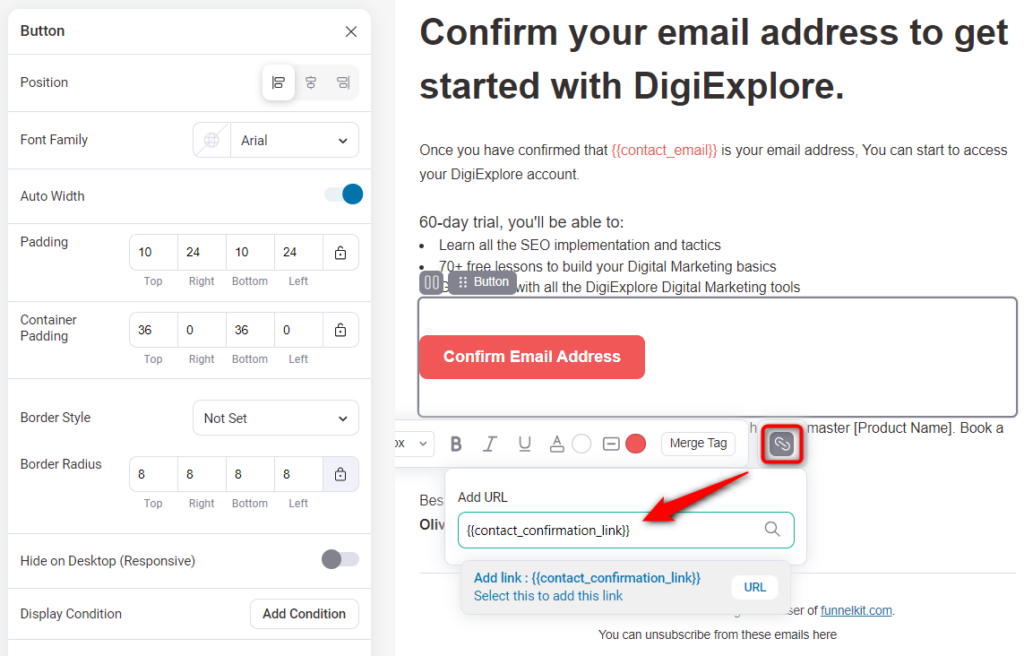
Then, select the text and interlink it by pasting the copied merge tag on your email body. This will help your contacts to confirm their subscription.
Additional Email Settings
Furthermore, you can also add the following options:
- Add Unsubscribe Text - Add an unsubscribe text at the end of this email.
- Save As Template - You can save this email as a template to be used again for your next campaigns.
- Send Test Email - You can send test emails to yourself or any other contact. All you have to do enter an email address and click on "Send mail".
- Show preview - You can see a preview of your email in another window.
The next thing to configure is the confirmation settings.
Confirmation Settings
Here are the confirmation settings that you need to understand:
- Don't send email if contact is already subscribed

Enabling this option will not send confirm subscription emails to contacts who are already subscribed to you.
- Redirect After Confirmation

This option lets you redirect your contacts to a specific URL or a file (after they've clicked on the confirmation link). It can be a custom thank you page or any other page on the website or even links to one of your custom lead magnets.
All you have to do is either select URL or File. Then, put the link over here.
- Add tags after confirmation

You can also add a tag to the contacts who confirm their subscription to your email using this option.
- Auto-confirm Contacts

If you enable this option, then the new contacts signing up for this form will automatically be added as your subscribers.
That's it! You have successfully enabled the lead notification settings.
Now that you've set up everything, click on the Activate button to make your form go live.
Overview
As you click on Activate button, an Overview screen will show up.
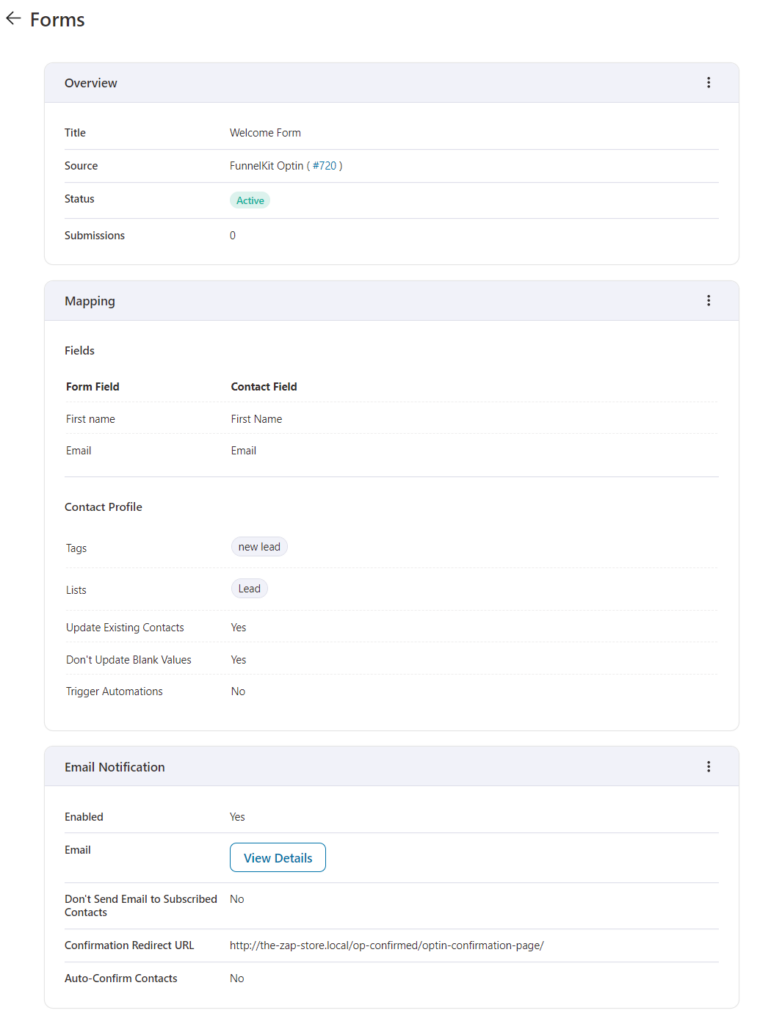
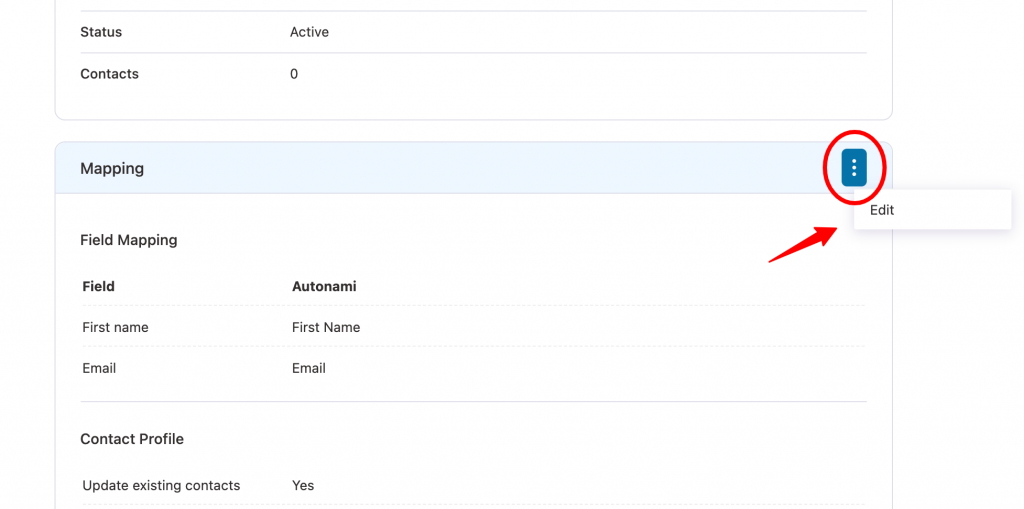
You can make changes to your form settings anytime. Go to the section you want to edit and click on the Action button and choose Edit.
This is how you can integrate your forms with FunnelKit Automations.


