When someone submits a signup form using any form builder FunnelKit Automations is compatible with, you can send a double-opt-in email in multiple ways.
Here we will share three ways to do so:
Method 1: Send a sequence of follow-up emails to confirm double opt-in after form submission with a goal
In this method, we check if the contact is already subscribed after someone submits a form. If not, a double opt-in confirmation email is sent.
After the initial email, additional follow-ups are scheduled, along with FunnelKit Automations’ Goal (Contact Subscribers). This way, once the user confirms their subscription and reaches the goal, they automatically exit the automation.
Here are the steps you need to follow:
Step 1: Create an automation for the form submit trigger
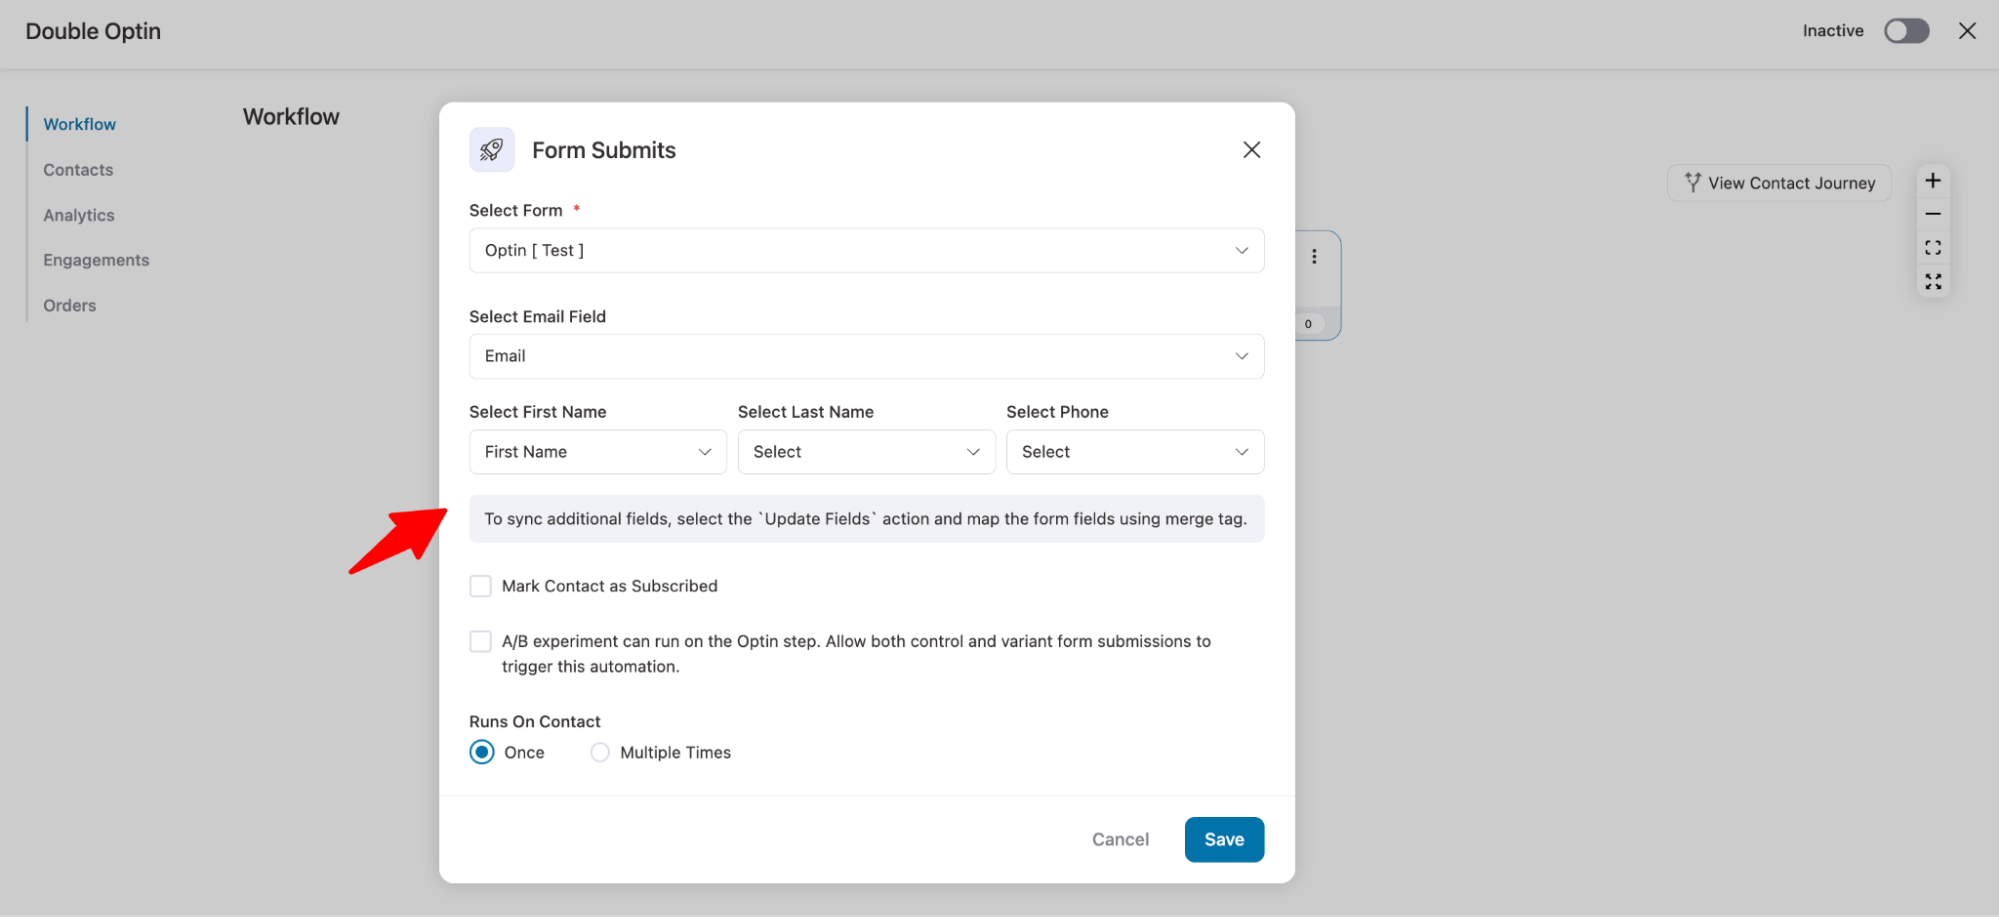
Go to FunnelKit Automations ⇒ Automations, create a new automation from scratch, and select the trigger Form Submits.
Next, choose the form, map the fields, and click Save.
Note: In this example, we're using a form created with FunnelKit Optin.
Step 2: Add a condition to check the subscriber’s status
Next, we will add a condition. For this, hit the + icon and choose a condition.
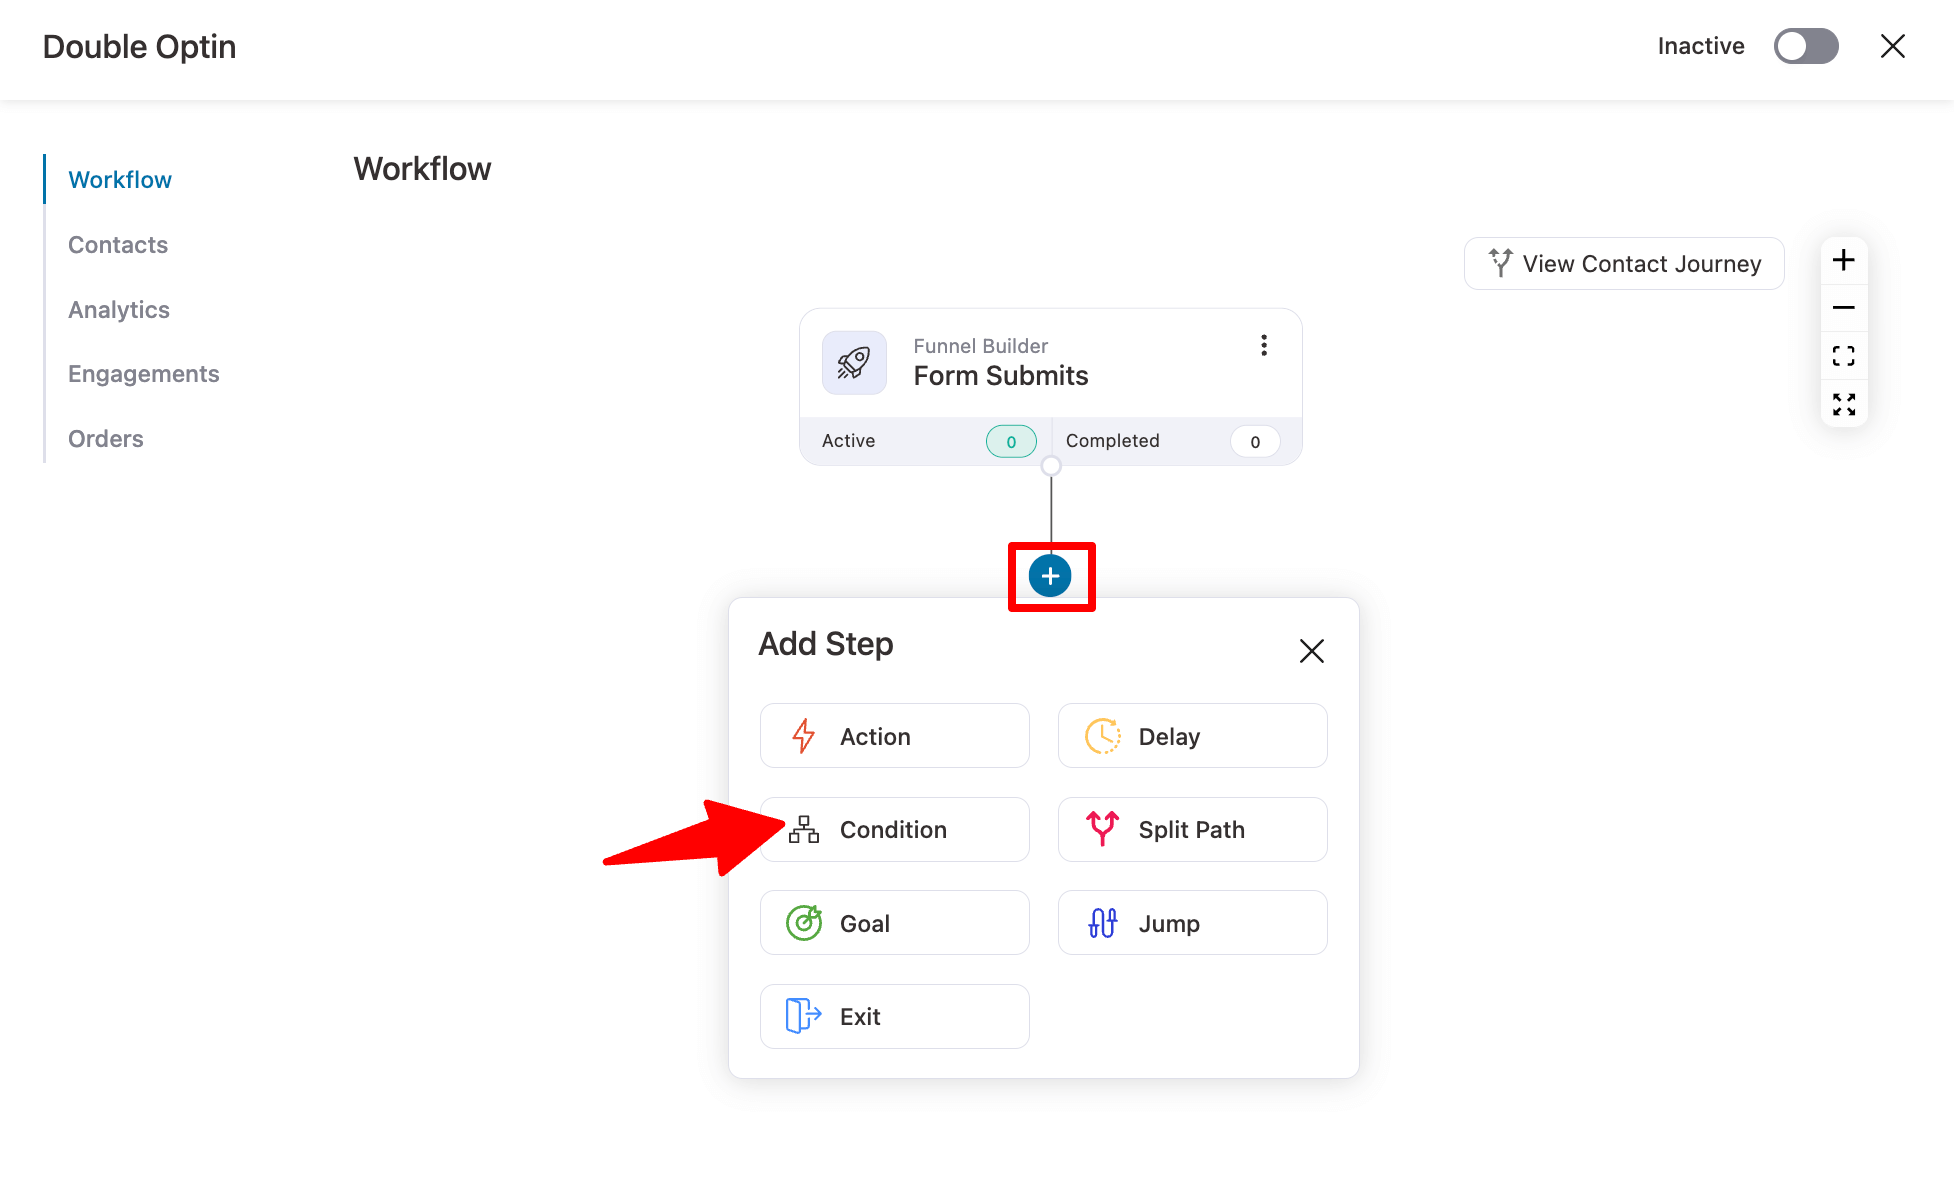
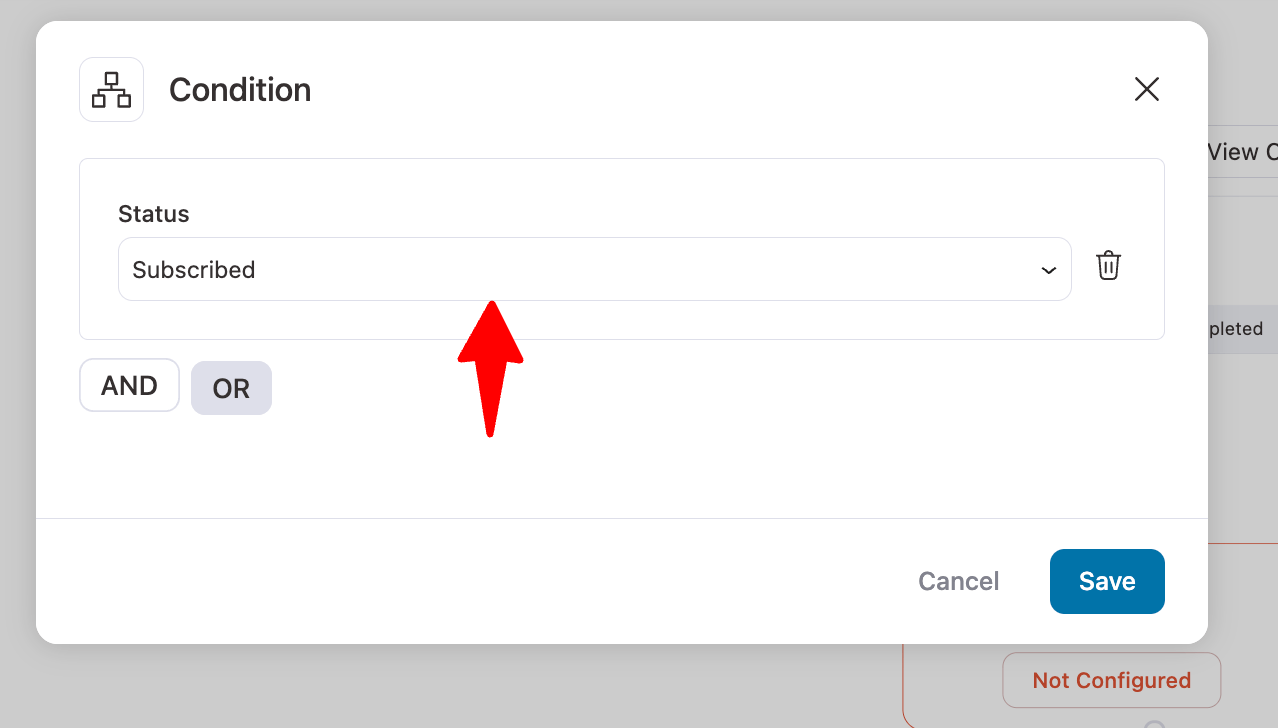
Next, click "Add Condition" and select "Status" under the "Segment" option. Then, check if the status is Subscribed, as shown below.
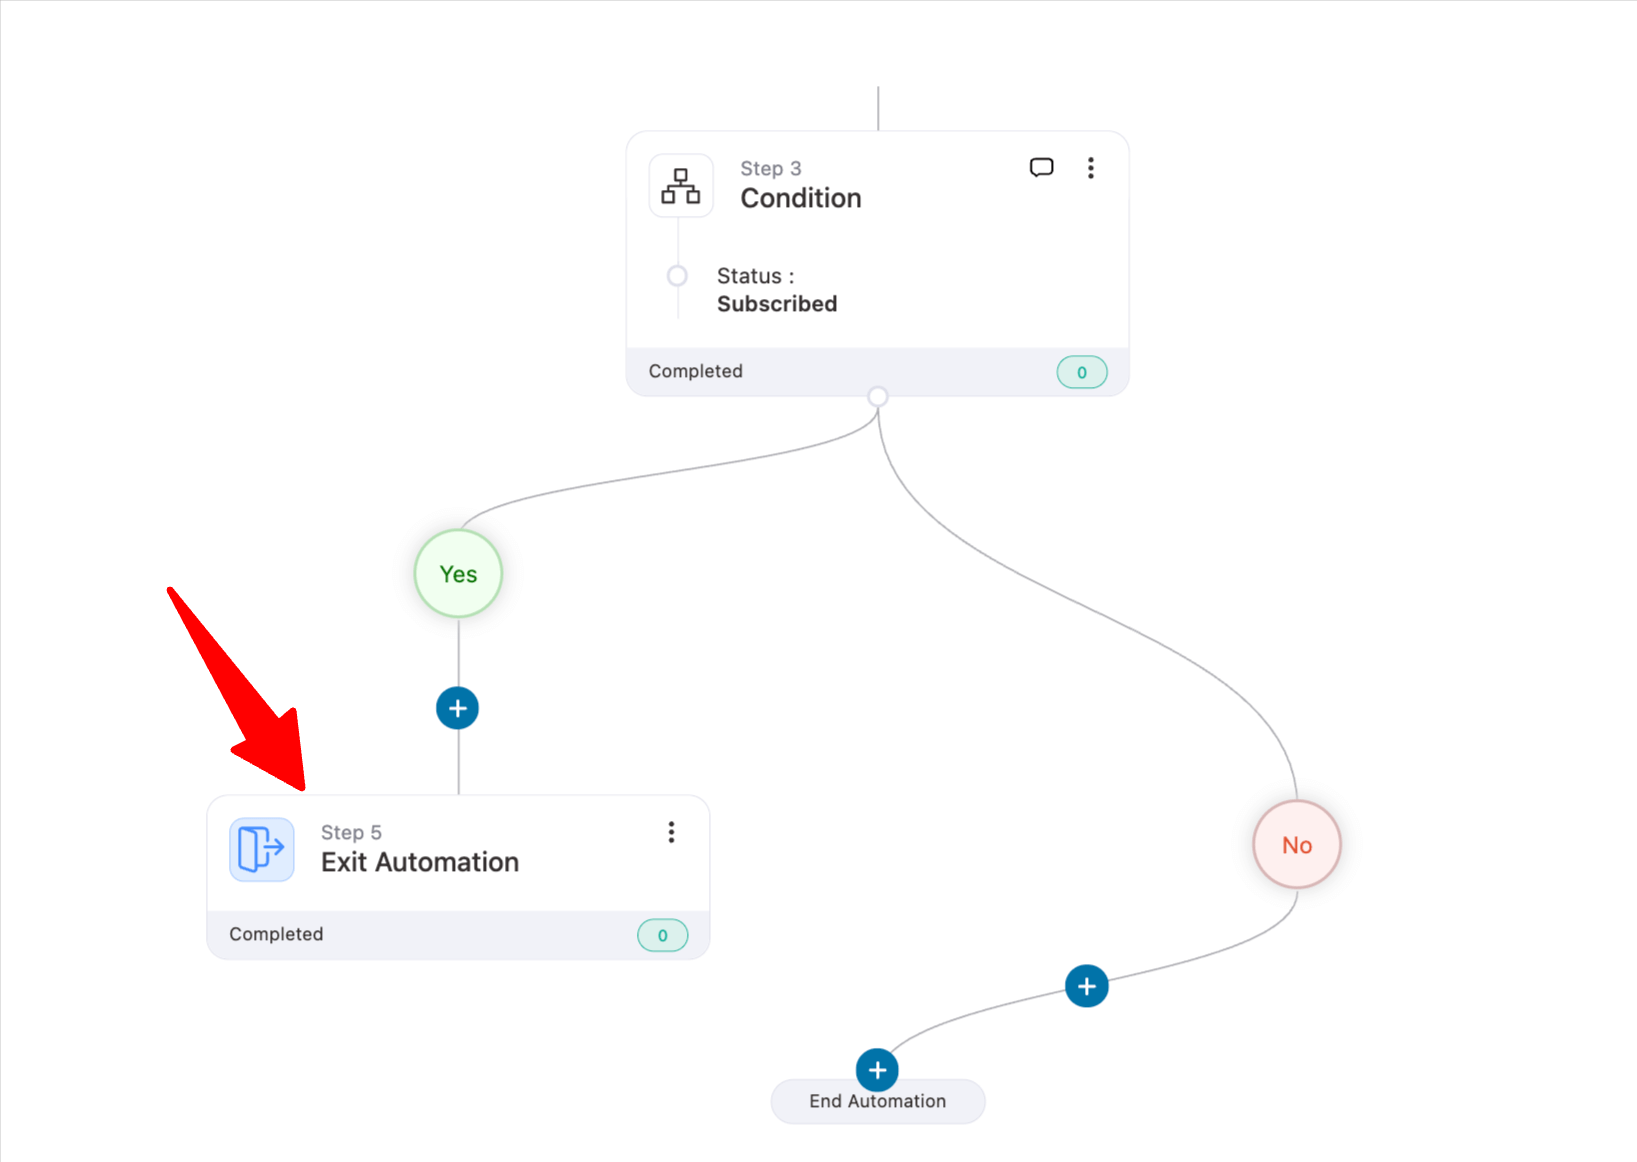
Step 3: Set subscribers to exit the automation
If the condition is true and the user is subscribed, set the Exit action to ensure they exit the automation.
Step 4: Send a double-opt-in email
If the condition is not met (meaning the user is not subscribed yet), set up a Send Email action.
Make sure to include the confirmation CTA using the “{{contact_subscribe_link}}” merge tag.
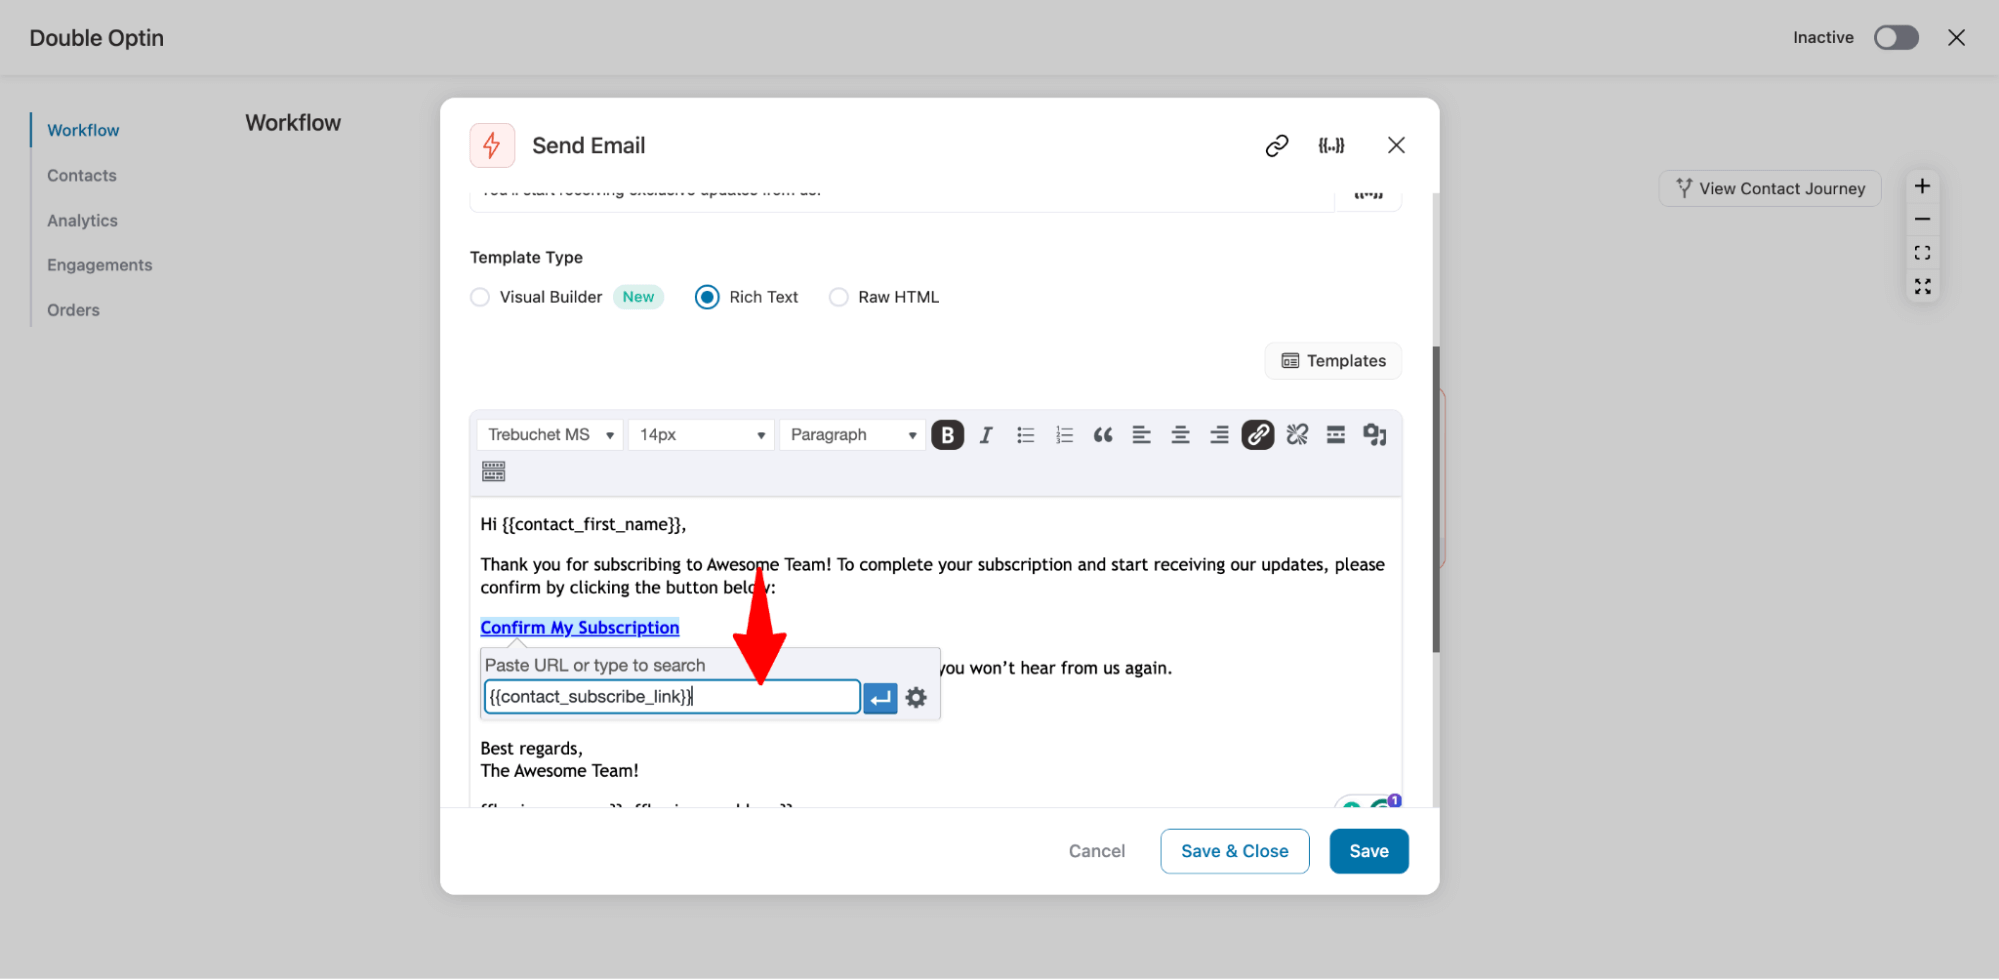
Make sure to hit Save to update.
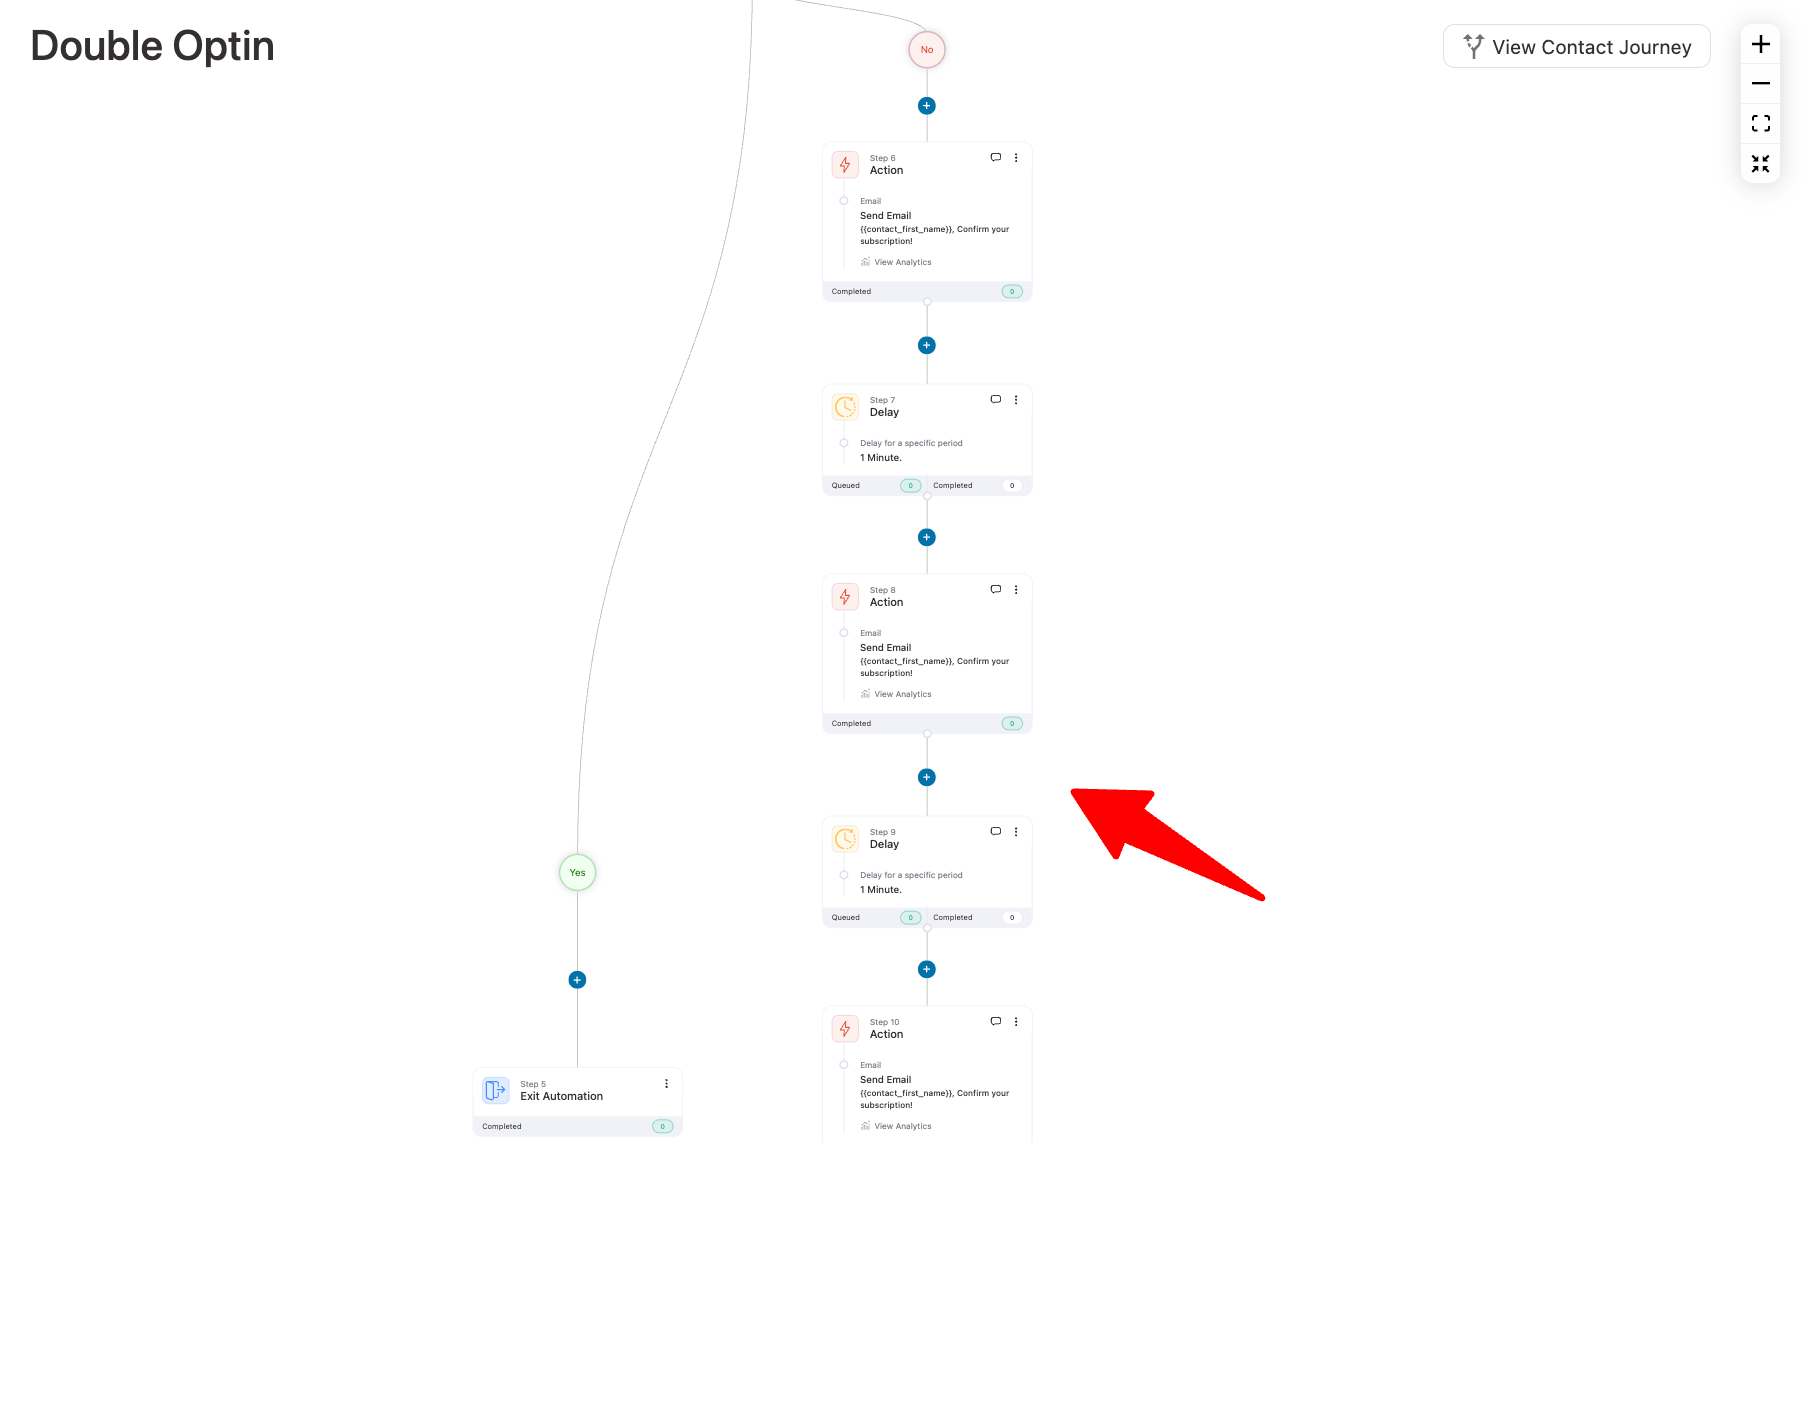
Step 5: Set a sequence of emails with delays
After sending the first email, set a 1-day delay, then send the next email. Repeat this process by adding another 1-day delay before sending the following email. This way, you can set up multiple follow-up emails with a specific delay between each.
Note: You can set the delay as per your strategy
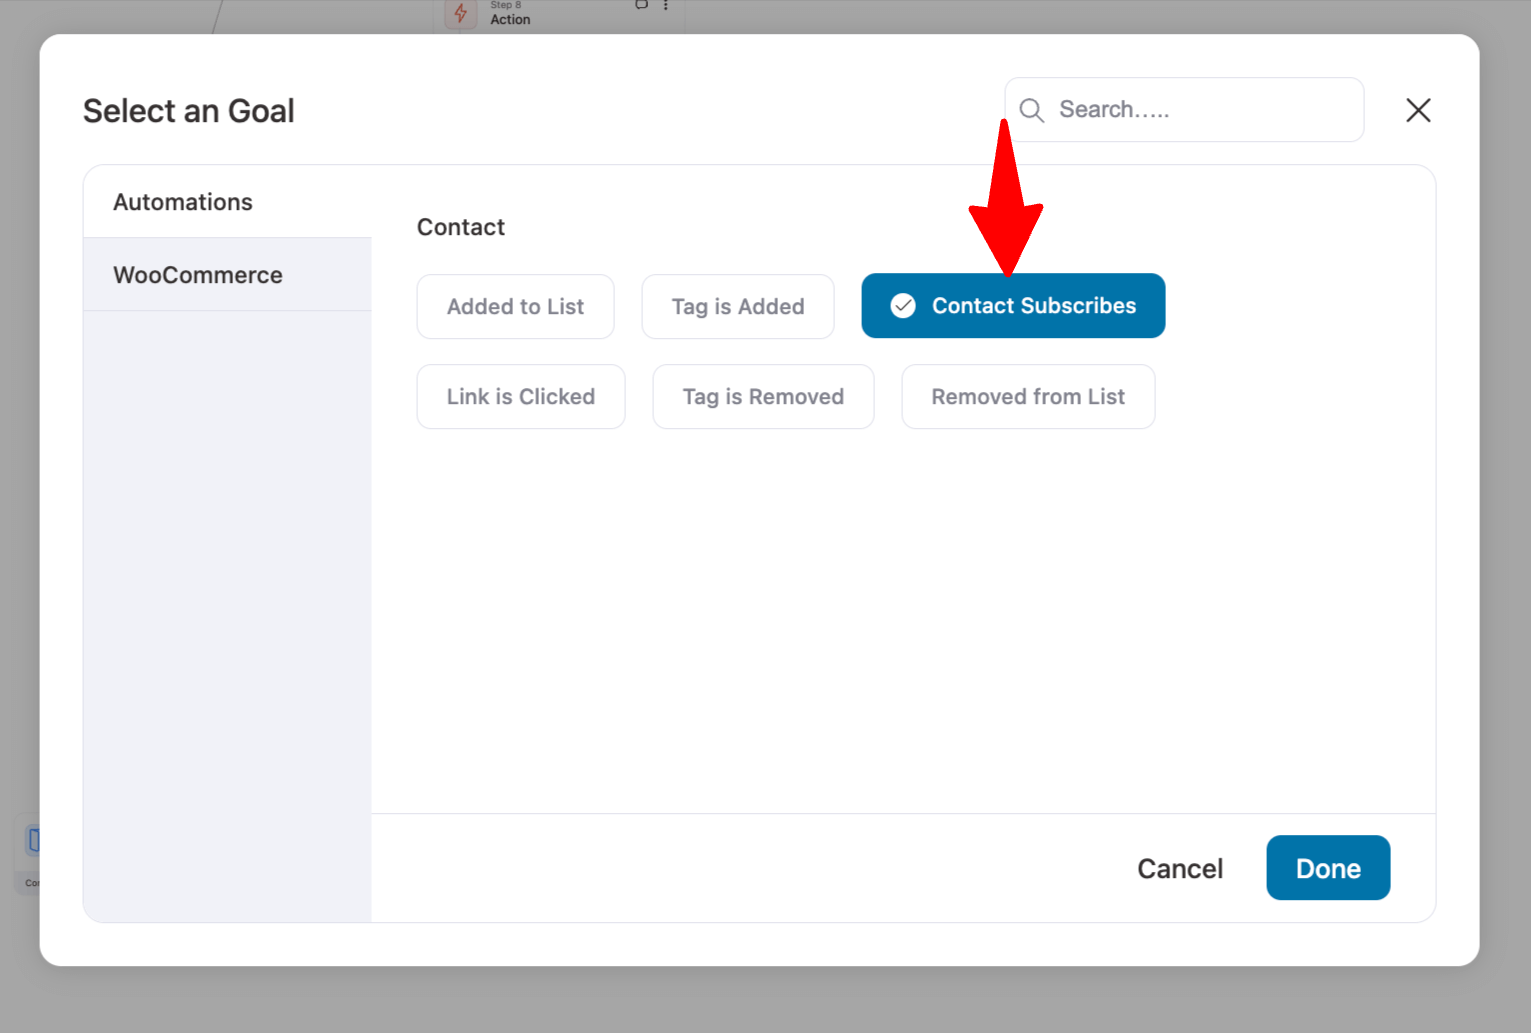
Step 6: Set a Goal as Contact Subscribes
Now, after the final Send Email action, set a Goal as Contact Subscribes.
Here, you can choose any option, but we recommend choosing the “End This Automation” option, as once users reach the goal, the automation ends for that contact.
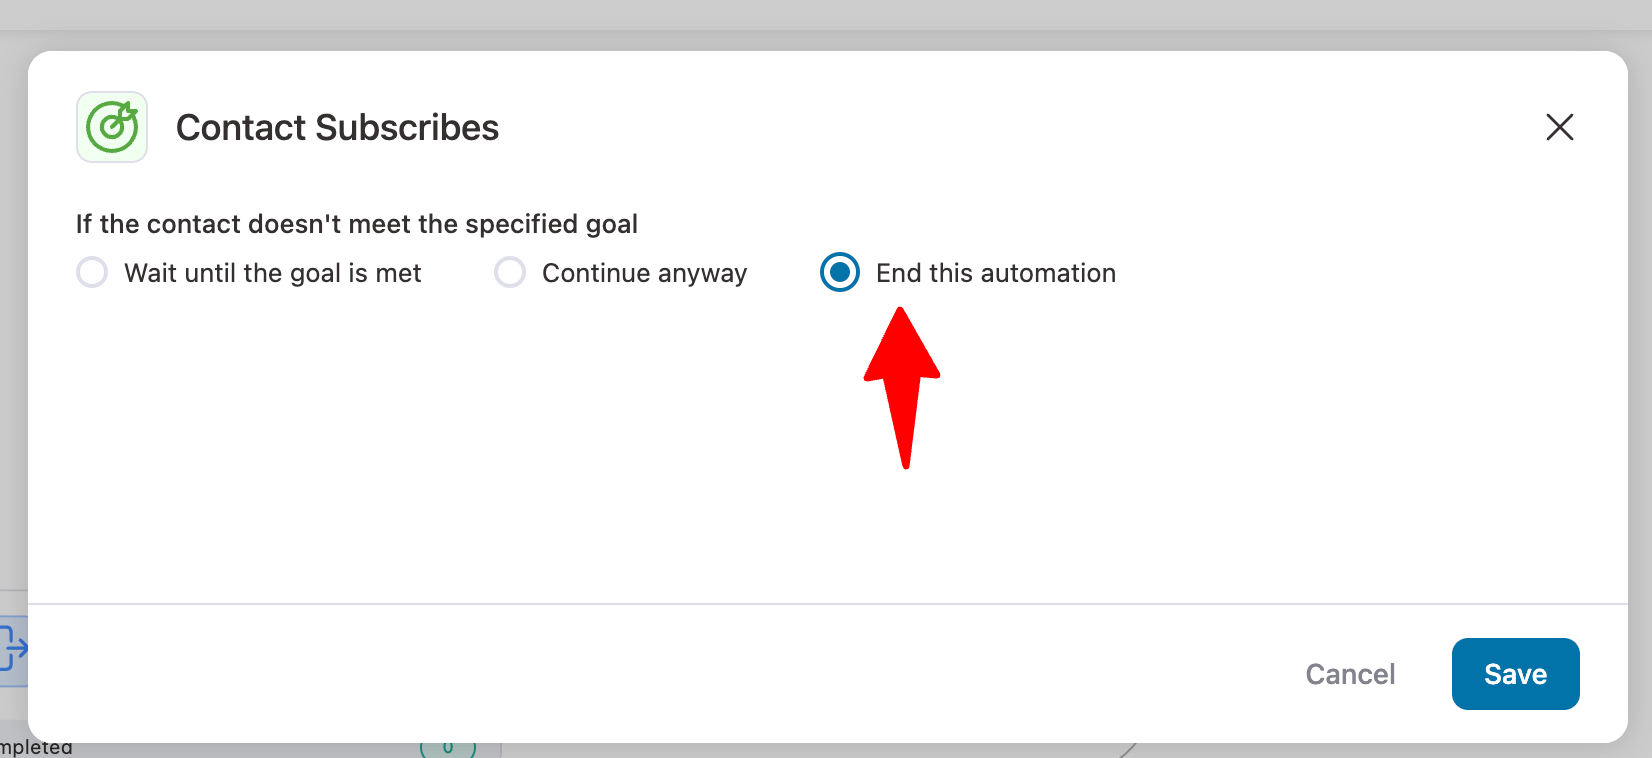
Finally, hit Save.
Don’t forget to turn on the automation live.
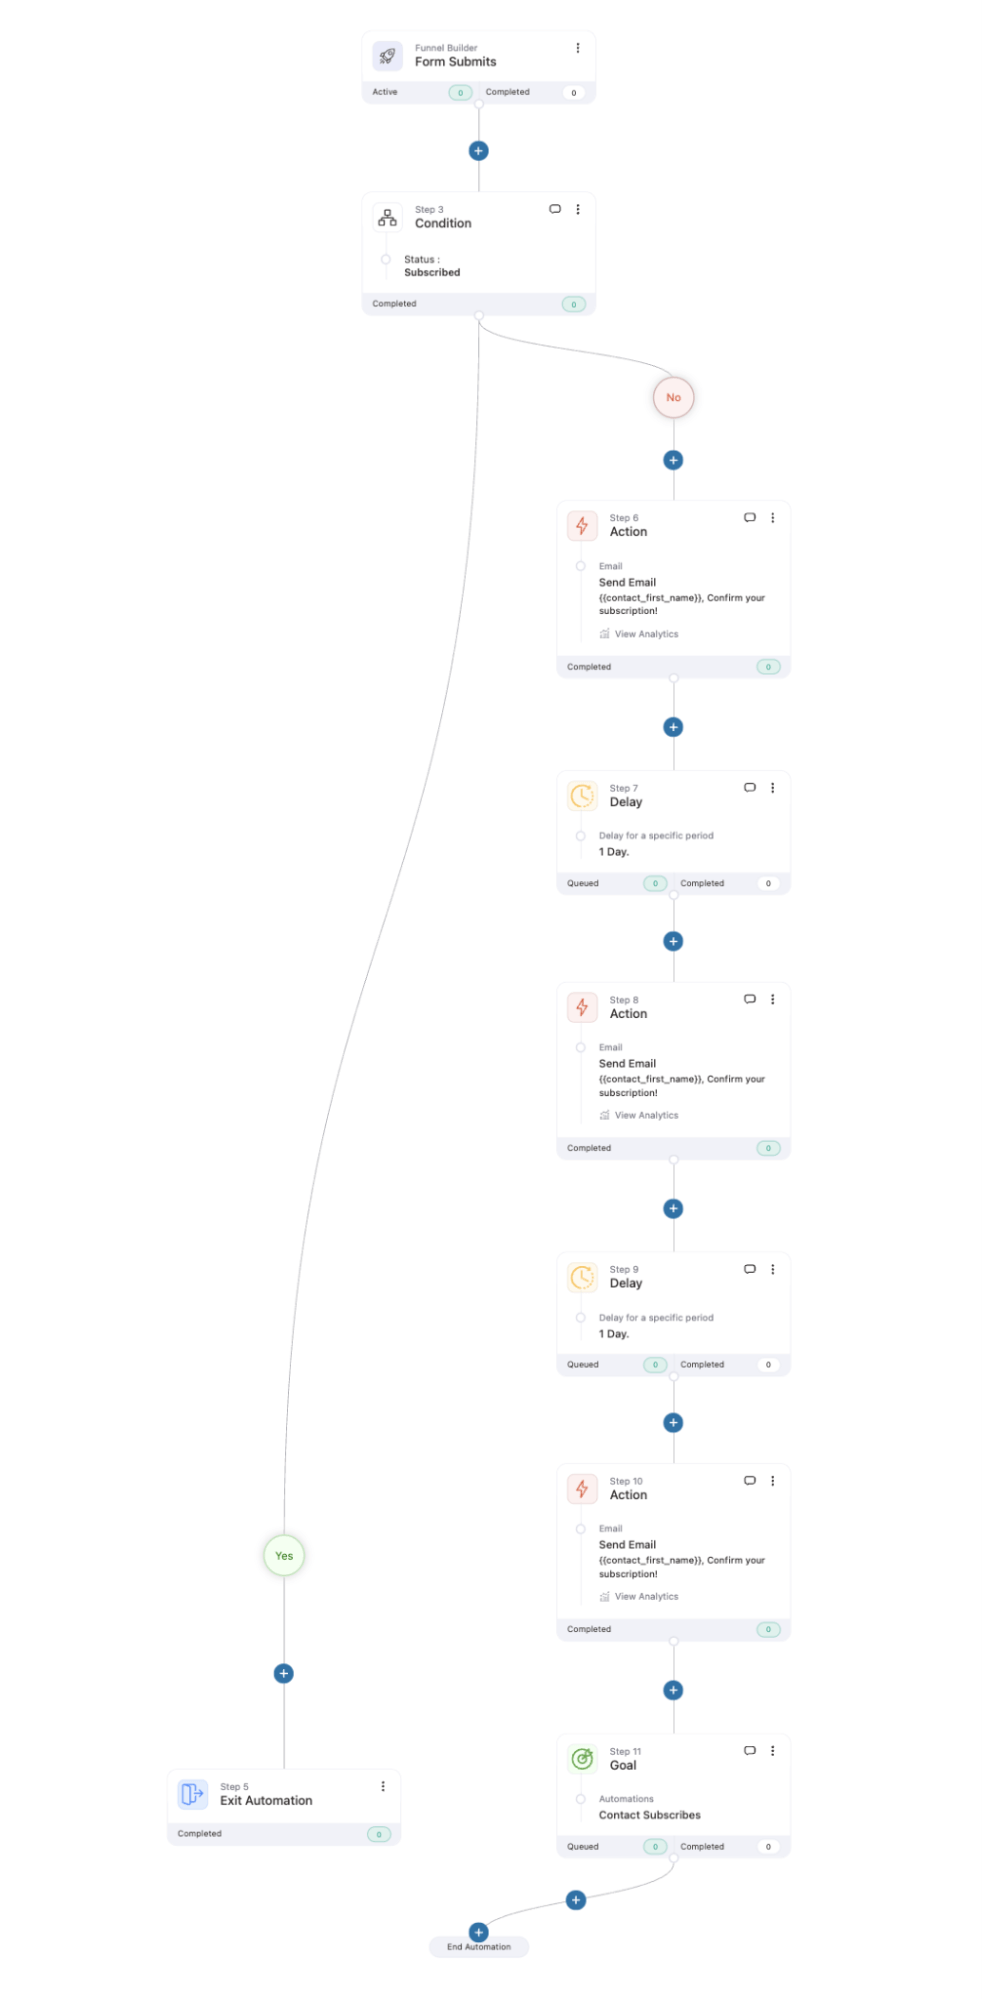
Here is how the final automation looks:
Method 2: Check subscription status before sending each follow-up confirmation email
In this method, we will use a Conditional rule before each email to check if the contact is already subscribed. If they are, remove them from the automation to maintain its cleanliness and efficiency.
For example, we will use the same automation from Method 1, but with one key change. We will remove the Goal.
Instead, before sending each follow-up email, add a Condition to check if the contact is already subscribed, just like we did after the form submission.
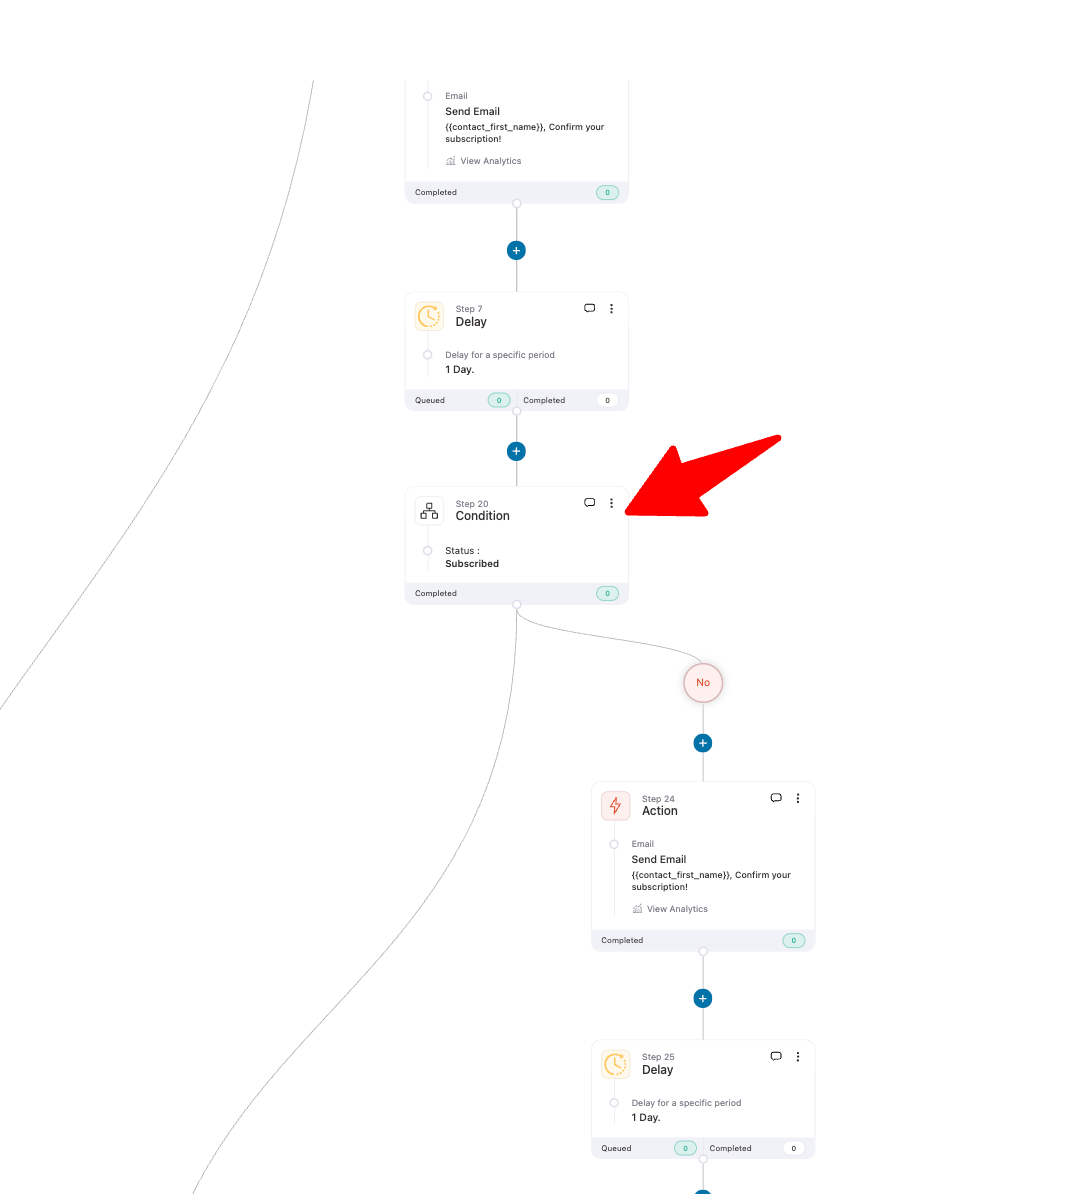
If you are sending three emails, place a subscription status check before each one. The email will only be sent if the contact is not subscribed.
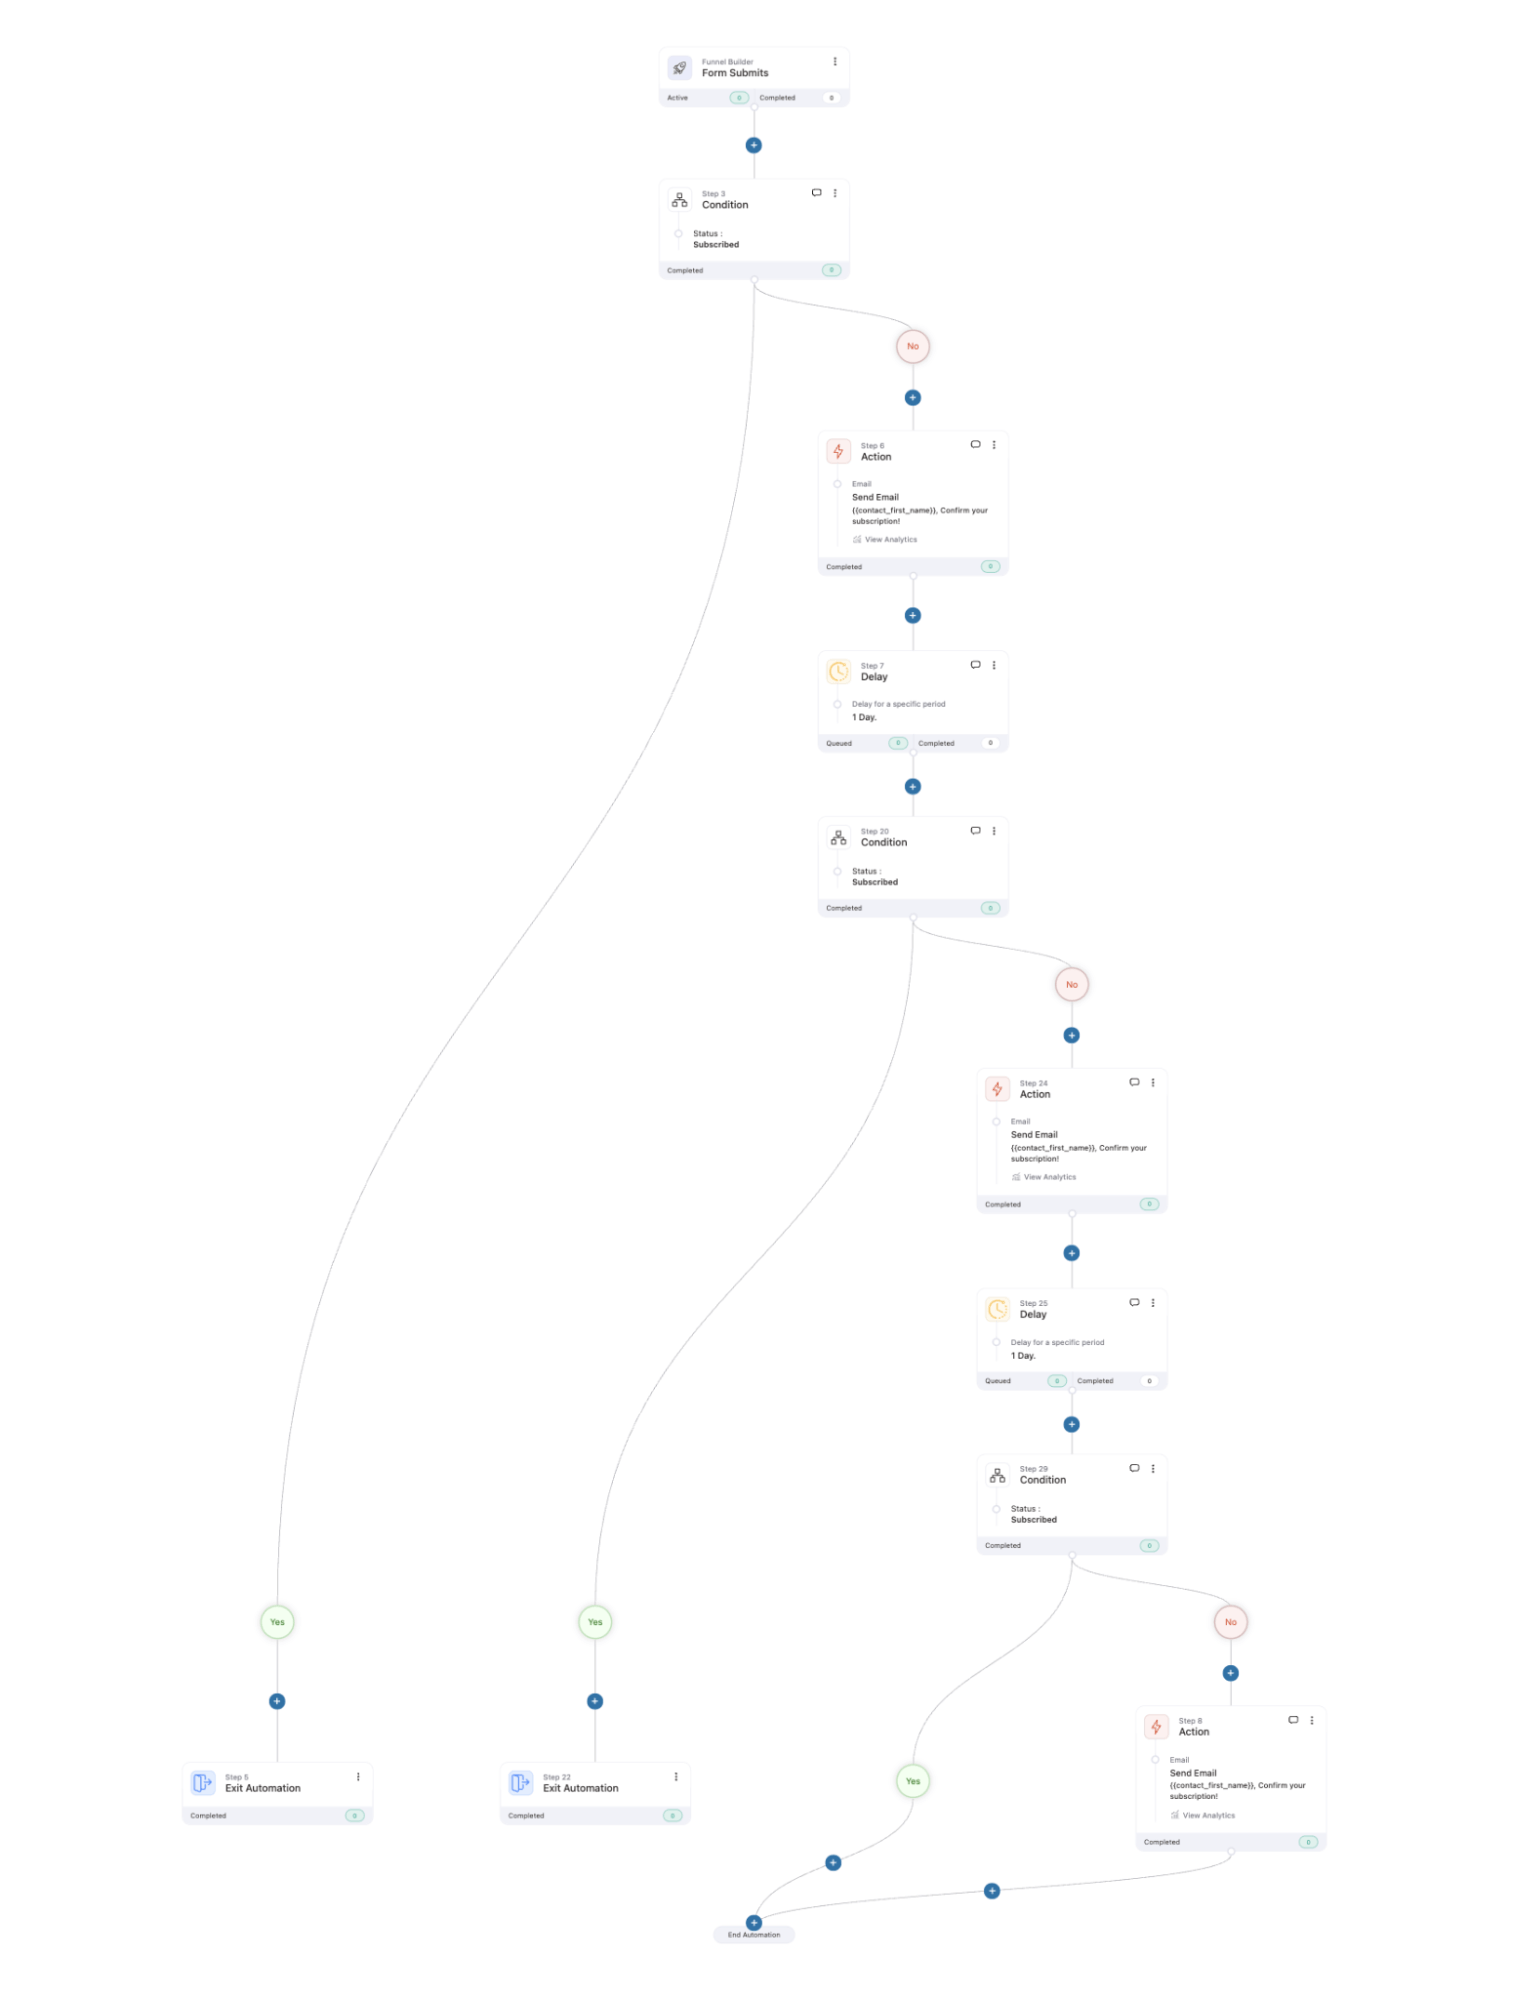
Here is the automation.
Method 3: Configure an optin form to send a confirmation email right after form submission
Using this method, you can set up a double opt-in confirmation email triggered upon form submission for any form that FunnelKit Automations integrates with. Later, use that form on any opt-in page to collect leads.
Note: Check out the list of forms FunnelKit integrates with.
Here are the steps you need to follow:
Step 1: Create a form
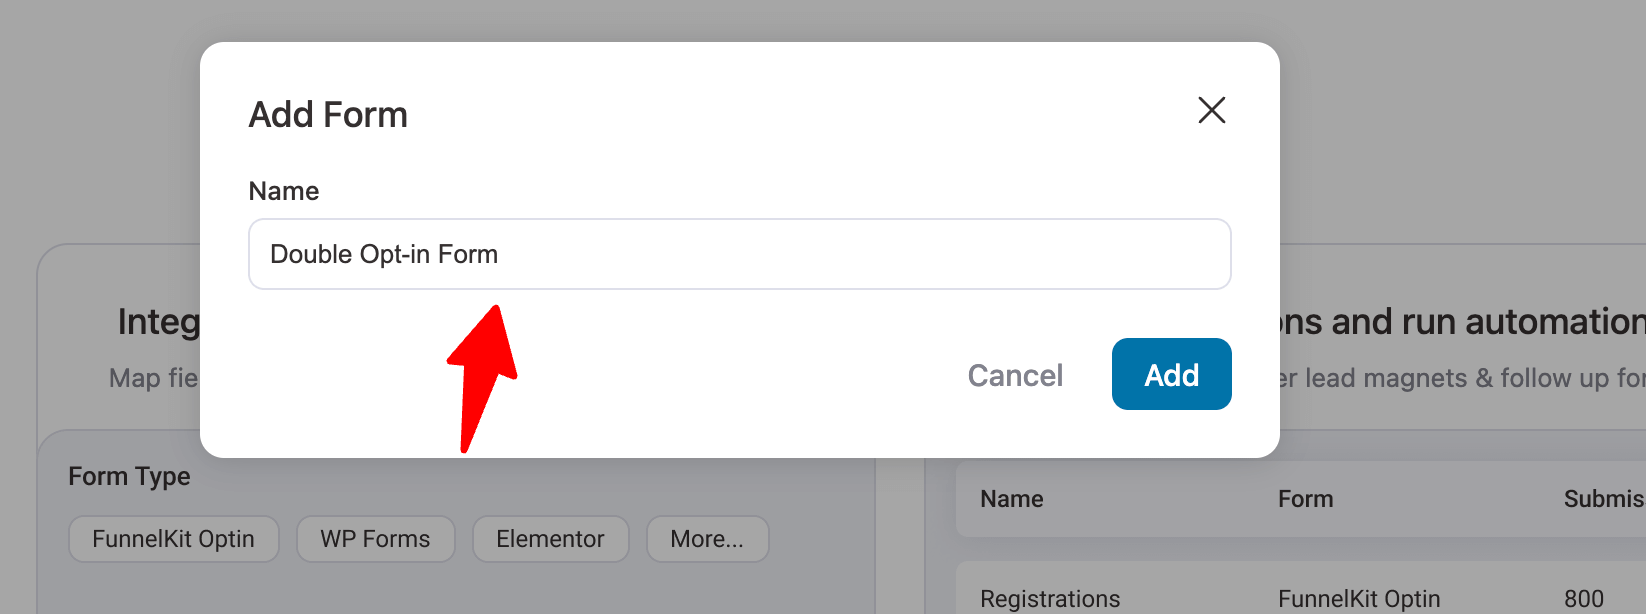
For this, navigate to Tools ⇒ Form and hit Create Form.

Next, provide a name and hit Add.
Step 2: Select the form type
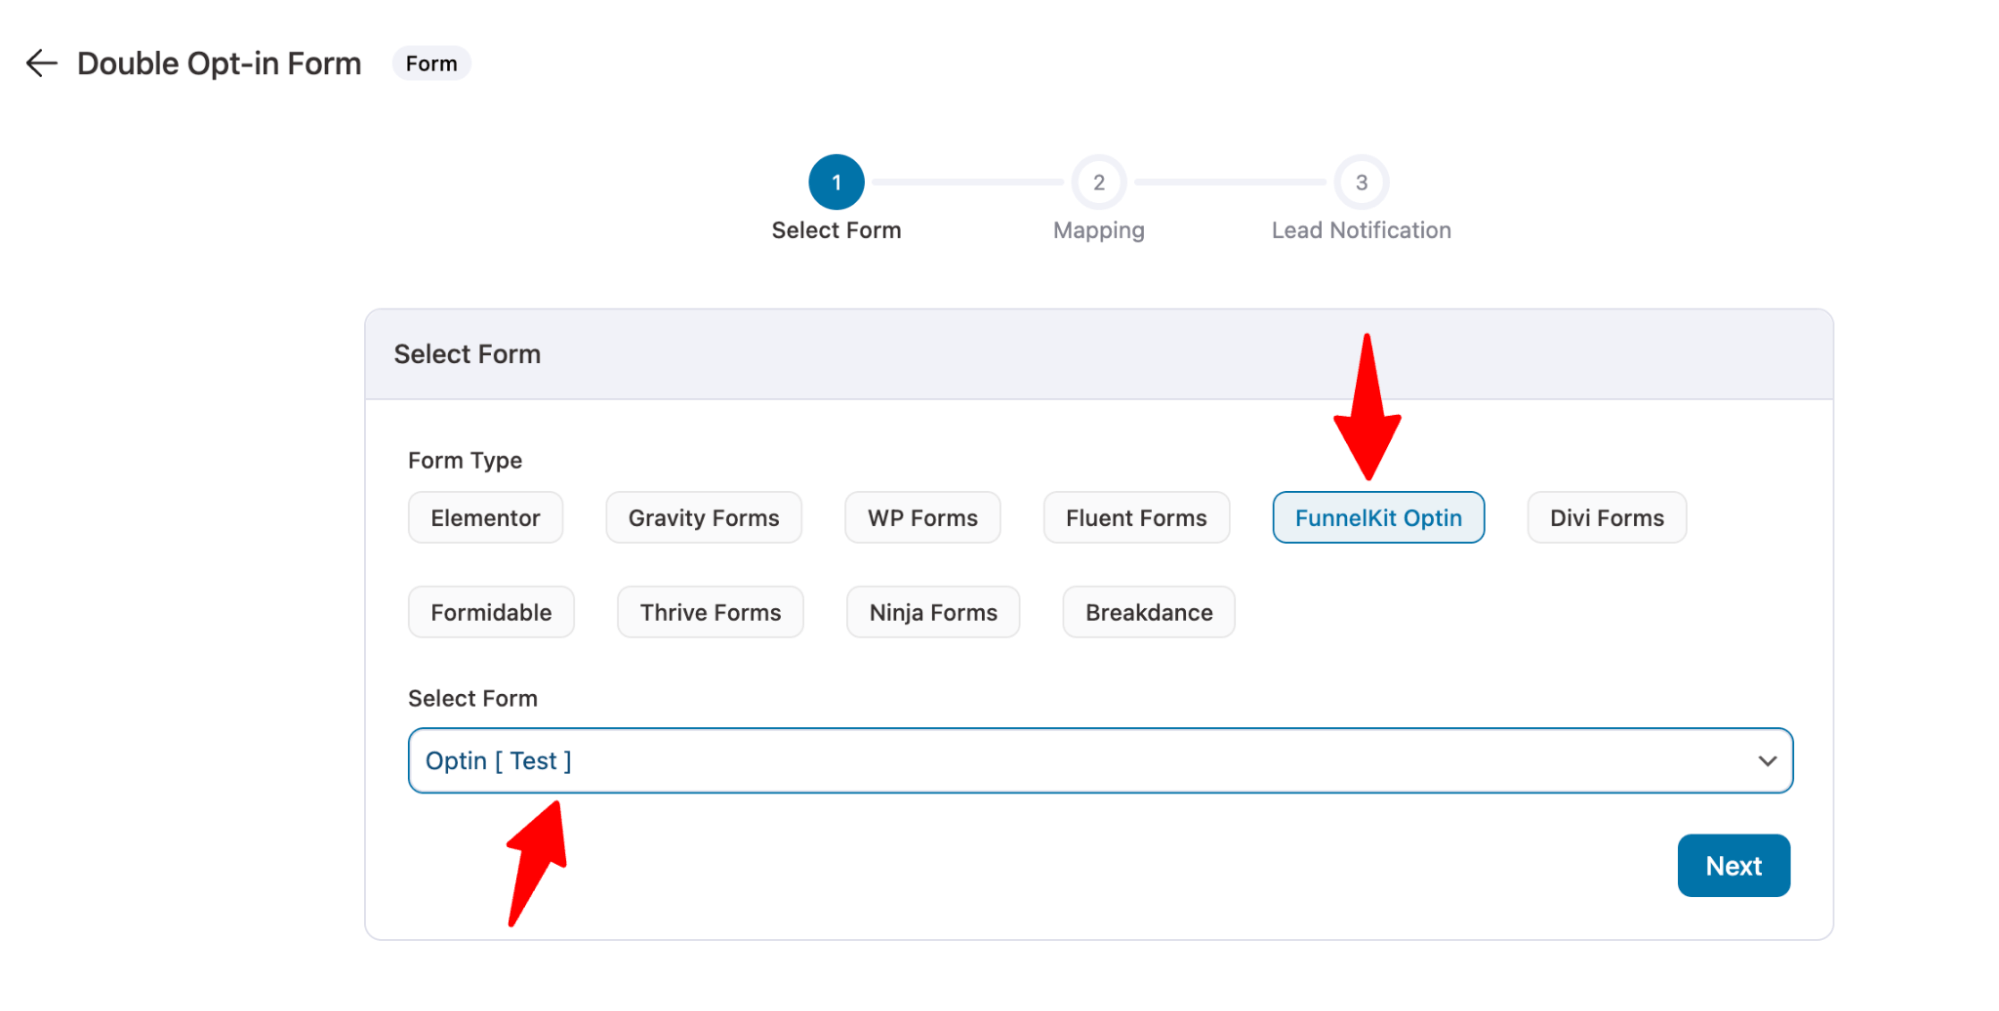
After creating the form, select the Form Type, then the Form, and hit Next.
Note: To show the process, we are using the FunnelKit Optin form; you can use any other form, the process remains the same.
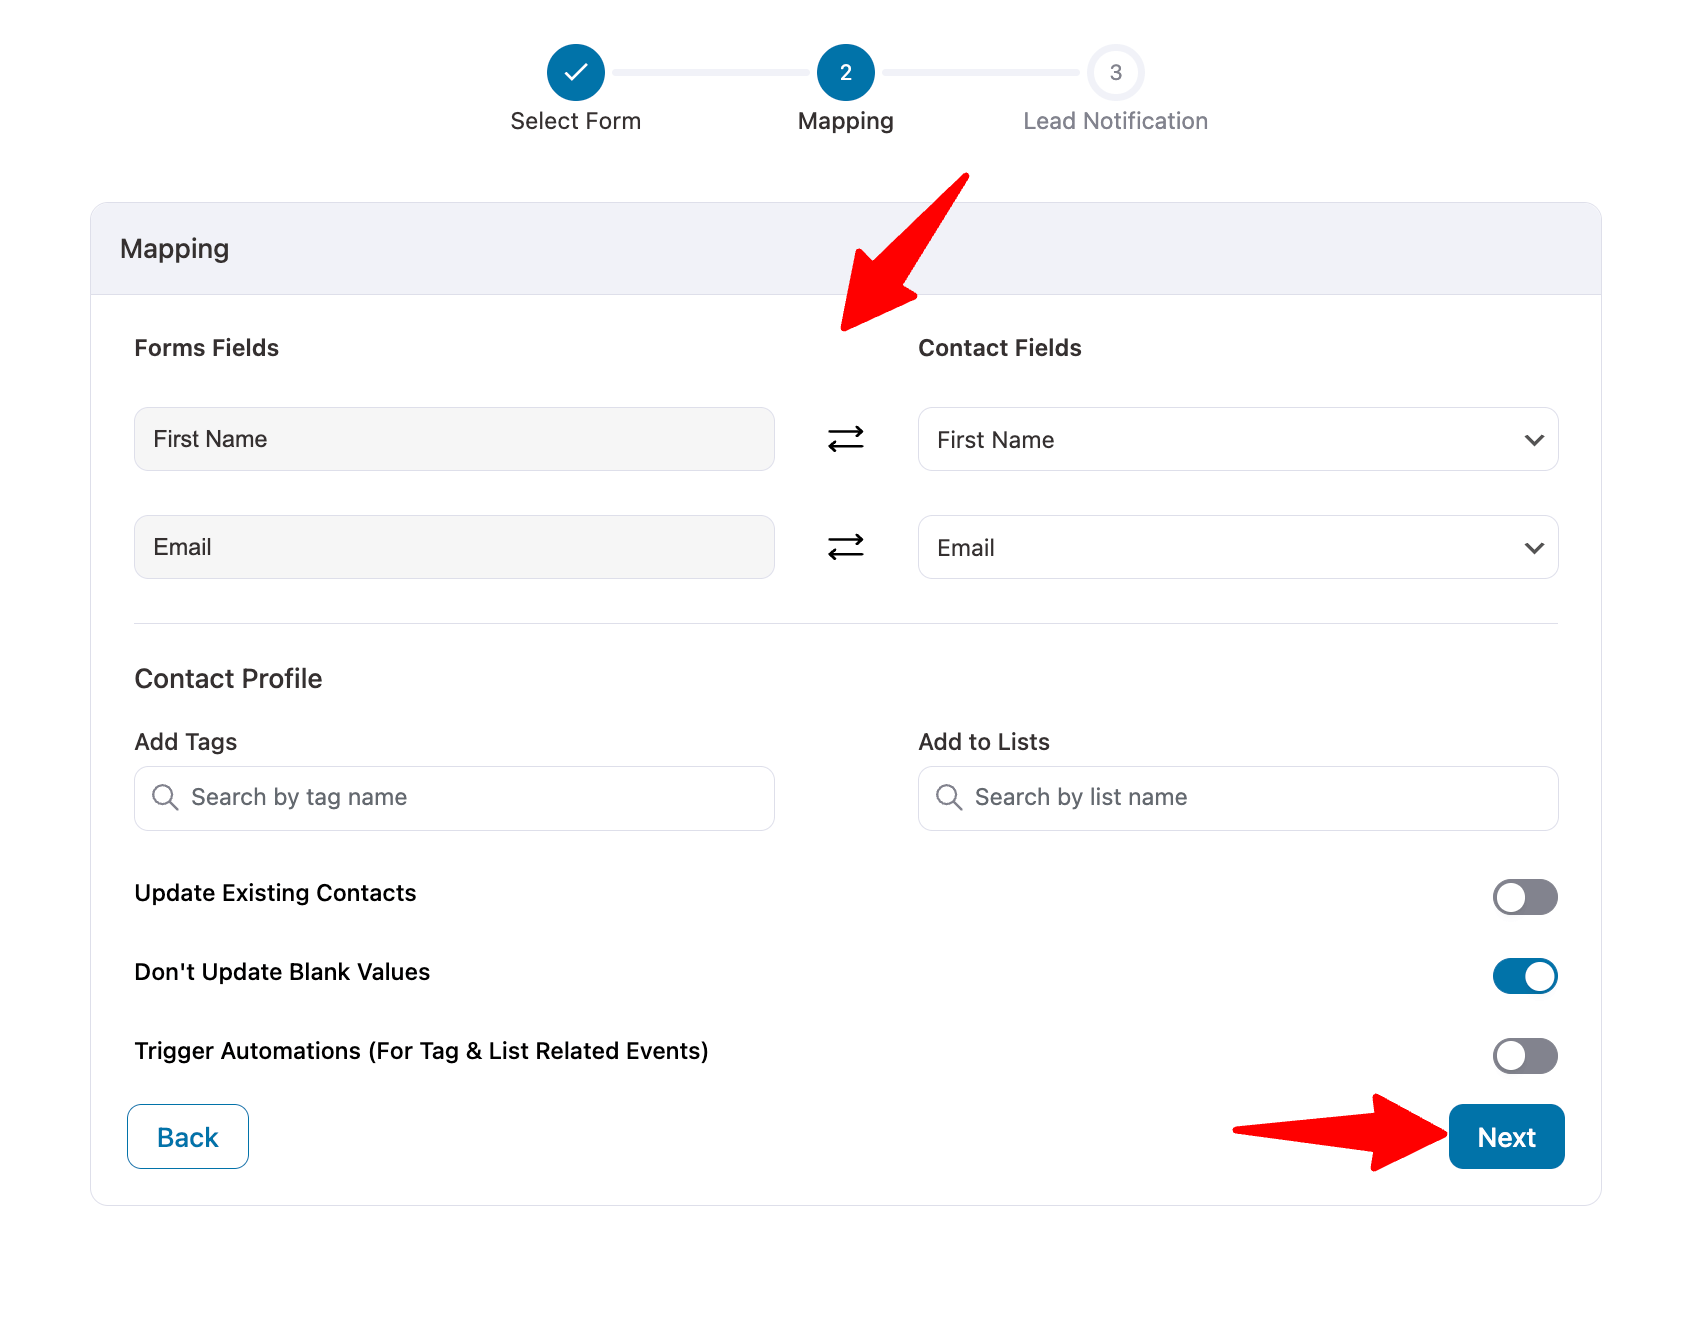
Step 3: Map the form fields
Next, map the form fields and hit Next.
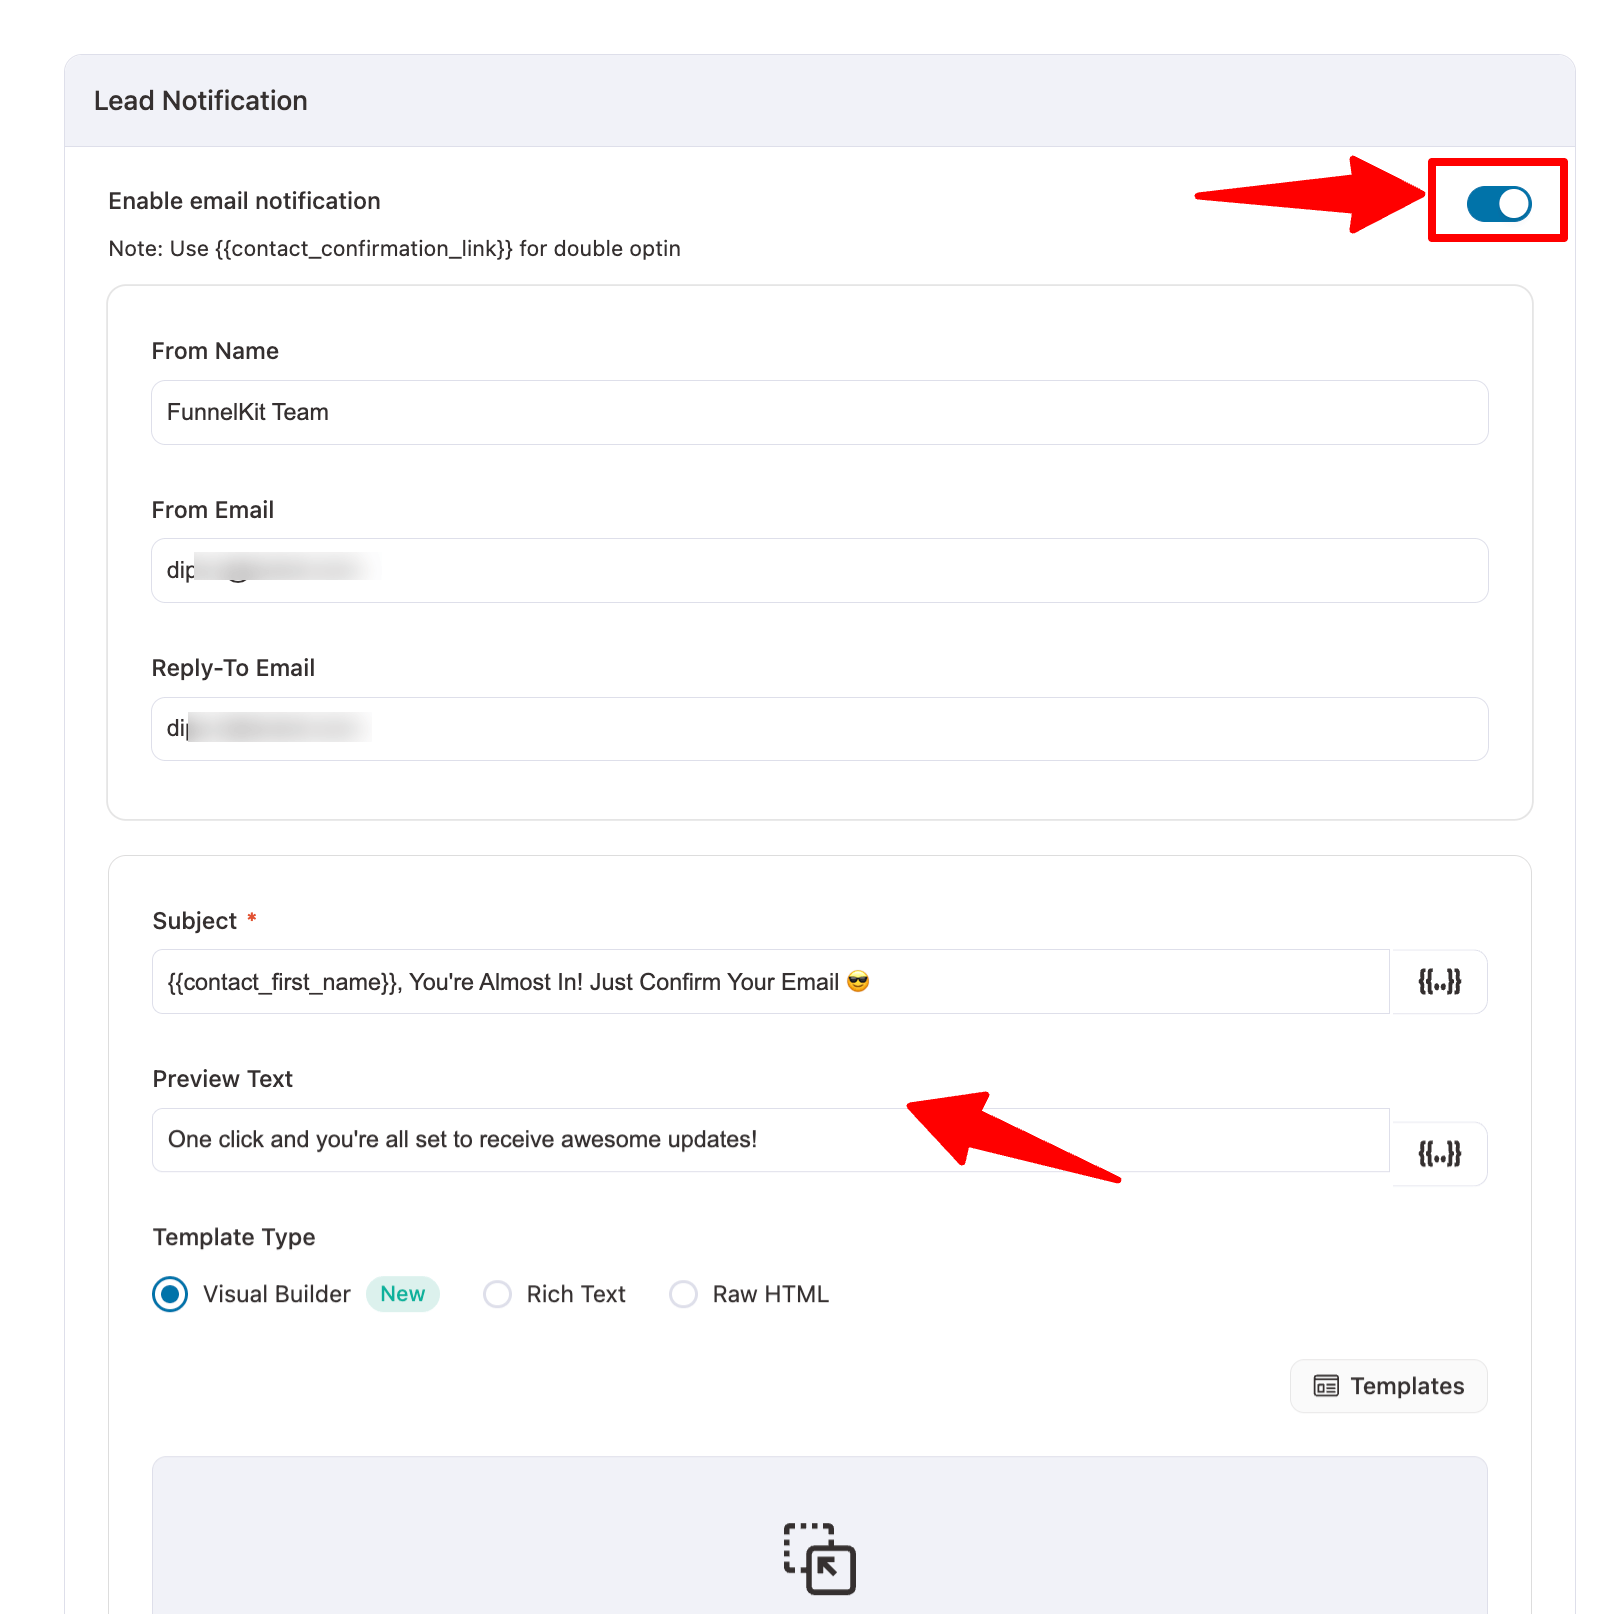
Next, enable the Enable email notification option. Then, all the email confirmation settings will open.
Step 4: Configure and design the double-opt-in email
Set the From Name, From Email, and Reply-To Email. For the email, set the Subject and preview text. Hit the {{..}} sign to add dynamic values, such as a contact name.
After that, choose the template type and design your email. Here, we are going with New Visual Builder and will use the prebuilt template “New Registration Email”
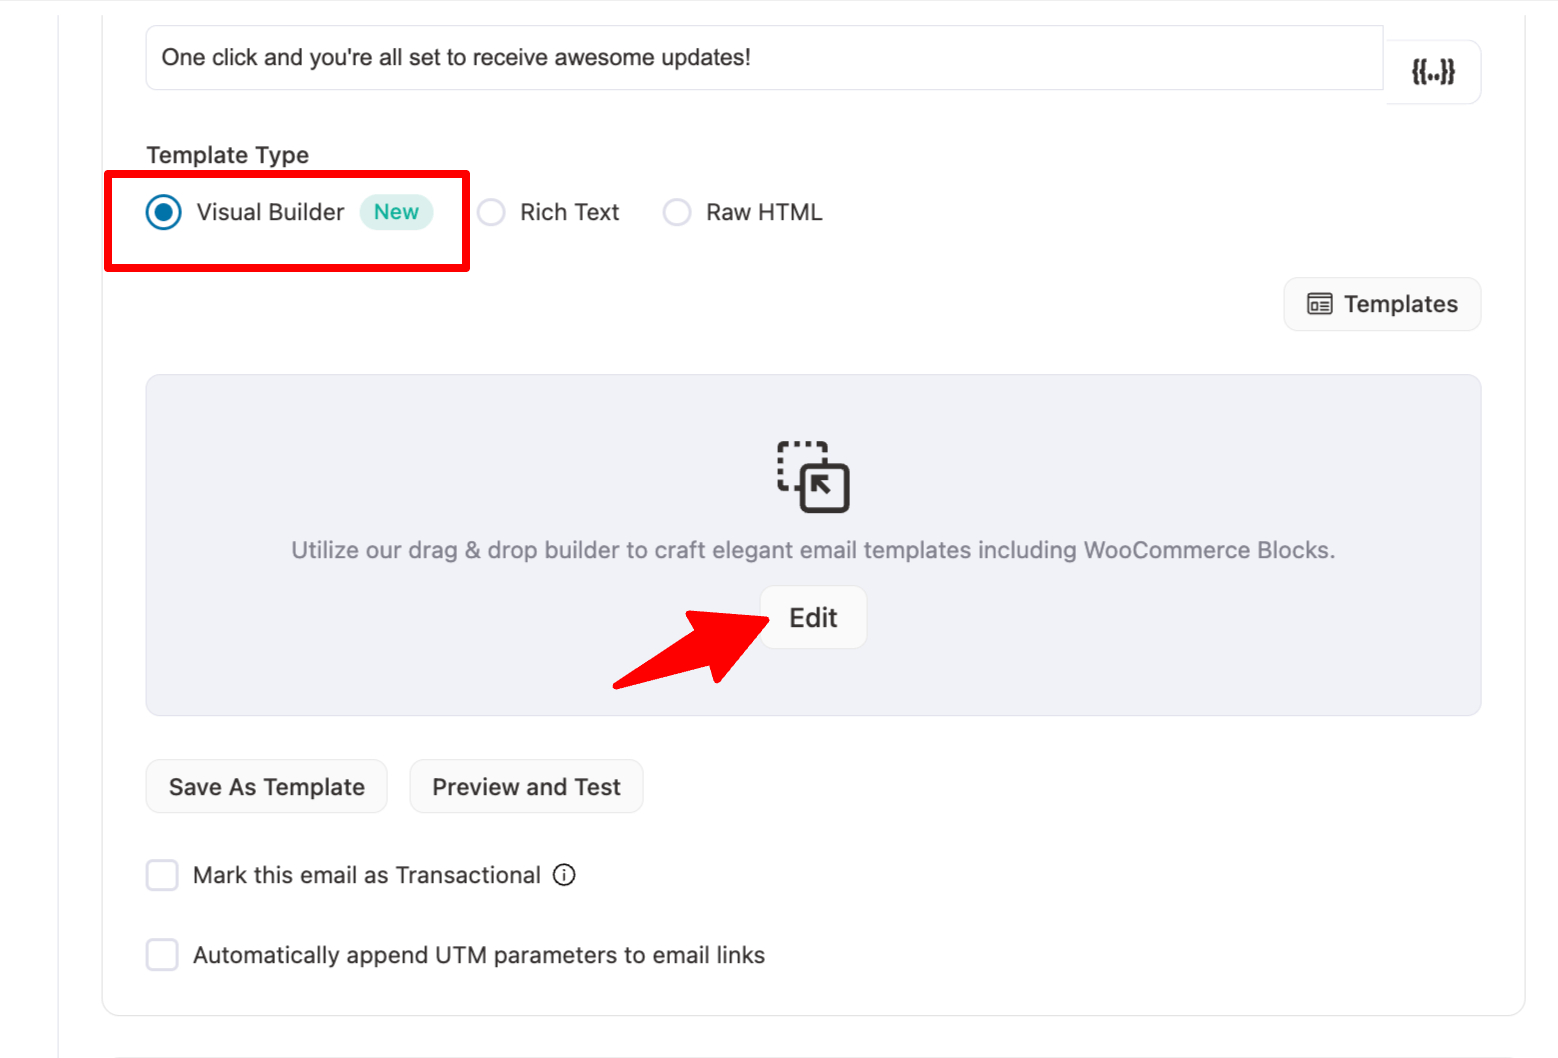
Make sure to include the link to the confirmation page using the merge tag “{{contact_confirmation_link}}”.

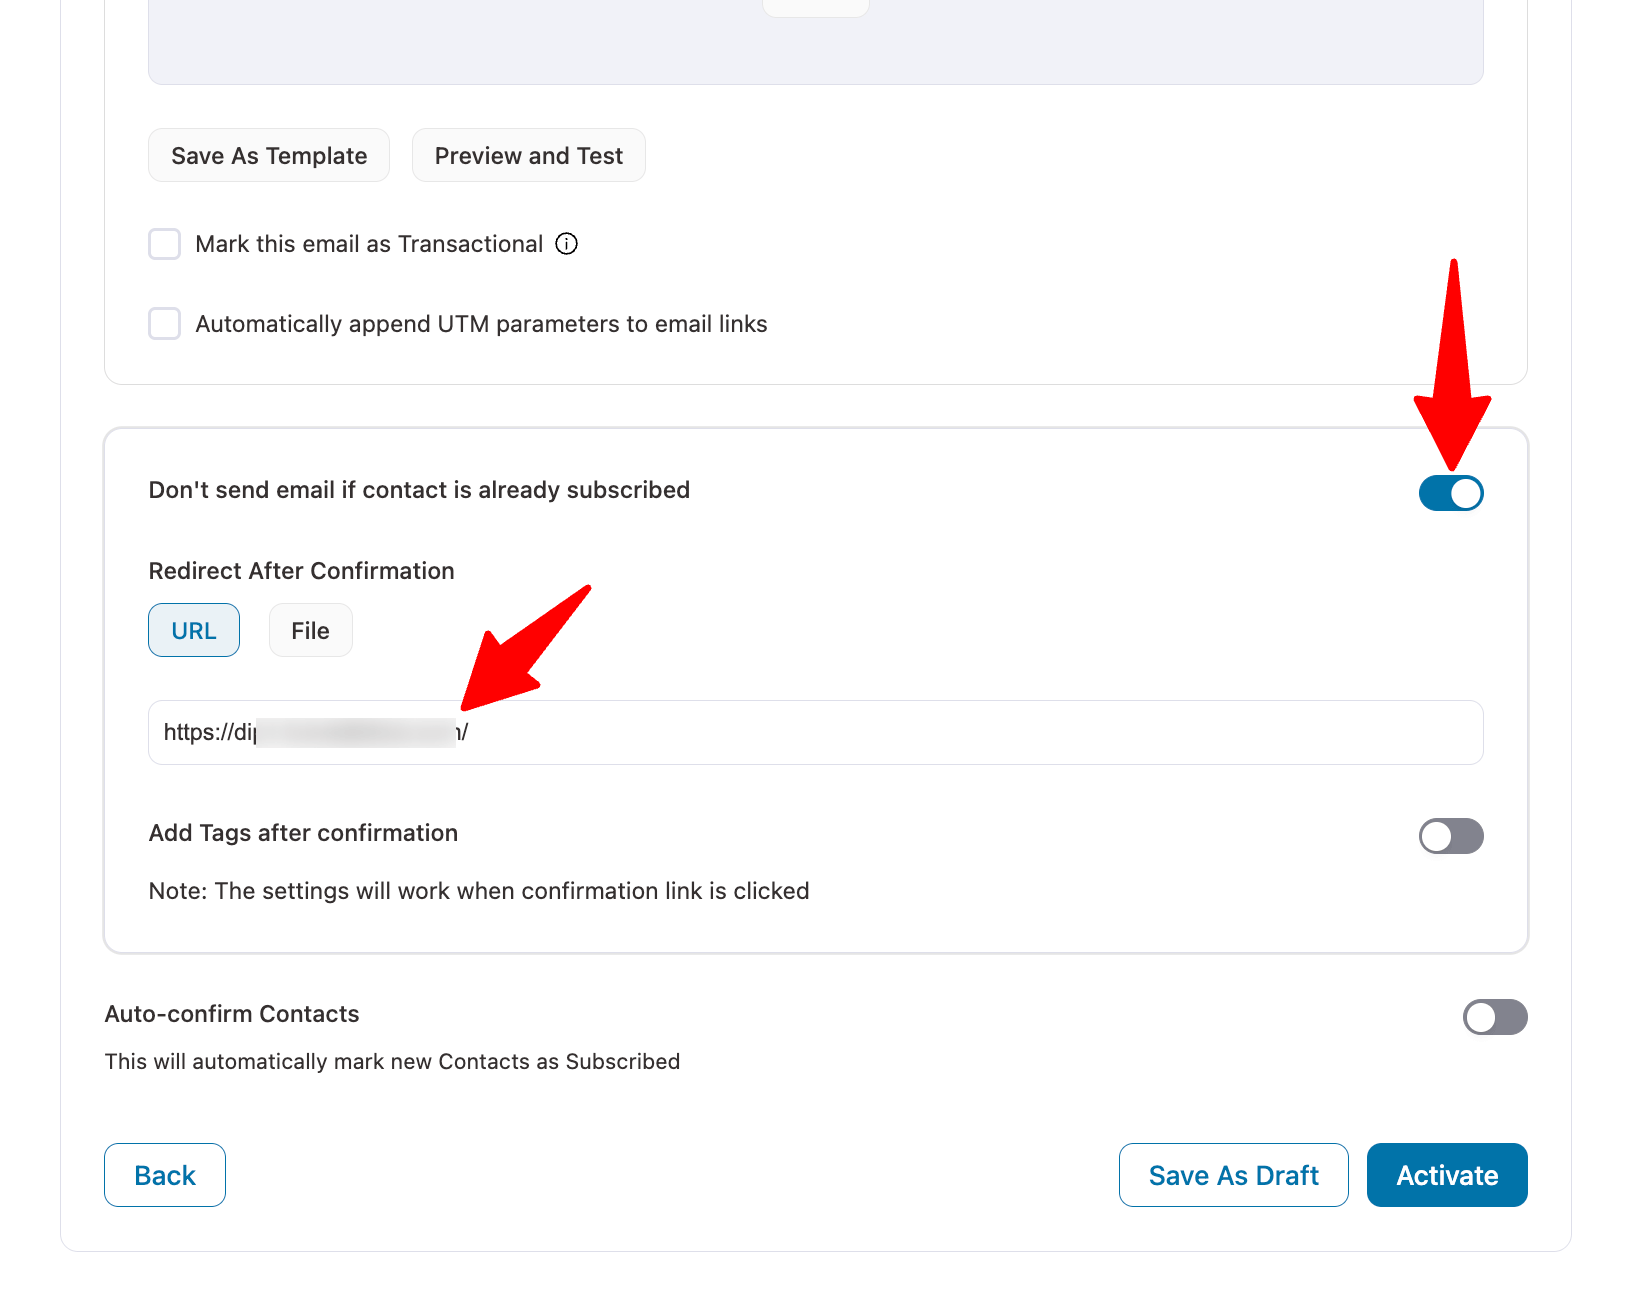
Step 5: Set the redirection page
After setting up the email, configure the remaining settings, such as enabling the option “Don’t send email if contact is already subscribed.” Then, set the “Redirect After Confirmation” URL.
Note: Method 3 sends only one confirmation email. If you want to send follow-up emails, you’ll need to create a separate automation using the "Contact Subscribes" event trigger.
That’t it. These were three different ways of automatically sending double-opt-in emails along with follow-ups. If you need further assistance, feel free to raise a support ticket here.


