In this documentation, we will test our link triggers (set up in the previous documentation) by creating an automation here.
Go to Automations to create a new automation.
If you are new to FunnelKit Automations, click here for more detailed instructions on how to design a new automation.
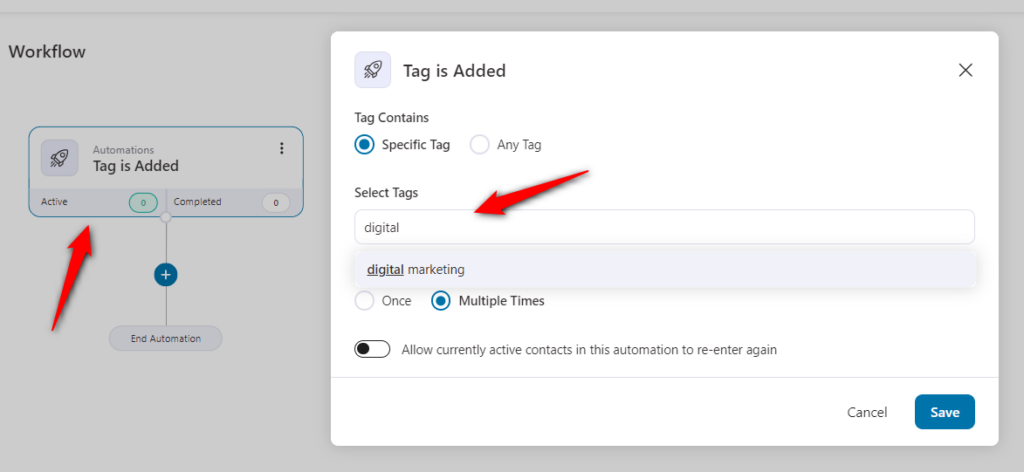
Step 1: Select an event
Select an event that will trigger this automation.
Here, we have selected the “tag added” as our event. We’ve also specified a particular tag for contacts that we’ll be targeting with this automation.
Step 2: Select the action
We will send an email to our contacts.
Select send email as the action and write the email body.
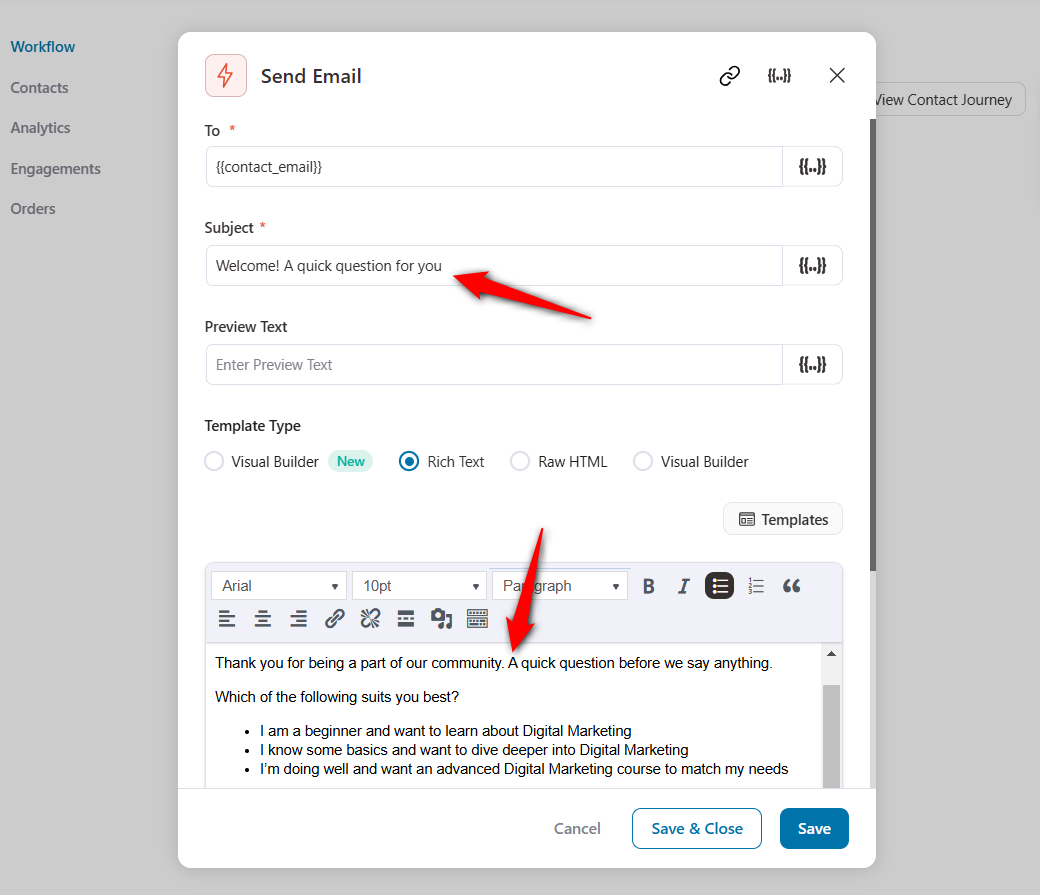
You can even use the built-in enhanced visual email builder to design beautiful emails.
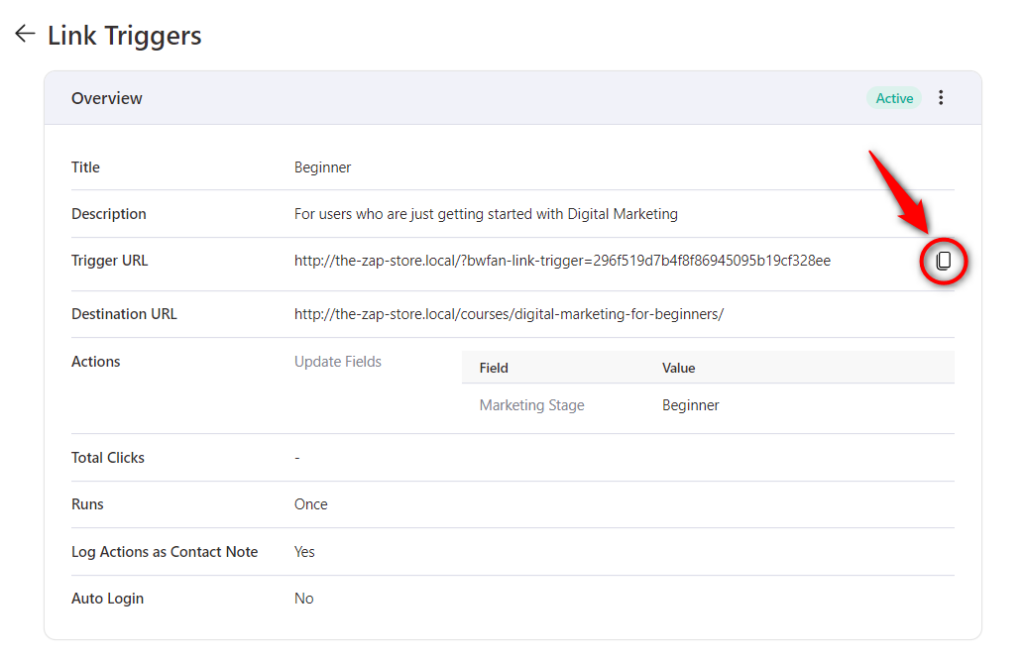
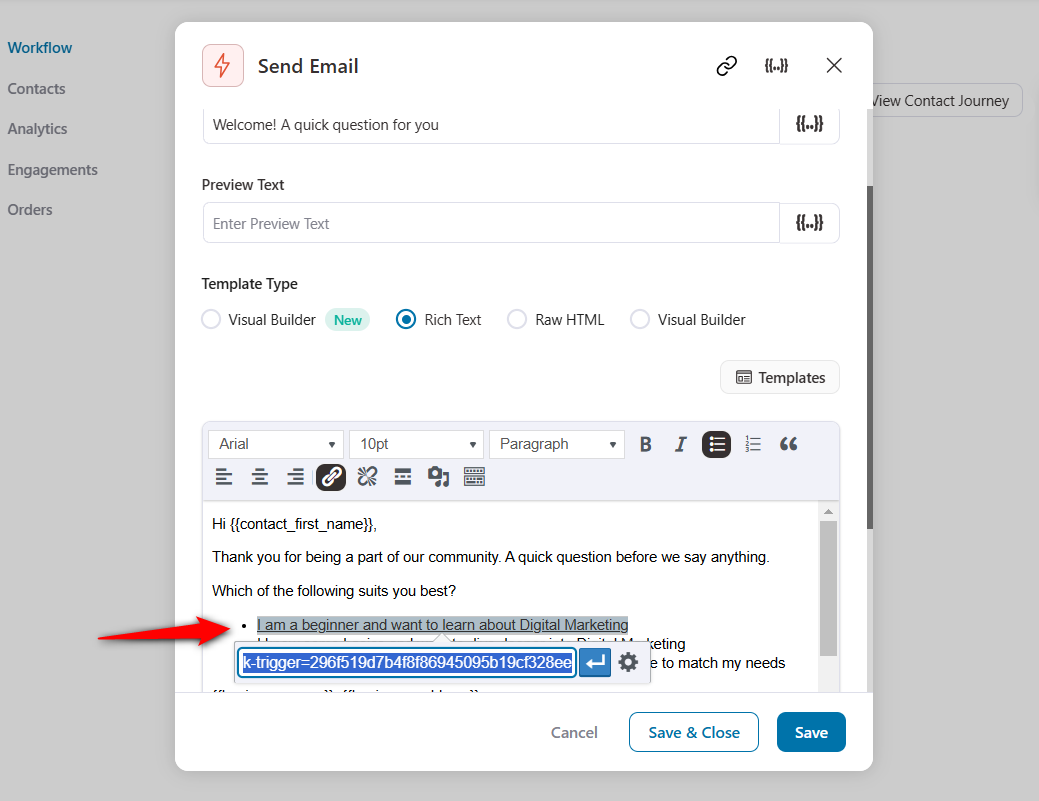
Insert the specific link triggers - beginner, intermediate and advanced to these options.
To do that, copy the link trigger from the link trigger page:
And, paste into the hyperlinks of the email:
Once you’ve interlinked all the link triggers, activate your automation by clicking on the toggle.
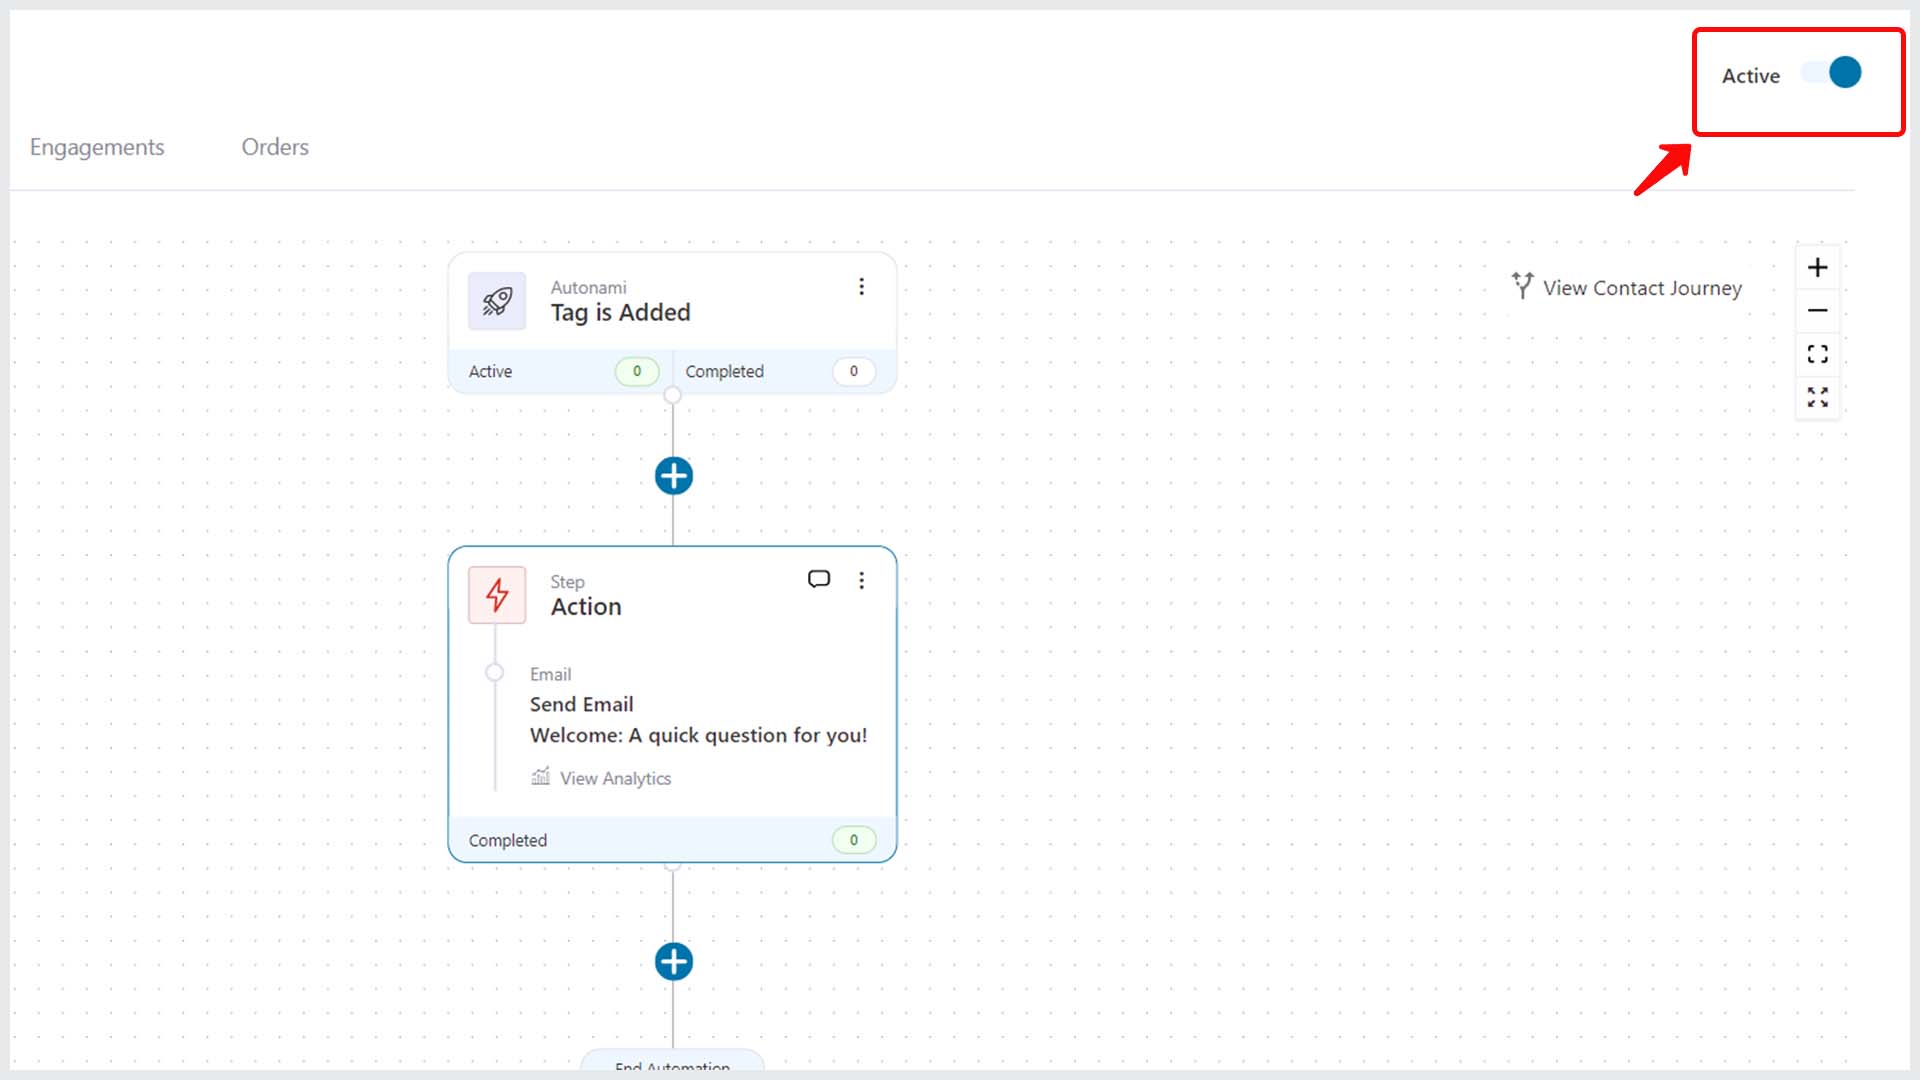
This will activate your automation.
Testing the Link Triggers
To test the link triggers, send a test email to a contact.
Users will receive the following email:
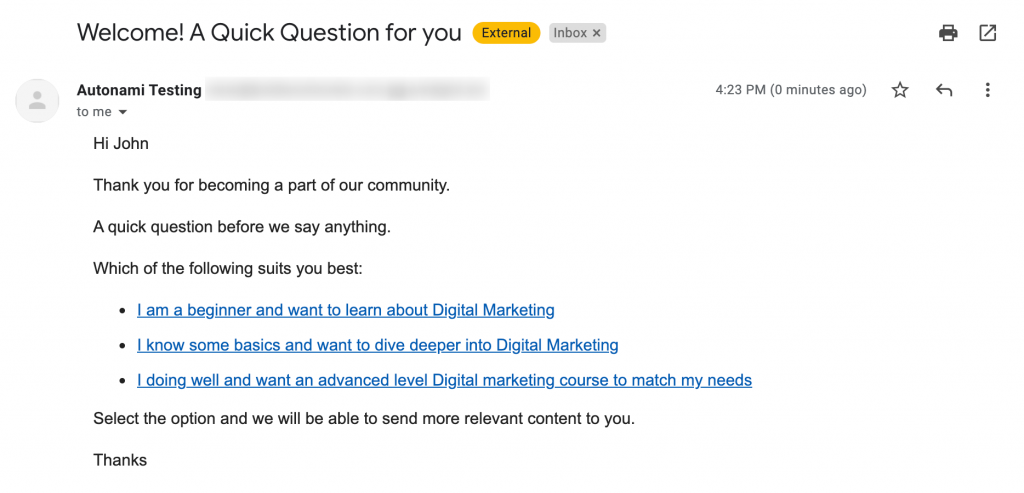
Whenever a user clicks on a particular link, they will be redirected to the URL you have specified.
You can see the updated stats of the Link Trigger in FunnelKit Automations:

Well done! You have successfully created and tested the Link Triggers in FunnelKit Automations.


