PushEngage is a web and app push notification service that lets websites and online businesses to send targeted notifications to their users even when they are not actively browsing the website.
These push notifications appear on the user’s device as small pop-up messages, usually on the browser window, and can include text, images, and links to drive user engagement.
FunnelKit Automations integrates with PushEngage to send automated push notifications to your contacts.
Here are a few things to emphasize after successfully integrating PushEngage with FunnelKit Automations.
Contact Profile
When you view the detailed contact profile, you’ll be able to see their opt-ins for push notifications.
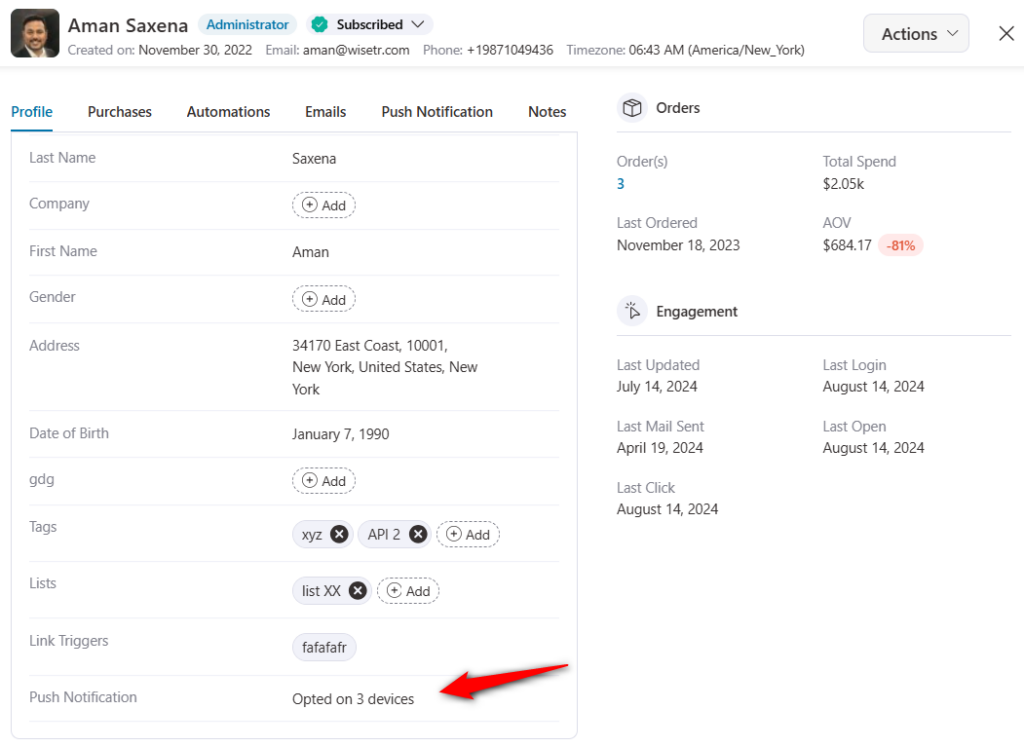
It’ll list the push notifications this user opted for on a different number of devices.
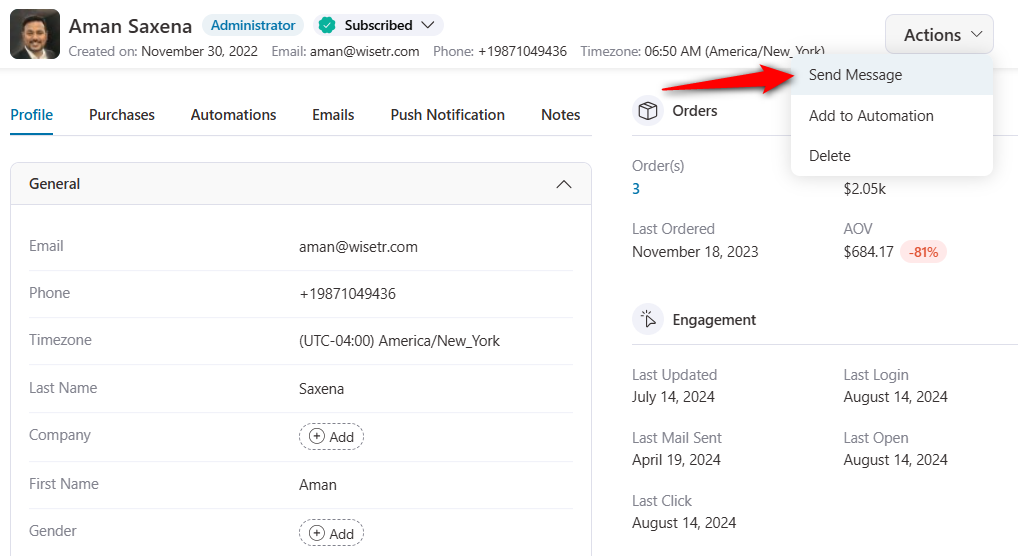
Sending a direct push notification
You can send a direct push notification manually to a user from their contact profile.
Click on Actions and hit the Send Message button.
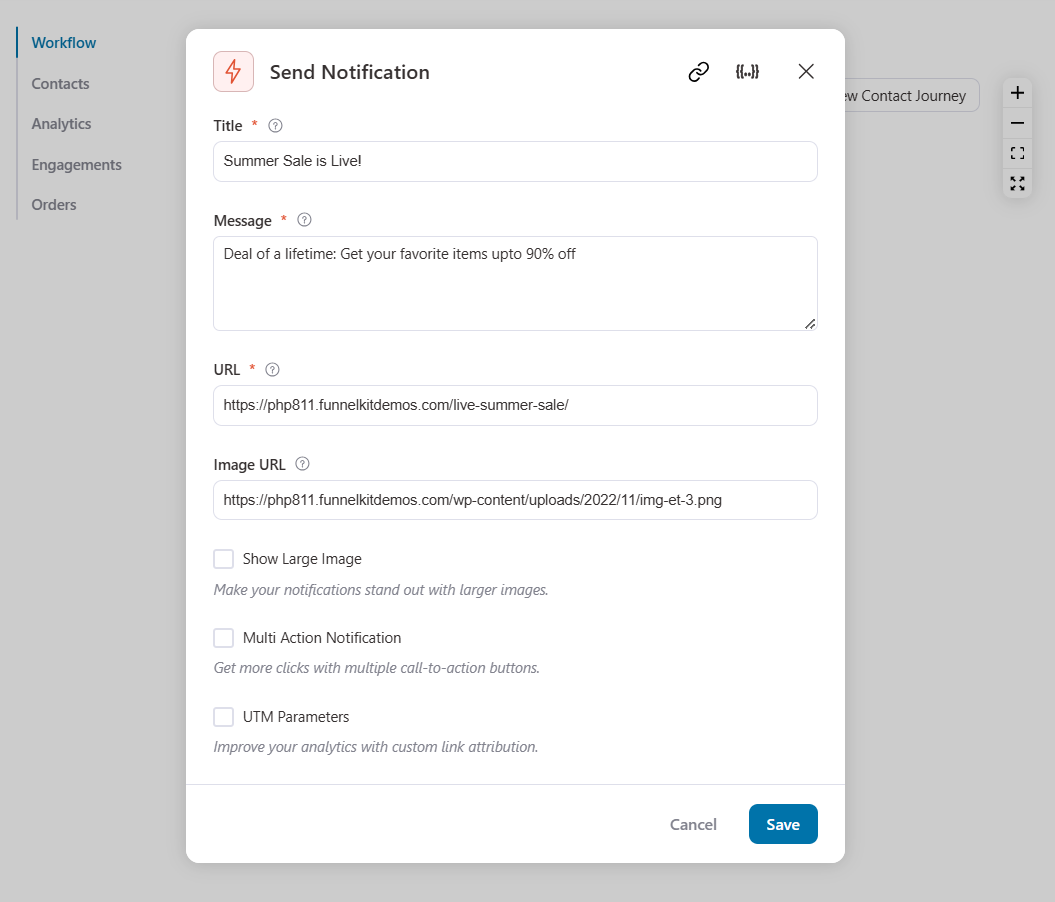
Select Push Notification (By PushEngage) and write the text you want to send to your contact.
- Title - Heading of the push notification
- Message - A brief description of the push notification
- URL - The URL of the page for redirecting users
- Image URL - The URL of the image to be shown inside the push notification
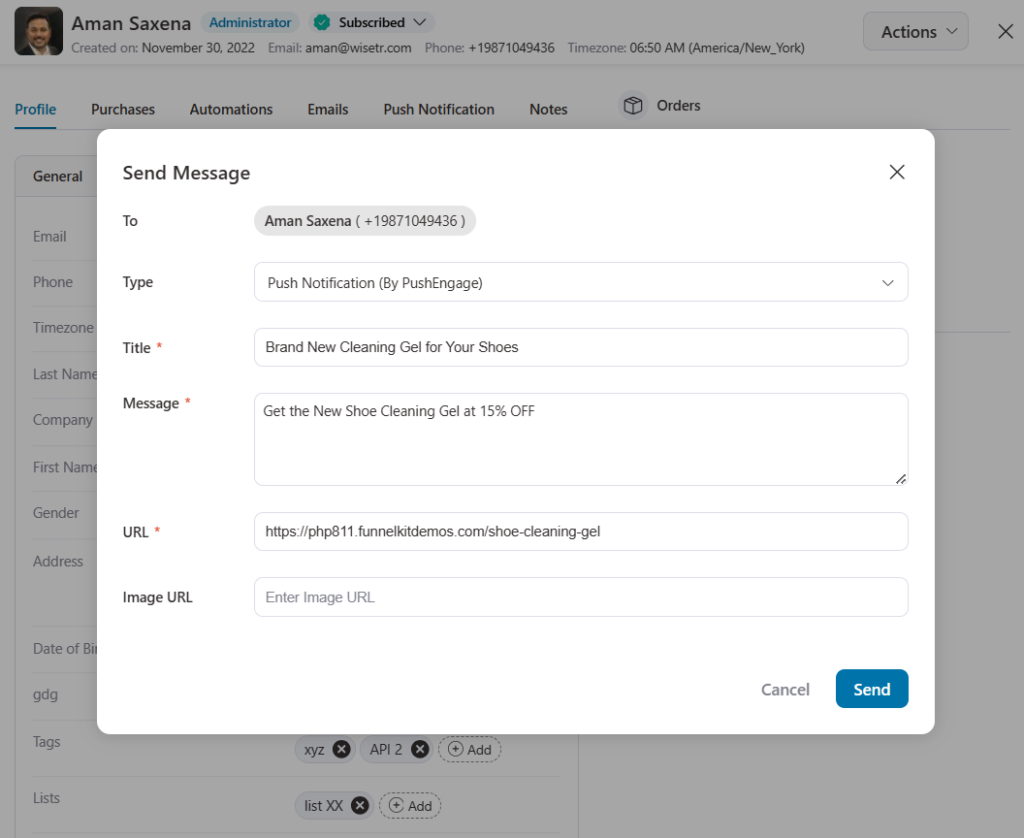
Once done, click on the Send button to send this push notification to your contact.
View push notifications sent to contacts
You’ll be able to view all the push notifications sent to your contacts manually or using automations.
Under the contact profile, go to the Push Notification section.
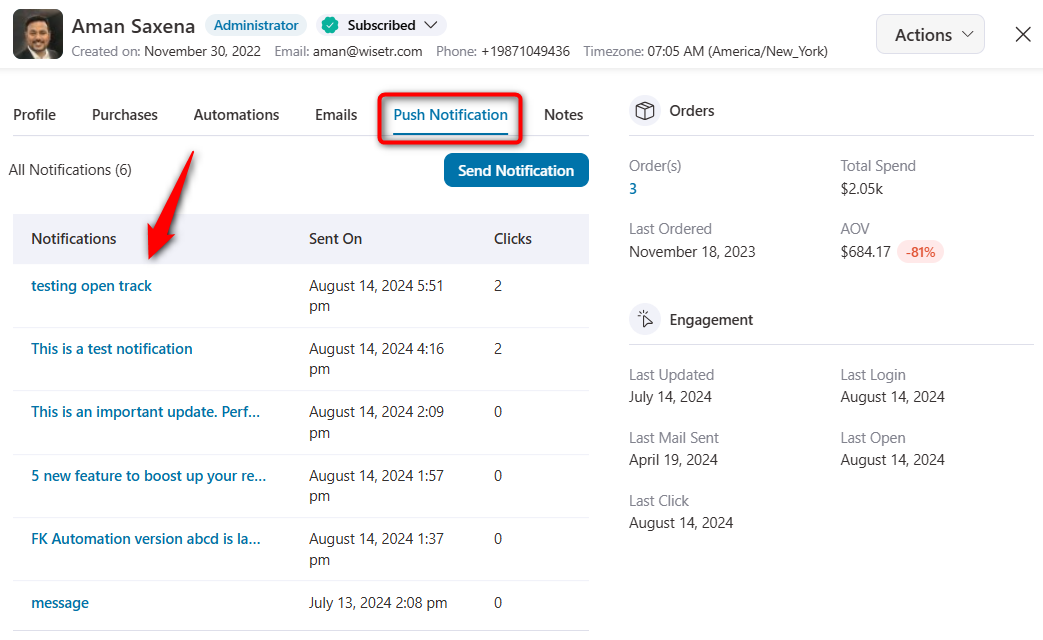
You can view the push notifications sent, the date, and the total clicks it got.
Filter contacts by PushEngage Opt-ins
You can filter contacts by PushEngage opt-ins.
Add a new filter and click on PushEngage.
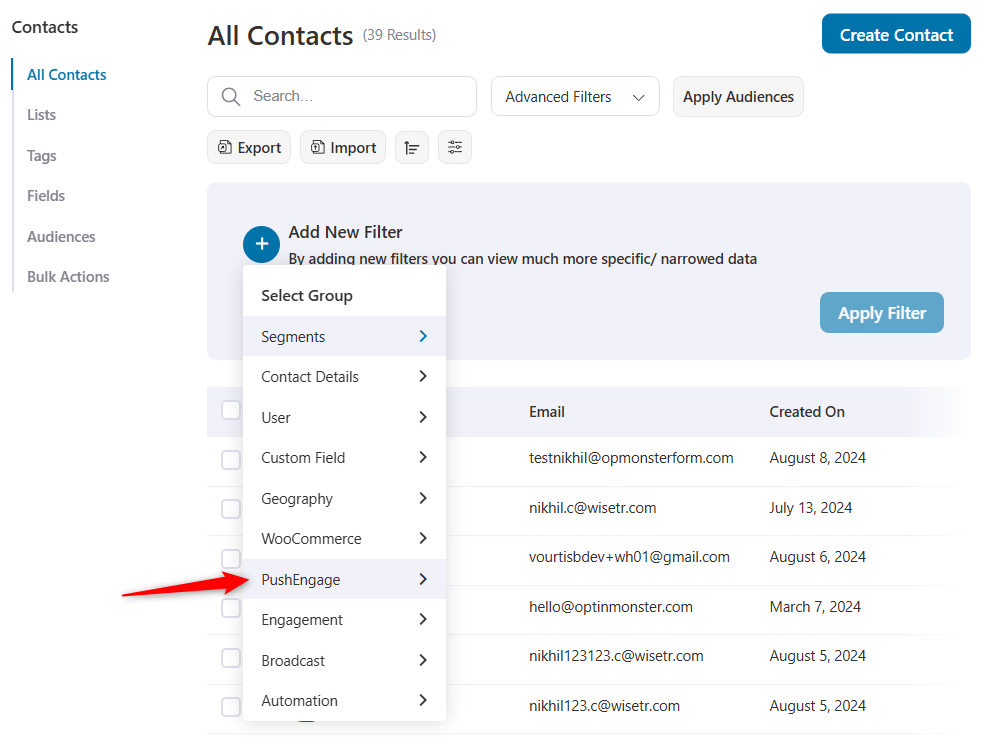
Hit the contact opted filter and specify the option.
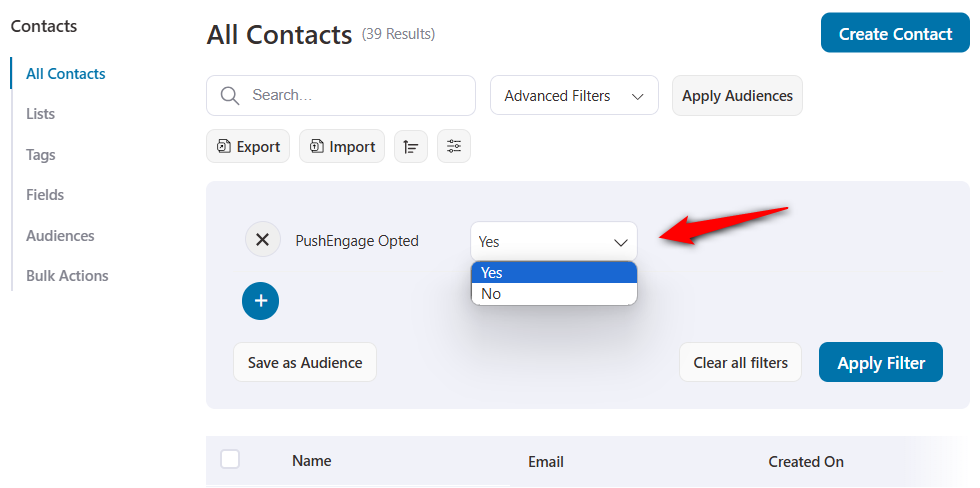
Once you’ve applied the filters, it’ll show all the contacts who have opted in for push notifications on your WooCommerce store.
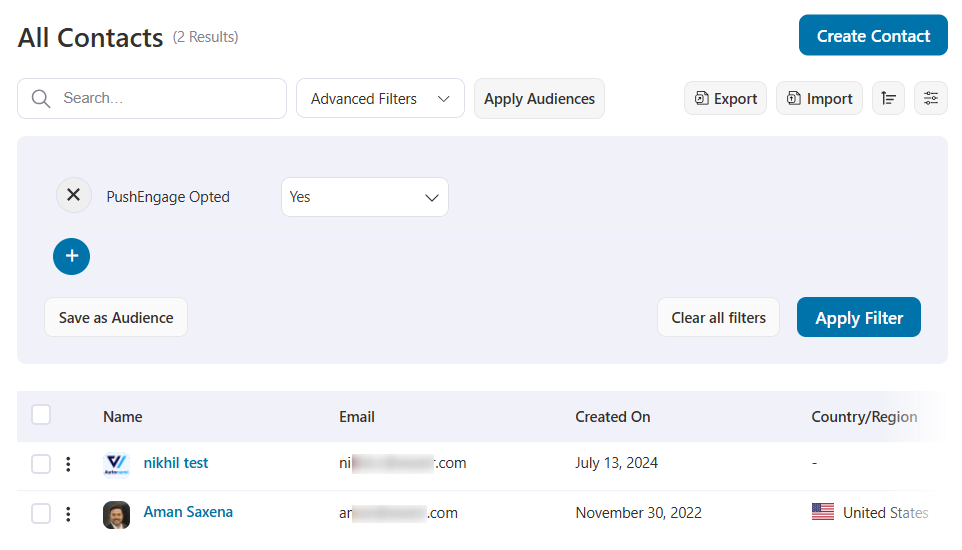
You can directly go to their contact profile or save them as audiences.
Send automated push notifications
FunnelKit Automations lets you send push notifications based on an event that gets triggered.
For example, you can send push notifications to inactive customers, encouraging them to visit the store and get items at discounted prices.
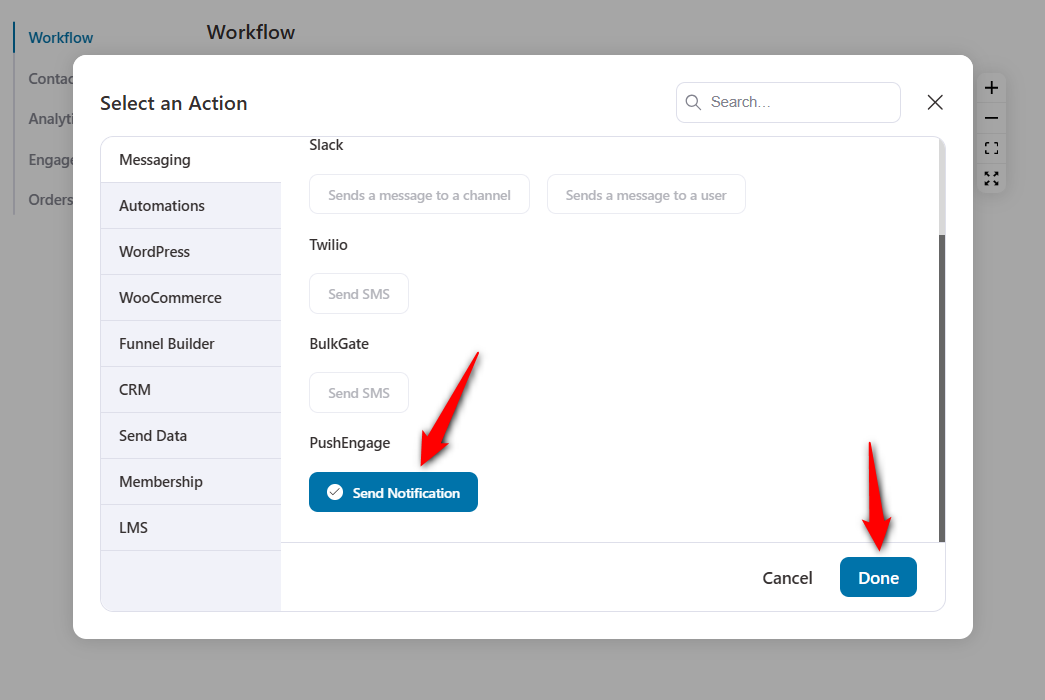
Here, we’ll use the Customer winback event trigger and add an action.
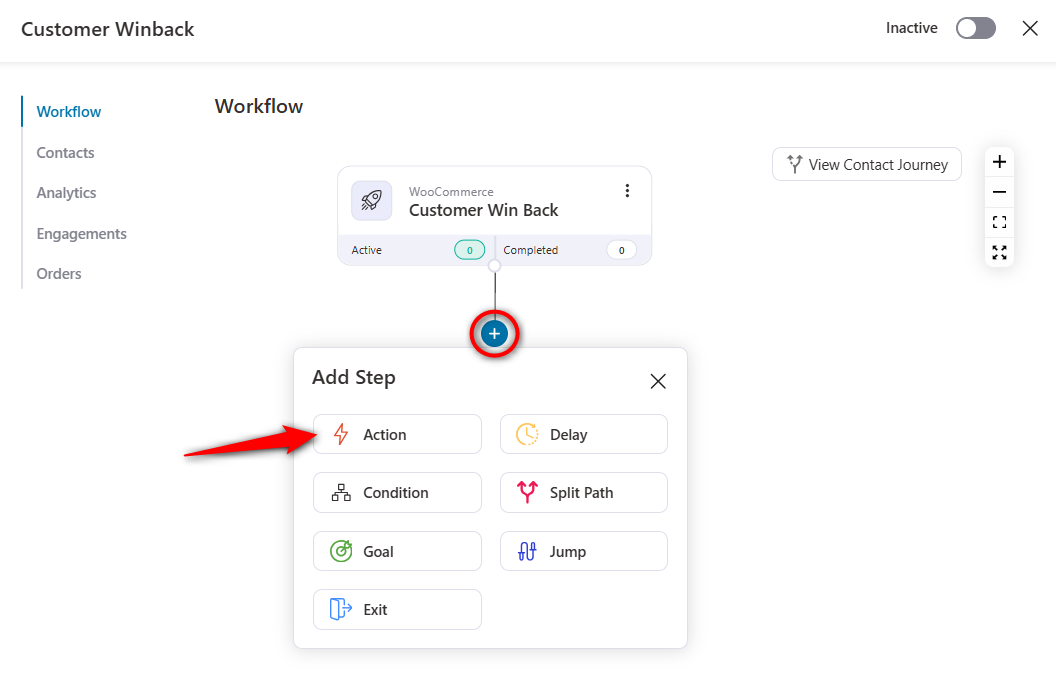
Under Messaging, select the Send Notification below PushEngage.
It has the same title, description, URL and image URL as we saw above when directly sending a push notification from the contact profile.
In addition, it has more options:
- Show large image - You can make your push notifications stand out with larger images. Just insert the link of a large image here.
- Multi action notification - Set up multiple call-to-action buttons to get more clicks. You can set up a maximum of 2 CTA buttons with text, button URLs and image URLs.
- UTM parameters - Append UTM parameters to your redirect URLs by fetching insights about the visitors and traffic sources. Just enter the UTM source, medium, campaign, term and content, and it’ll automatically appended to the URLs of your push notifications.
Activate the automation, and it’ll automatically send this push notification to your inactive customers for the inactivity period you were assigned.
There are many more use cases that you can set up with FunnelKit Automations - PushEngage integration.
👉 Learn more about the detailed use cases in our FunnelKit Automations - PushEngage article.


