Now that you’re already understood the outgoing webhooks and incoming webhooks, let’s learn about the rules or conditions available in FunnelKit Automations.
You get one rule when you set up a condition for your “Webhook Received” event in the automation.
Go to your automation and click on the Condition.

Click on Add New Condition and hit Webhook.
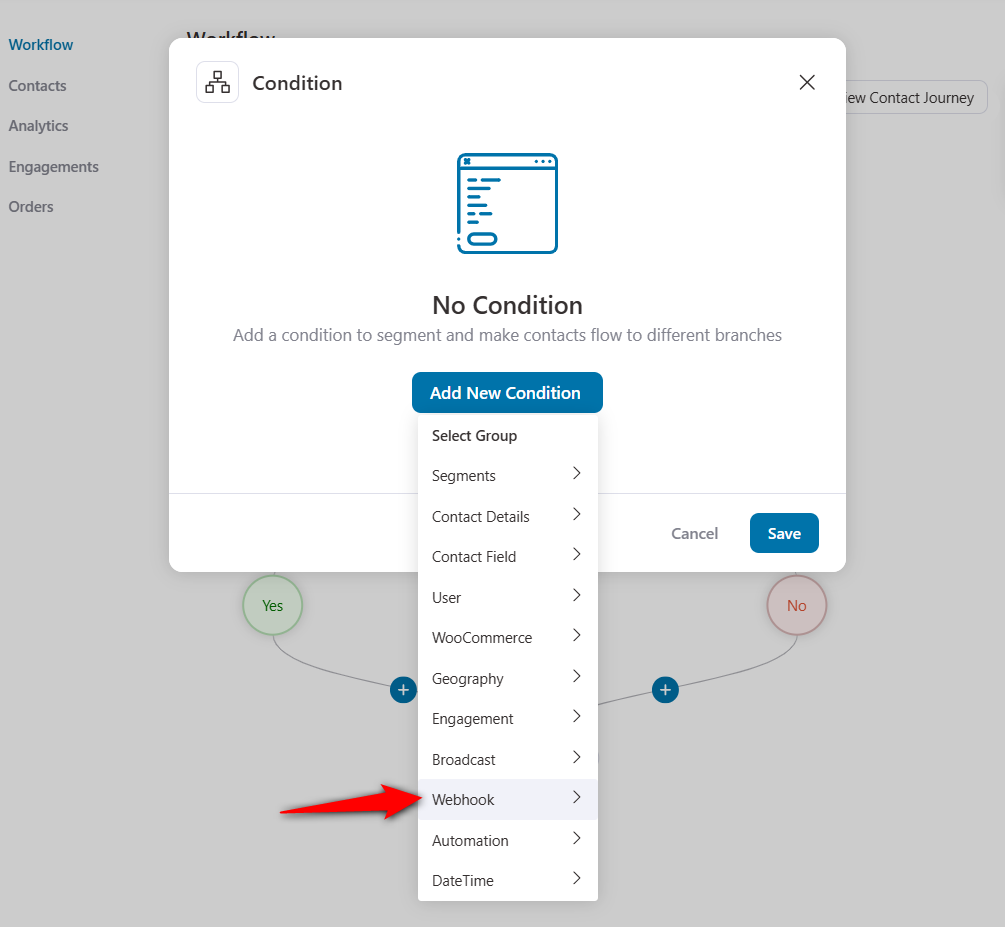
Here you can set the rule based on the data received from the webhook.
As you can see, the data from this webhook contains email, name and language field.
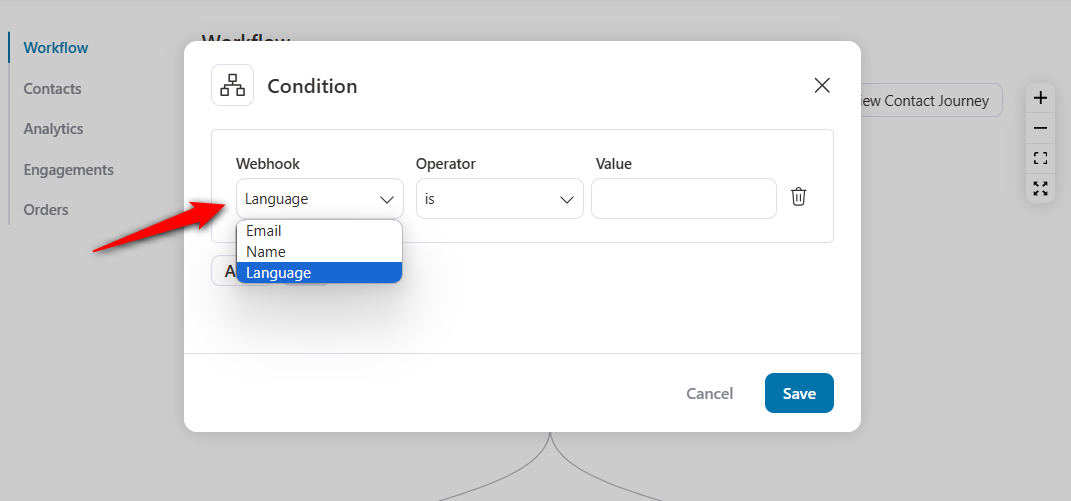
Let’s set the condition of - if the language is English, then we will configure the next actions in our workflow.
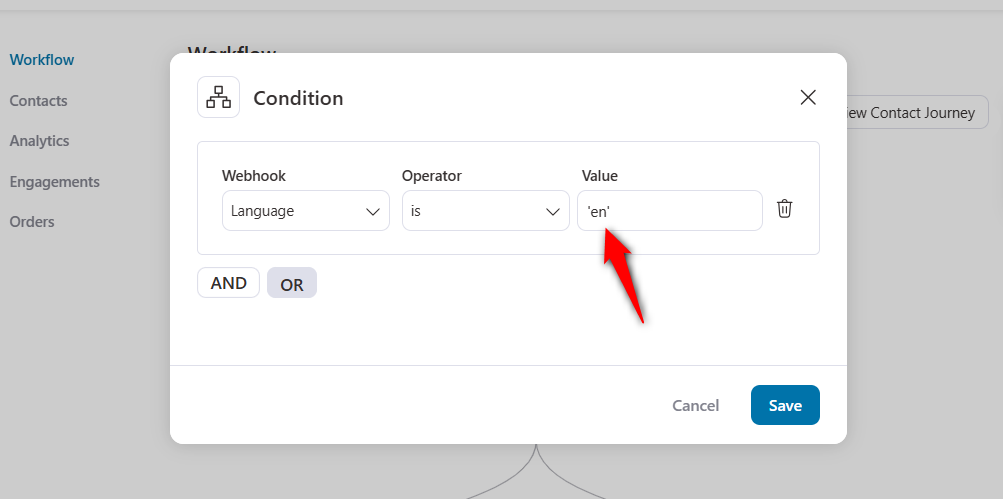
Once done, click on Save.
Now that your condition is configured, you can choose any action to continue your workflow.
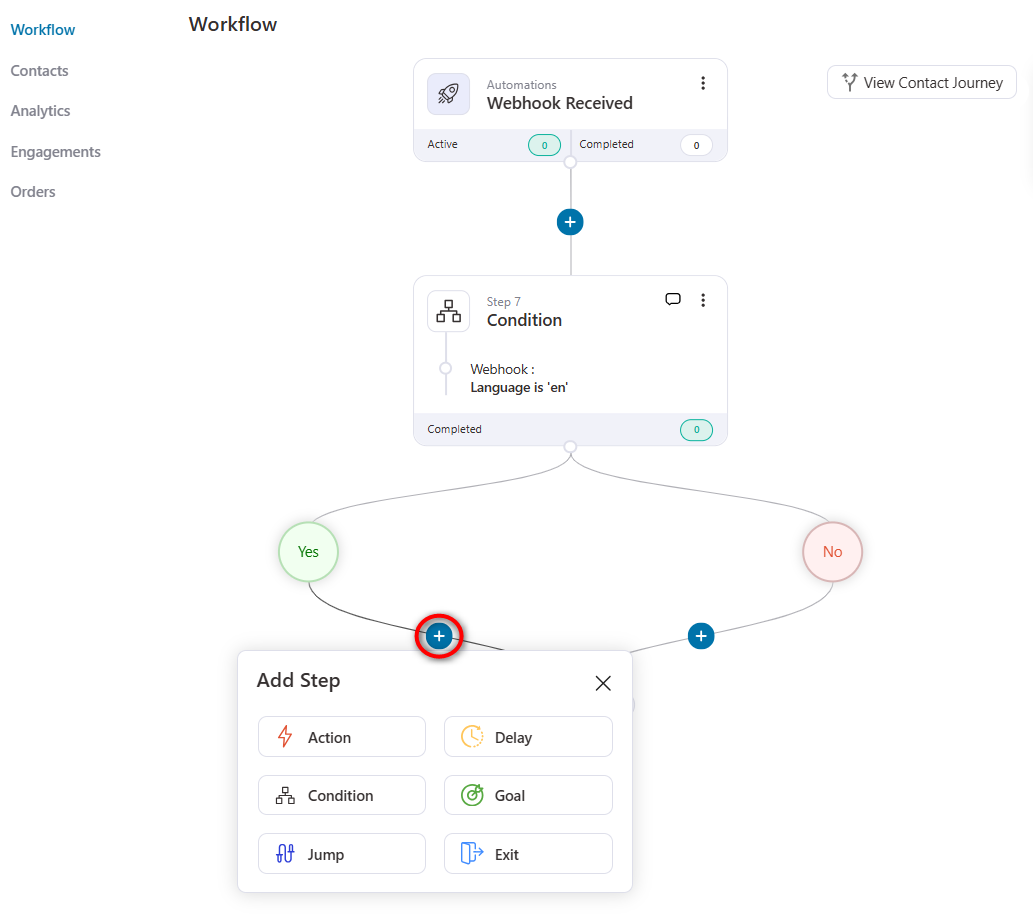
Refer to our Actions and Conditions document for FunnelKit Automations to set up your automation.
This document is specifically designed to explain the webhook conditions; we hope you find it helpful.
This is how you can set conditions in your webhook-related automation.


