AffiliateWP is an affiliate management plugin for WordPress. It lets you manage your affiliates, their total earnings, unpaid and paid referrals, and more - all in one place.
We’re proud to announce that FunnelKit Automations now deeply integrates with AffiliateWP.
In this documentation, we’ll look at how you can unleash the power of AffiliateWP by connecting it with FunnelKit Automations.
You should have the plugin installed and activated on your WordPress website.
Here are a few things to cover with FunnelKit Automations' deep integration with AffiliateWP:
Let’s take a look at each one of these.
Importer
You can import your AffiliateWP users to FunnelKit Automations with a single click.
All you have to do is go to the Contacts section and click on Import.
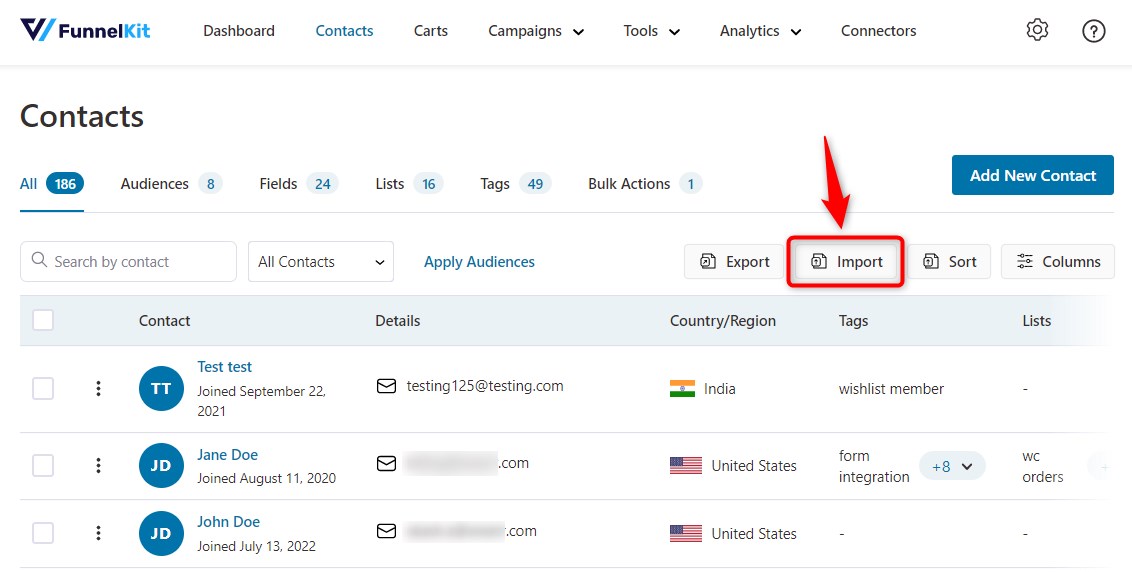
Now, click on AffiliateWP.

Here, all your AffiliateWP contacts will be ready to import.
You can configure the import settings - add tags to contacts or add them to a list, trigger automations for tags/list-related events, mark their subscription status, and more.

Click on Import.
All your AffiliateWP contacts will get imported as shown on the progress bar.
See the metrics of skipped, failed, and successfully imported contacts here.
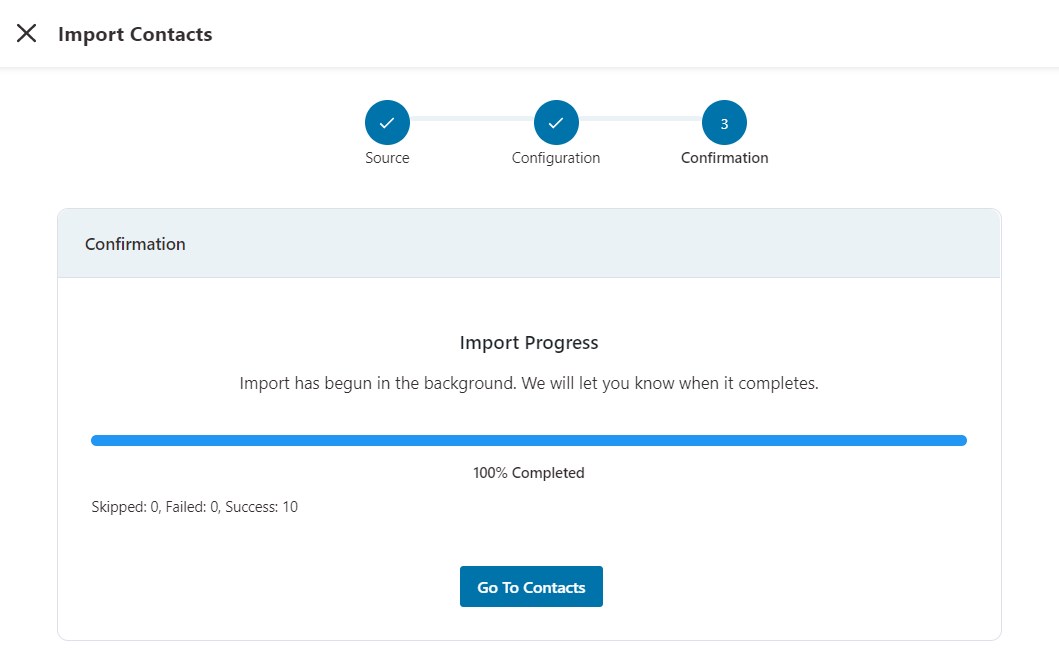
You can go to the Contacts section to see your newly imported contacts.
Filters
You can now filter your contacts based on the attributes of AffiliateWP.
Go to Contacts in FunnelKit Automations and select Advanced Filters.

Click on Add New Filter, and you’ll see AffiliateWP.
These are all the filters you get:

You can filter your contacts using the attributes of AffiliateWP:
- Status - The status of the affiliate (active, pending or inactive).
- Paid Earnings - The earnings that have been paid to the affiliate.
- Unpaid Earnings - The earnings that have not been paid to the affiliate.
- Total Referrals - Referrals done by the affiliate.
Click on the Filter to apply it. You can also apply multiple filters and save them as your audience.
This is how you can filter your contacts based on AffiliateWP’s attributes.
Contact
FunnelKit Automations’ deep integration with AffiliateWP lets you see all its details in one place.
Click on any of your AffiliateWP imported contacts:

You can now see a new tab with “AffiliateWP” like this:

Along with their usual contact details, you can now see all the information related to their AffiliateWP details under this tab.
Export
You can now export the AffiliateWP contacts from FunnelKit Automations.
FunnelKit Automations’ deep integration with AffiliateWP lets you export your contacts along with Affiliate ID, Affiliate URL, Status, Total Earnings, Unpaid Earnings, Total Referrals, Total Visits, and Payment Email.
Go to Contacts and click on Export.
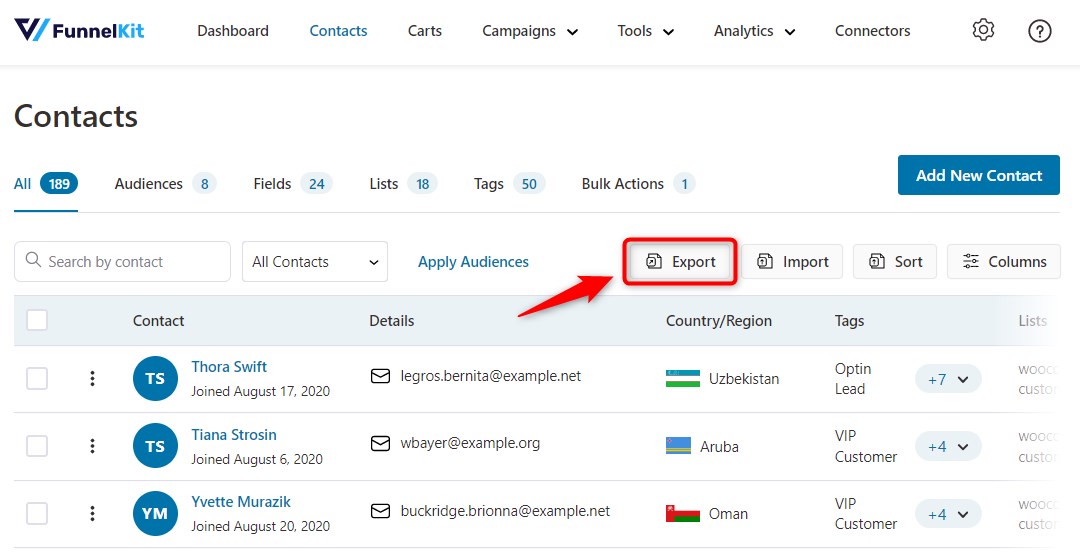
Click on Add New Export.

Enter the name of your export and select all the fields you want to export.
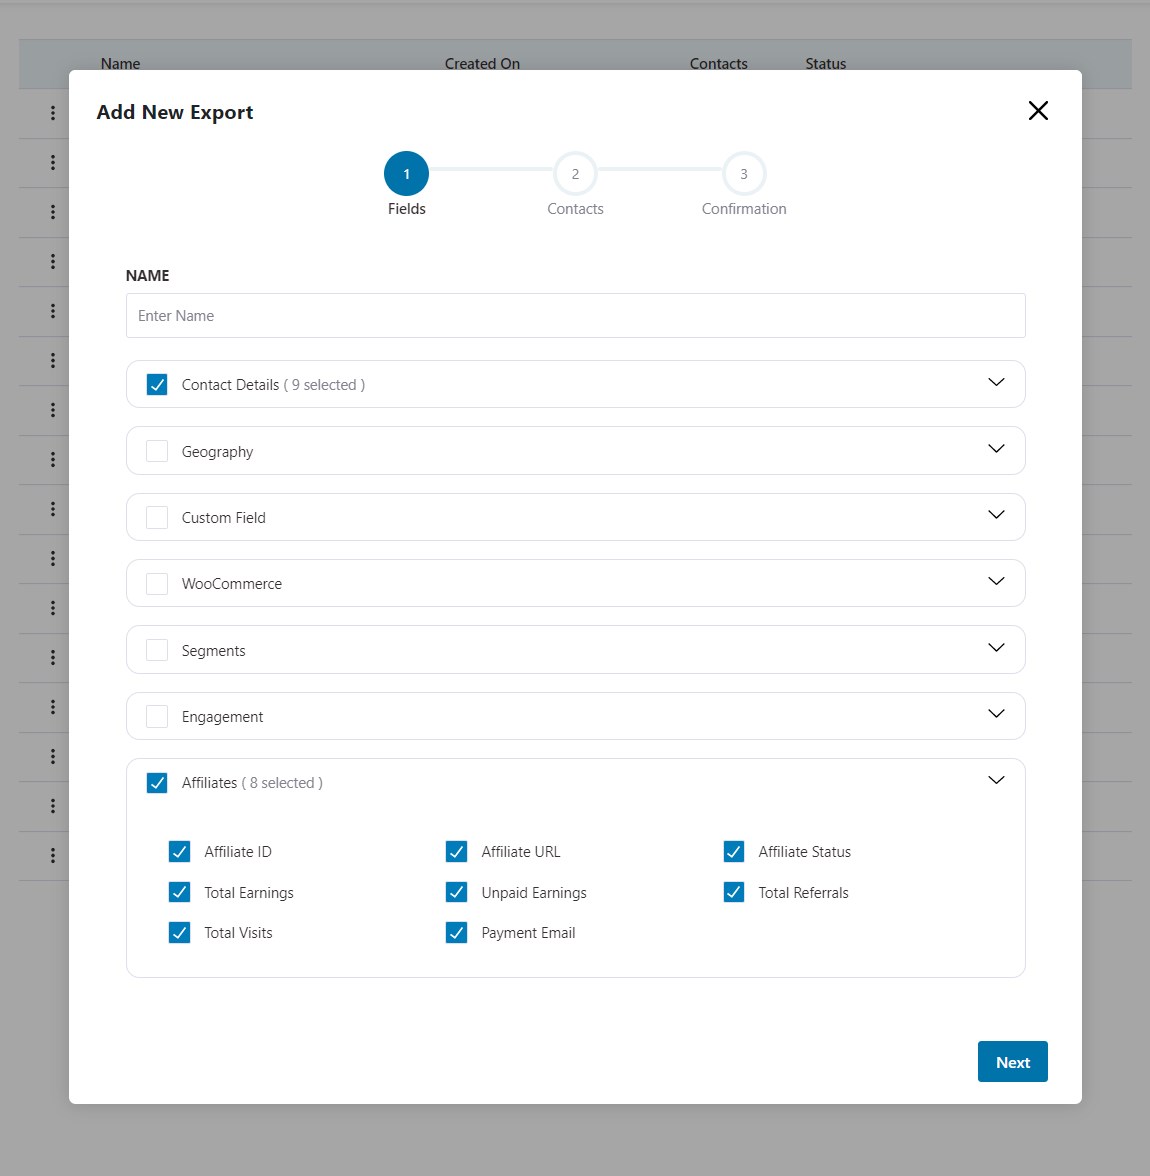
Once done, you'll be able to see your contacts exported in a CSV file format.
Read this documentation for detailed steps on how to export contacts in FunnelKit Automations.
Events
Here’s the list of events available under Affiliate WP:
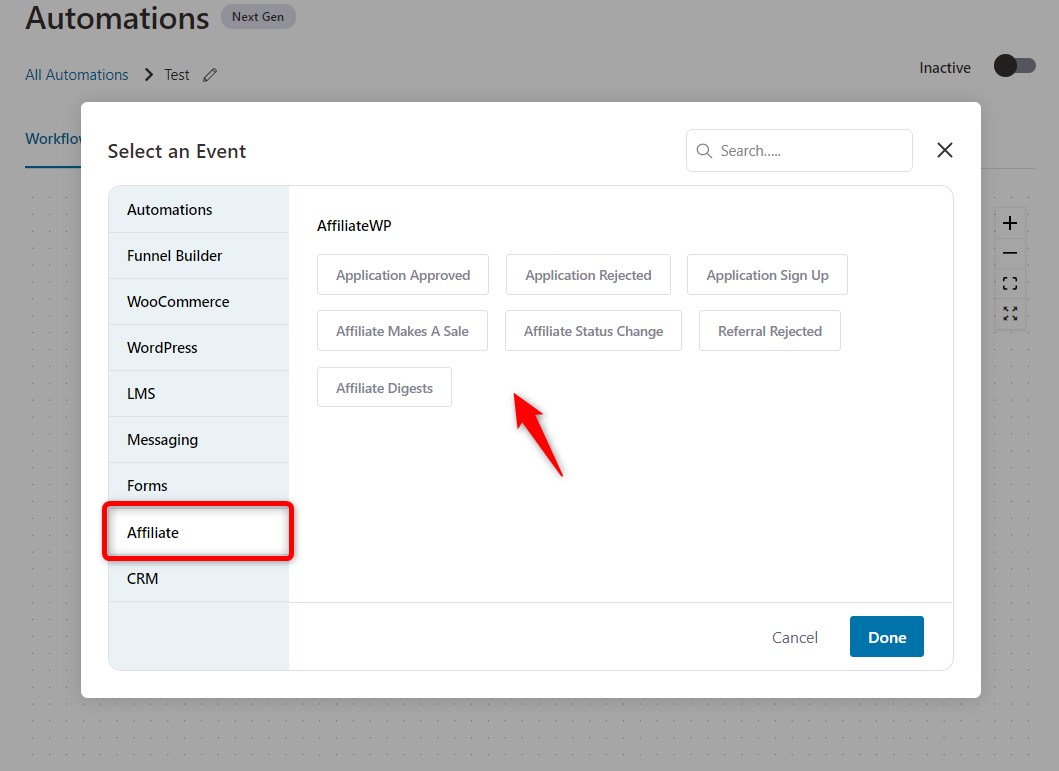
- Application Approved - You can set up automation to execute certain actions when an affiliate application gets approved. Send an email congratulating the affiliate, tag them in your CRM, send data to Zapier, and more.
- Application Rejected - When an affiliate’s application gets rejected again, you can execute the actions that you want.
- Affiliate Status Change - Specify the action based on the status change of an affiliate.
- Application Sign-up - When you receive a new application, you can engage with it via email, ask the applicant to fill out a survey, or set their expectations regarding your acceptance policy or wait period.
- Affiliate Makes A Sale - Every time an affiliate makes a sale, congratulate them for their effort and encourage them to do more of what they’re doing.
Let's suppose if you haven't made a sale in the past, you can send an email to your contacts to buck them up and provide additional resources.
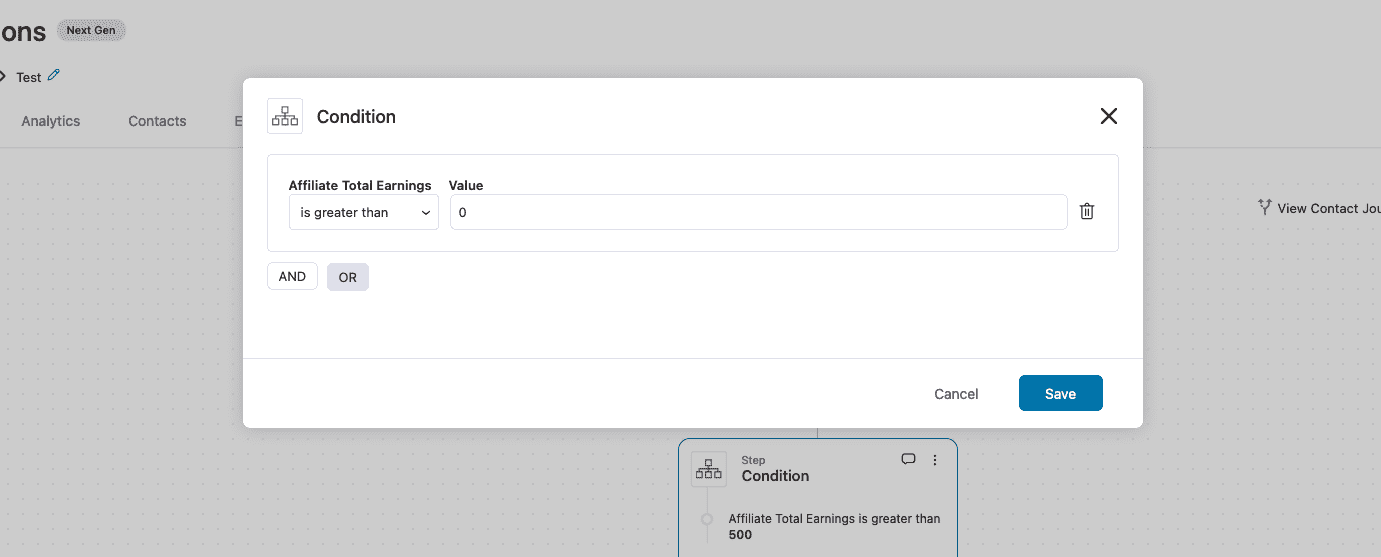
To set it up, you have to select the rule of ‘Affiliate Total Earnings’ from the drop-down - equals zero.
Here’s how:
Add a new condition:
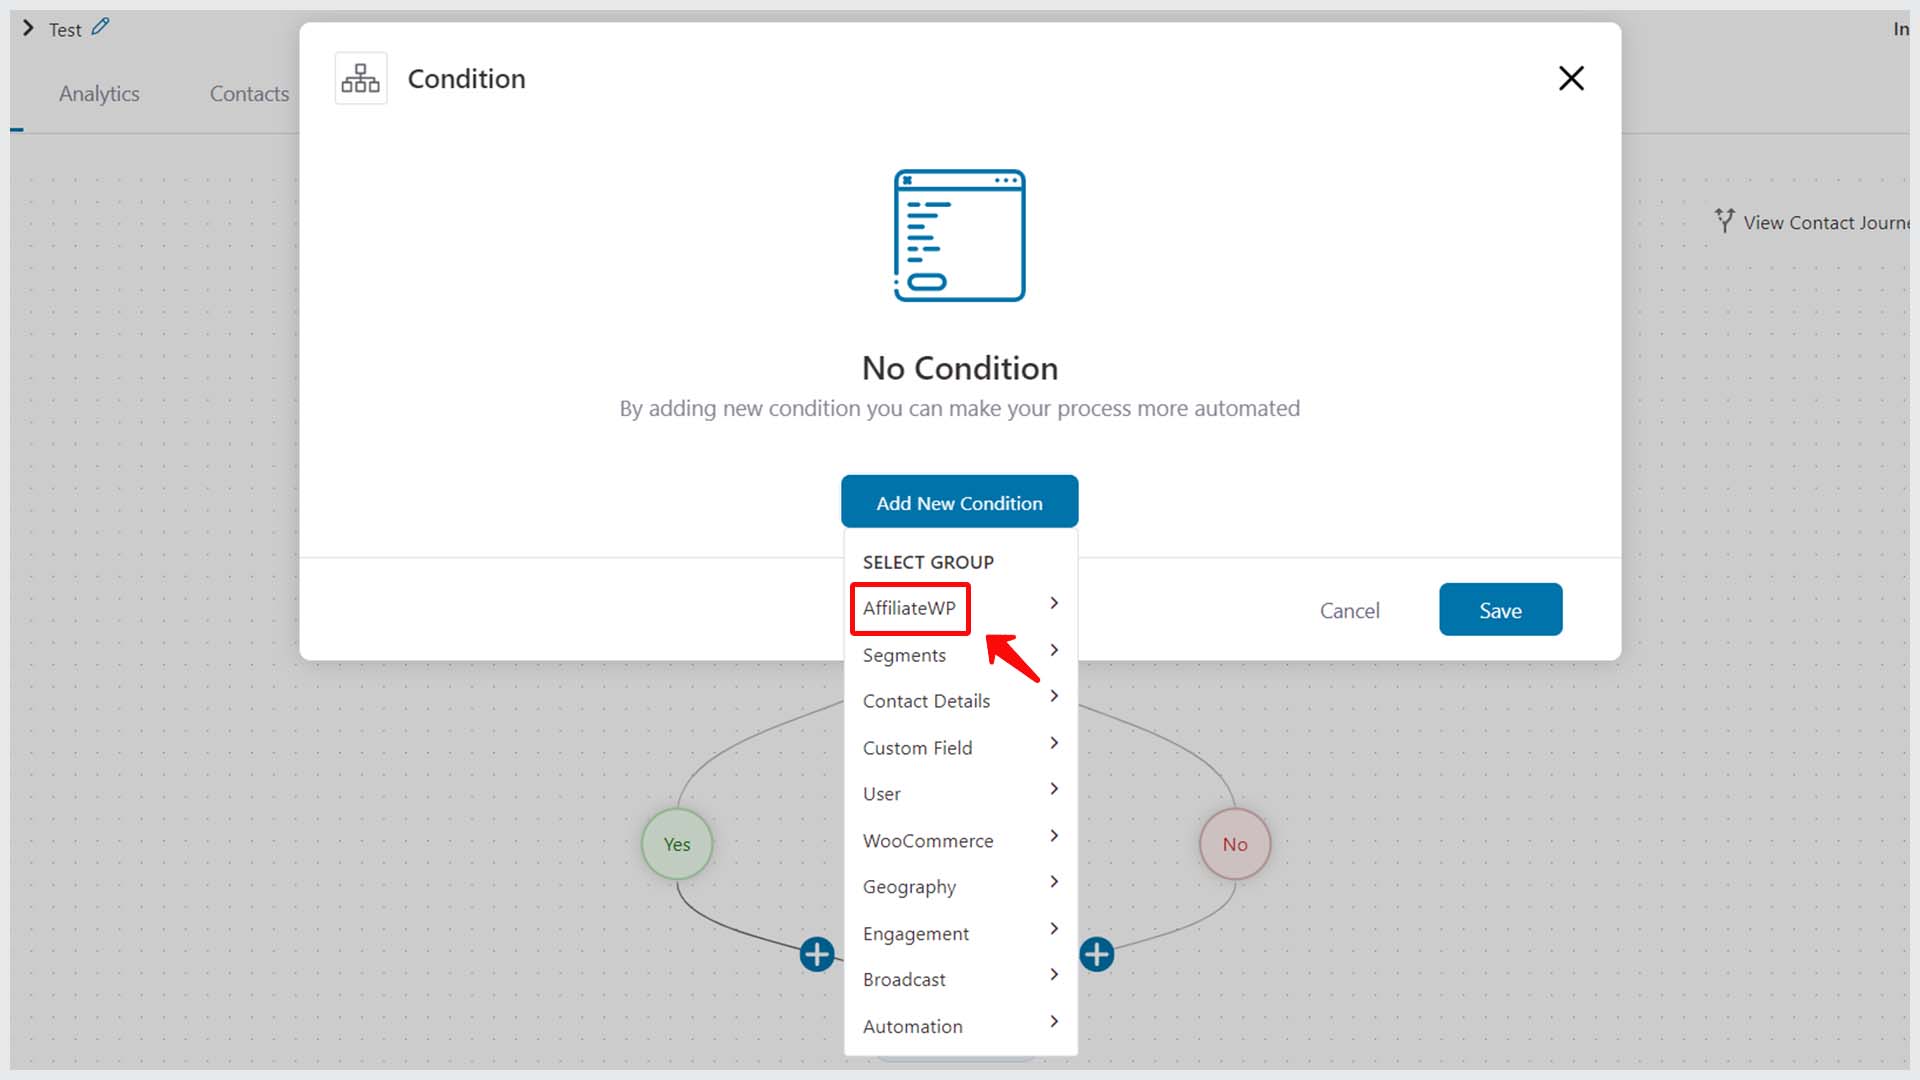
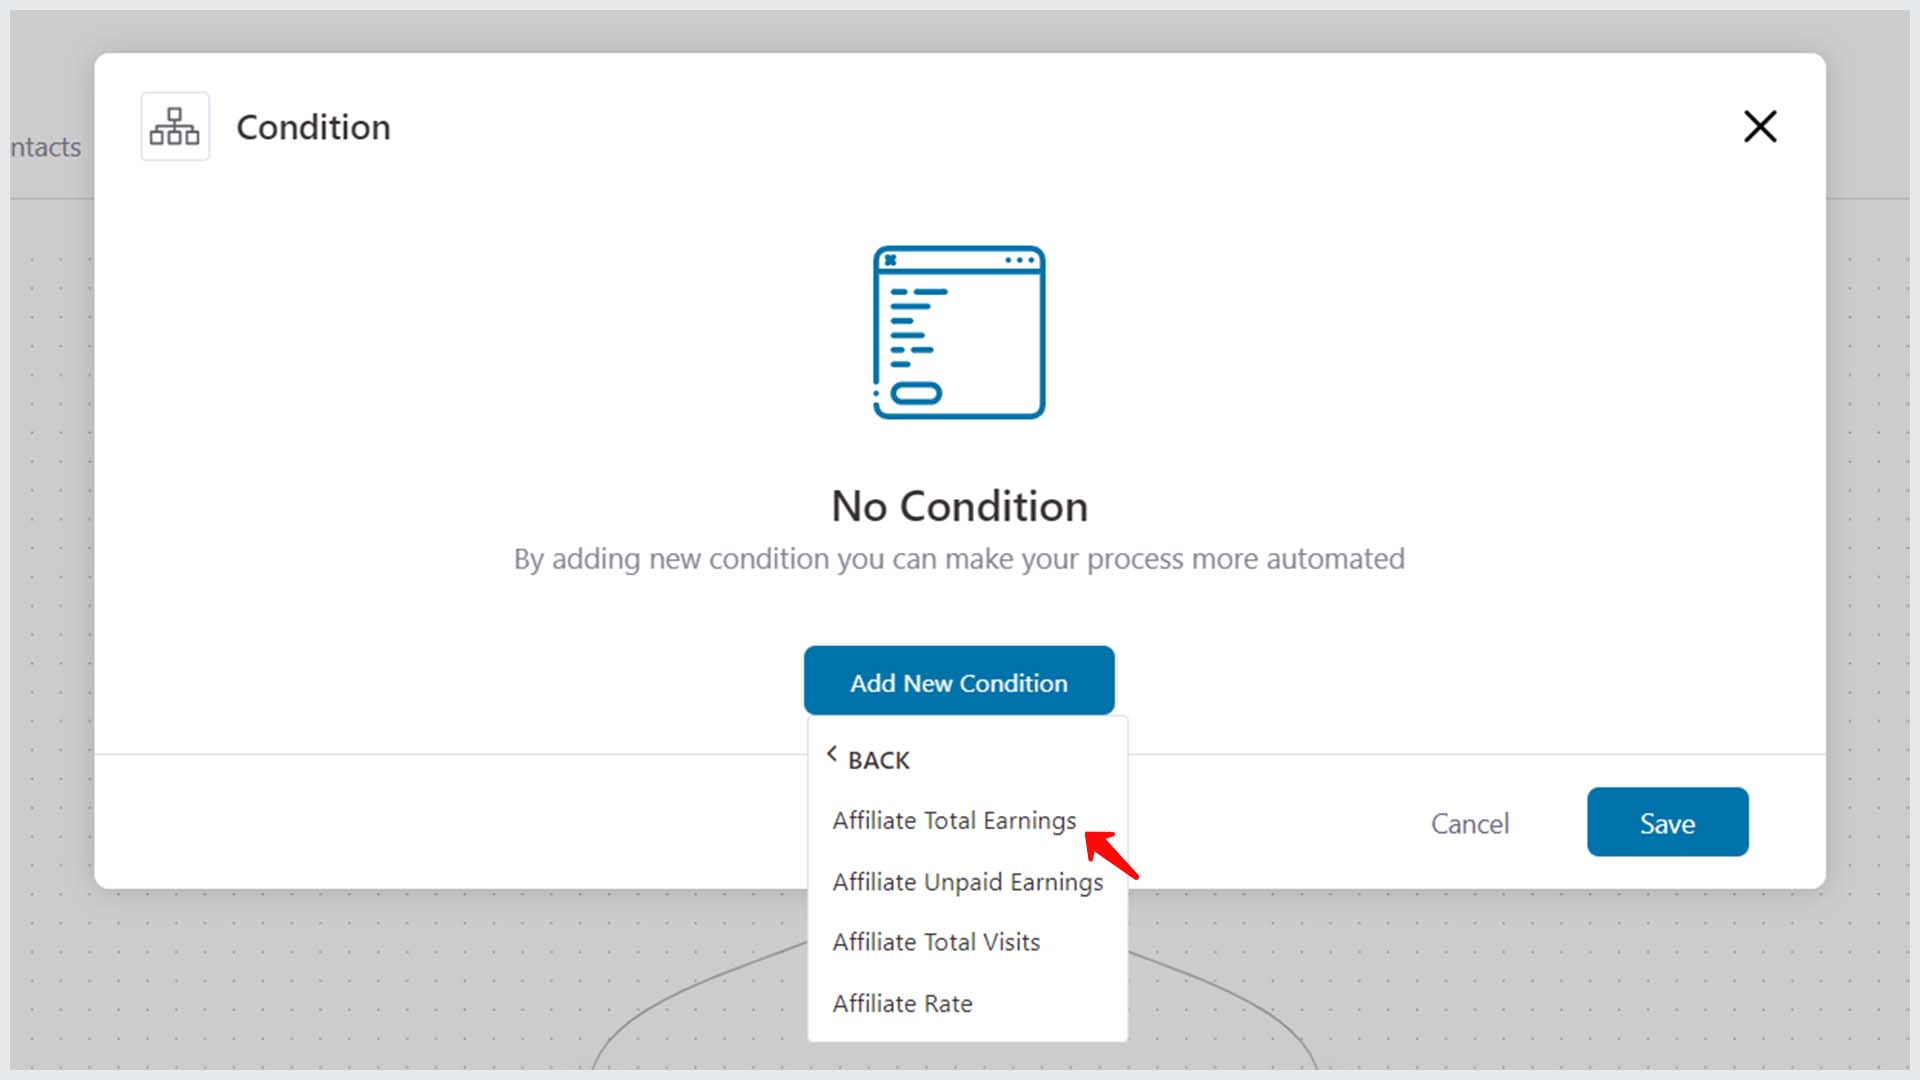
Then, choose the Affiliate Total Earnings.
You can then specify your conditions from here.
- Referral Rejected - This event triggers an automation upon a referral rejection.
- Affiliate Digests - This refers to a series of automated emails that go to the affiliates. You can choose the frequency of contact and set the day to send out your emails.
Take a look:
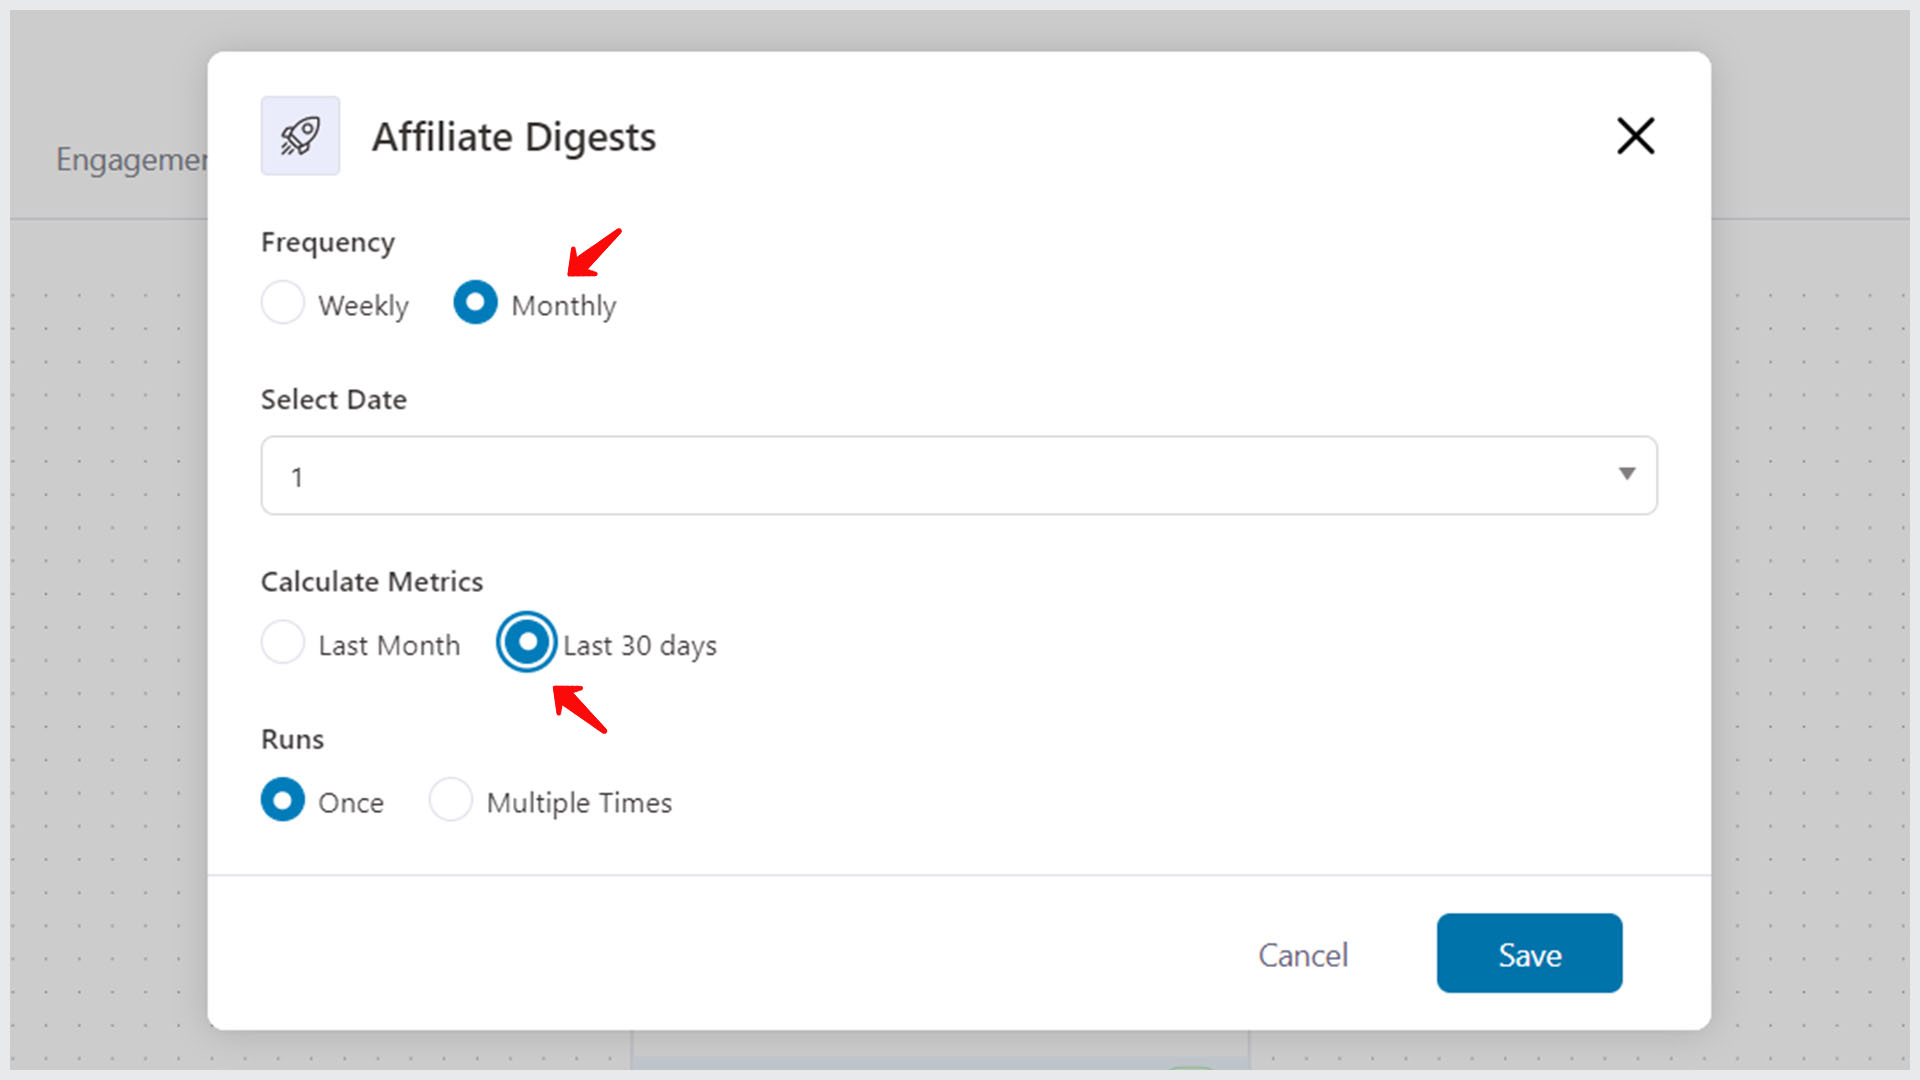
The digest emails will go automatically on a set day and after the exact number of days you choose.
Here are a set of Affiliate Digest-specific rules for your affiliates:
- Referral Count (Selected Frequency) - Select this rule if you want to take action based on the number of referrals your affiliate has created in a chosen date range.
- Referral Visits (Selected Frequency) - To take action(s) based on the number of referral visits that your affiliate received in a specific date range.
Actions
Apart from the regular actions like sending an email, sending SMS, adding a tag, and more - you also get a couple of affiliate-specific actions:
- Change Affiliate Rate
- Change Referral Status
For example, you can create an automation to change the affiliate rate based on certain rules.
Here's how affiliates are listed with their rate, earnings (paid & unpaid) and more details:

Here's an automation to change the affiliate rate:
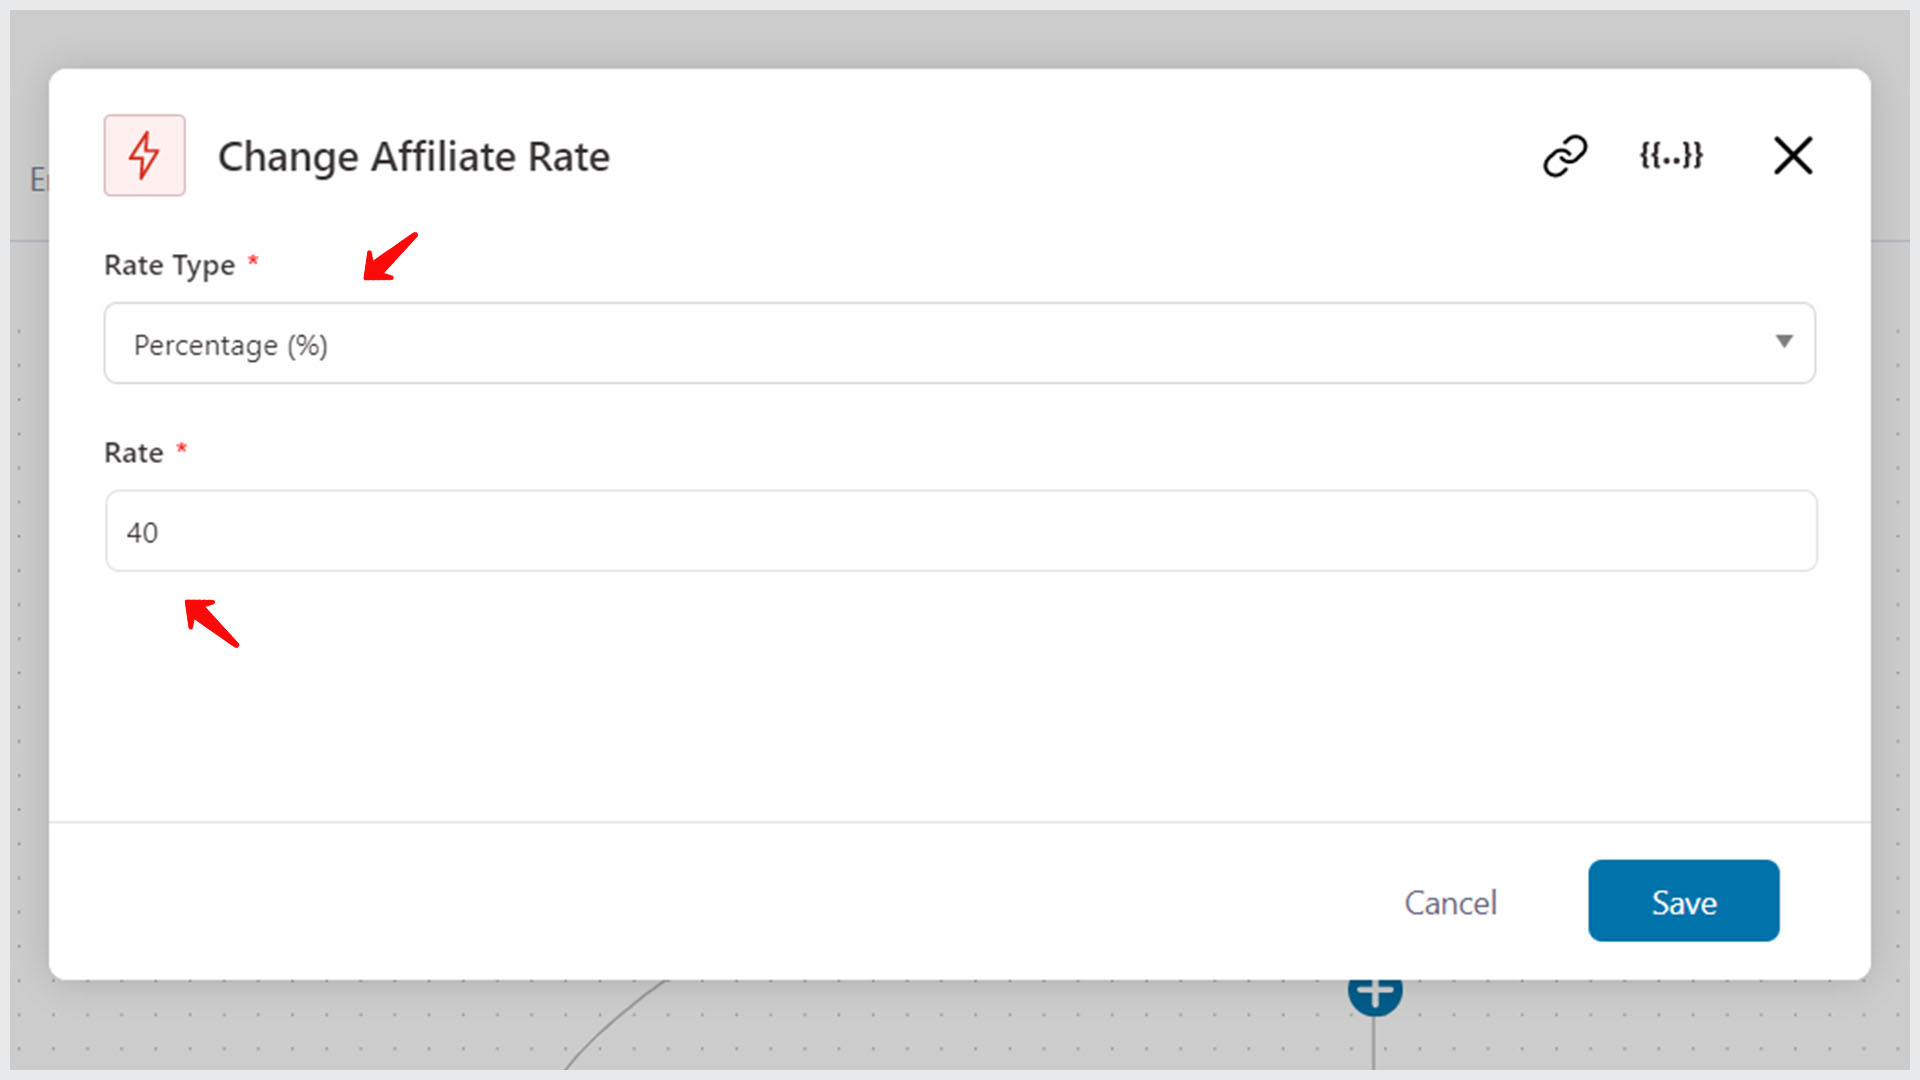
There you go! Get ready to unleash the full power of AffiliateWP now using FunnelKit Automations.
Rules
When you select ‘Conditional Action’ to take action based on the events, then you’ll see a number of Affiliate-specific rules that appear in the drop-down.
Take a look:
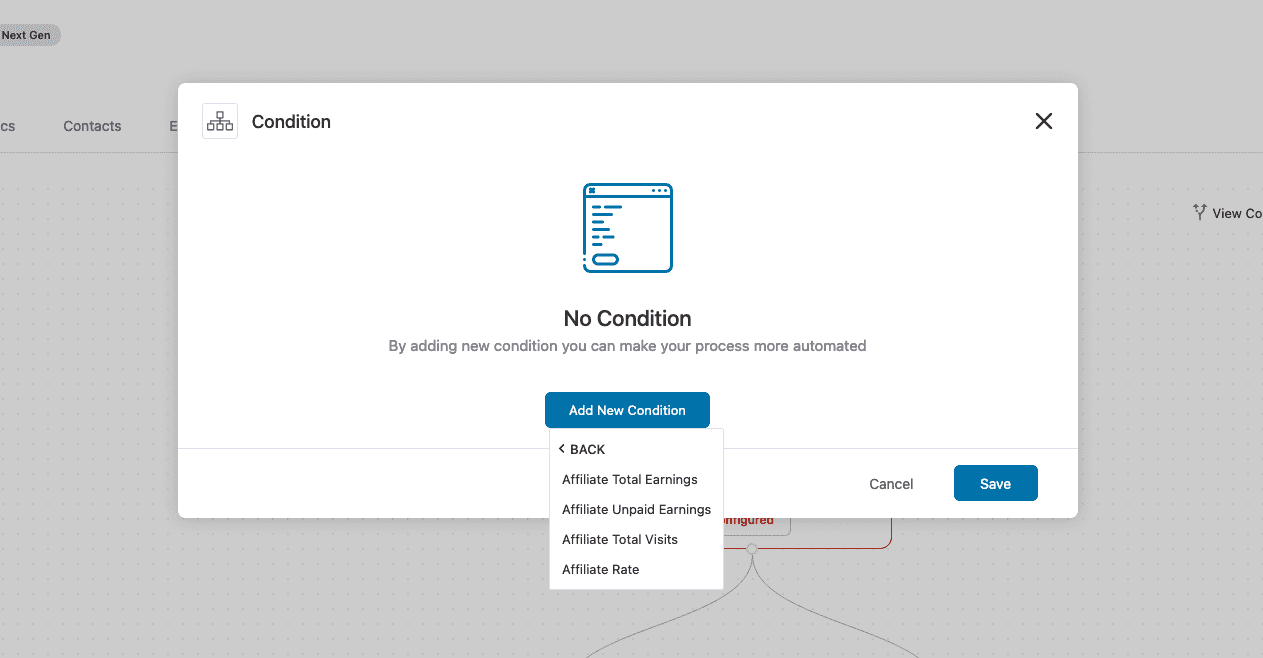
- Affiliate Total Earnings - Select this rule to run your automation based on how much an affiliate has earned in a lifetime with your business.
- Affiliate Unpaid Earnings - This rule lets you take action based on an affiliate's total earnings for which they haven't been paid yet.
- Affiliate Total Visits - When you select this rule, you can take action(s) based on the total number of visits an affiliate has received (to date) on the links they shared with their audience.
- Affiliate Rate - This rule allows you to take action based on the rate of an affiliate for which they will get paid.
Merge Tags
You can use the following merge tags to personalize the emails and show the correct numbers used in the email:
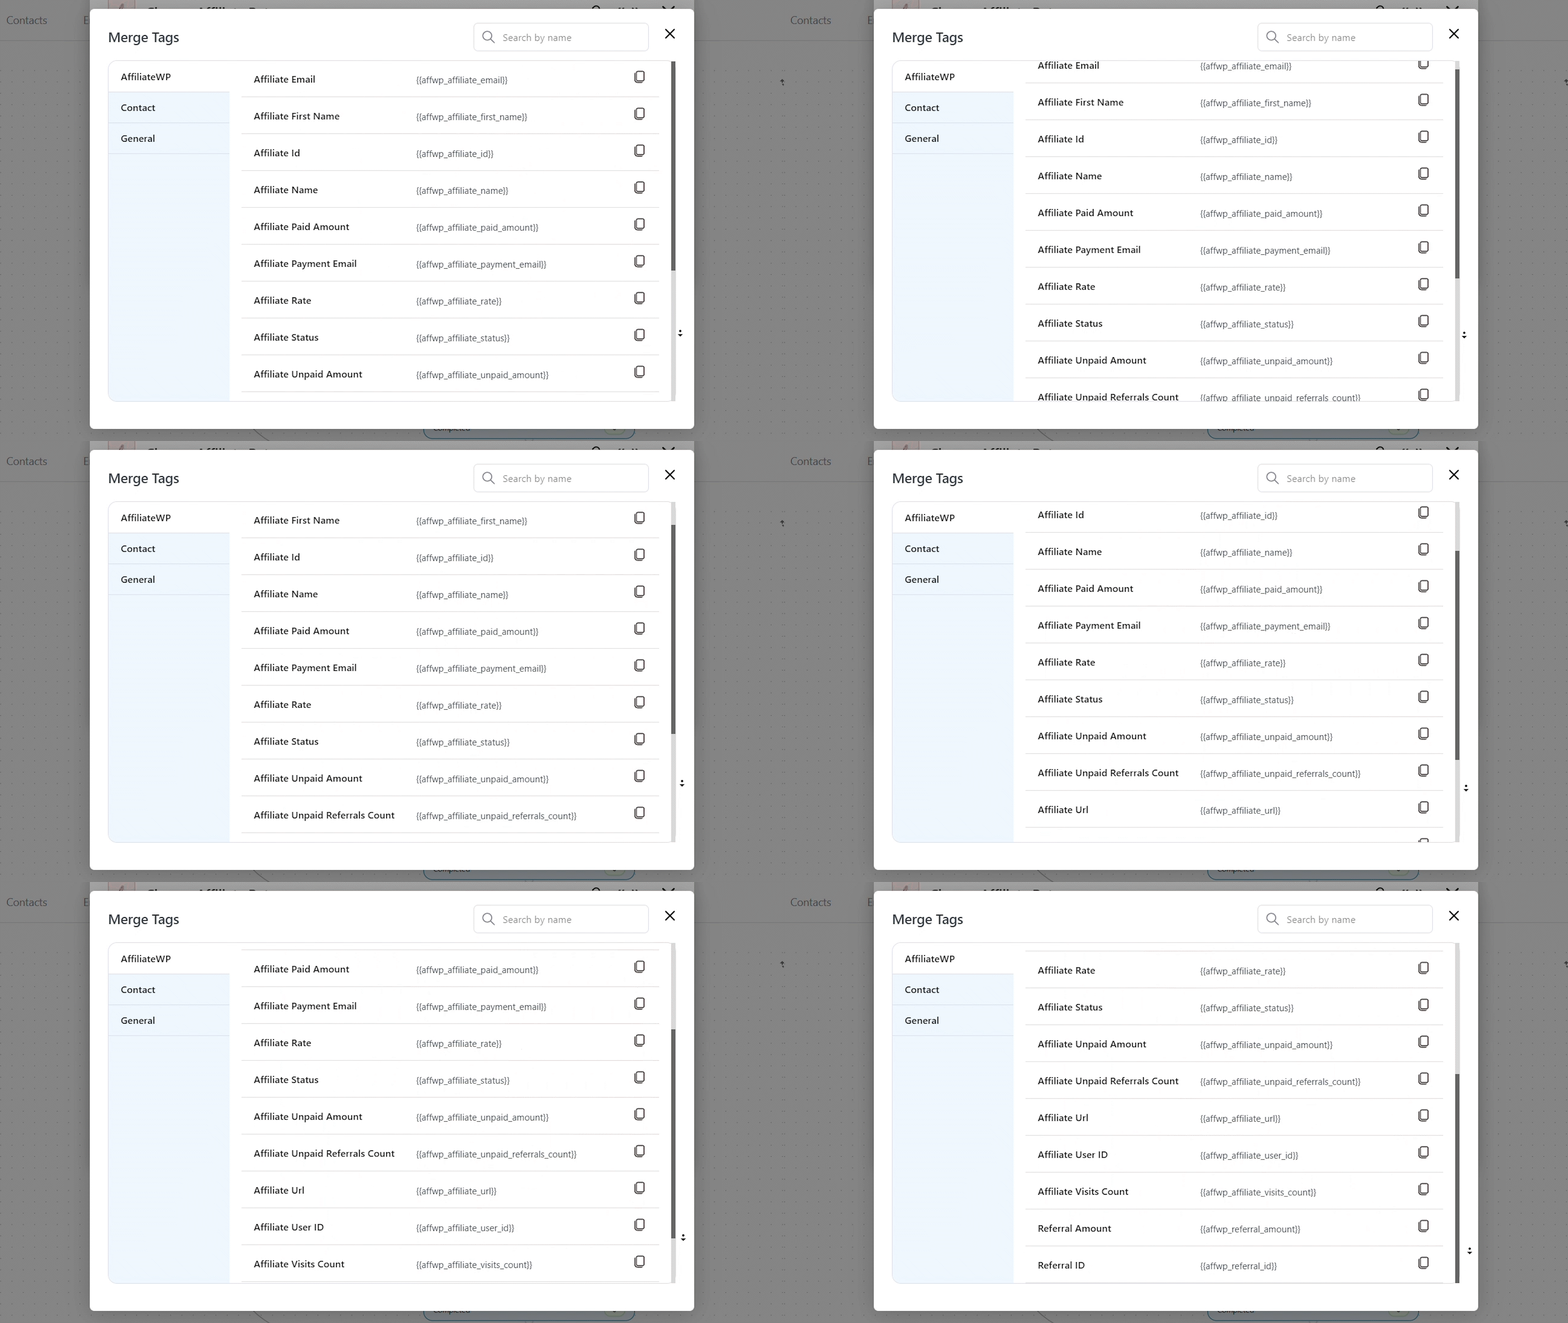
Here's an explanation of common merge tags:
- affwp_affiliate_id - This merge tag adds the Affiliate ID.
- affwp_affiliate_name - This merge tag adds the name of the affiliate.
- affwp_affiliate_paid_amount - This merge tag gives the amount paid to the affiliate.
- affwp_affiliate_rate - This mentions the affiliate's rate.
- affwp_affiliate_unpaid_amount - This merge tag gives the amount that has not been paid to the affiliate.
- affwp_affiliate_status - This merge tag provides the status of the affiliate.
- affwp_selected_date_range - This merge tag gives the dynamic date range you selected for sending monthly/weekly digests to your affiliates.
- For example, Oct 1, 2019, to Nov 1, 2019 (in case you’ve selected the monthly option while selecting the “Affiliate Digests” event).
- affwp_selected_range_commissions - This merge tag states your affiliates' unpaid commission for the selected date range. (Available with Affiliate Digest event)
- affwp_selected_range_referral_count - It gives the unpaid referral count of your affiliates for the selected date range. (Available with Affiliate Digest event)
- affwp_selected_range_visits - This merge tag gives the number of visits to the affiliate digest for the specified date range. (Available with Affiliate Digest event)
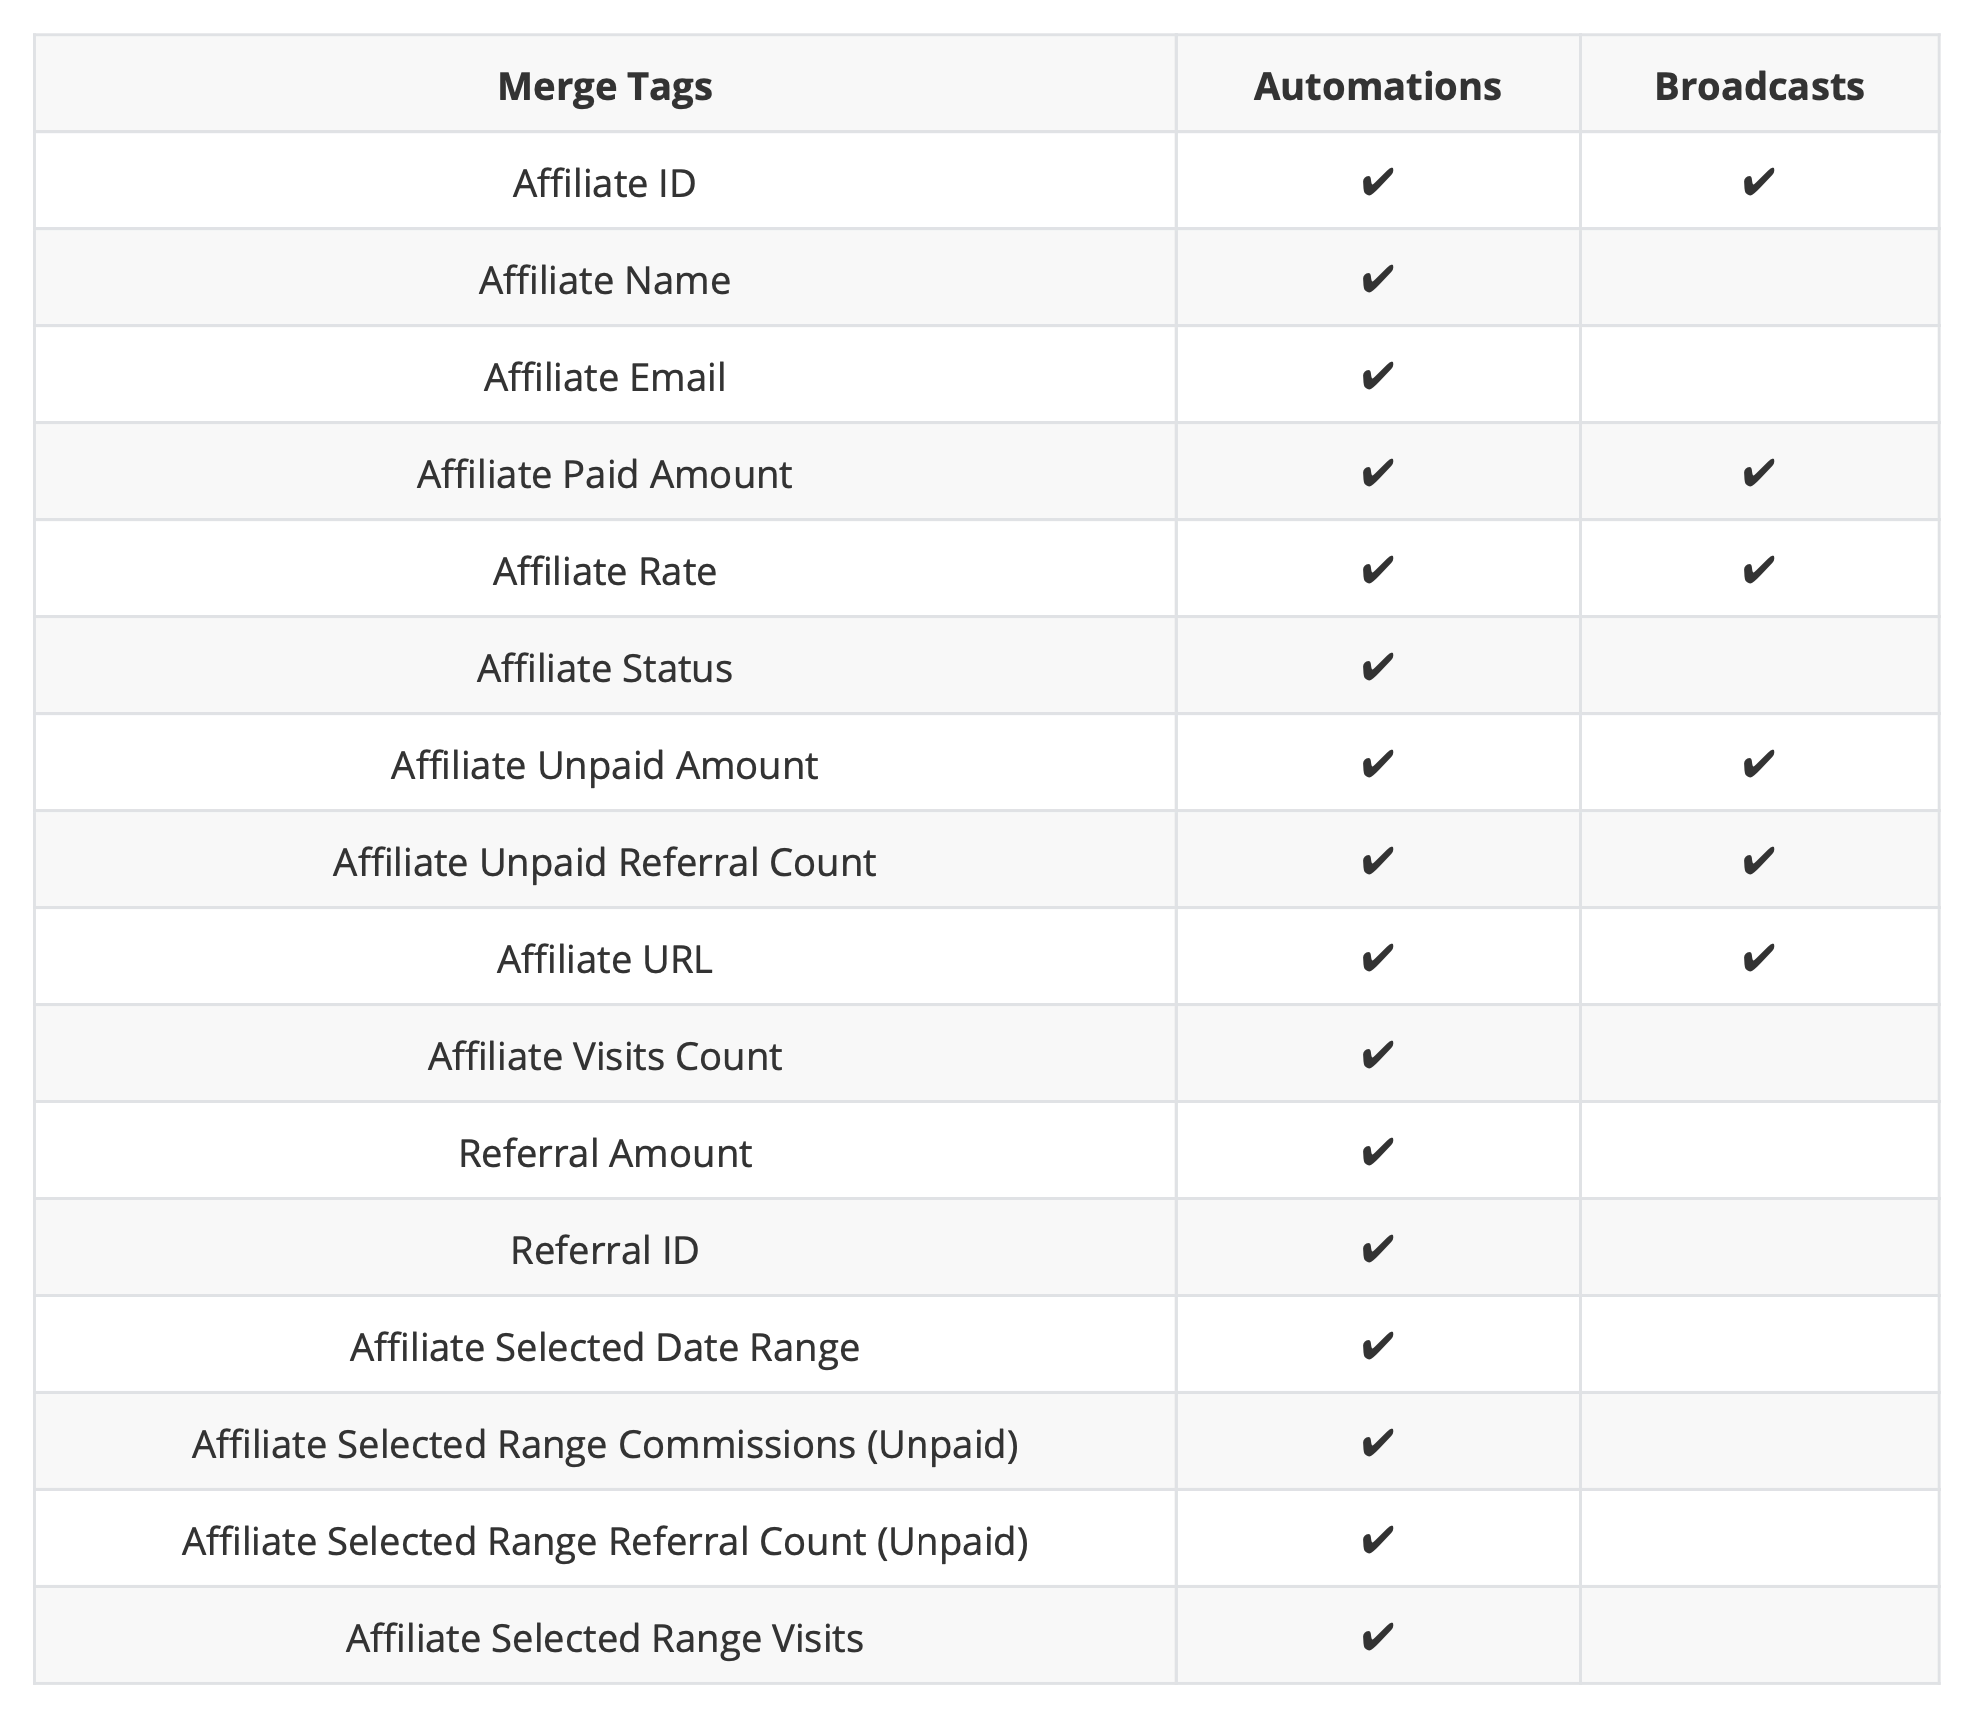
AffiliateWP Merge Tags Available in Automations and Broadcasts
Here are the AffiliateWP merge tags which you can use in Automations and Broadcasts:
This is all about FunnelKit Automations' deep integration with AffiliateWP.


