WooCommerce Wishlists lets you add an unlimited number of products to your wishlist so that you can make an informed purchase decision later on. In simple words, it’s simply a method of shortlisting an item and checking it out later.
FunnelKit Automations actively integrates with WooCommerce Wishlists and helps you set up trigger-based automations.
In this documentation, we will learn how to create automations for WooCommerce Wishlists using FunnelKit Automations.
Triggers
You can assign triggers/events for WooCommerce Wishlists to perform actions with FunnelKit Automations.
Here is a list of available events for WooCommerce Wishlists in FunnelKit Automations:
- Wishlist Item on Sale
- User adds product to wishlist
- Wishlist Reminder
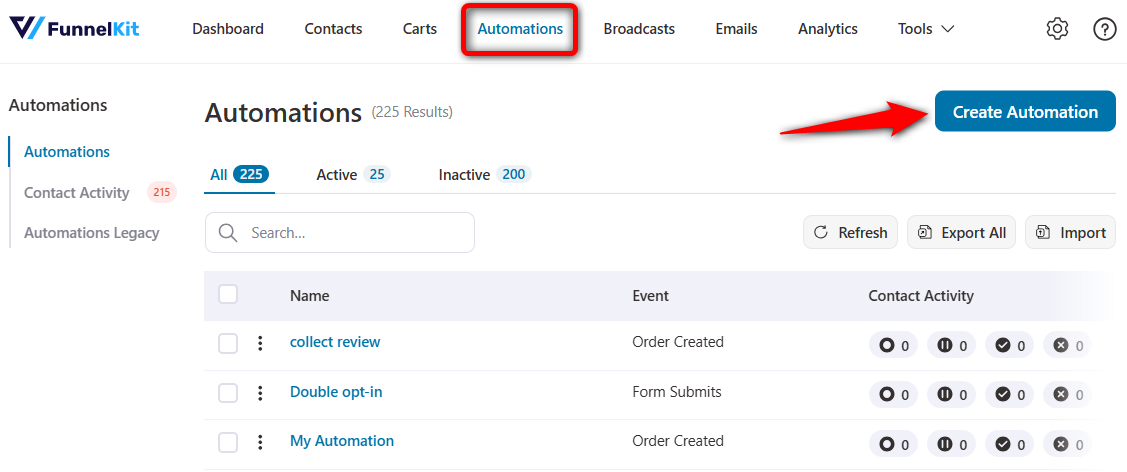
To set up an event, go to Automations and click on Create Automation.
Click on Start from Scratch and enter the name of your automation.
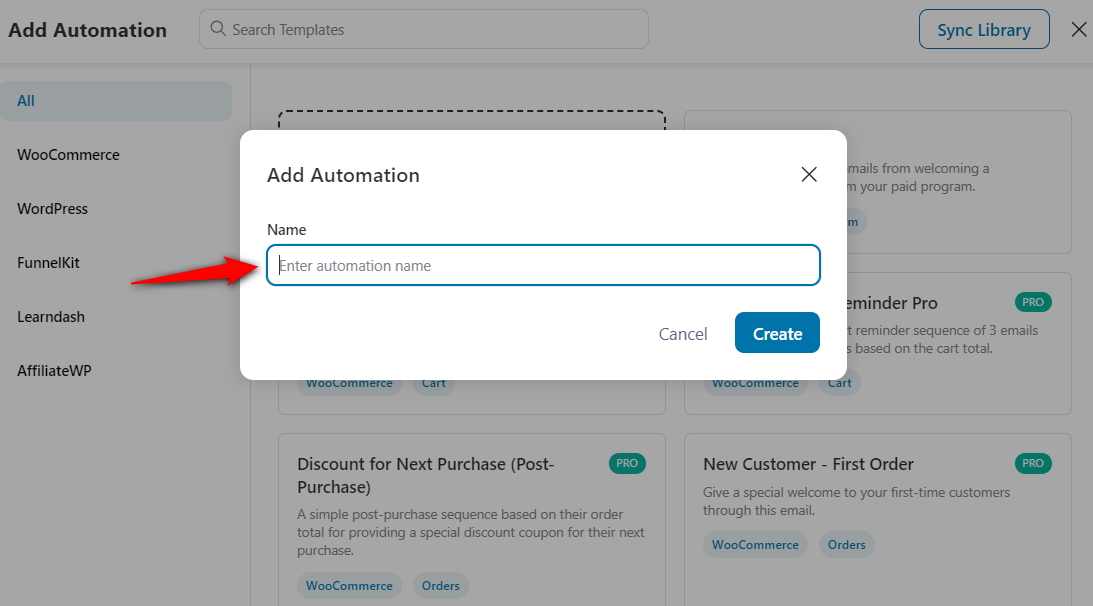
Hit the Create button.
Click on Select Trigger.

Now, select your event and click on Done.
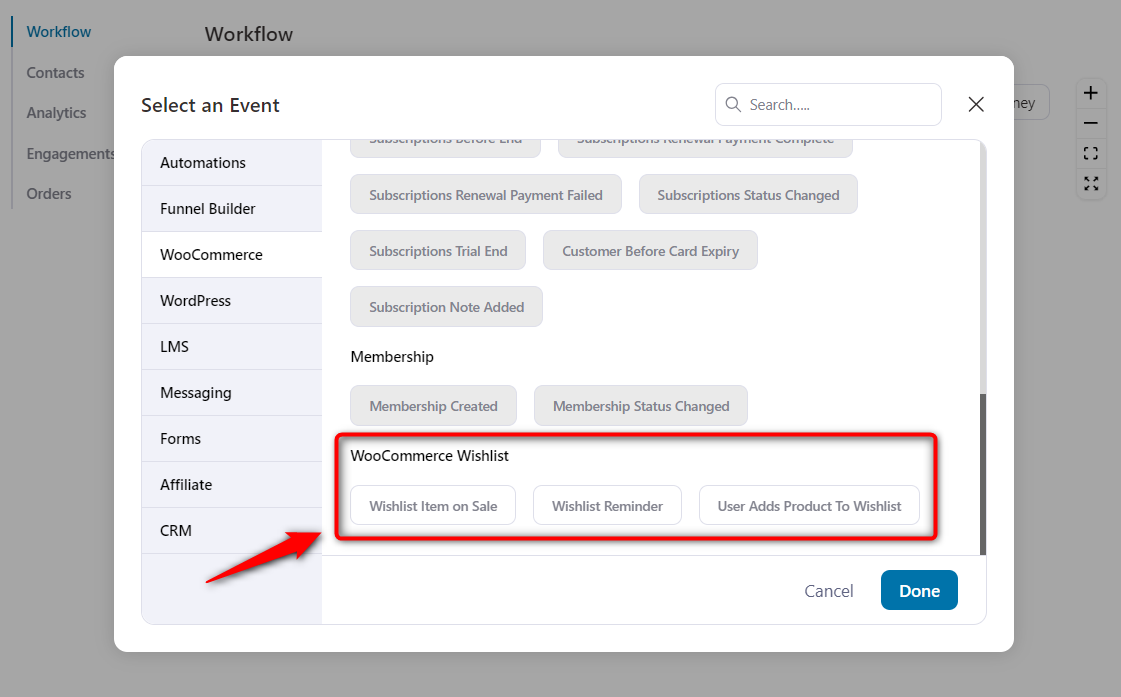
You can trigger these events and select an action in FunnelKit Automations.
Please note that WooCommerce Wishlists don't have any subsequent actions under them.
Rules
There are two interesting rules that FunnelKit Automations offers under WooCommerce Wishlists:
- Items
- Item categories
Click on Add New Condition and select Wishlist when setting up conditions.
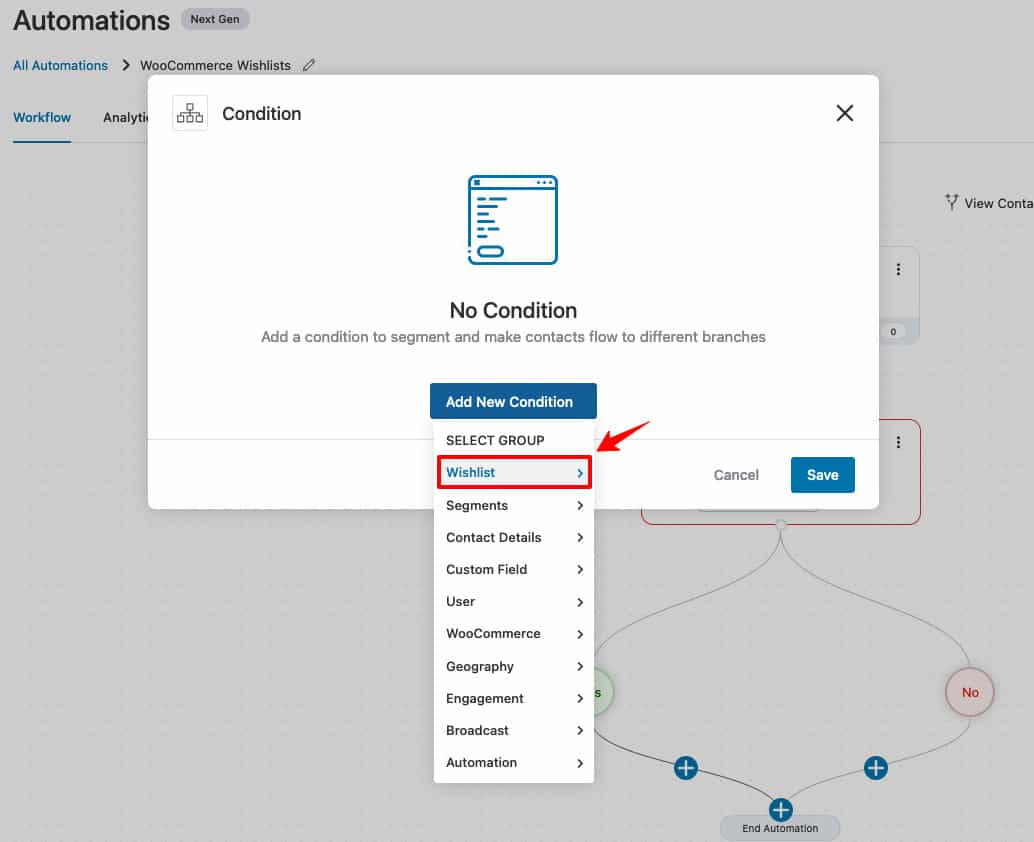
Now click on the rule you want to select:
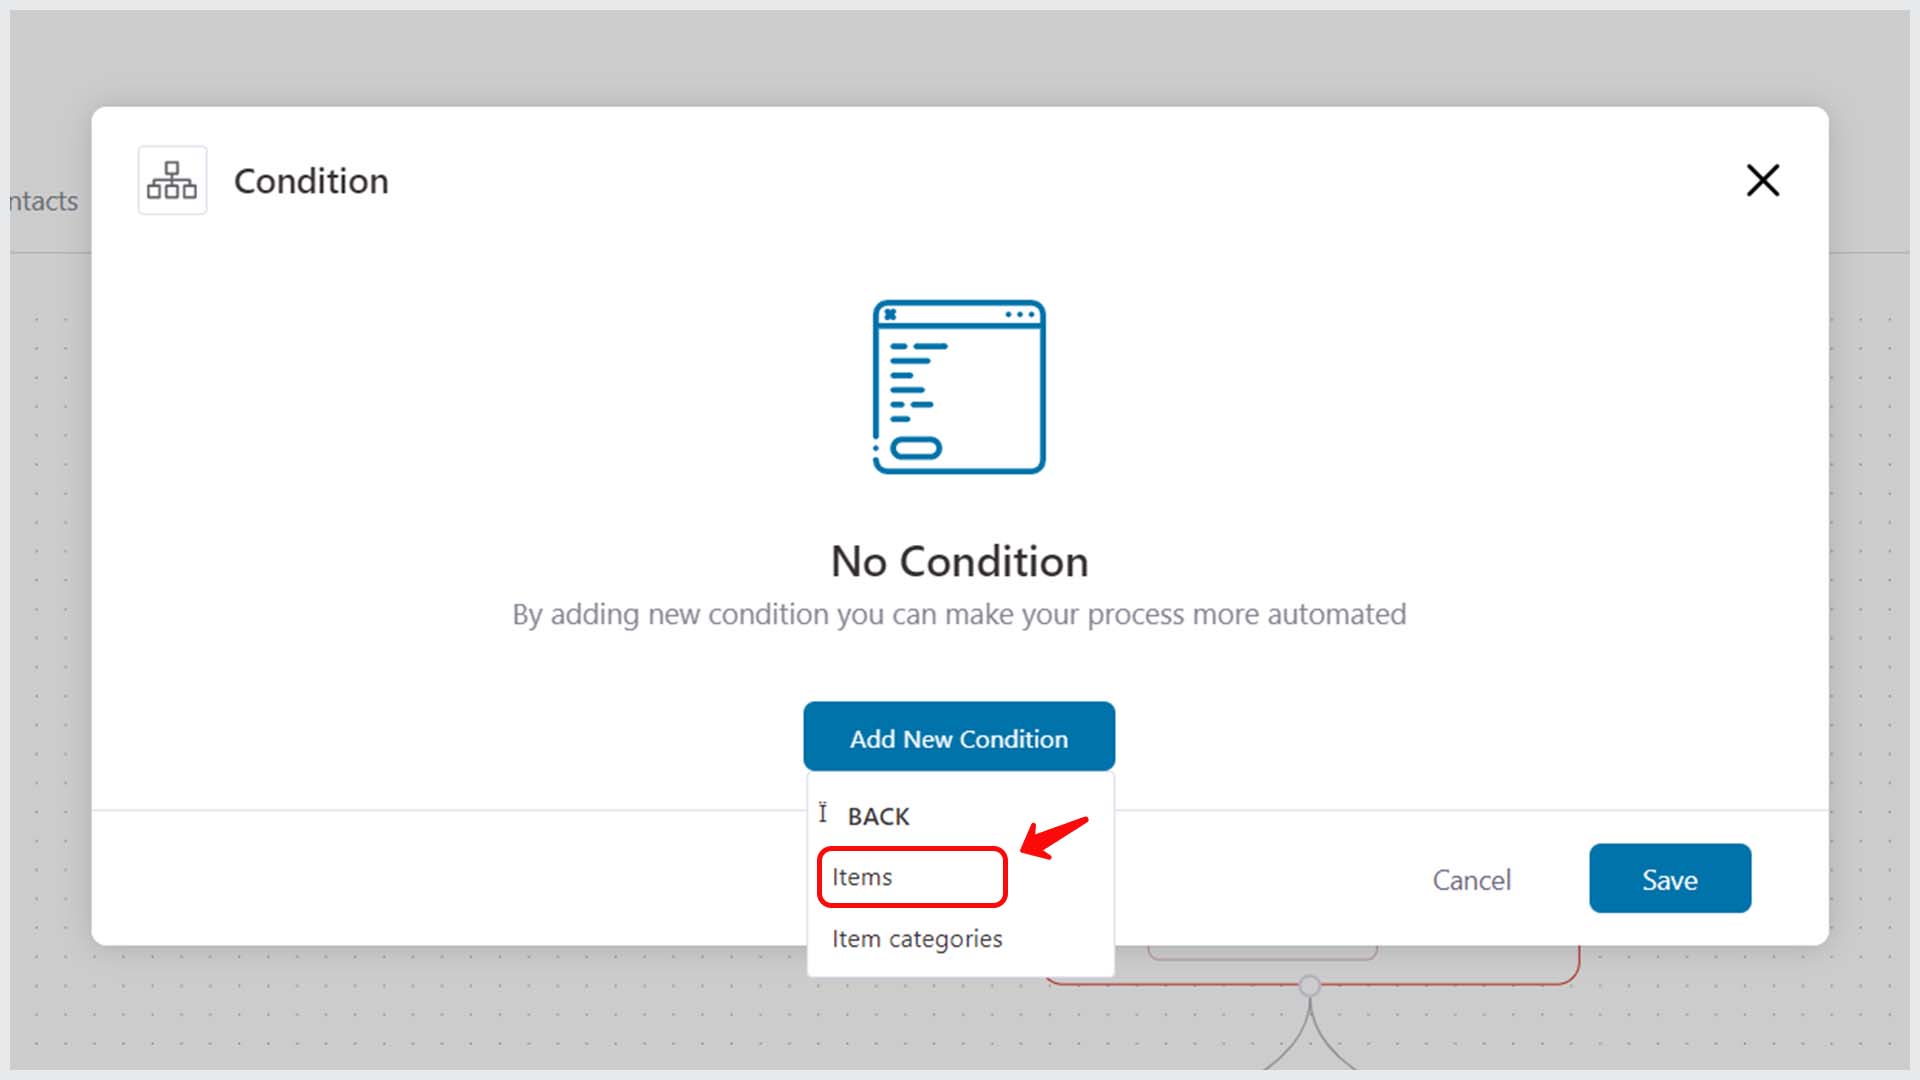
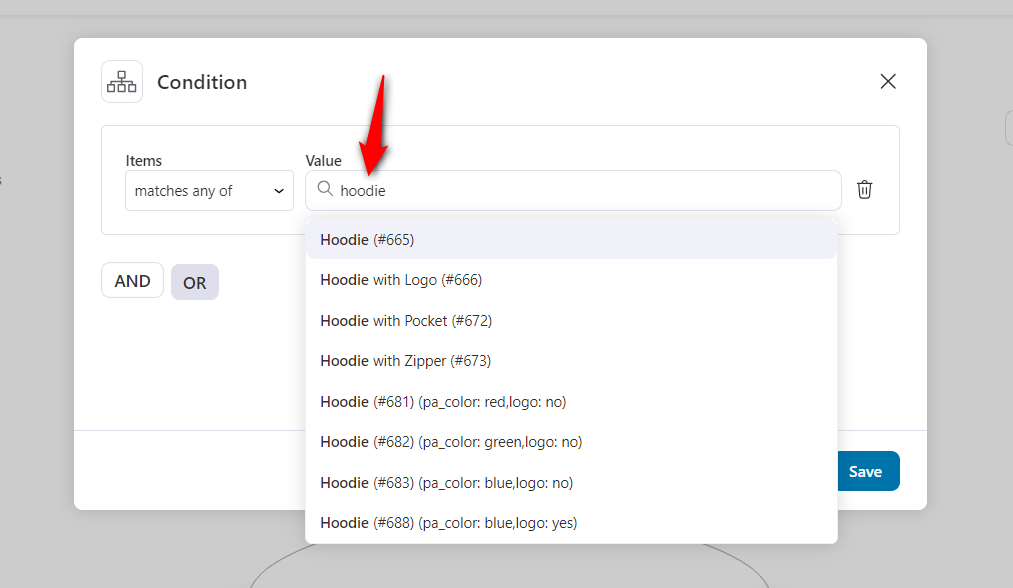
Let’s explore the rule of Items here.
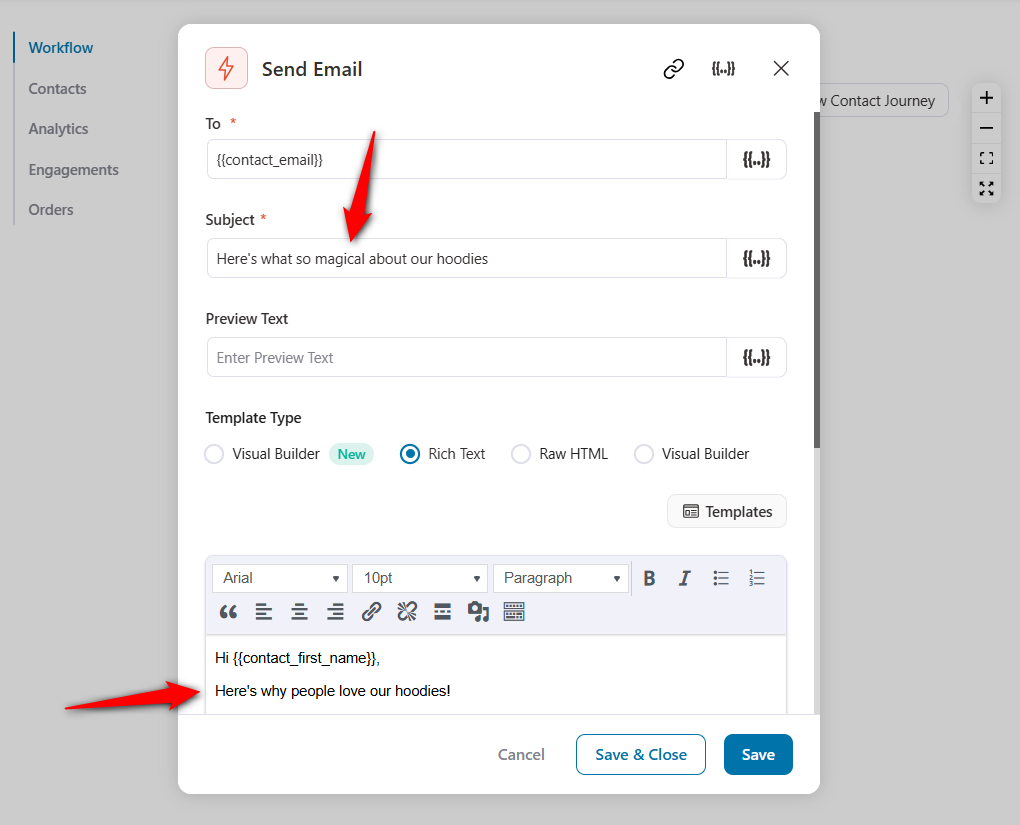
Let’s select the conditional action as Send Email and write an email here.
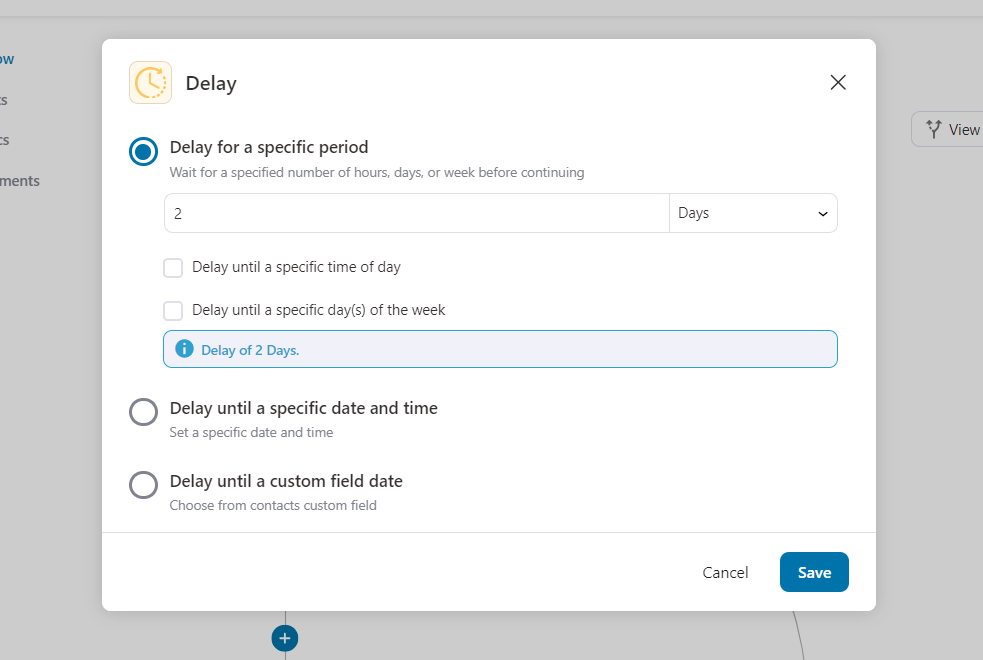
We will be sending this email after 2 days when the user has added this course to their wishlist.
Therefore, select a delay of 2 days right before your 'Send Email' action in your sequence.
Once done, turn the automations’ toggle to active.
This is how you can set a WooCommerce Wishlists rule within your automations in FunnelKit Automations.
Merge Tags
Here are some merge tags available for WooCommerce Wishlists:
- Wishlist Items Count
- Wishlist Items
- Wishlist ID
- Wishlist Title
- Wishlist View Link
You can make use of these merge tags to perform different actions.
For example, if you want to remind the users about their wishlist items, then you can use wishlist_items merge tag:
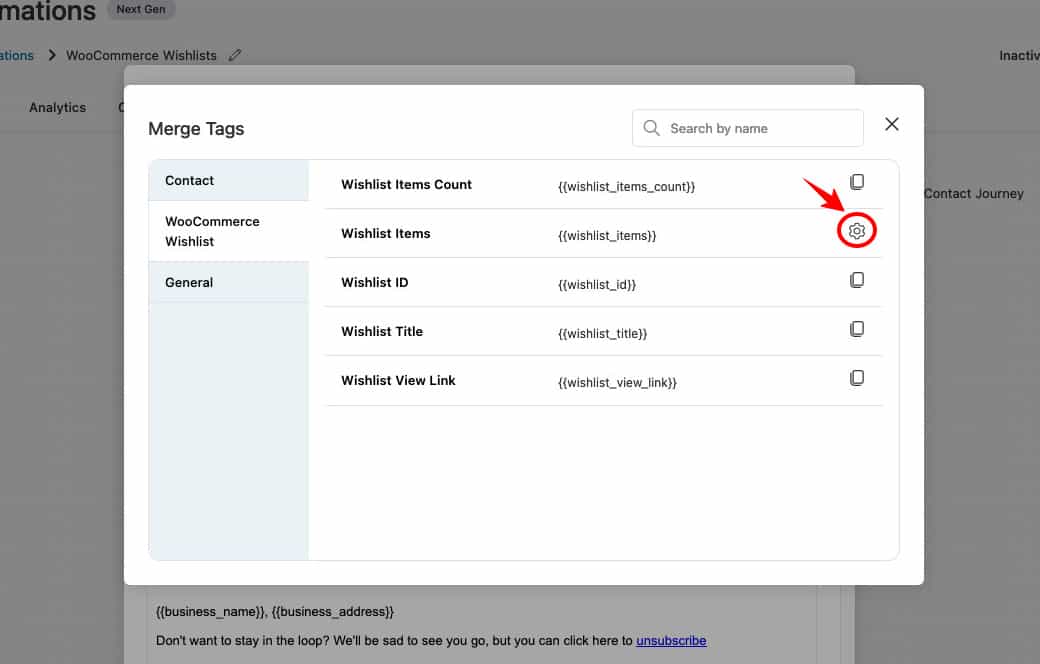
Select a template in which you want to show these items within the email.
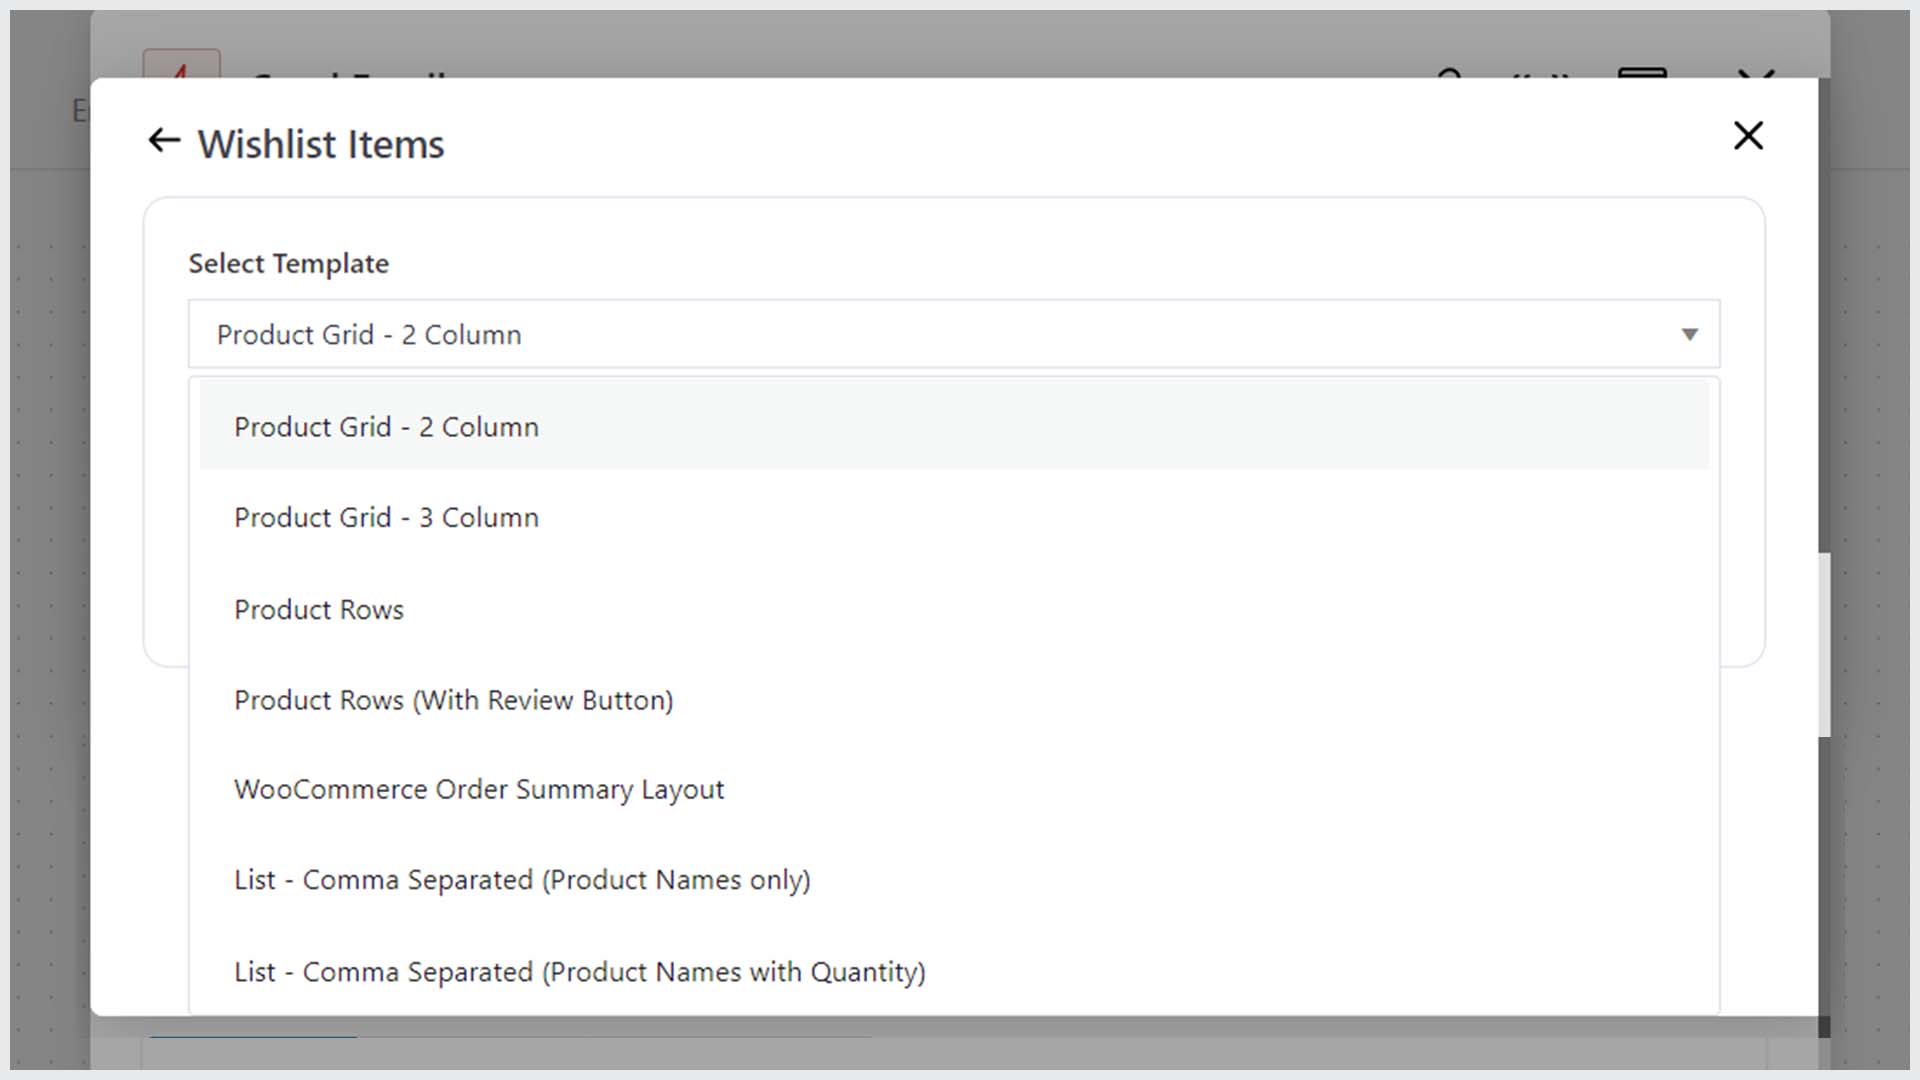
Copy and paste the merge tag to your email content. It’s as simple as this!
This is how you can use merge tags to set up personalized interactions.


