When you’re setting an automation, FunnelKit Automations helps you personalize your emails/SMS using merge tags. You can use as many of these tags as you wish while composing your messages.
It is even possible to create personalized coupons to incentivize purchases.
Composing Personalized Messages
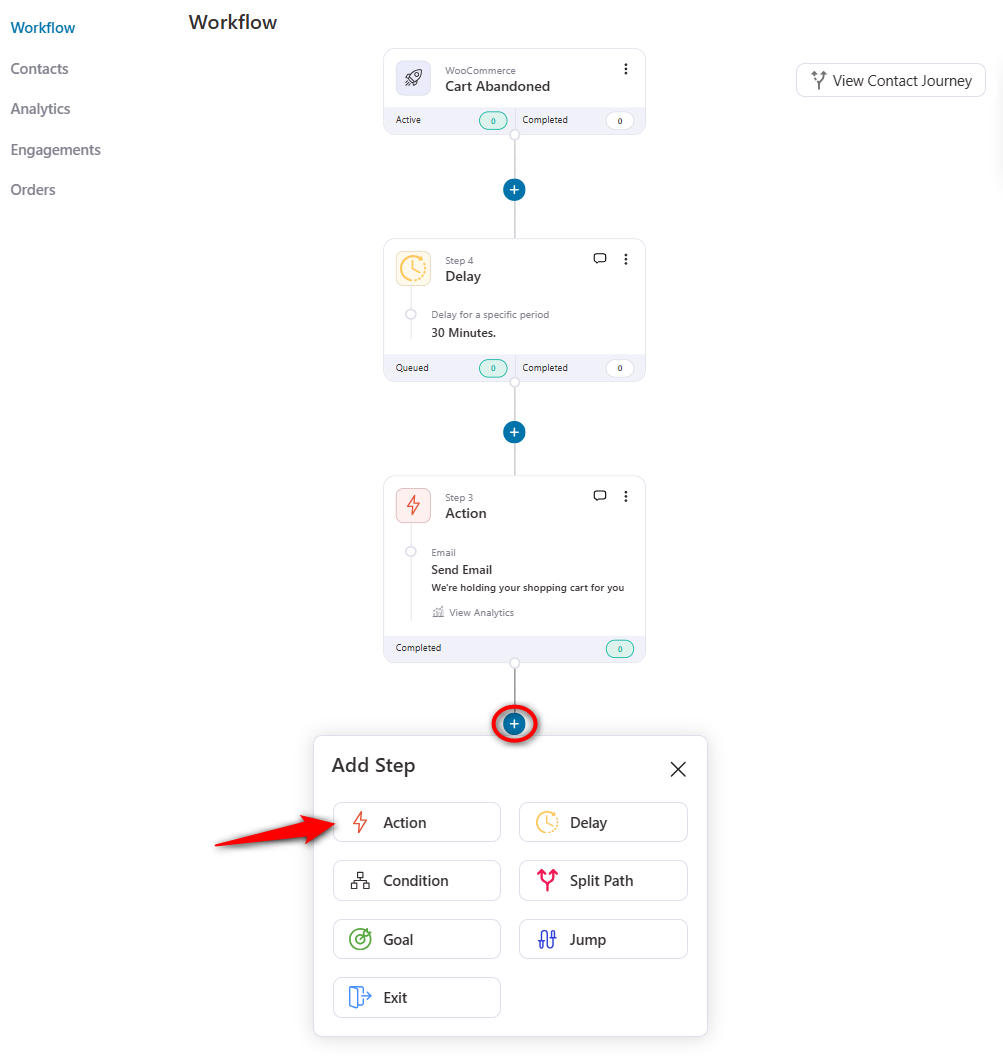
Step 1: Select a trigger and then select an action
You can choose from various triggers such as cart abandonment, purchases made, new contact gets added, etc.
The action following the event could be to send an Email or SMS.
For our case, we have selected Cart Abandoned as the trigger and Send Email as the action.
In the email area, you can see the option to select merge tags.
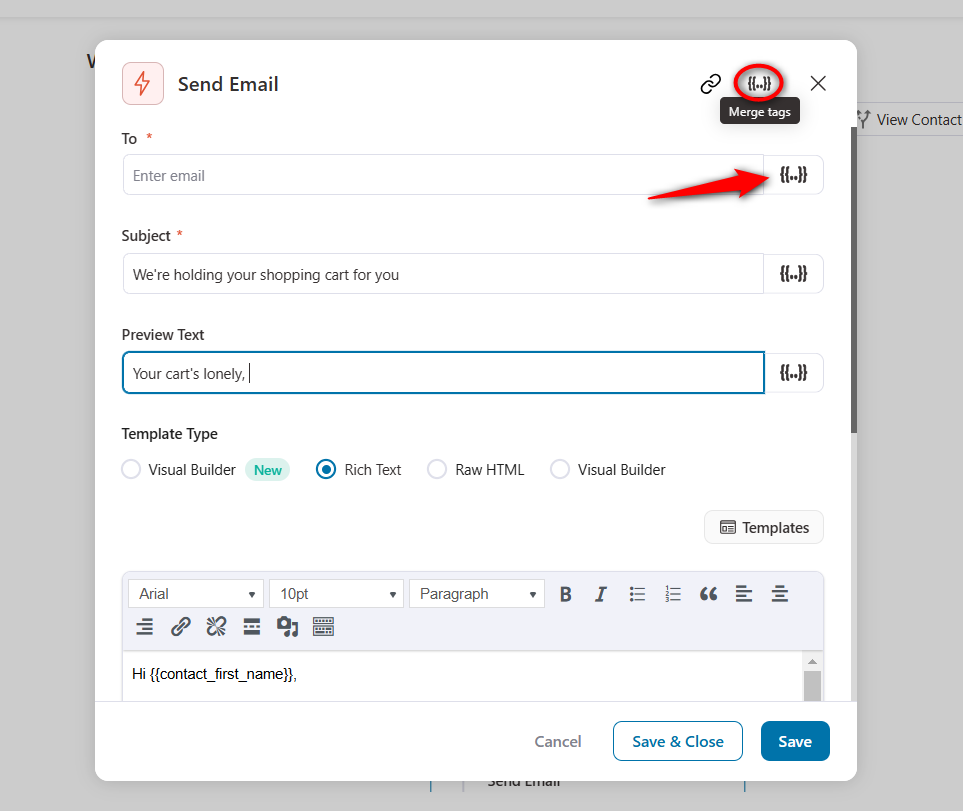
Step 2: Select merge tags
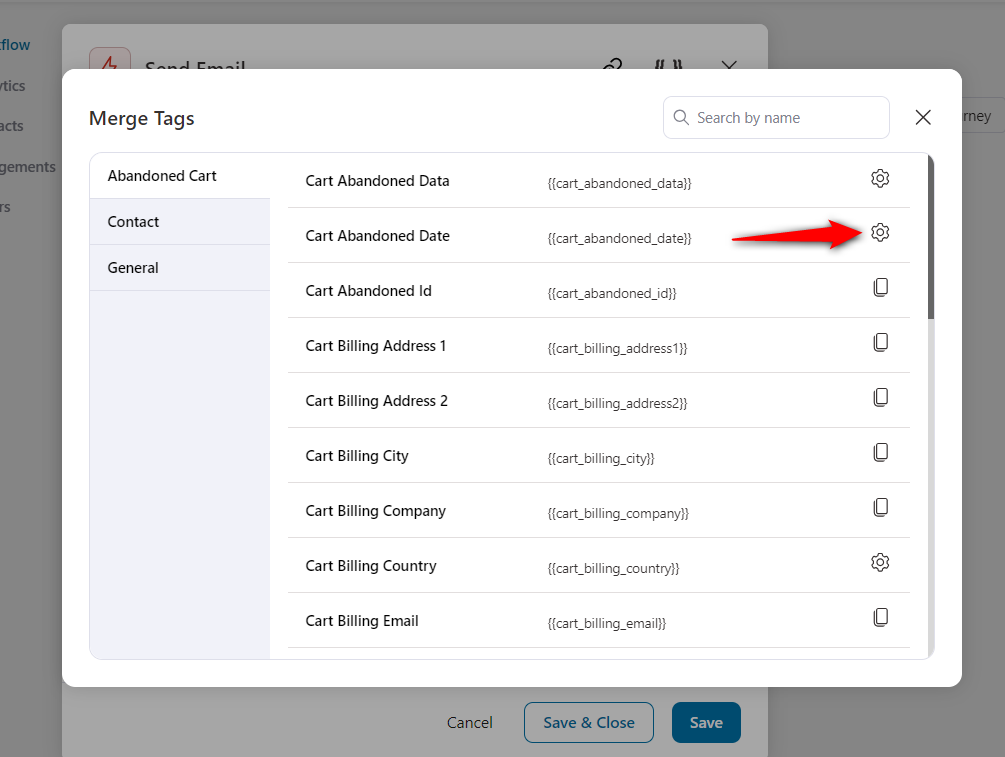
When you click on merge tags, you’ll see a list of merge tags to choose from. You can type to search and FunnelKit Automations will suggest tags that you can choose.
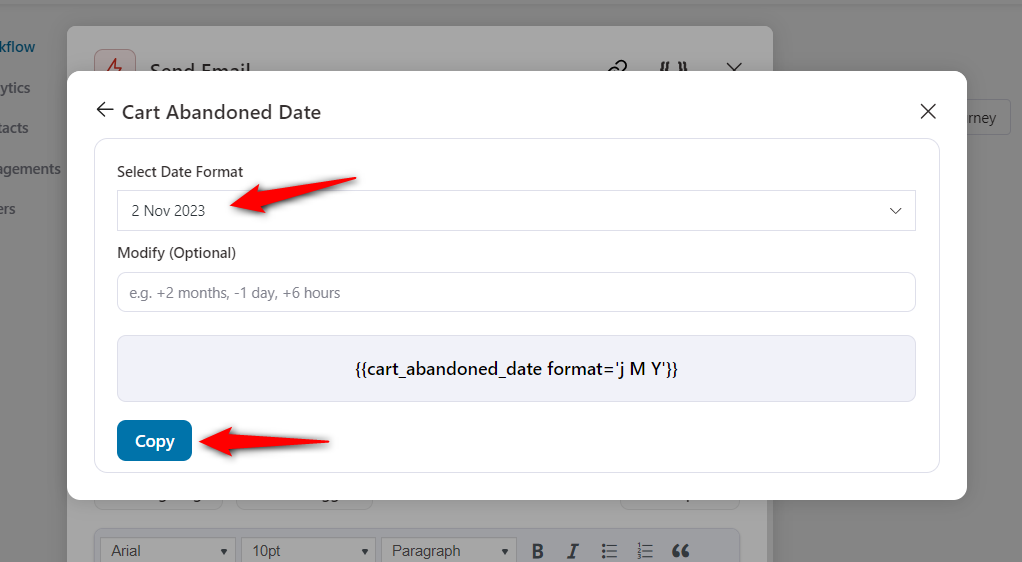
For example, if you want to add Cart Abandoned Date, click on Select next to it.
Now, copy this merge tag.
Step 3: Paste the merge tags
Once you've copied the tag, paste it into the email copy.
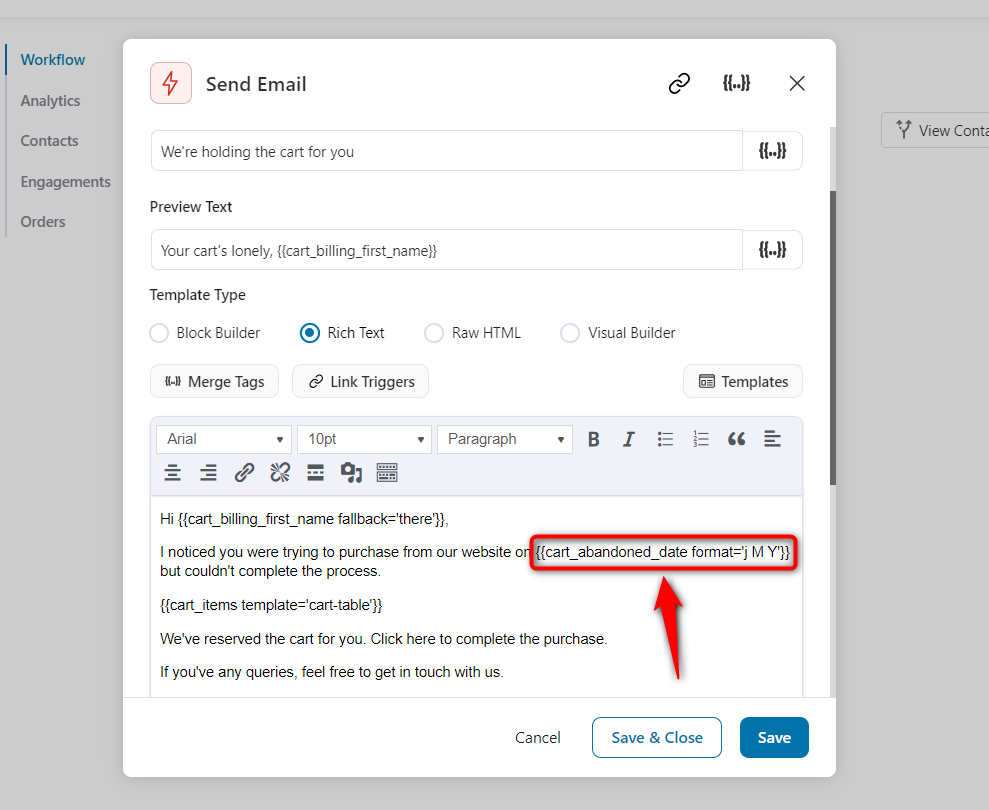
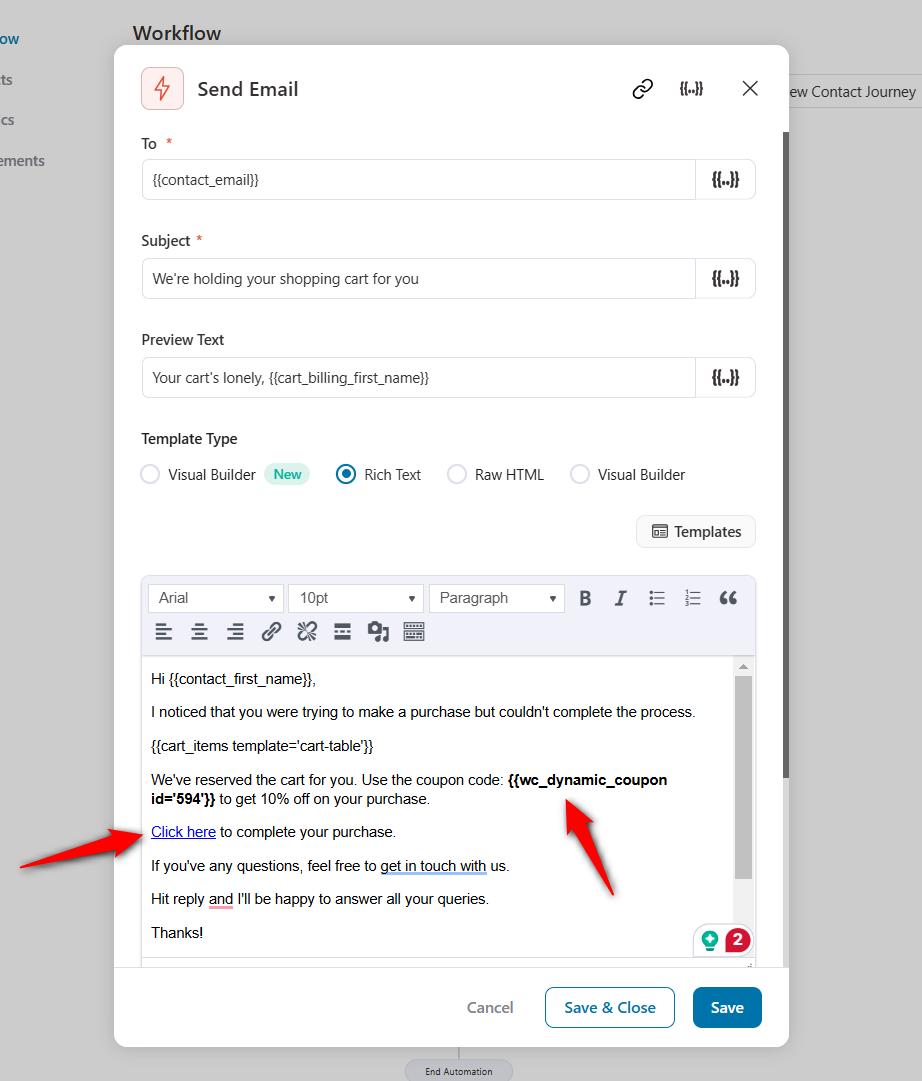
So, when your prospect receives this email, it will read like this - "I noticed that you were trying to buy some products from our website on {{cart_abandoned_date}} but couldn't complete the purchase..."
This level of personalization can increase the click-through rate of your emails.
Some of our commonly used merge tags are email, first name, items in cart, cart recovery link, and cart total.
Creating Personalized Coupon Codes
FunnelKit Automations lets you create personalized, time-bound coupon codes that you can send via email or SMS.
Let’s say you want to create a coupon with a first name like JOHNSAVE, followed by randomly generated codes. You can easily create it using FunnelKit Automations.
Let's look at how:
Step 1: Add an Action
For this automation, we have selected the Cart Abandoned trigger and now creating a coupon as the action.
Please note that you can directly create your coupon codes in FunnelKit Automations.
Step 2: Create a Coupon
You can find the option of creating coupons under WooCommerce.
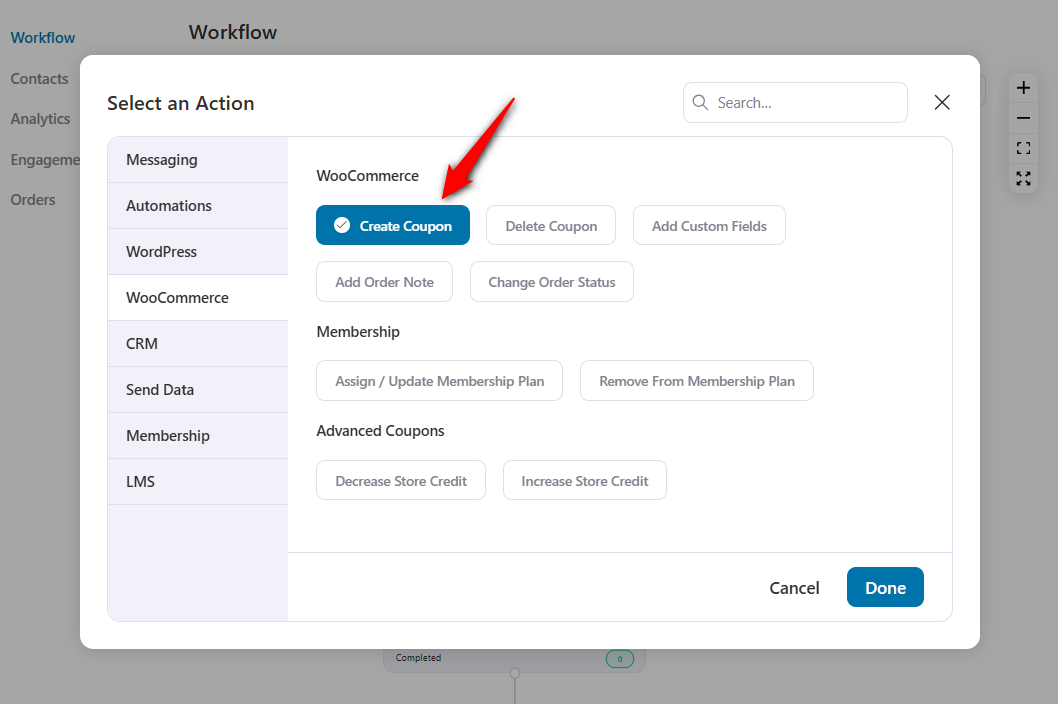
Click on Done.
Step 3: Customize the coupon settings
Here are the options available for you to customize your coupon code:
- Coupon Title - Enter the name of your coupon code
- Amount - Enter the number you want to give the discount to your user
- Coupon Code Prefix - You can personalize your coupon by adding a prefix, after which FunnelKit Automations will put a random code for each contact
- Coupon Expiry - Choose the expiry option to set the expiry after a certain number of days, on a specific date, or doesn't expire.
- Allow Free Shipping - Choose this option to allow free shipping if any user uses this coupon code.
You can even set restrictions and limits for this coupon by going to the respective tabs.
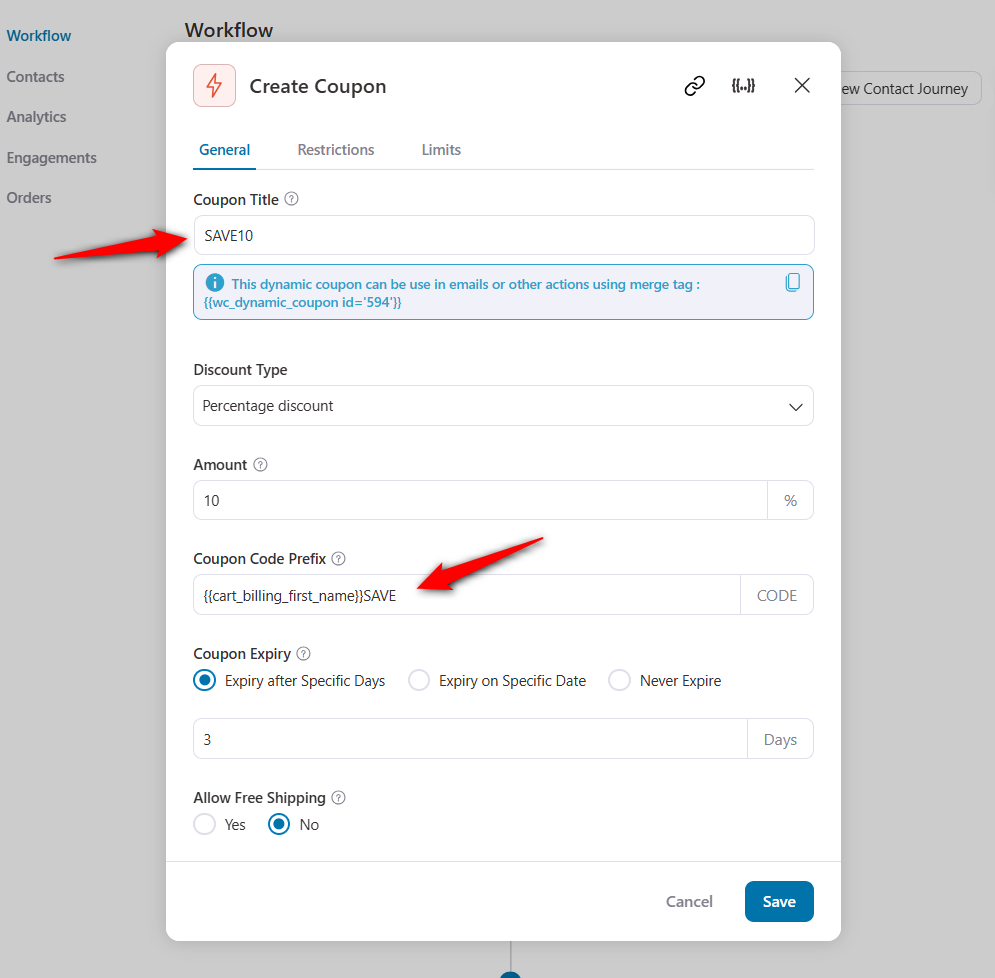
Click on Save when done.
Step 4: Paste the coupon code into your email
Paste the code you created on your email body content.
You can even embed the coupon code into the cart recovery link with the help of merge tags.

This is what our email will look like:
Toggle the automation to live, and you’re good to go!
This is how you can personalize your emails in FunnelKit Automations.


