You can import contacts to FunnelKit Automations from a CSV file.
Here's how you can do that:
Step 1: Prepare your CSV
Please take a note of the following points when preparing your CSV to import:
- Ensure the Email field is present in your CSV file. Also, check that contacts have a valid email format.
- If the Country field is there, please ensure it's in 2-digit ISO Code format.
- If there is a Date field present, it should be in the YYYY-MM-DD format.
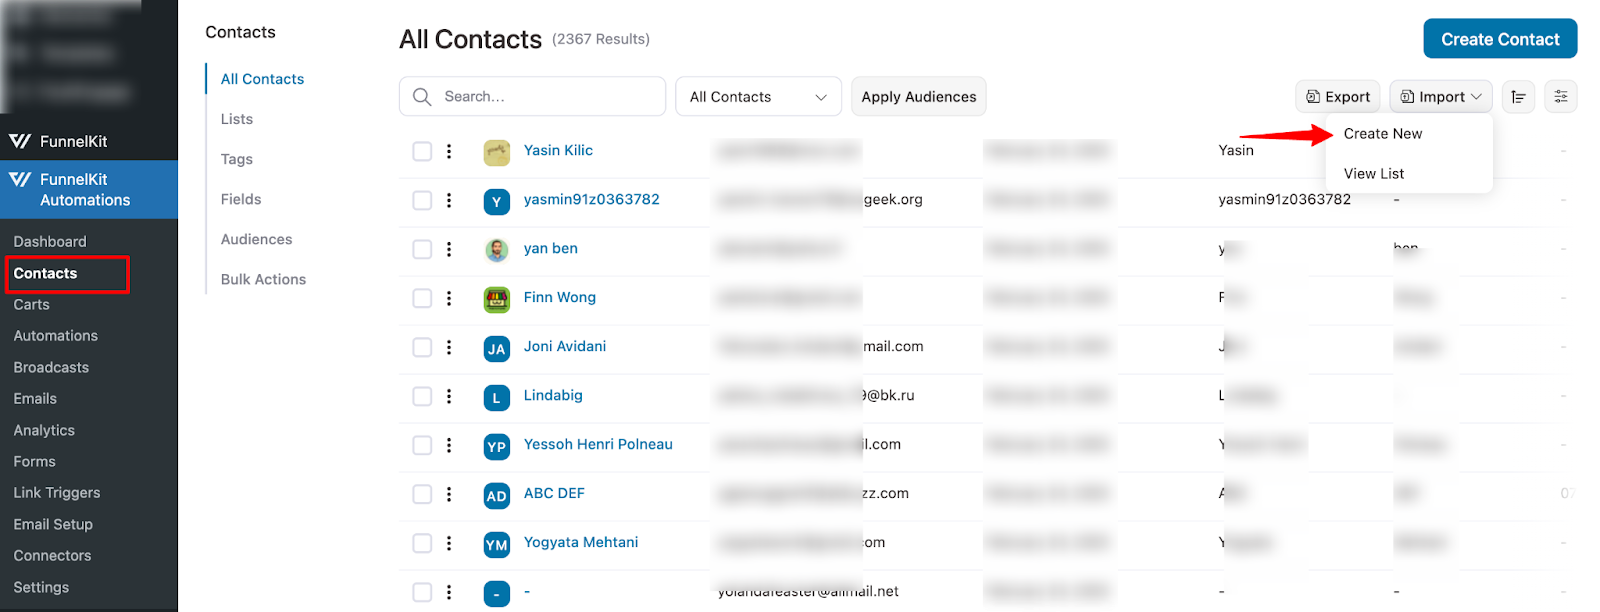
Step 2: Go to the Contacts tab in FunnelKit Automations and click on Import
Navigate to FunnelKit Automations ⇒ Contacts. Then,click on the 'Import' button and hit Create New.
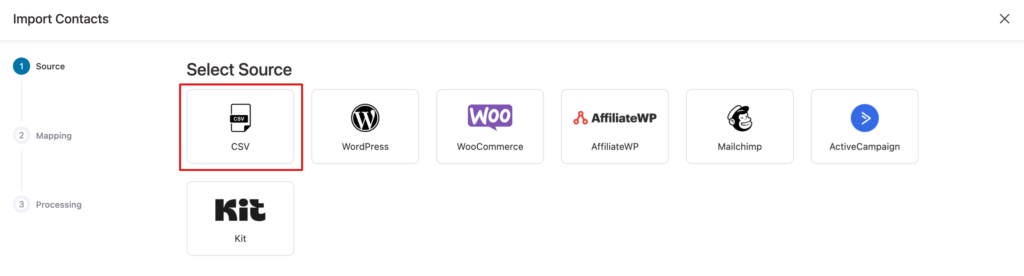
Step 3: Select CSV as the source
Next, select CSV as the source.
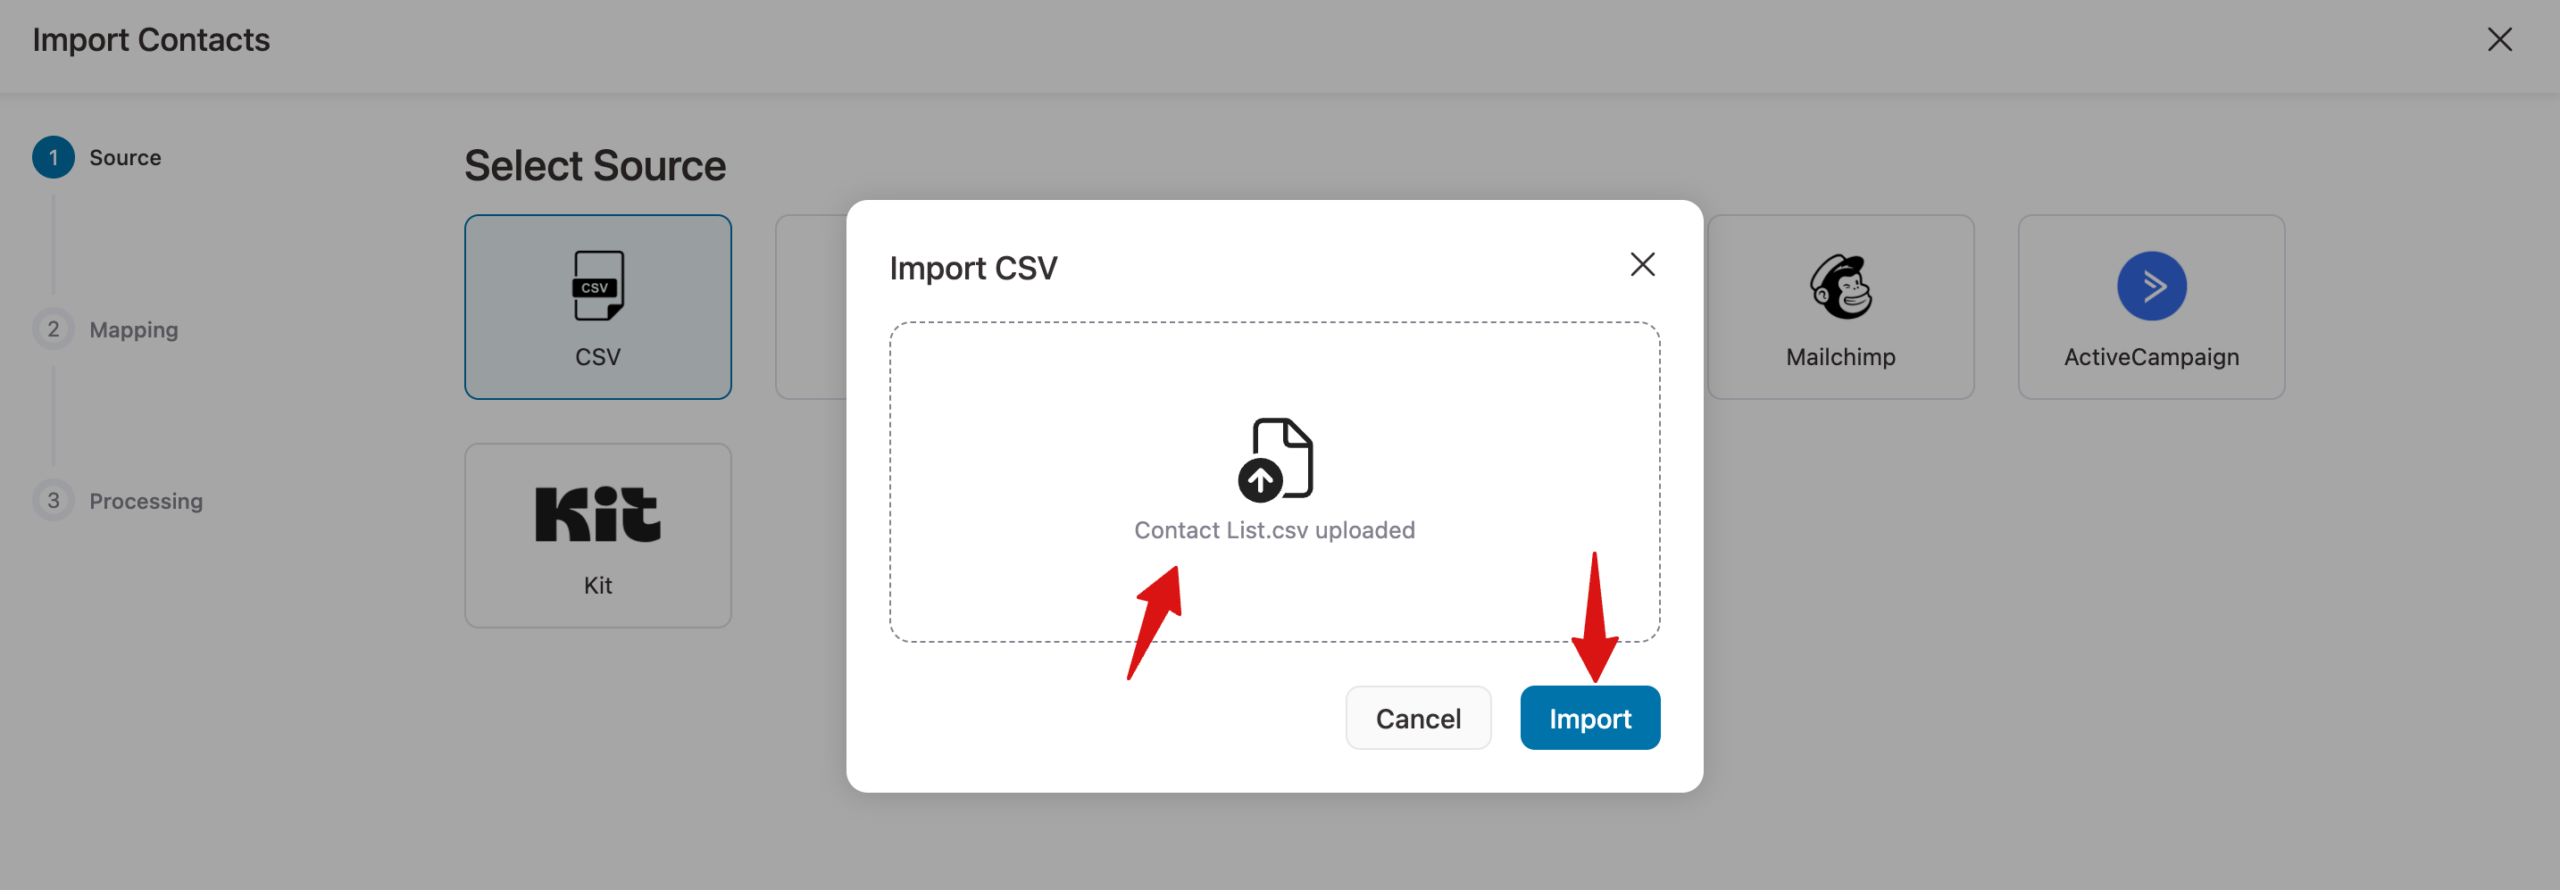
Step 4: Upload your CSV file here
You can upload the CSV file here that you’ve exported from another CRM or a file on your computer. You can drag and drop the CSV file or upload it. After that hit Import.
Before you upload the CSV file, make sure to follow the pointers mentioned below:
- Email is a mandatory field for import.
- The country code should be in the form of two-digit ISO codes.
- Tags should be separated by commas.
Step 5: Map the fields
Mapping allows you to store your fields in FunnelKit Automations correctly. You can map the columns of your CSV to the fields in FunnelKit Automations.
In case you don't find a relevant field in FunnelKit Automations, create a custom field to map the data.
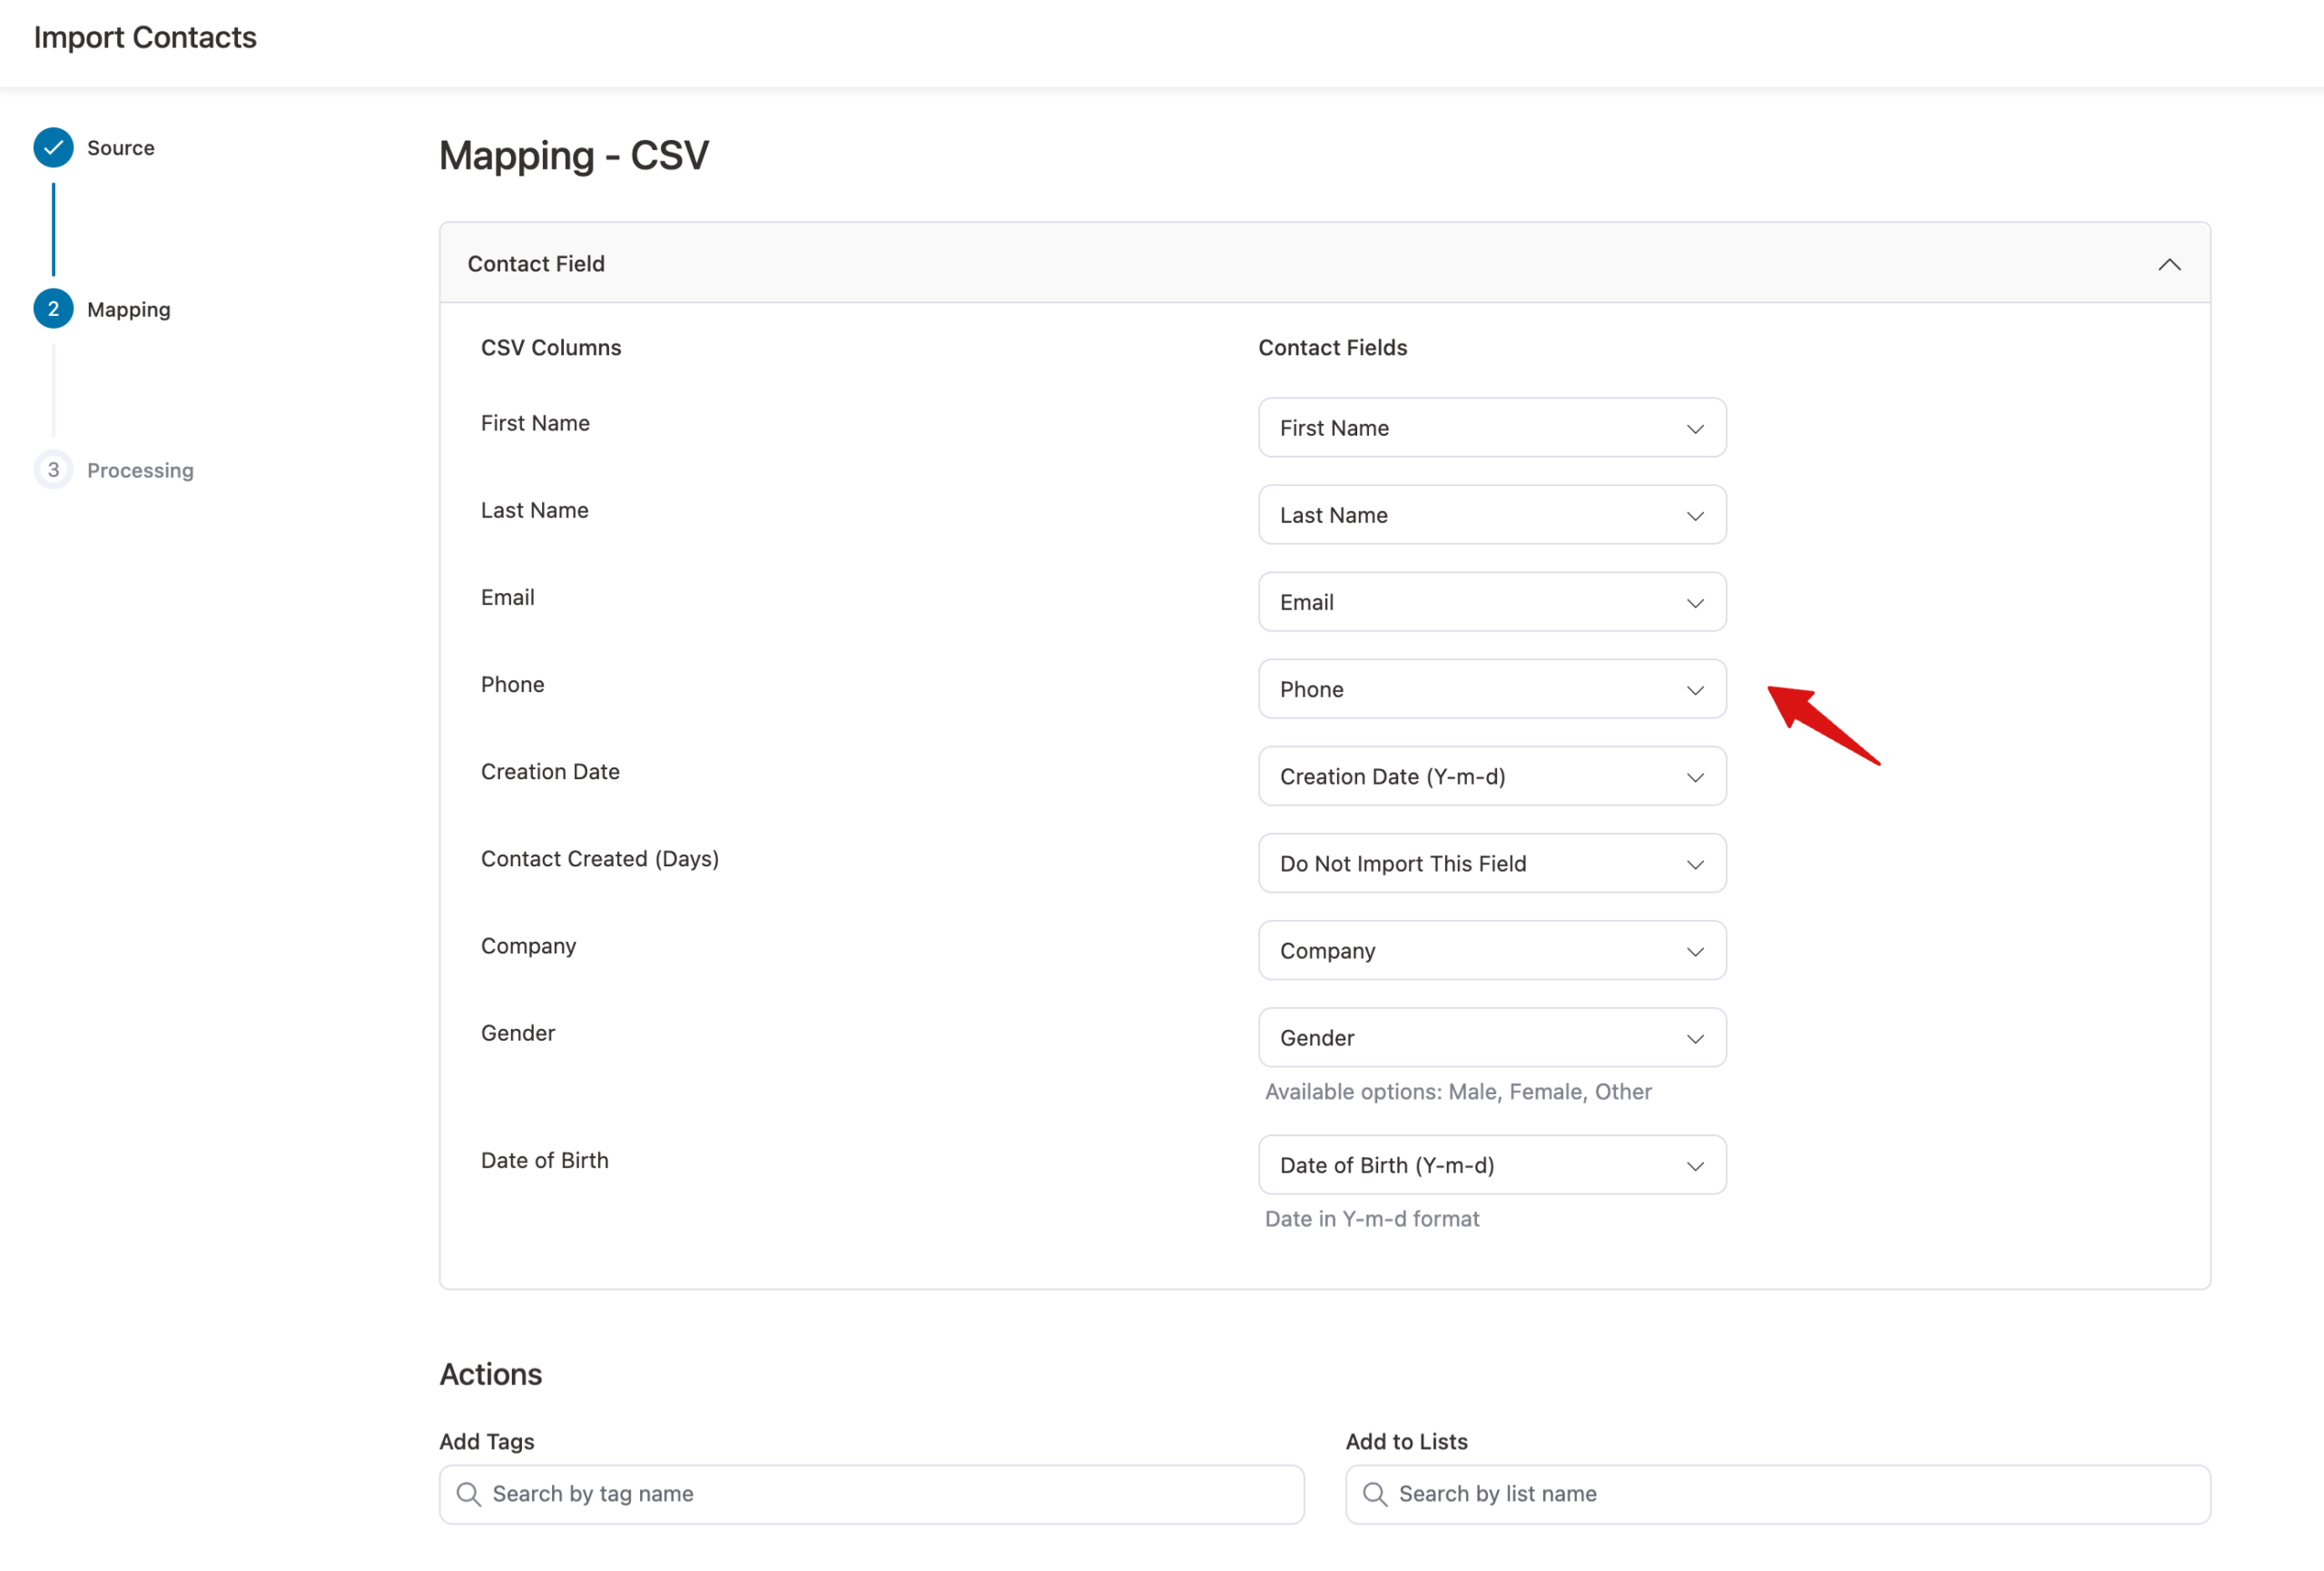
Step 6: Assign tags, lists, and status
Under the Mapping section, there is another section called Contact Profile. Here you can assign:
- Add Tags - The tag(s) you assign here will be added to all the contacts being imported.
- Add to Lists - By defining a list here, you’ll add these contacts to that specific list.
- Status - You can choose to add your contacts as Unverified, Subscribed, Bounced, Unsubscribed, Soft Bounced, or Complaint. By default, the option is set to "Subscribed".
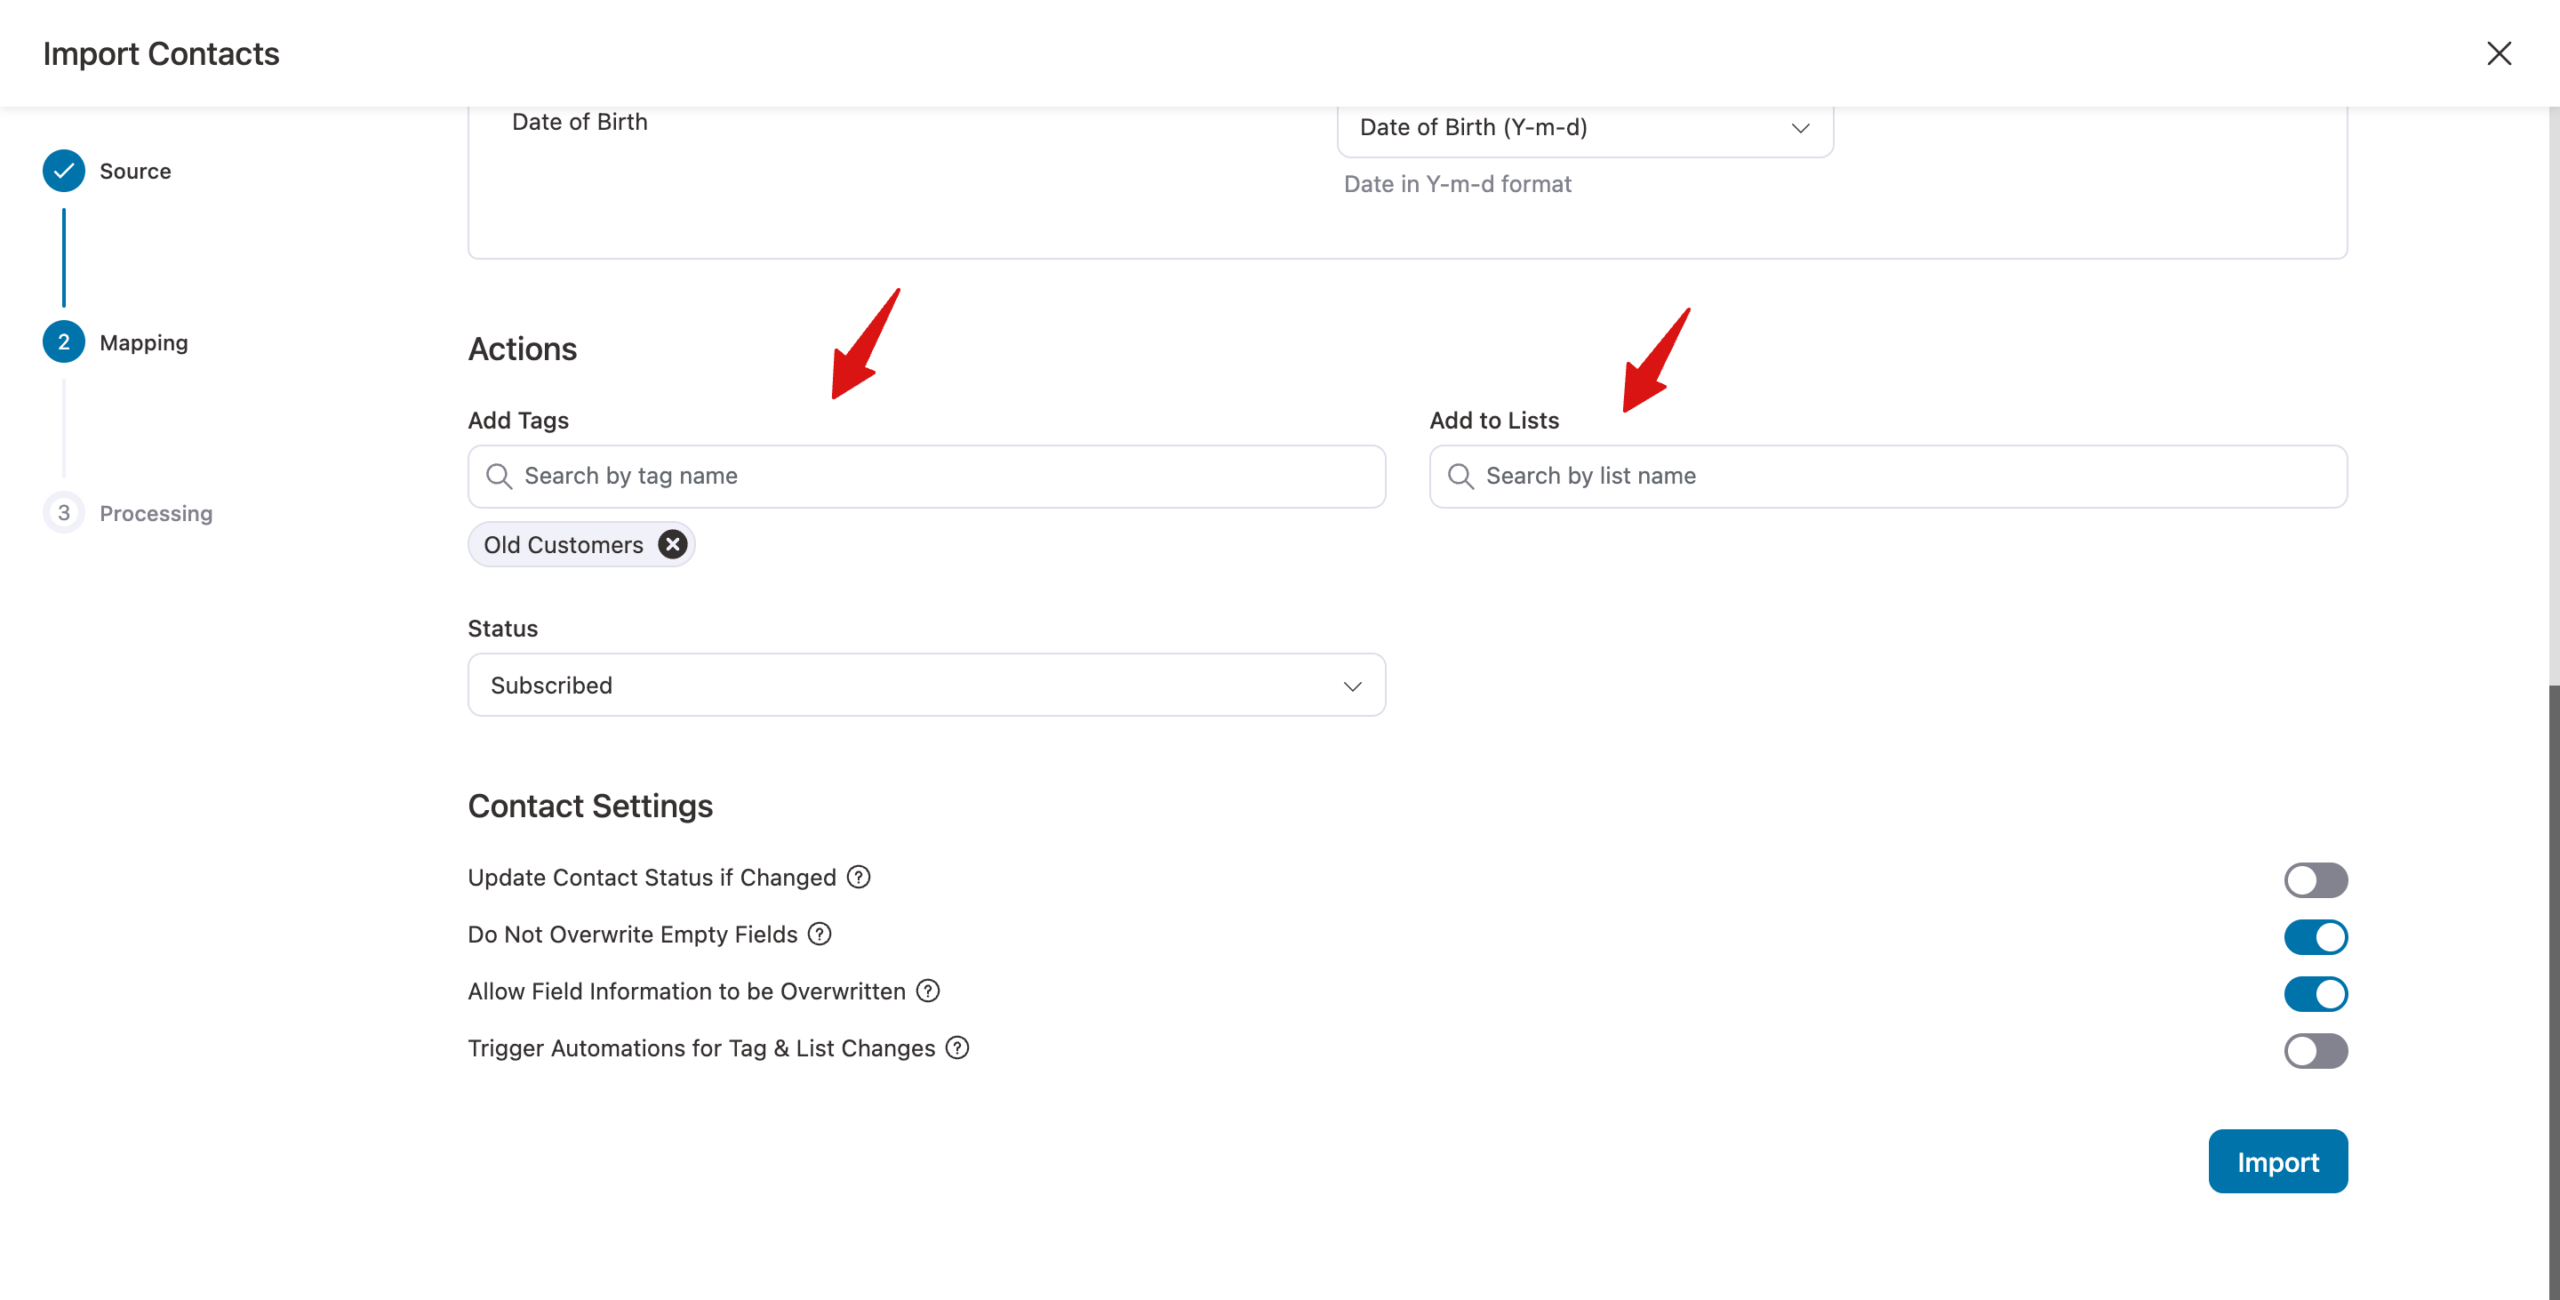
Step 7: Configure the contact profile
After that, set the following:
- Update Contact Status if Changed: Enable to update the contact’s status when a different status is found during import.
- Do Not Overwrite Empty Fields: Enable to prevent empty values in the import file from overwriting existing contact data.
- Allow Field Information to be Overwritten: Enable overwriting existing contact fields with new values from the import.
- Trigger Automations for Tag & List Changes: Enable to trigger automations when tags or lists are added or updated during import.t.
Once you’ve made the changes, click Import to move on to the next step.

Step 8: Wait for your import to complete
Please wait for a few seconds, depending on the number of contacts. You will find a progress bar of how many contacts were skipped, failed, or successfully imported.
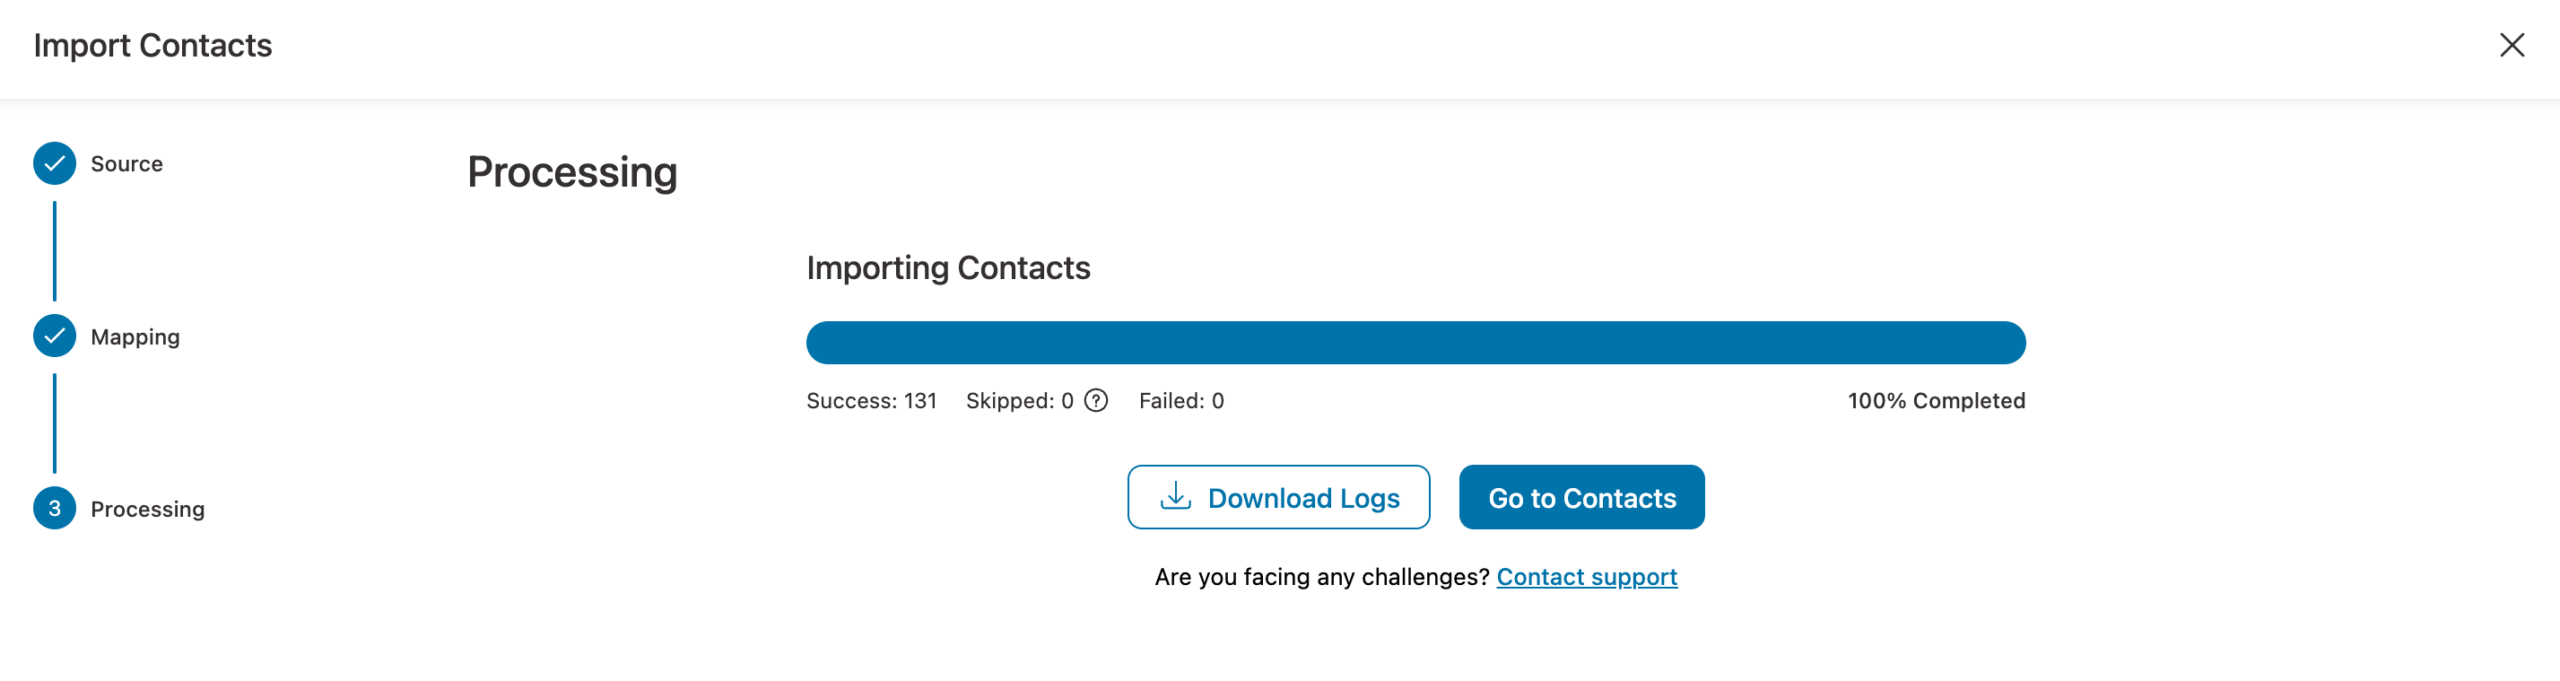
Go to contacts to see your imported contacts.
This is how you can import contacts from the CSV file.


