


Actions are the series of processes that you can perform when an event gets triggered.
In this documentation, you'll learn about actions you can define within your workflow.
Here are the core actions associated with FunnelKit Automations:
- Create Contact - Creates a new contact in FunnelKit Automations
- Update Fields - Updates the fields of your contact
- Add Tags - Add tags to a contact
- Add Contact Note - Add a note to a contact
- Remove Tags - Remove tags from a contact
- Add Contact to List - Add a contact to a list
- Remove Contact From List - Choose this action if you want to remove a contact from a list
- End Automation - End an automation
- Add To Automation - Adds a contact to an existing automation
- Delete Contact - Deletes a contact
These are the core actions under FunnelKit Automations. However, you can always integrate with other plugins and applications to get more action.
Defining an Action
Let's say we have an event - A tag is added.
To define an action, click on the blue (+) button.
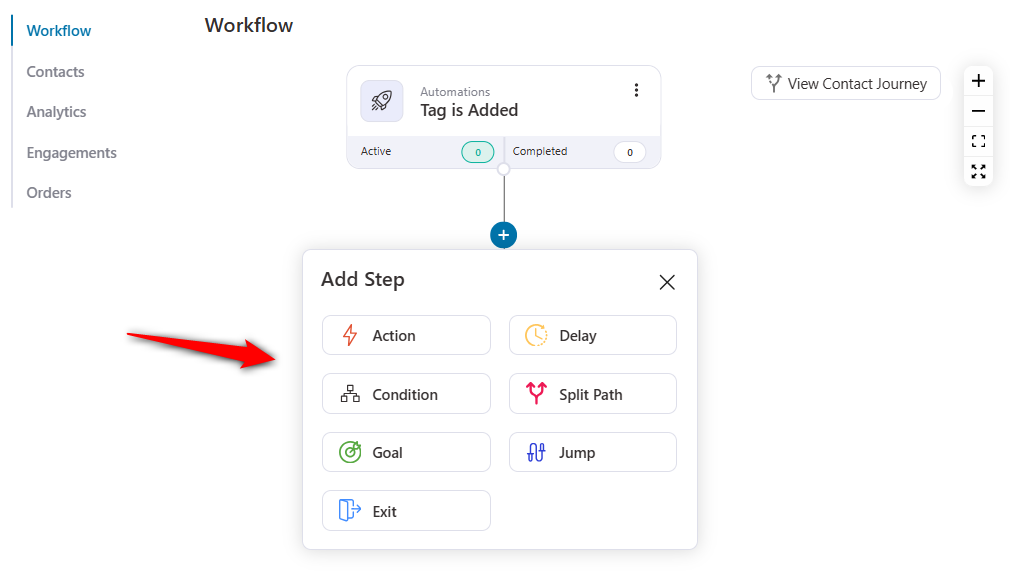
Hit Action from here.
Here we have selected the action to add the contacts to a new list.
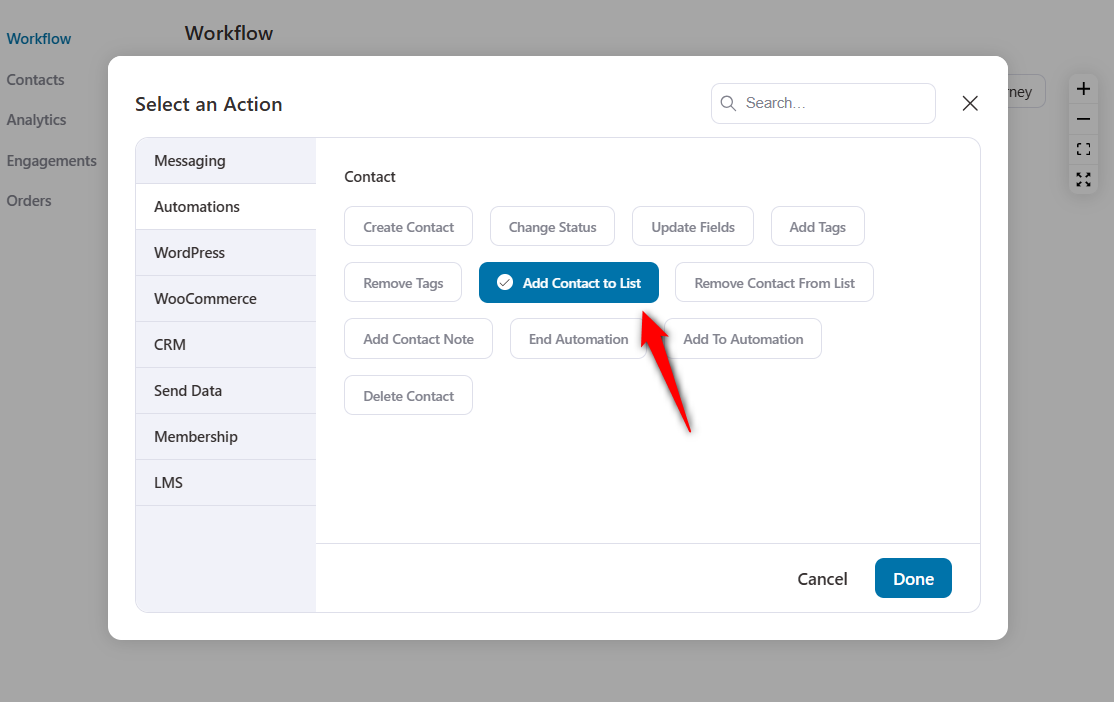
Click on Done.
Specify the list to which you want to add your contacts when the event triggers.
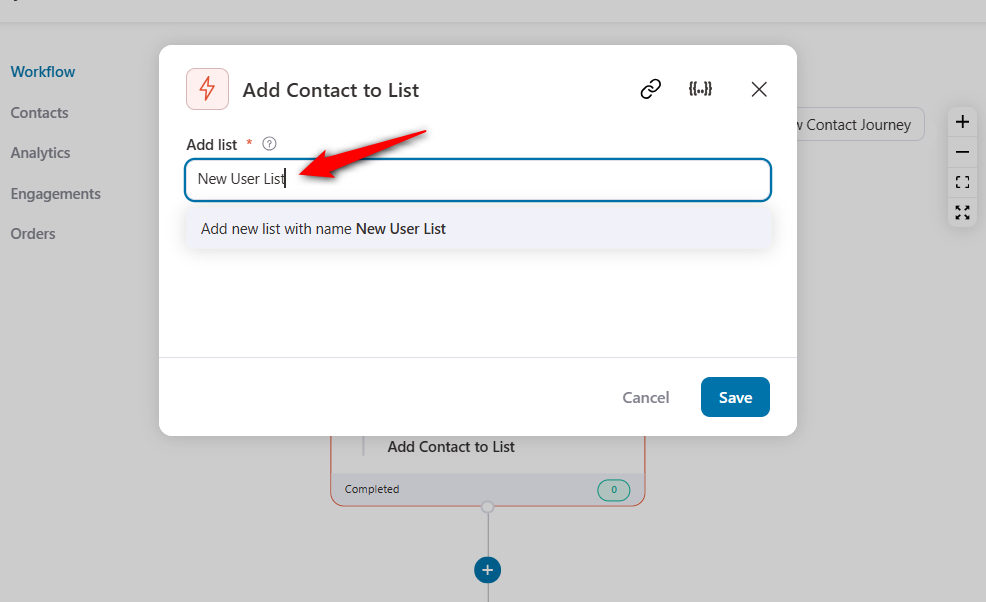
Once done, click on Save to lock all your changes.
Make sure to turn the automation toggle to 'Active' to make it live.
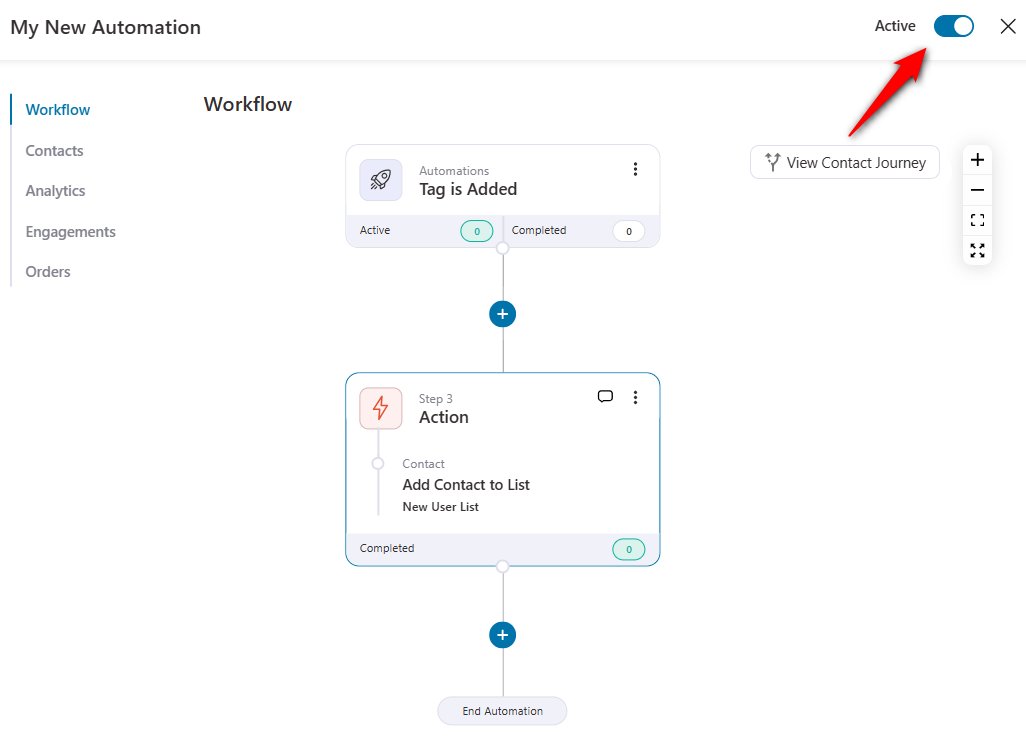
Now, if you run another automation to add a tag on any contact or even manually add a tag to them, they’ll get added to your list.
You can even assign a specified tag to trigger this automation when configuring your event.
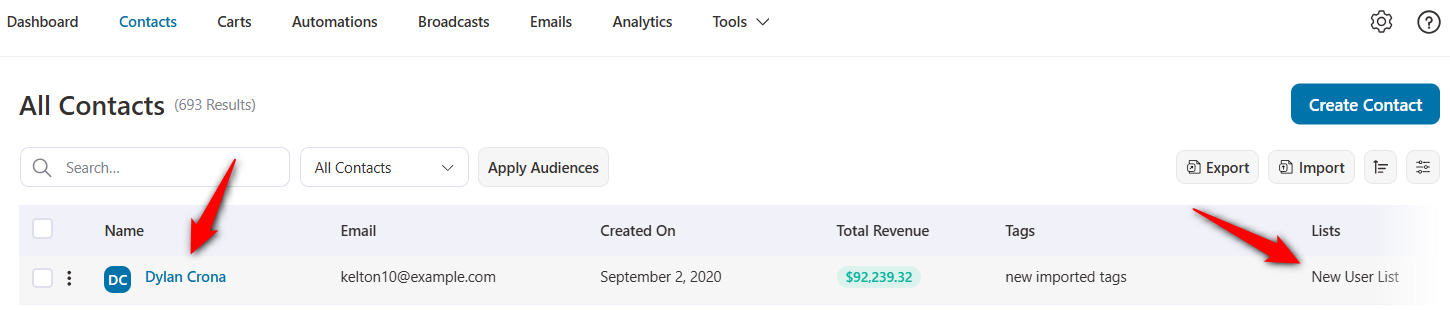
This means the automation successfully works!
Disable Any Step
Need to pause part of your automation without deleting it? You can now disable any step and turn it back on whenever you're ready.
Whether it's an action, delay, condition, or split path, you can temporarily take it out of your automation without affecting the rest of your workflow.
This is especially useful when you're testing changes, troubleshooting an automation, or temporarily pausing specific steps.
Open the three-dot menu on the step you want to disable and click Disable Step.
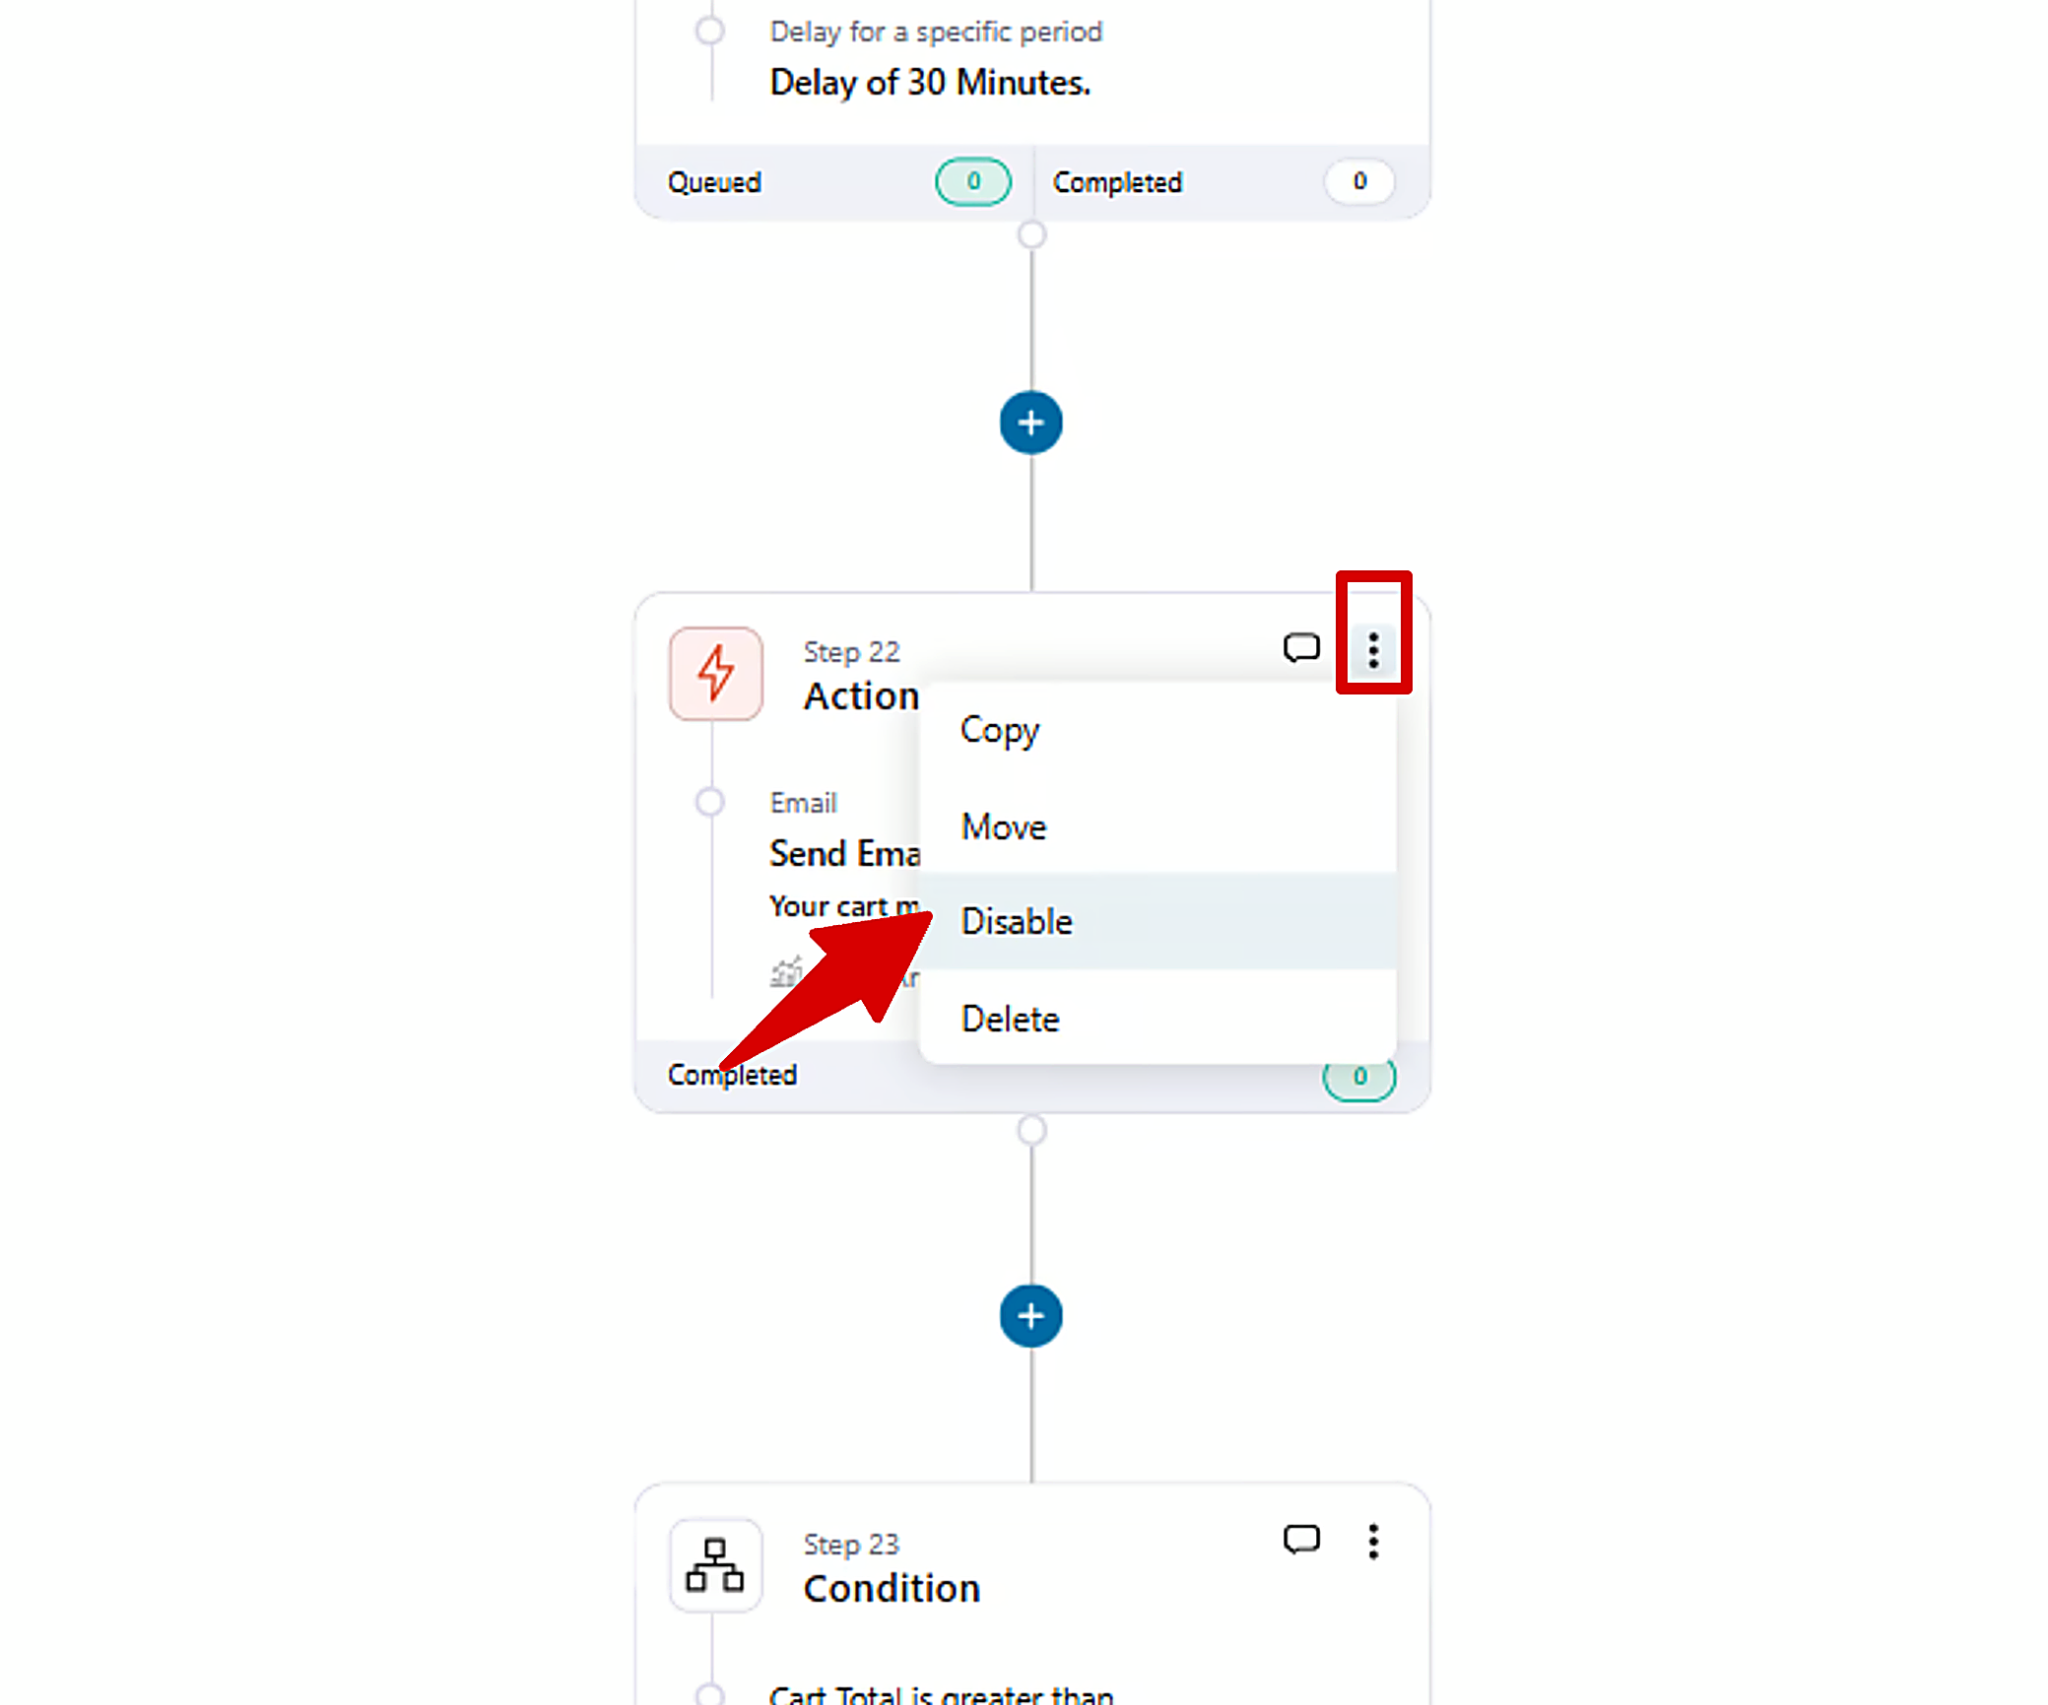
Confirm your choice, and the step will be disabled immediately.
What Happens After You Disable a Step?
A disabled step stays in your automation, but it won't run.
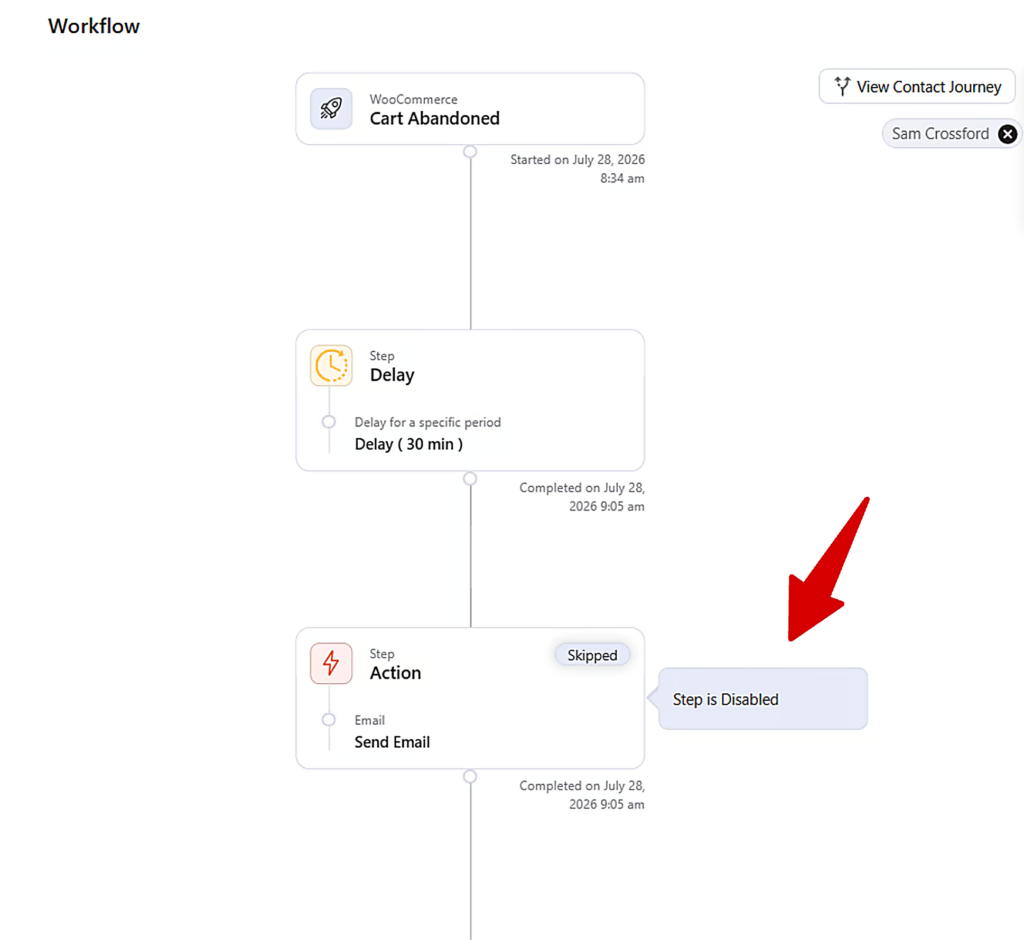
When a contact reaches that step, FunnelKit Automations skips it and continues with the rest of the workflow.
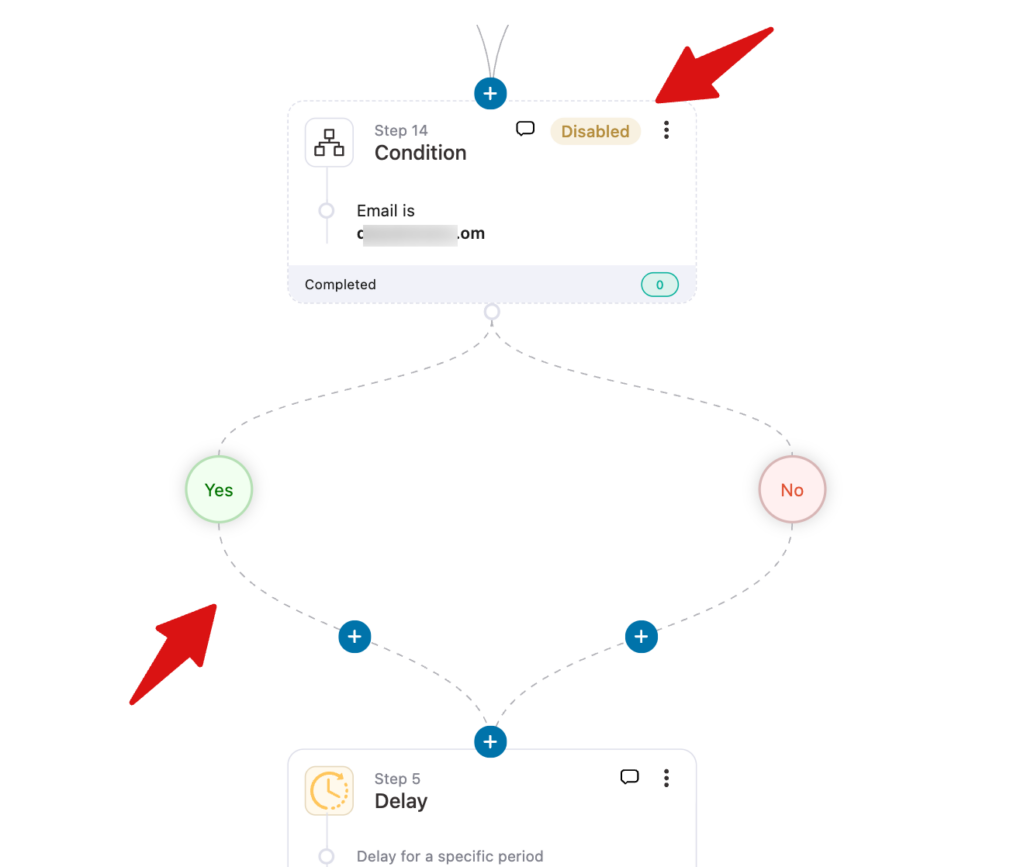
If you disable a Condition or Split Path, the disabled branches appear with dashed edges on the automation canvas, making it easy to see what's currently inactive.
Note: You'll also see a Skipped status in the contact's journey, along with a note indicating that the step was disabled.
Enable the Step Again
Ready to use the step again?
Open the three-dot menu on the disabled step and click Enable Step.
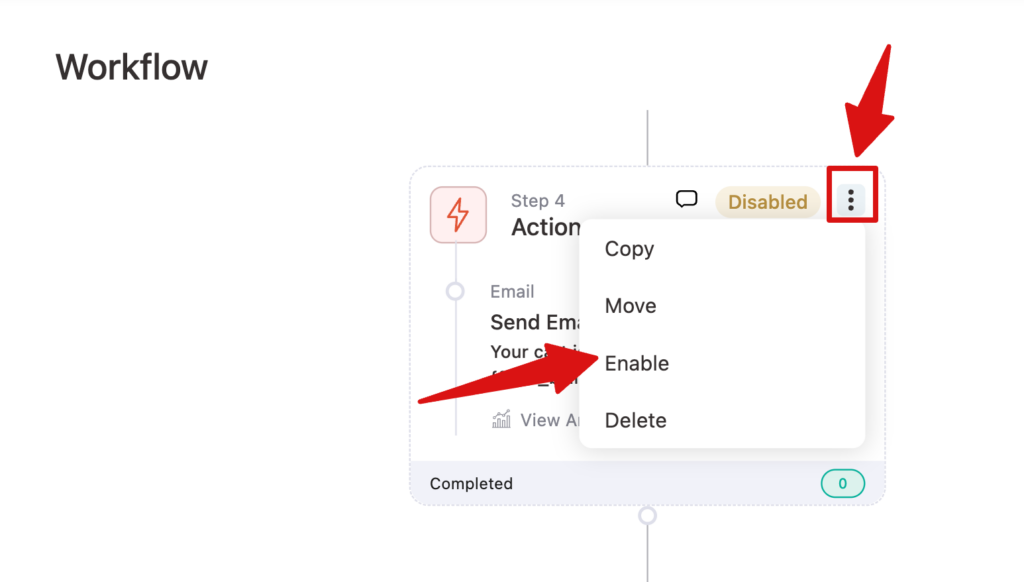
The step becomes active again and will run normally for any contacts that reach it going forward.
Disabling a step gives you the flexibility to update live automations without deleting or rebuilding parts of your workflow. You stay in control of what's running and what stays paused, making it easier to test, troubleshoot, or make temporary changes.
You can set up conditions in FunnelKit Automations as well. We have discussed it in the next document.


