Follow the step-by-step instructions to import your contacts from the MailChimp plugin into FunnelKit Automations.
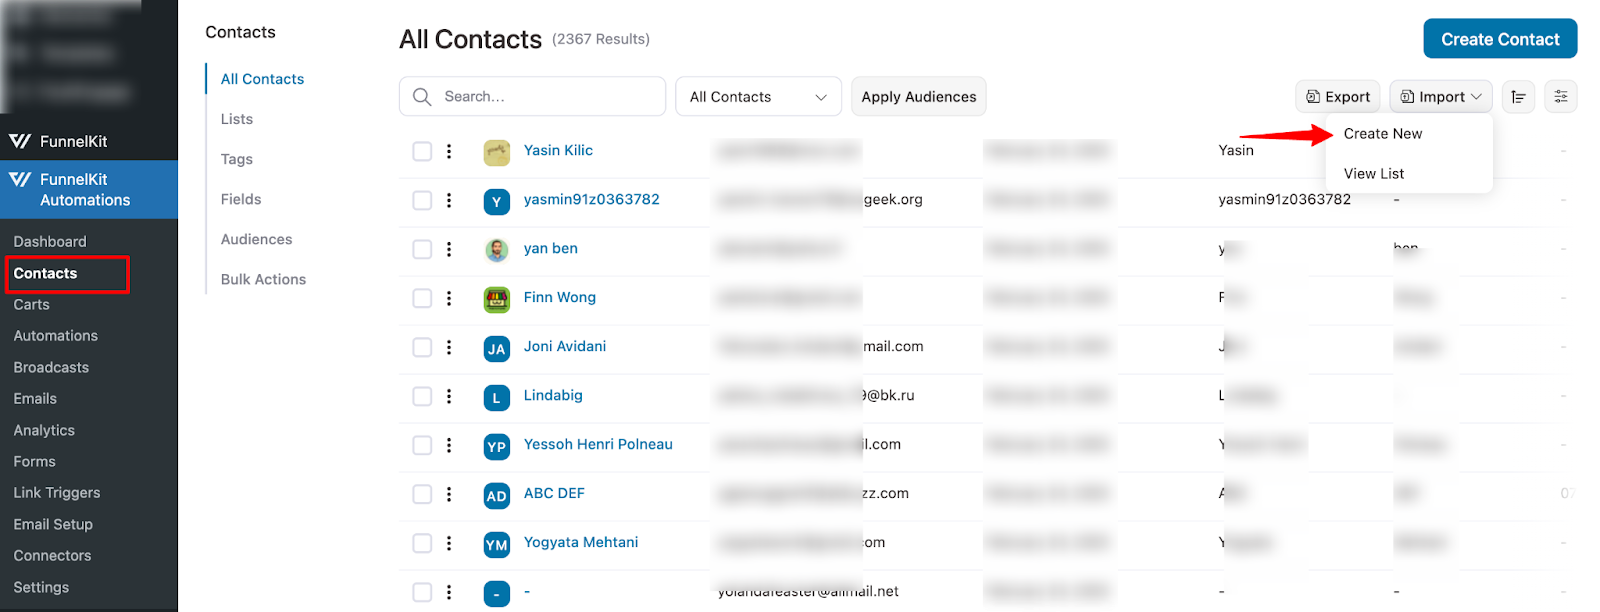
Step 1: Go to the Contacts tab in FunnelKit Automations and click on Import
Navigate to FunnelKit Automations ⇒ Contacts. Then, click on the 'Import' button and select 'Create New'.
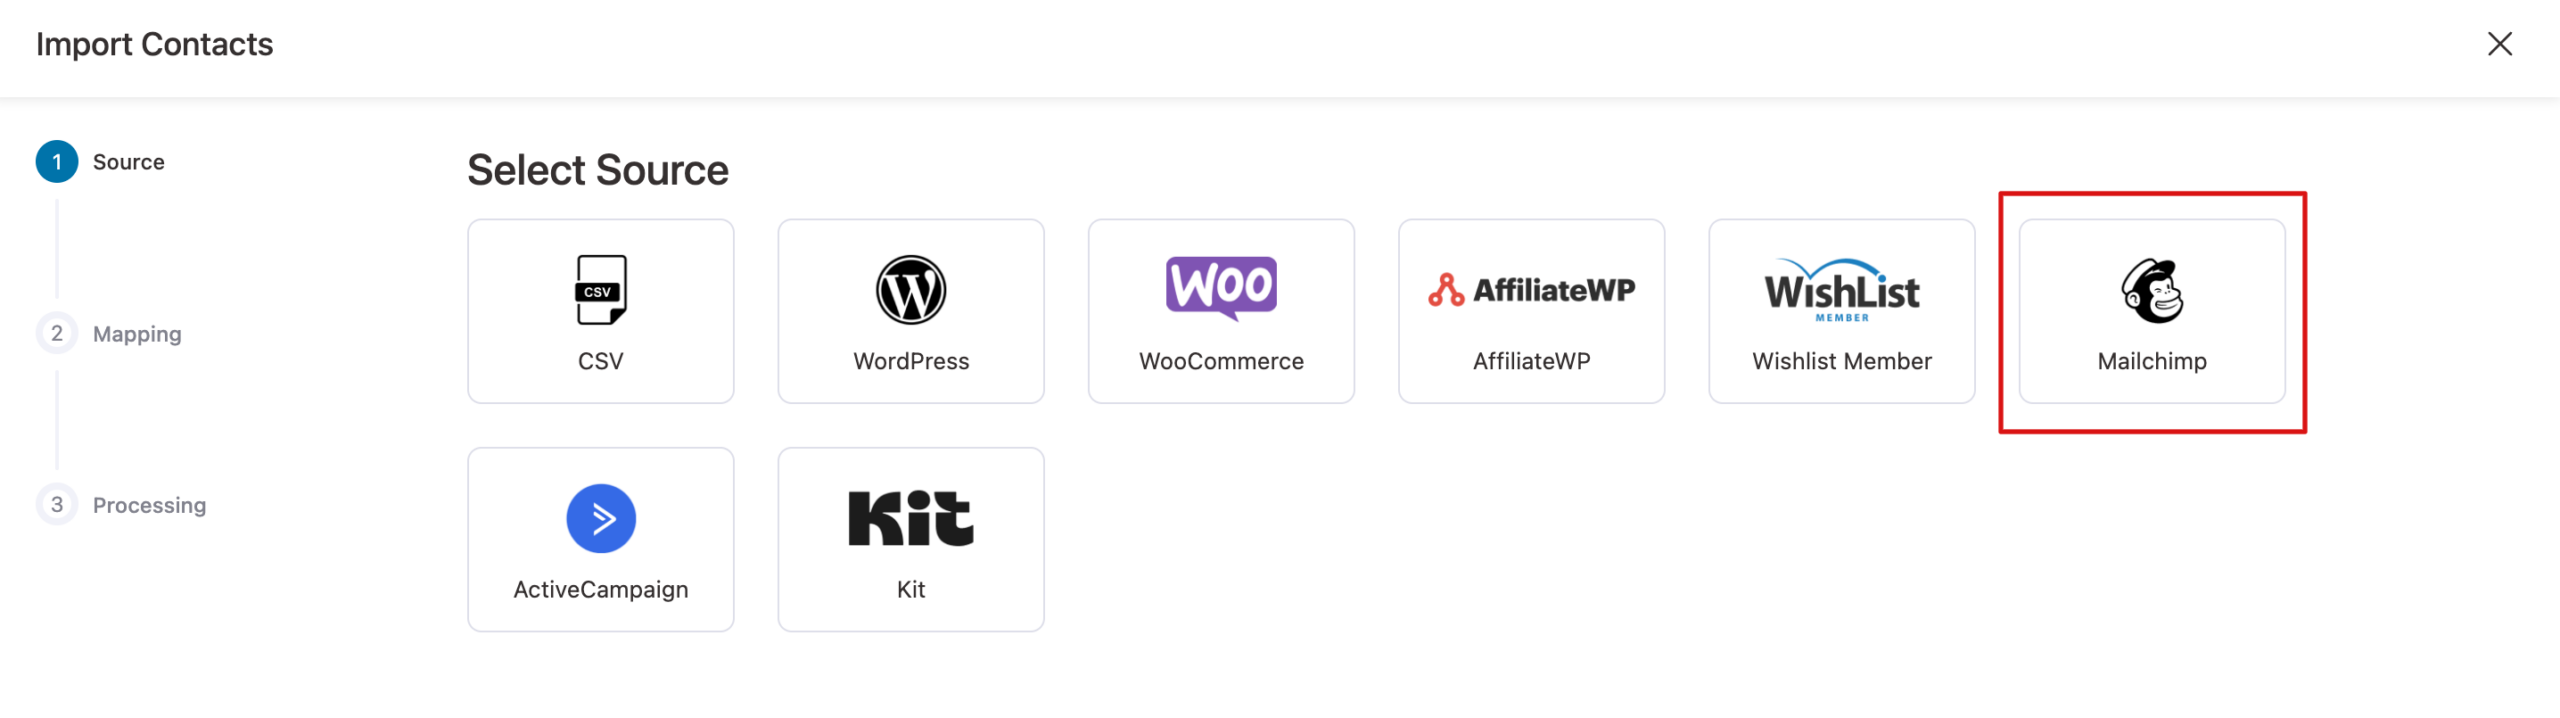
Step 2: Select MailChimp as the source
Select the source as MailChimp.
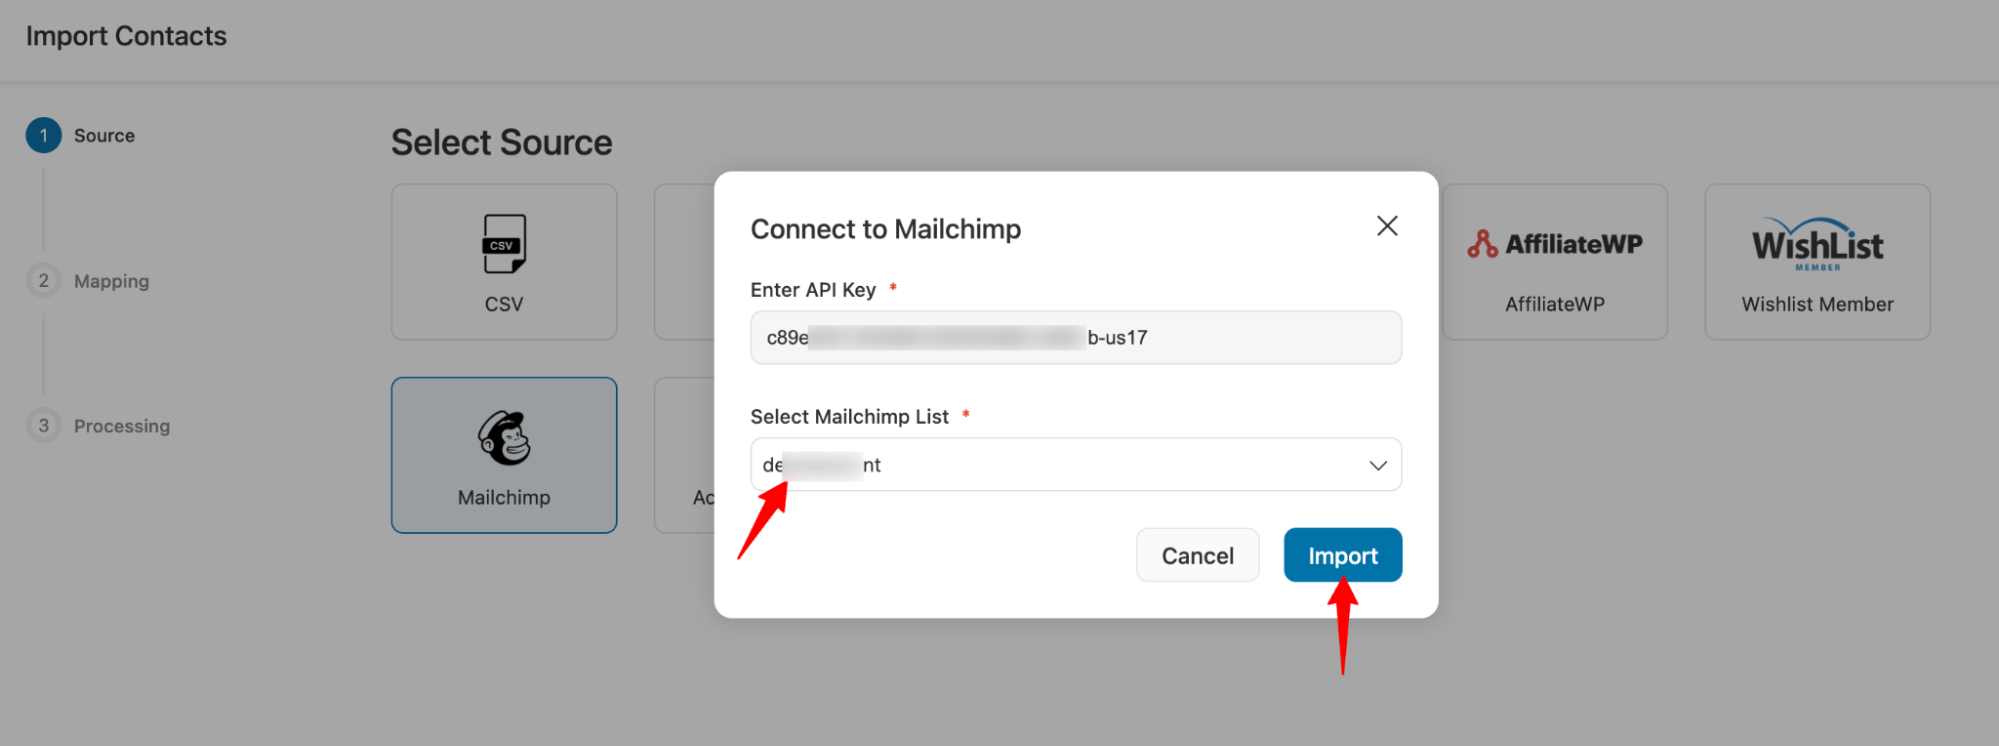
Step 3: Connect FunnelKit Automations to MailChimp and choose a list for import
Next, add the API Key and hit Connect.
Next, select the Mailchimp list you want to import from the dropdown and click Import.
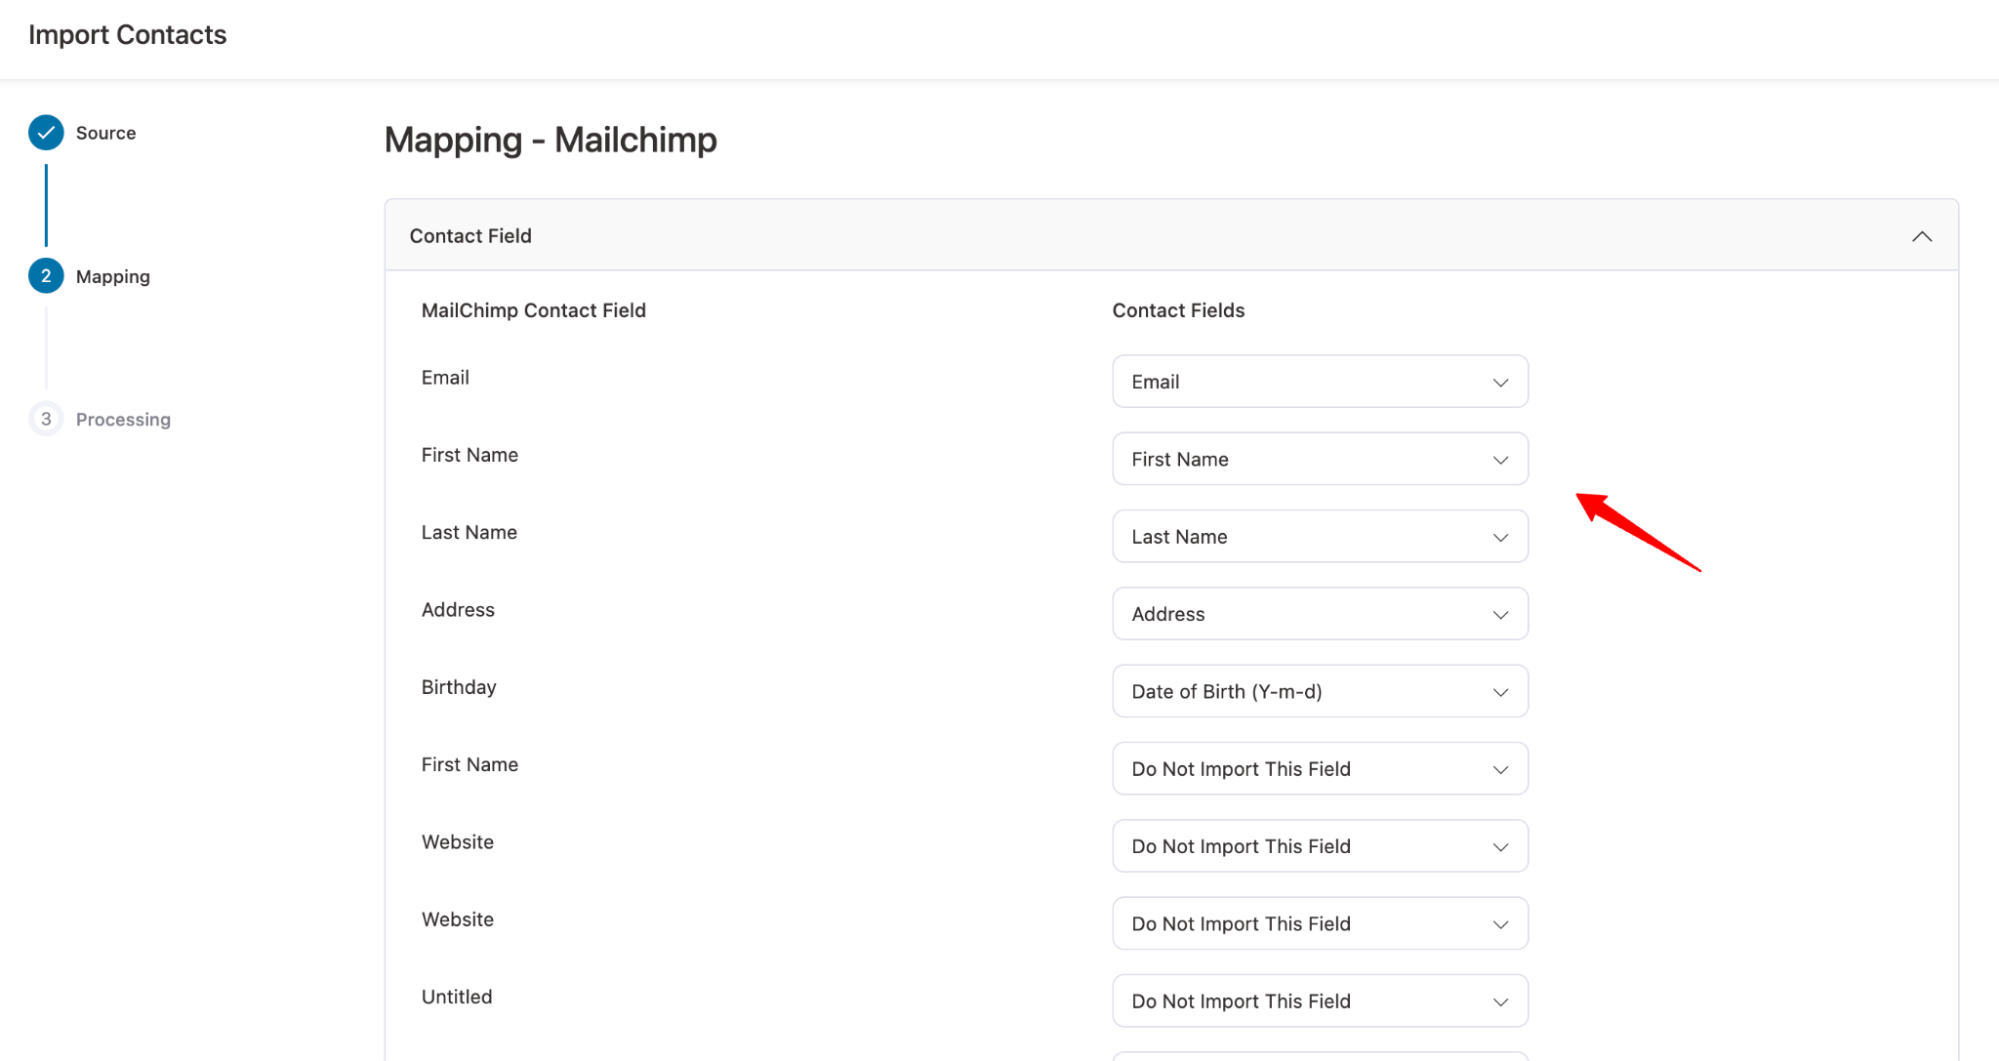
Step 4: Map the contacts field
Mapping allows you to accurately store your fields in FunnelKit Automations by linking MailChimp data to the appropriate fields where you want it saved.
Step 5: Autocreate MailChimp tags and lists
Next, you can automatically create the existing MailChimp tags and lists in FunnelKit Automations.
To auto-generate tags, enable the 'Auto-Create All Tags' option. If you prefer to generate only specific tags, disable the ones you don’t want to create.
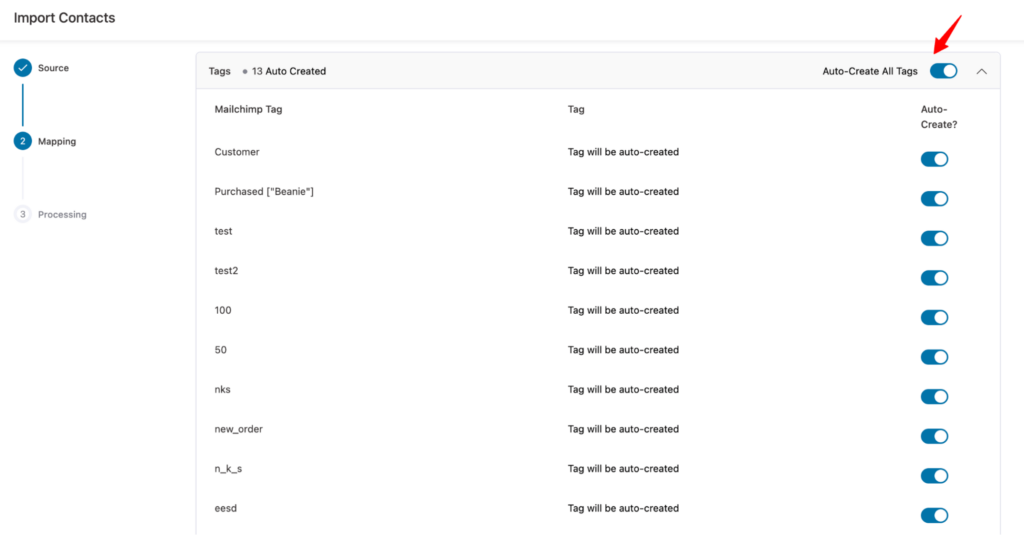
You can follow the same process to auto-generate lists as well.
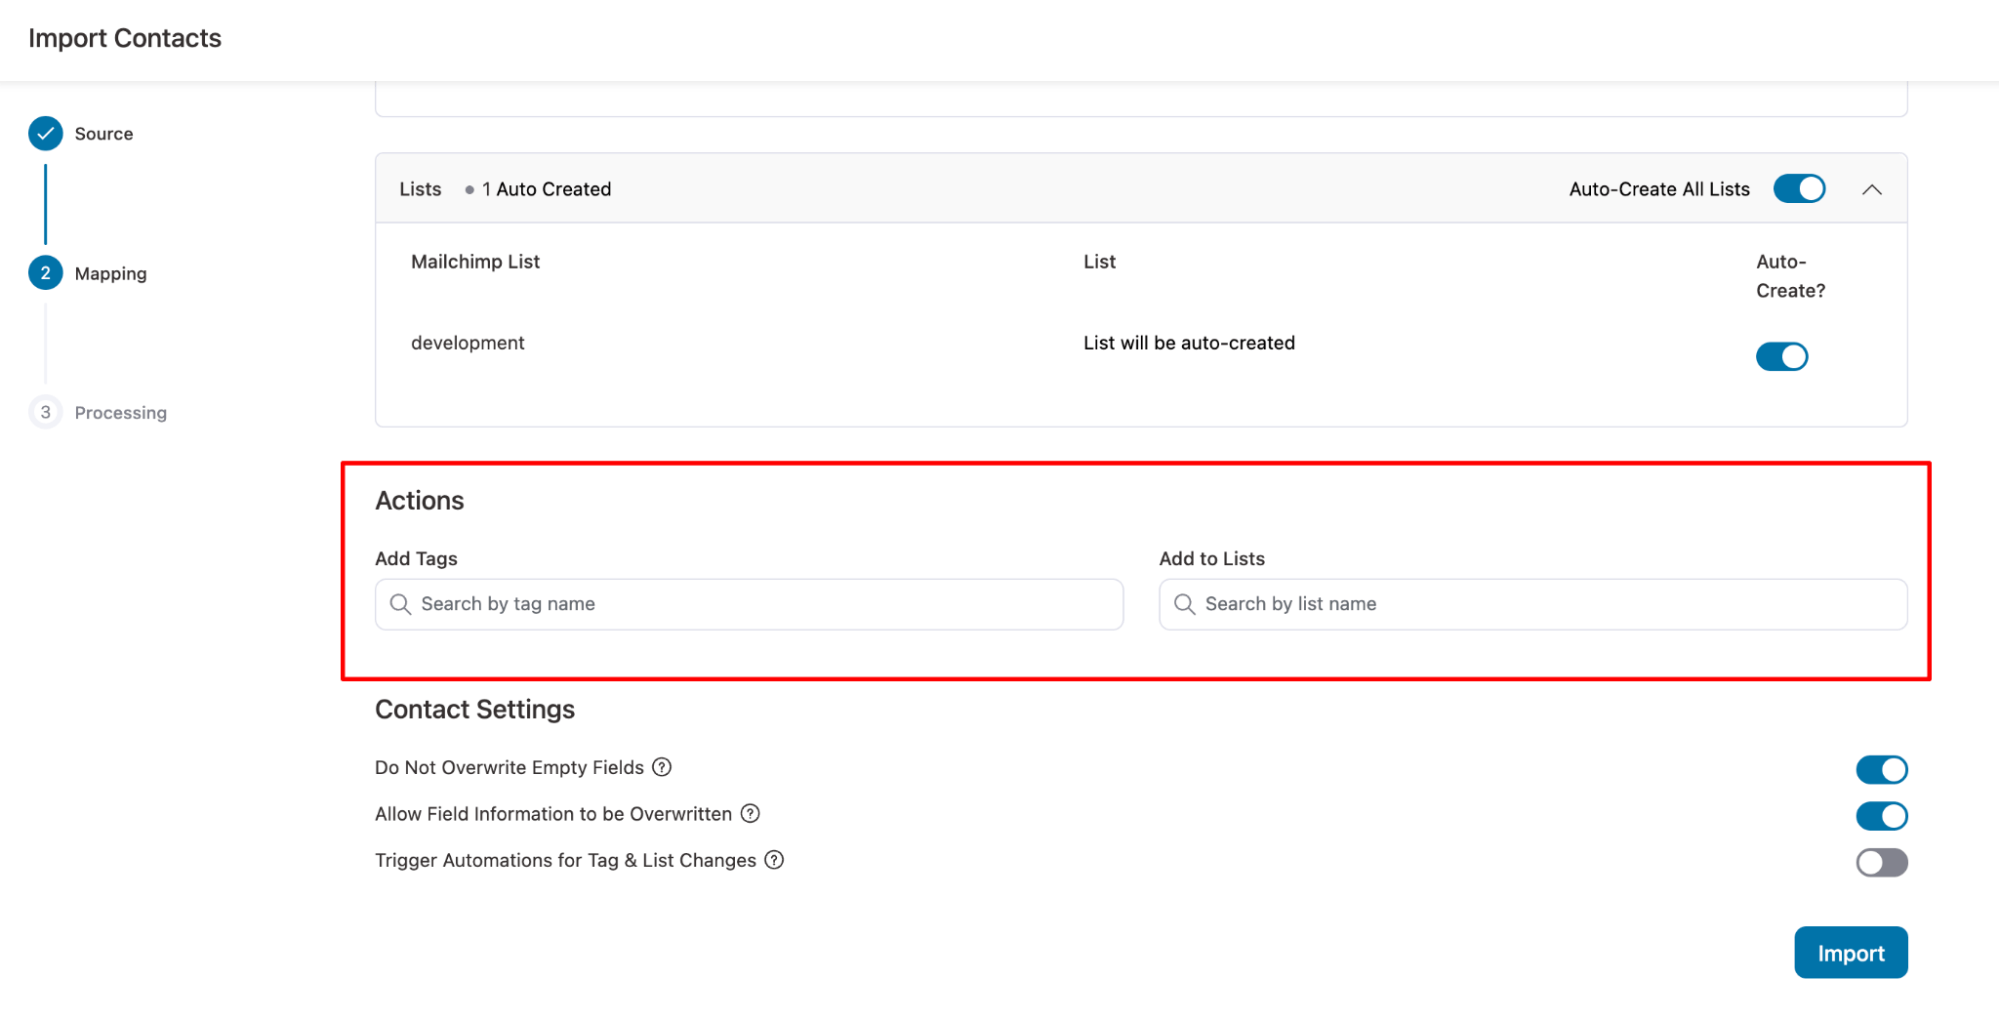
Step 6: Set the actions
Under Actions, you can add tags and lists.

Step 7: Configure the contact profile
After that, set the following:
- Do Not Overwrite Empty Fields: Prevents blank fields in your import file from replacing existing contact information.
- Allow Field Information to be Overwritten: Let's the import update and overwrite existing contact fields with new values.
- Trigger Automations for Tag & List Changes: Enables automation workflows to run when a contact’s tag or list is updated during import.
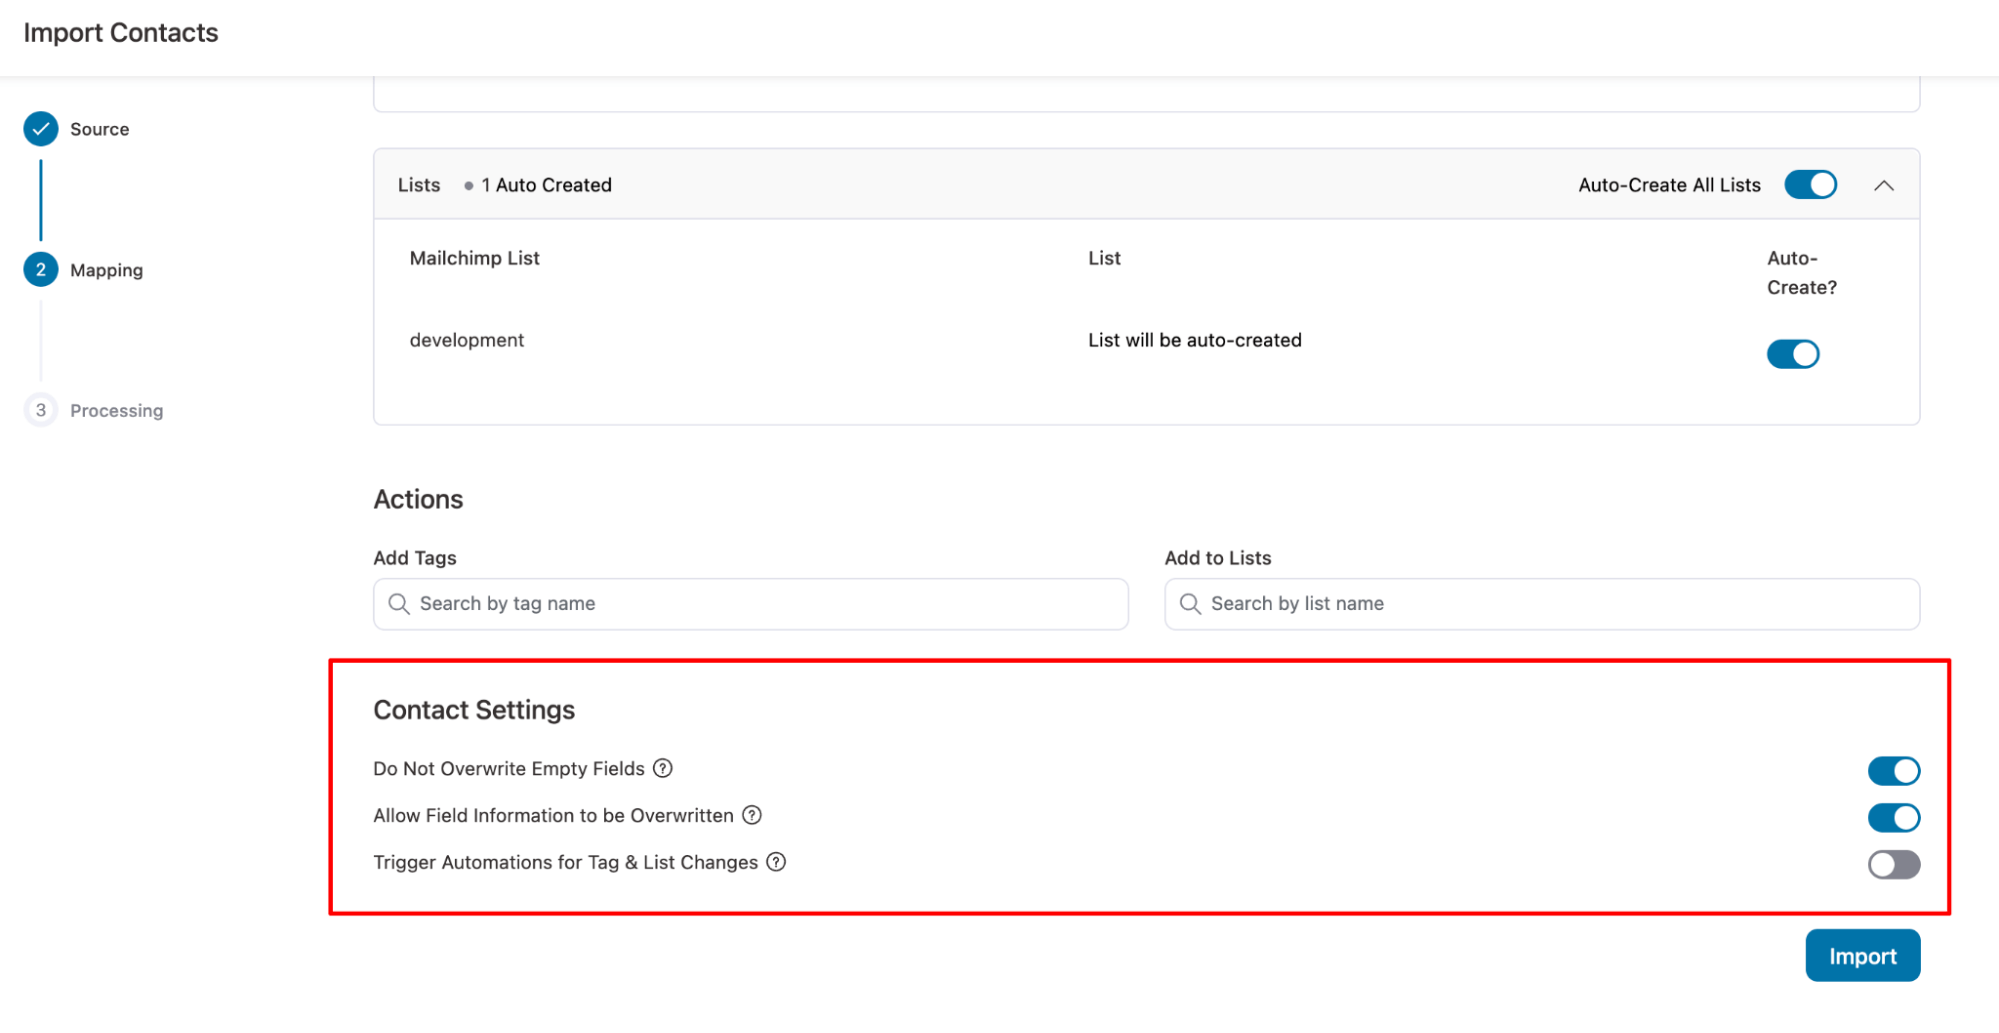
Finally, hit Import.
Step 8: Wait for your import to complete
Please wait for a few seconds, depending on the number of contacts. You will find a progress bar of how many contacts were skipped, failed, or successfully imported.
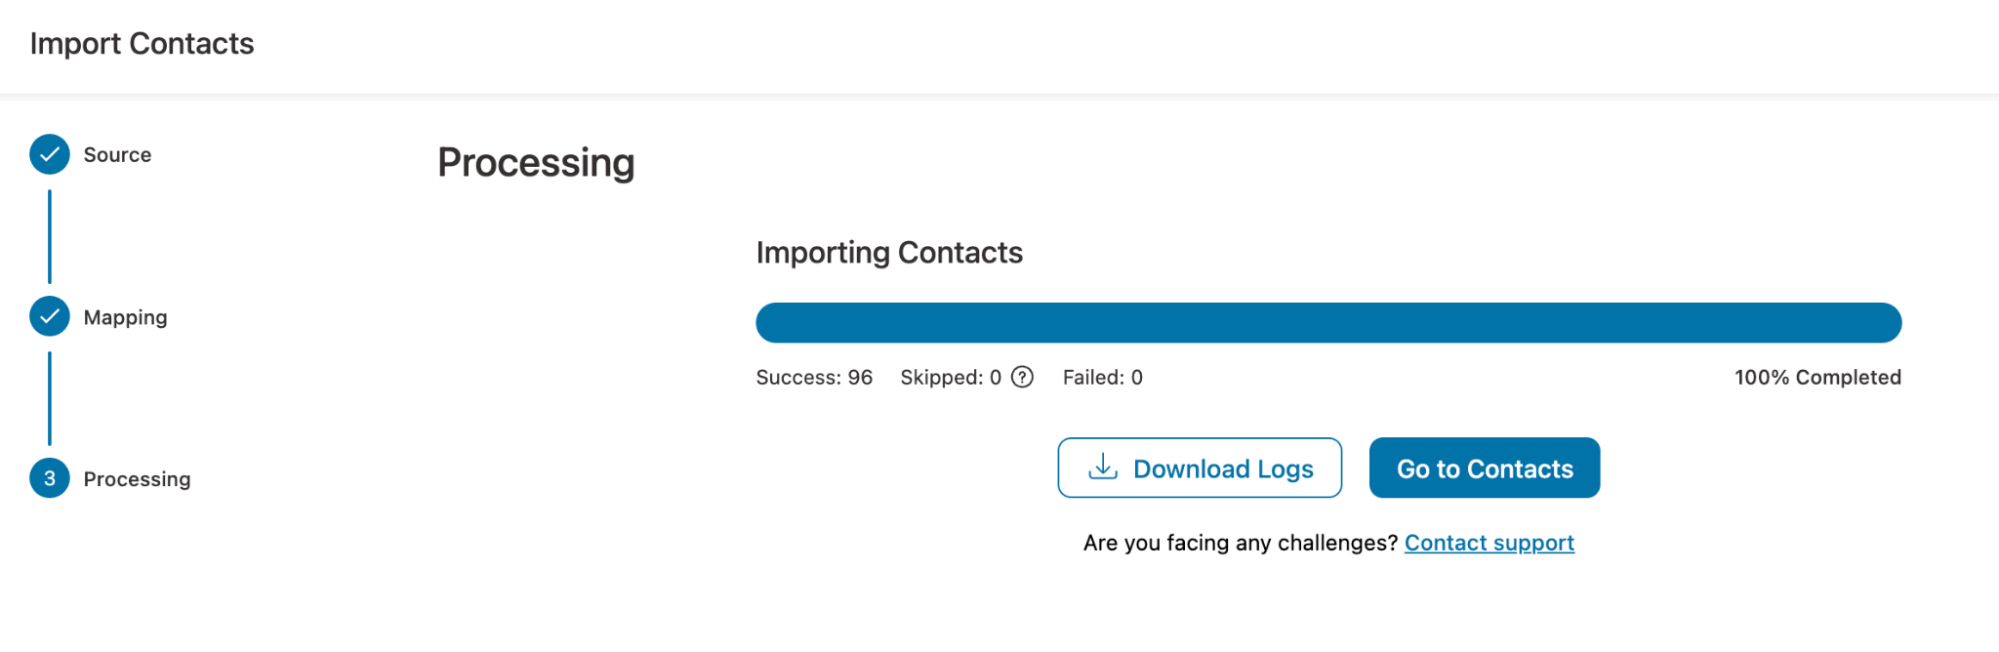
Go to contacts to see your imported contacts.
This is how you can import contacts to FunnelKit Automations from MailChimp.


