FunnelKit Automations lets you access custom order fields using the "Order Data" merge tag - all you have to do is put the metadata key into the merge tag.
In this documentation, you'll learn how to set up an automation to access custom order fields in FunnelKit Automations.
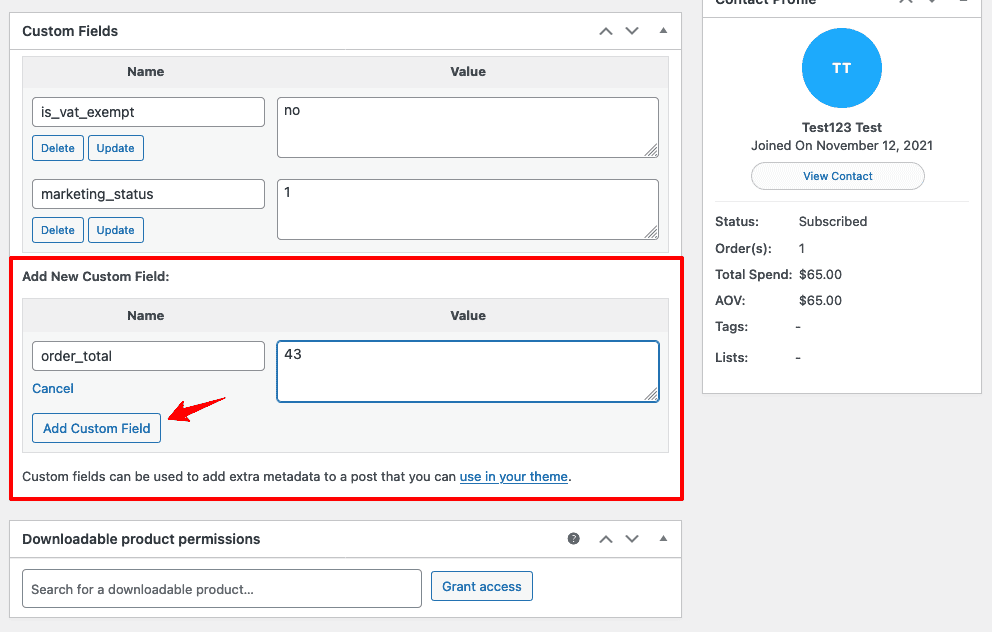
Step 1: Add a new custom field in WooCommerce
Go to WooCommerce ⇨ Orders

Click on any order. Scroll down and you'll find Add New Custom Field.
Enter the metadata key and value here.
Step 2: Create a new automation in FunnelKit Automations
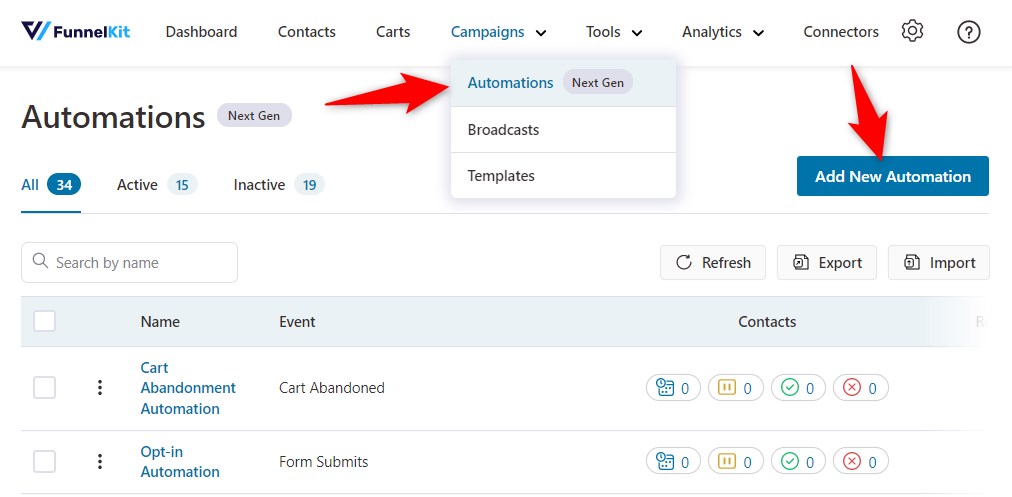
Go to Campaigns ⇨ Automations and click on Add New.
Next, hit Start from Scratch and enter the name of your automation.
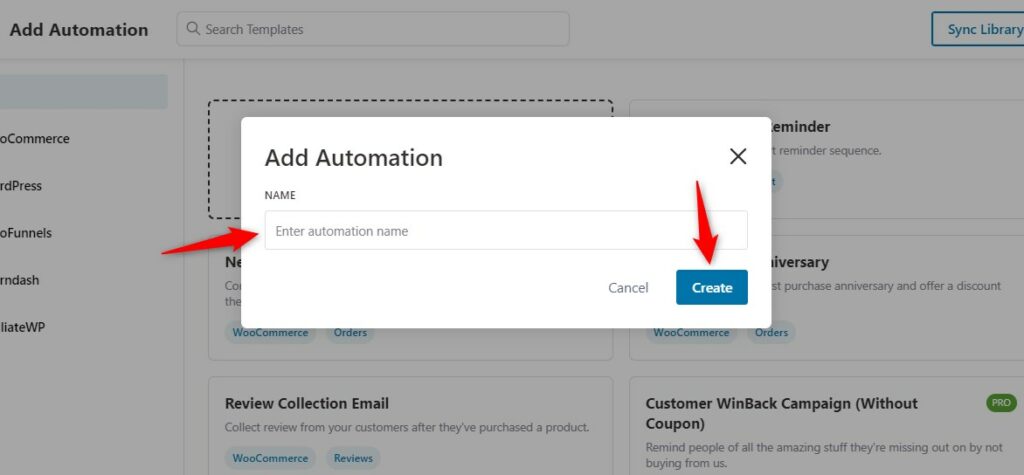
Click on Create.
Step 3: Select a trigger
Click on Select Trigger.
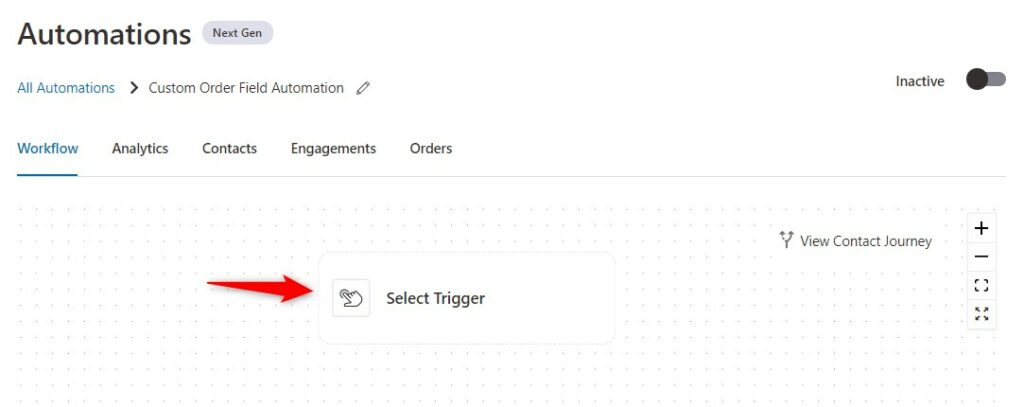
Select Order Created under WooCommerce from events.
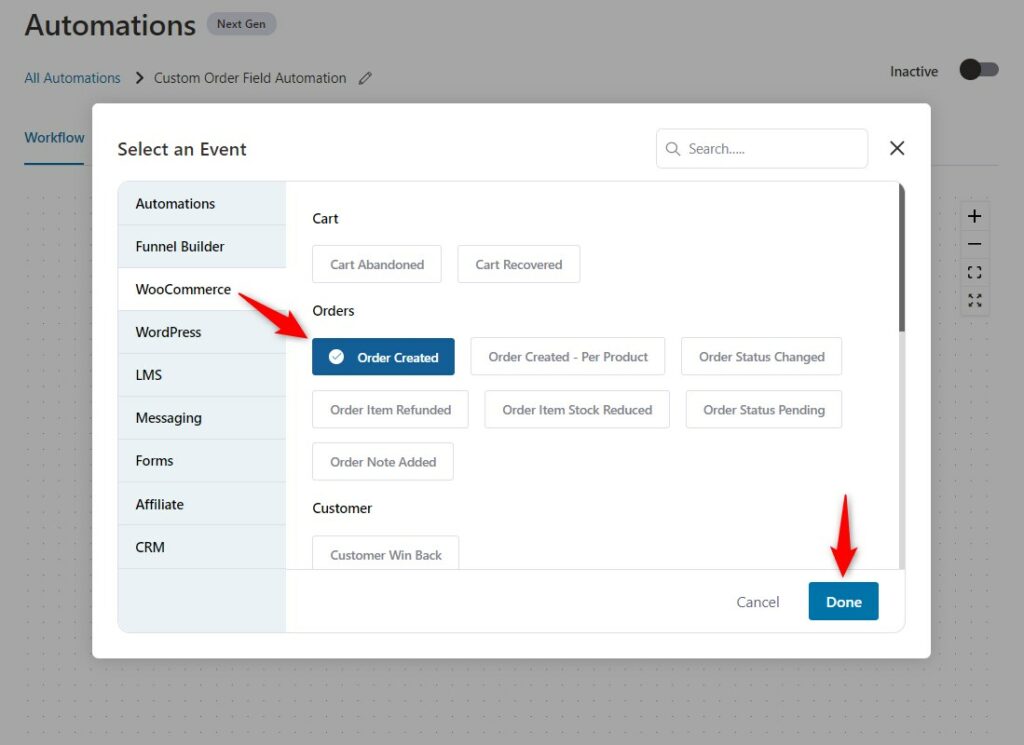
Click on Done.
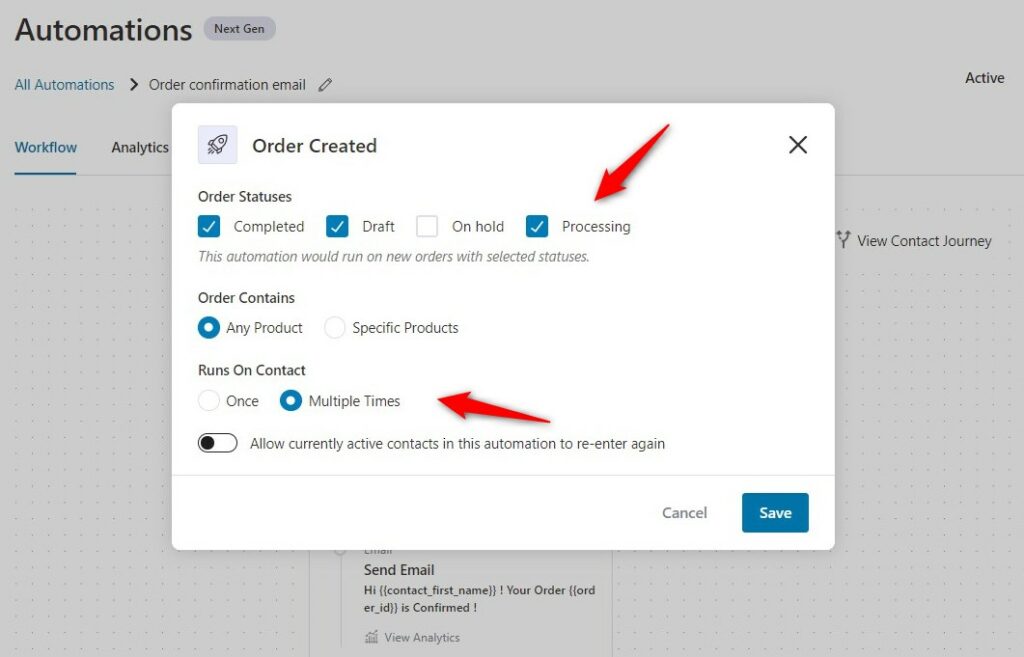
Make sure to configure this 'Order Created' trigger by clicking on it and selecting the status. You can even assign a specific product if you want to run this automation for a particular item:
Step 4: Define the action
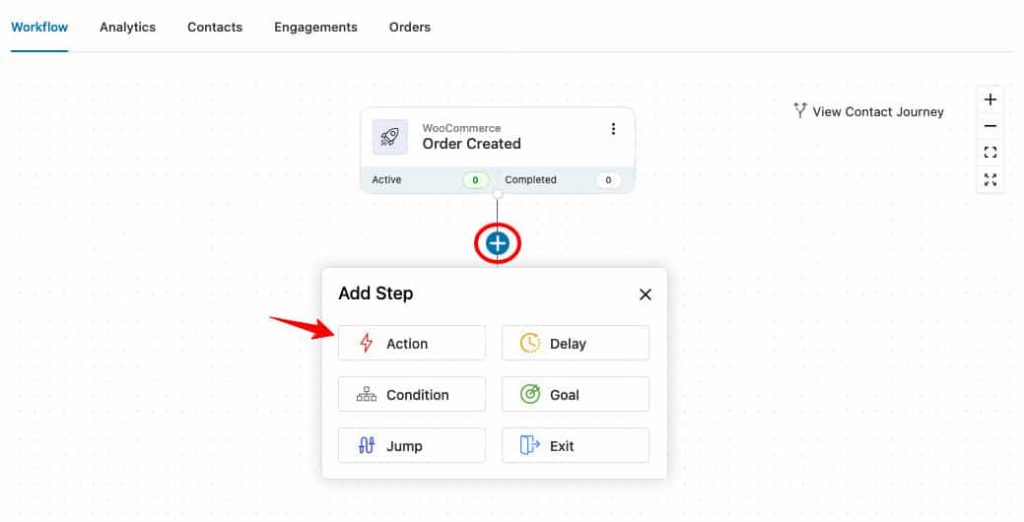
Click on the (+) node and select Action.
Click on Send Email as the action.
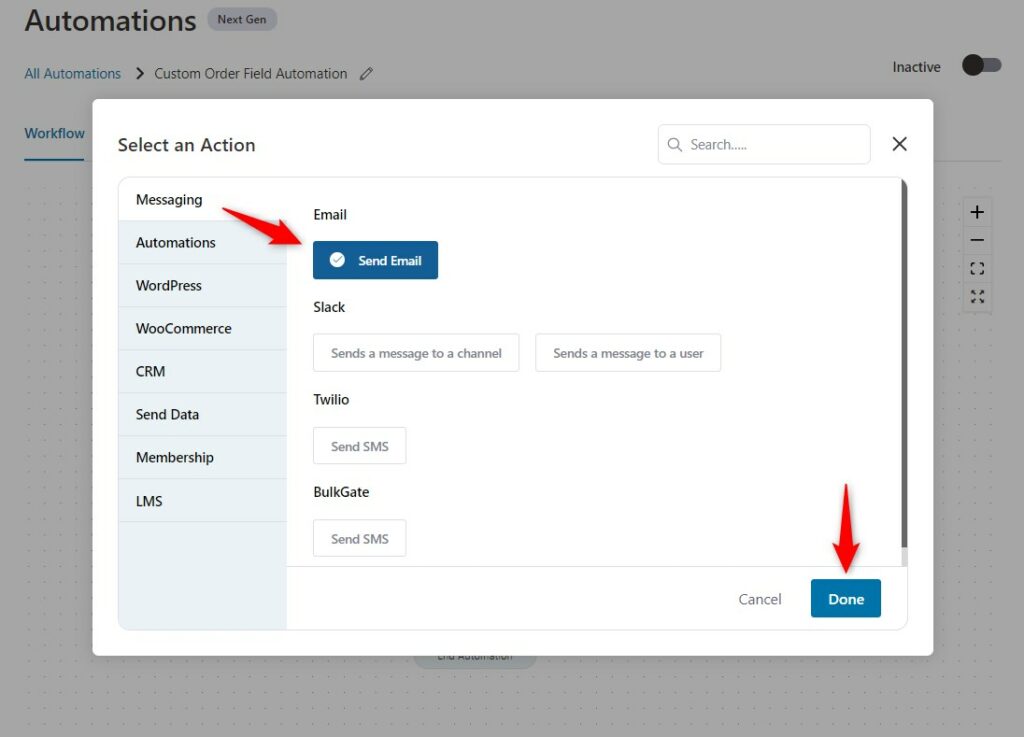
Click on Done.
Step 5: Select your merge tags
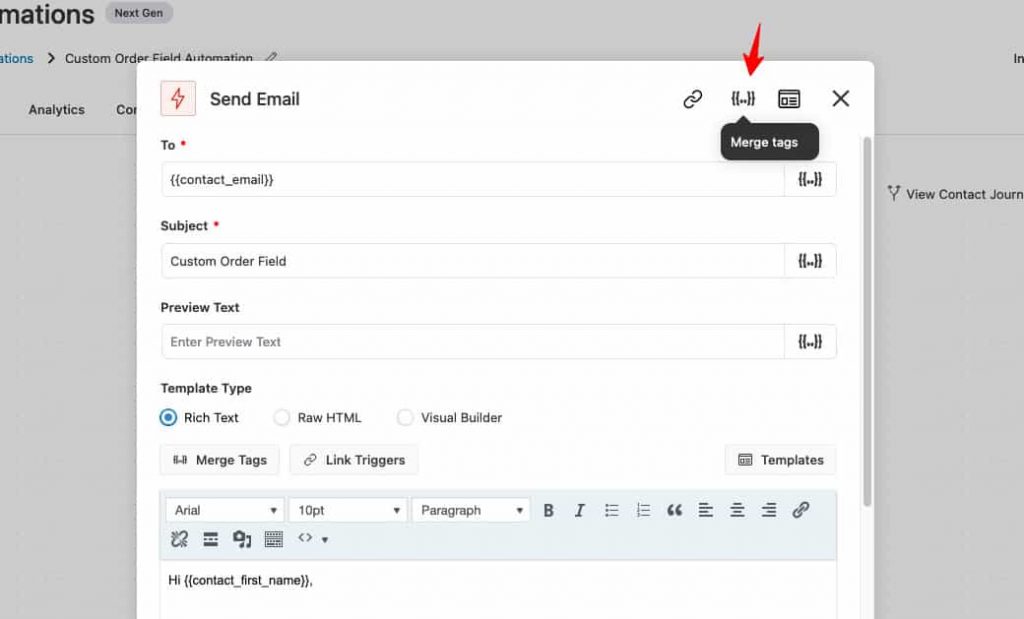
Click on Merge tags.
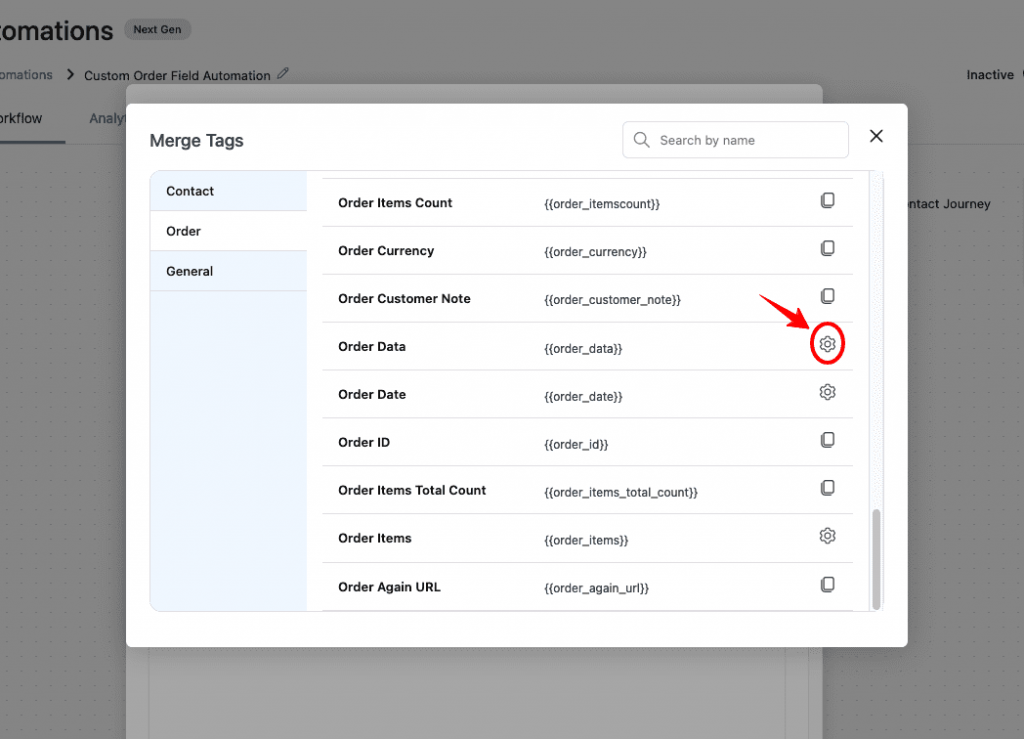
Click on Configure next to Order Data merge tag.
Paste your metadata key here.
If you have a plugin that contains the metadata key of your custom order field, copy and paste the key here.
For example, we have pasted the "order_total" metadata key.
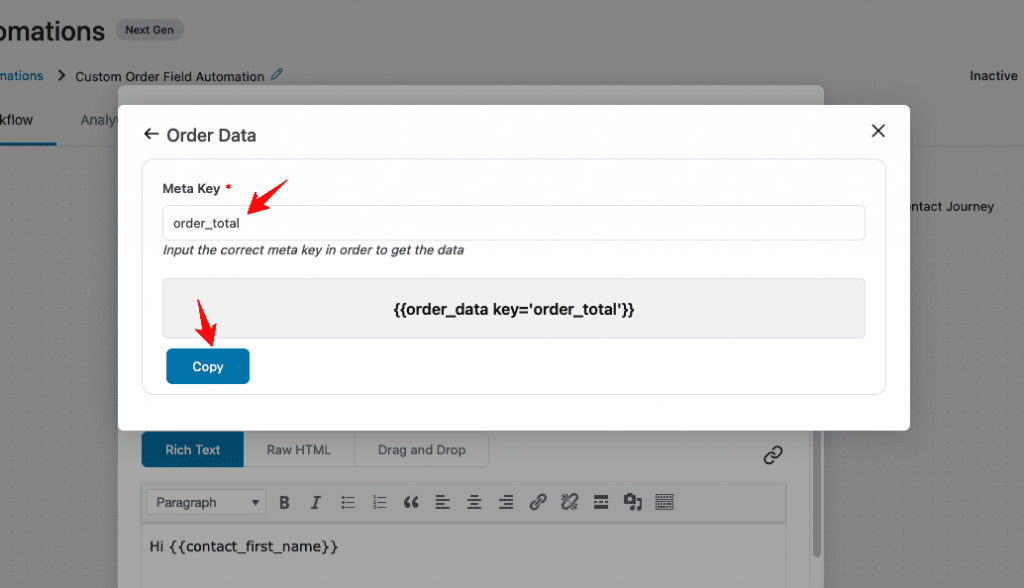
Once done, click on Copy.
Step 6: Paste your merge tag
Now, compose your email by pasting the merge tag within the email body content.
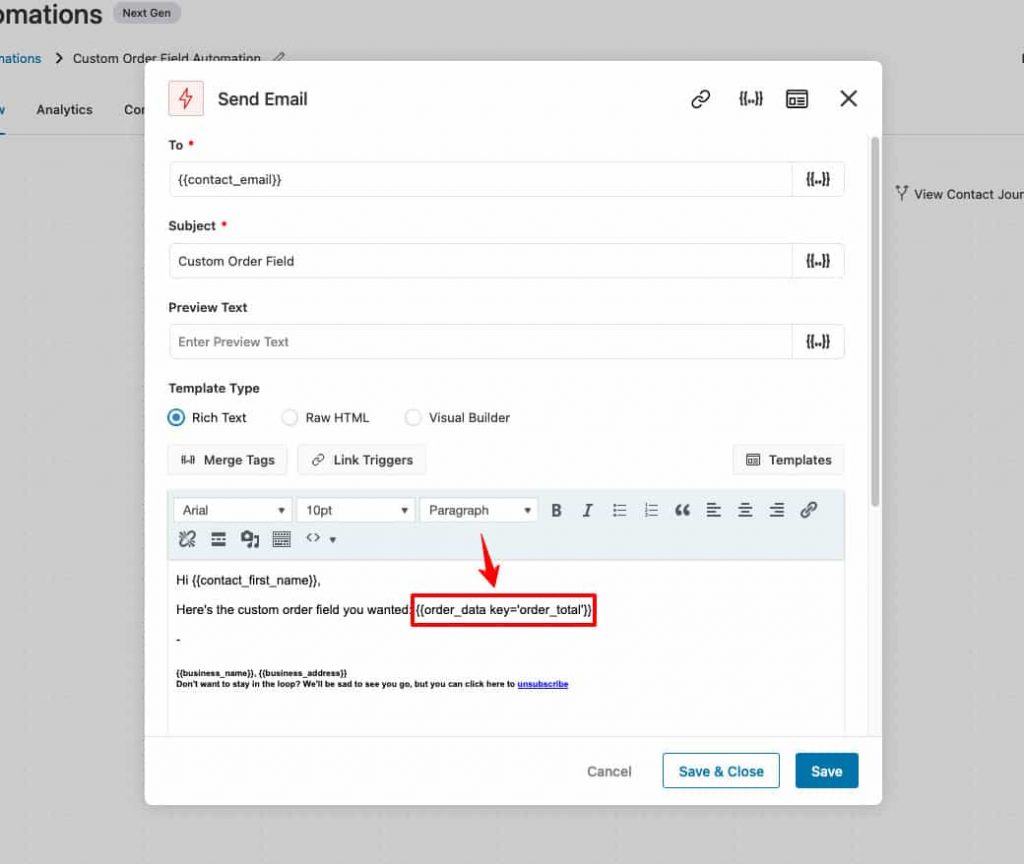
Once done, click on Save & Close to lock all the changes.
Step 7: Make your Automation live
Turn the toggle of your Automation to active.
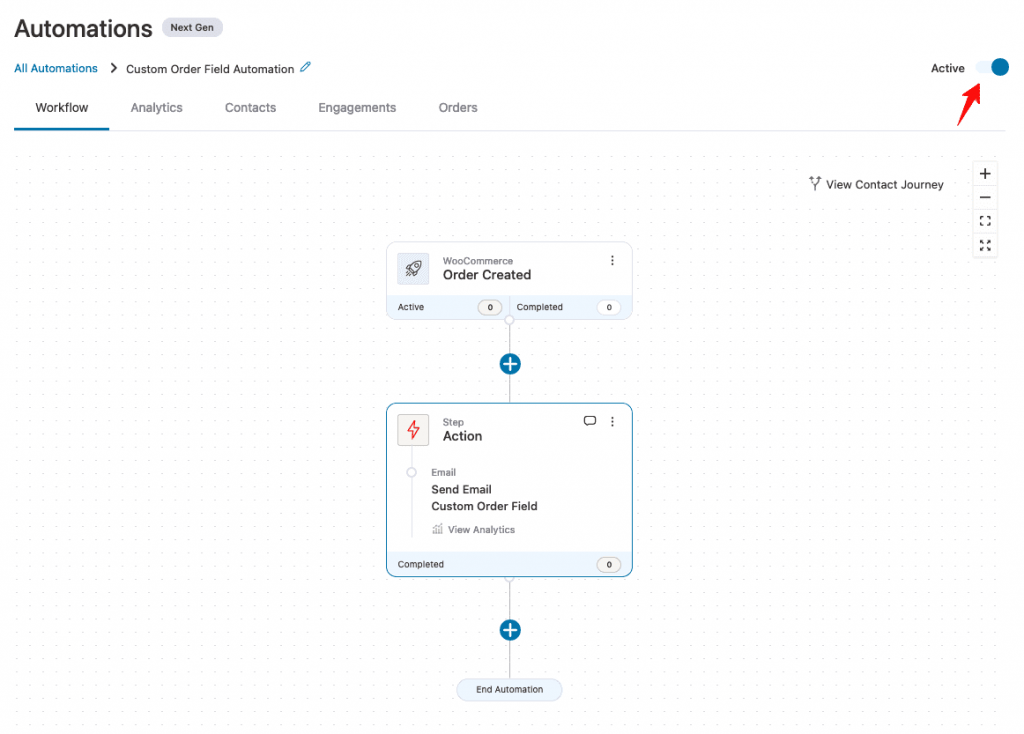
This will automatically fetch the data stored in the particular custom order field. You can use it to get the order delivery date, tracking information, and much more.
Well done! You have successfully set up the automation to access custom order field data using FunnelKit Automations.


