Categories are used to group similar items based on type, purpose, or shared characteristics. They make it easier to organize, manage, and find content or products efficiently.
The Category feature in FunnelKit Automations helps you organize:
- Automations
- Email Broadcasts
- Email Templates
- Forms
- Link Triggers
You can quickly create, assign, and filter categories to keep everything streamlined and under control.
Create a category
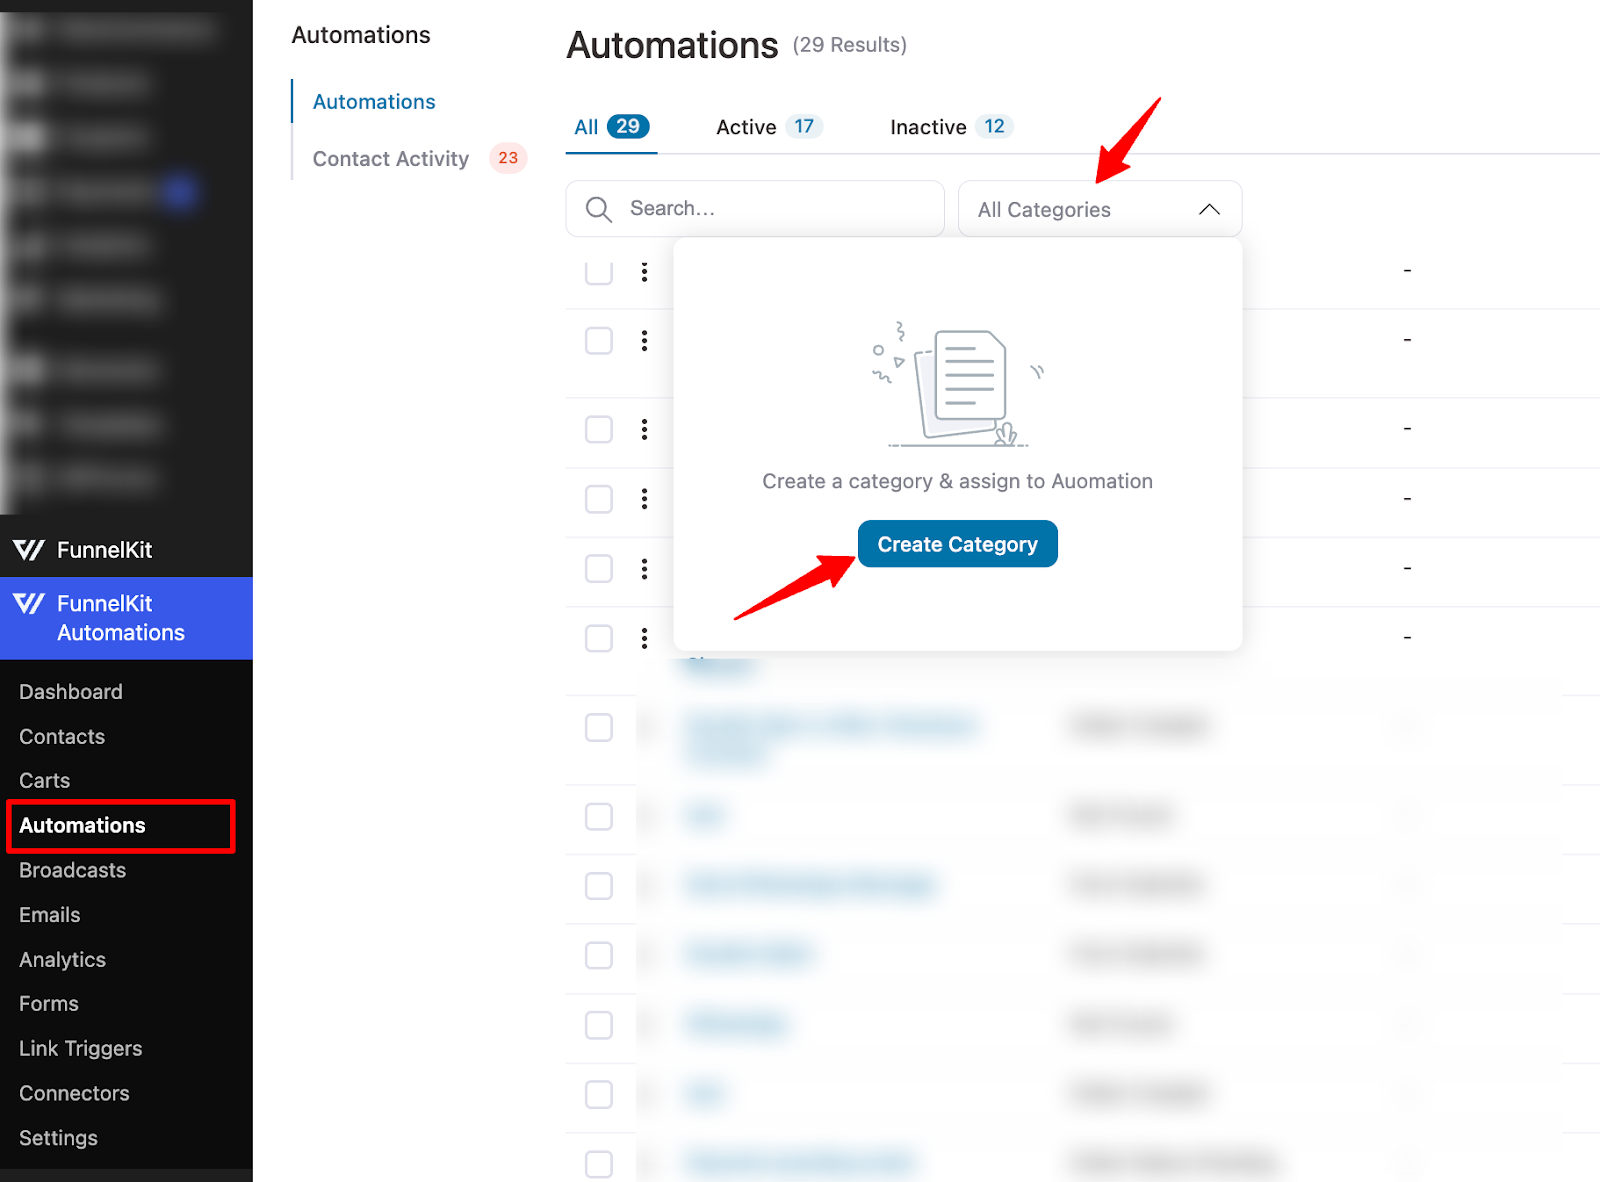
To create an Automation category, go to FunnelKit ⇒ Automations. Then, click on "All Automations" and hit "Create Category."
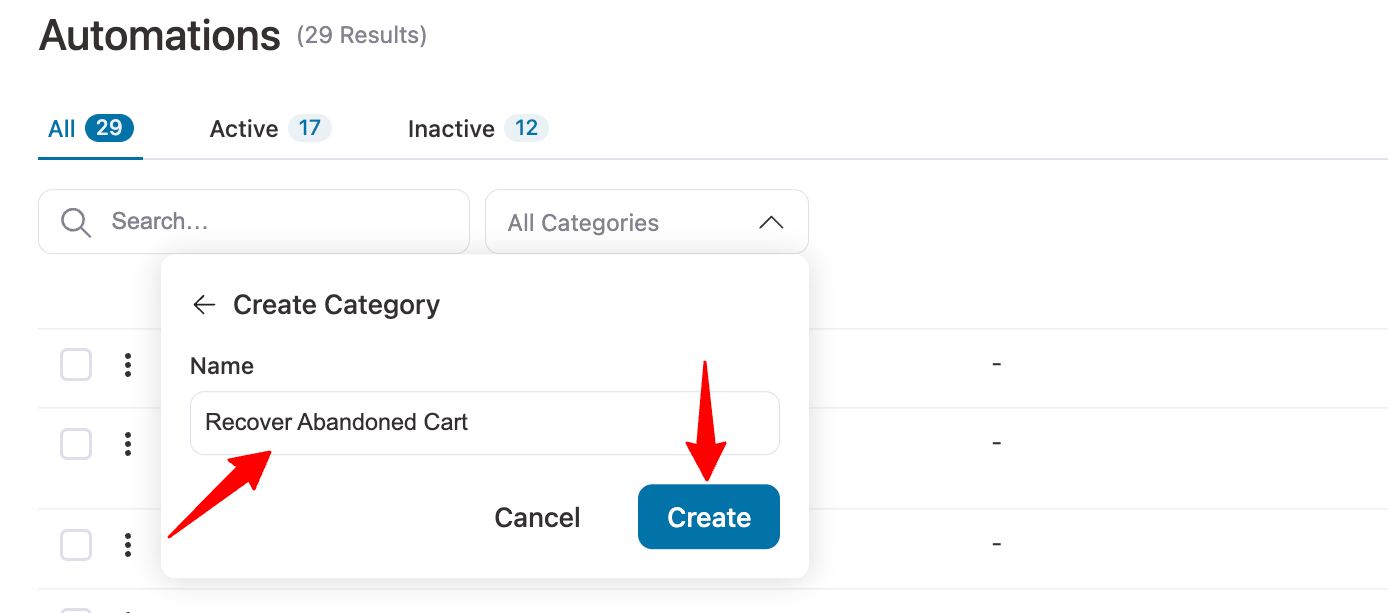
Next, provide the name and hit Create.
Assign a category
To add a category to automation, click the ⋮ sign and select Assign Category.
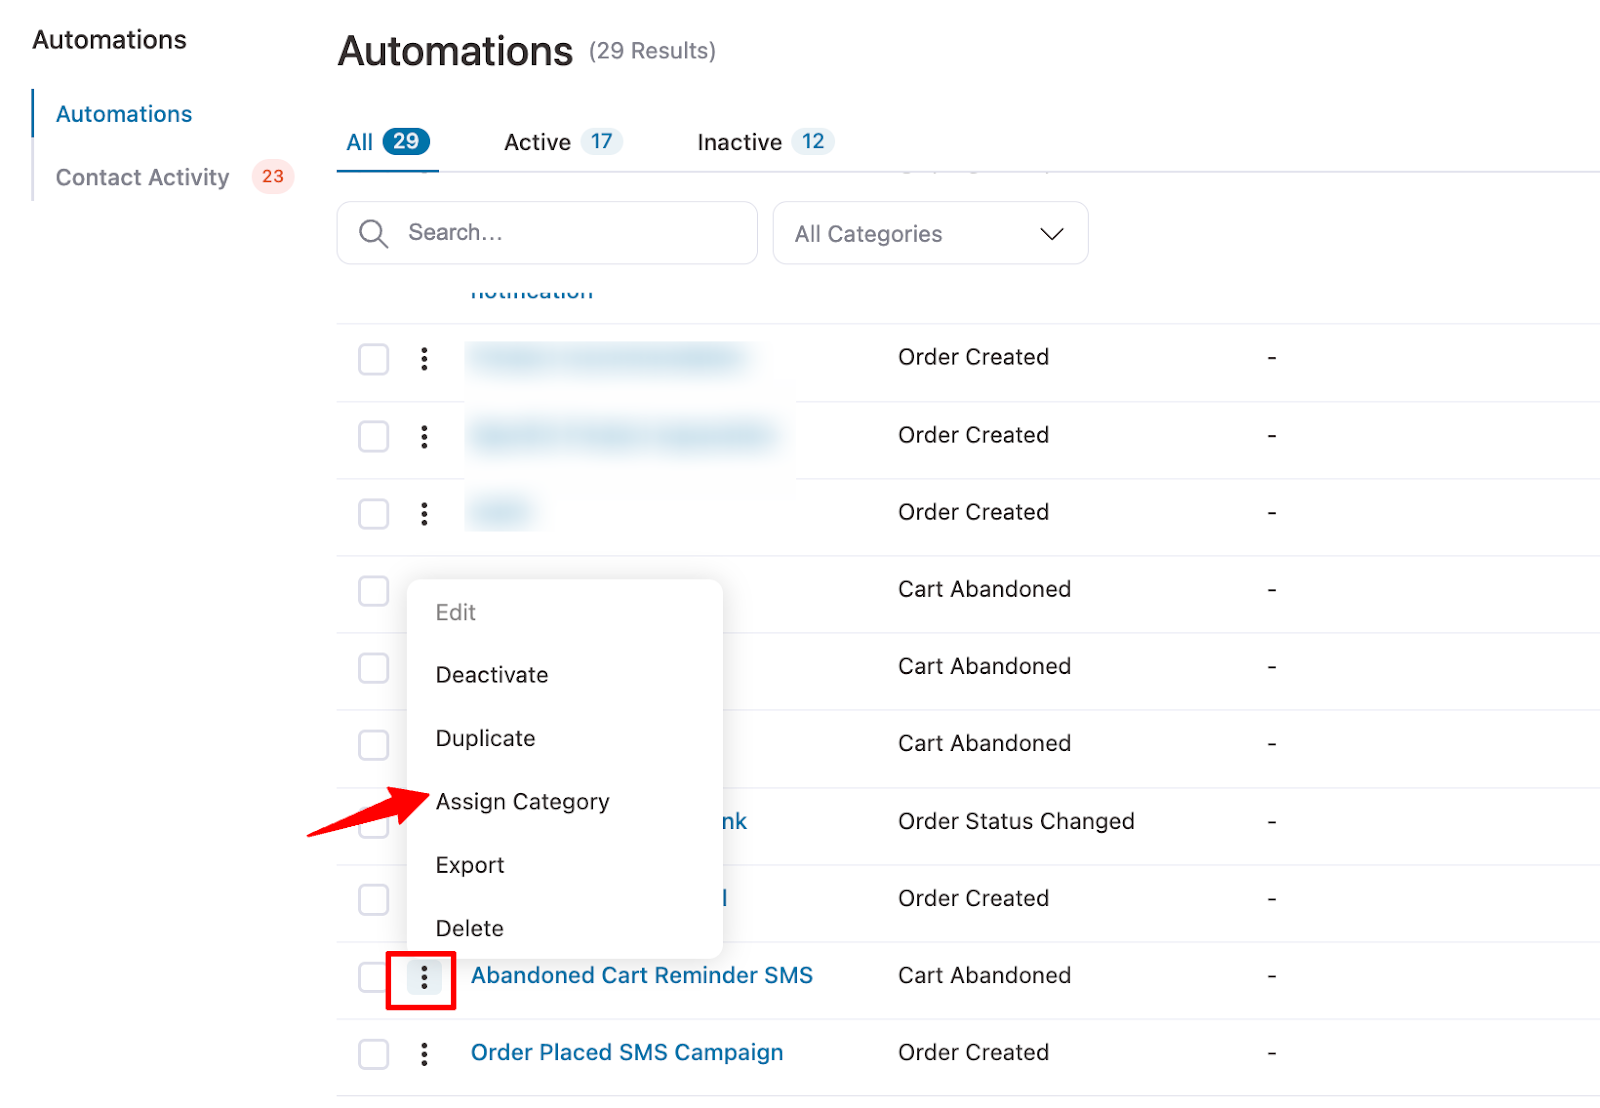
Now you can either assign an existing category or create a new category and assign that on the fly.
You can add multiple categories if you want.
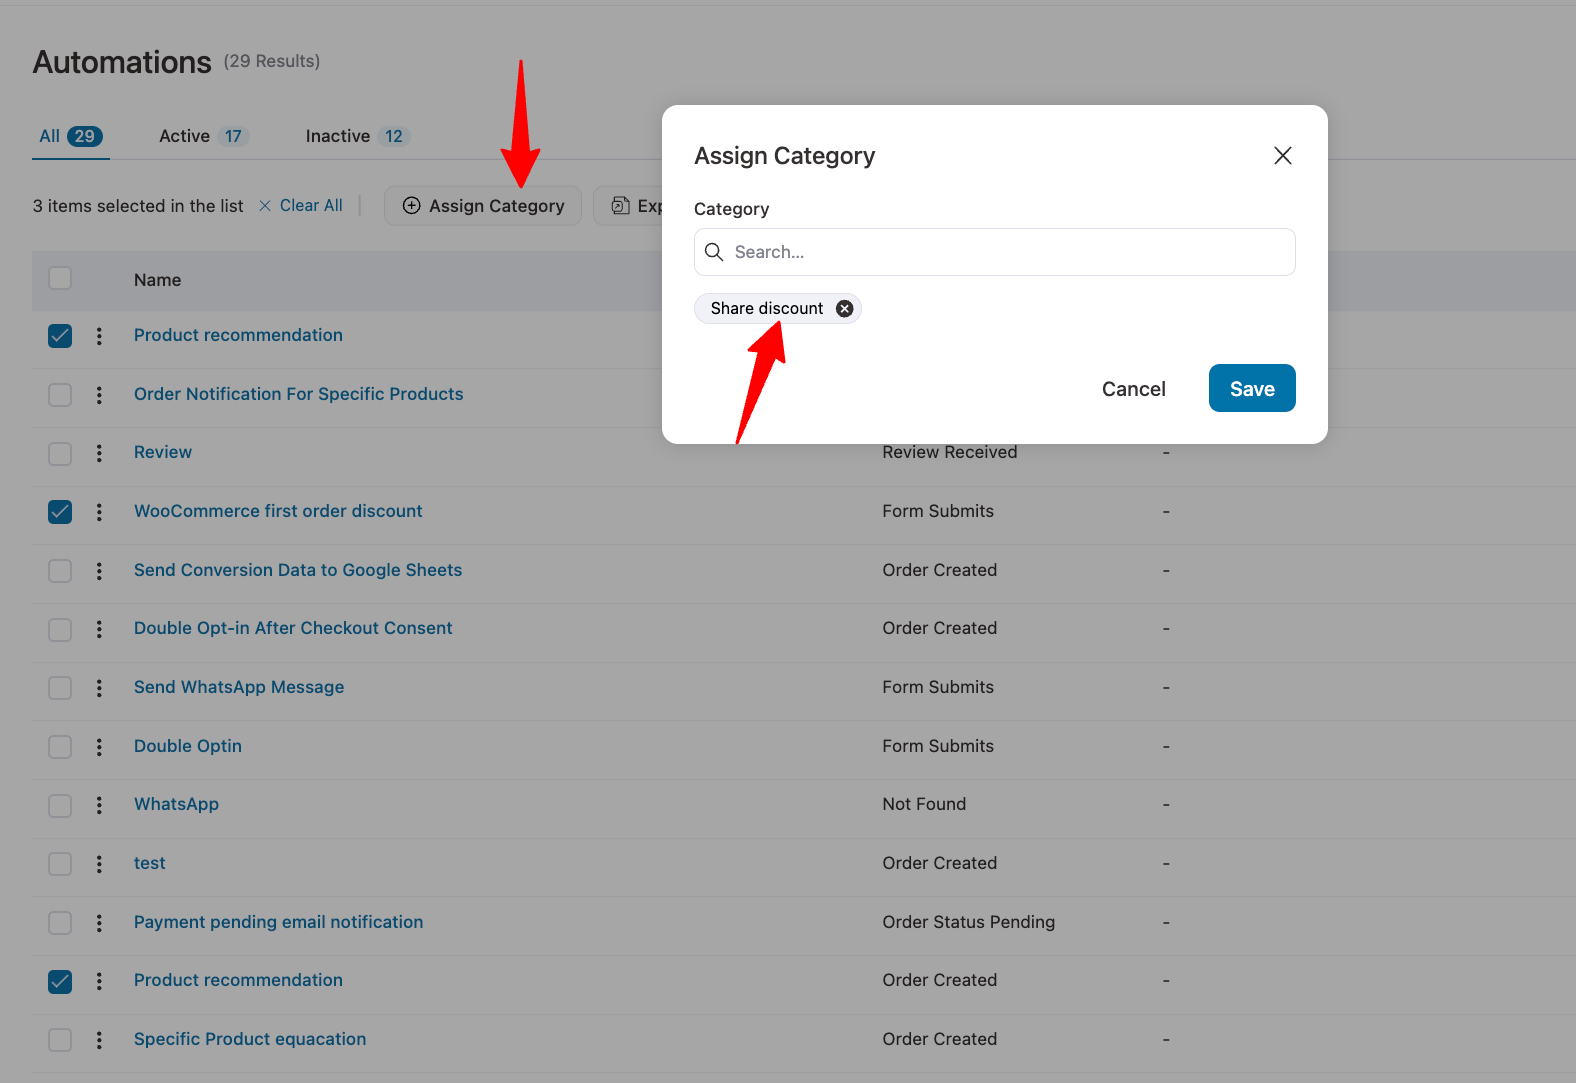
Bulk assign category
You can also add categories to automations in bulk. Select the automations, then click the Assign Category button at the top. Next, you can add one or multiple Automations like you did earlier.
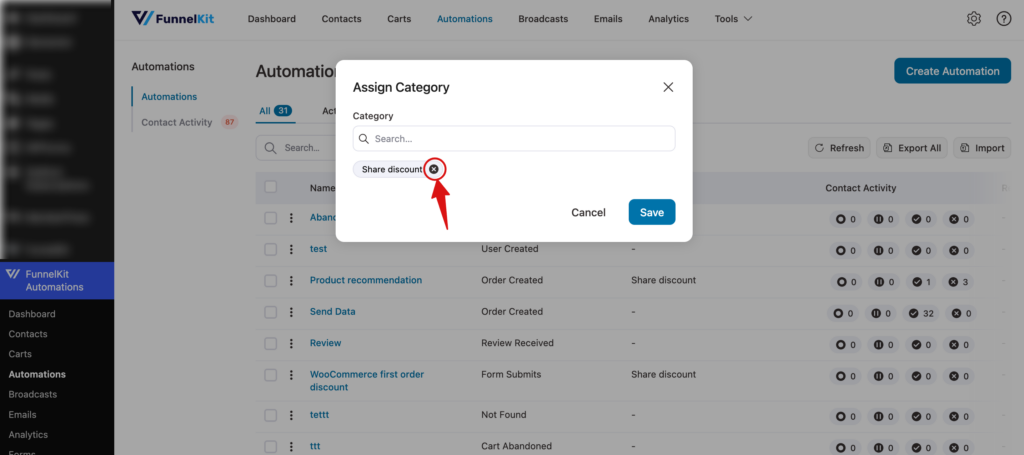
Unassign a Category
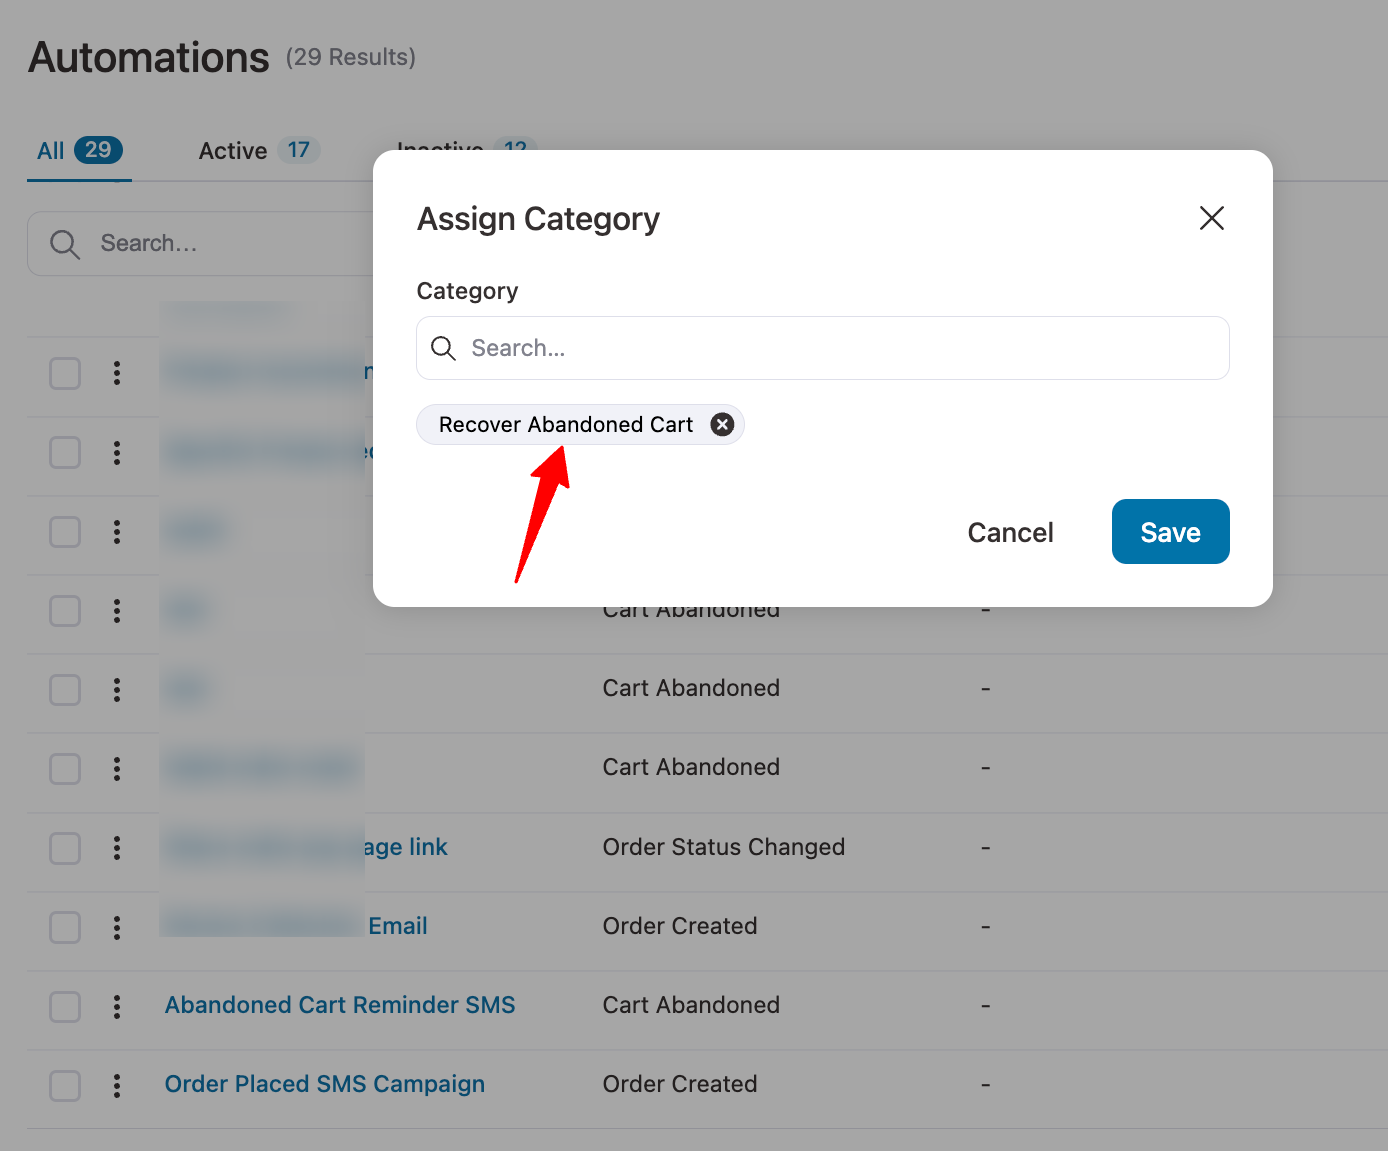
To unassign a category from any single automation, hit the three vertical dots (⋮), then select Assign category from the options.
Next, click the X icon next to the assigned category. Make sure to hit Save to apply the changes.
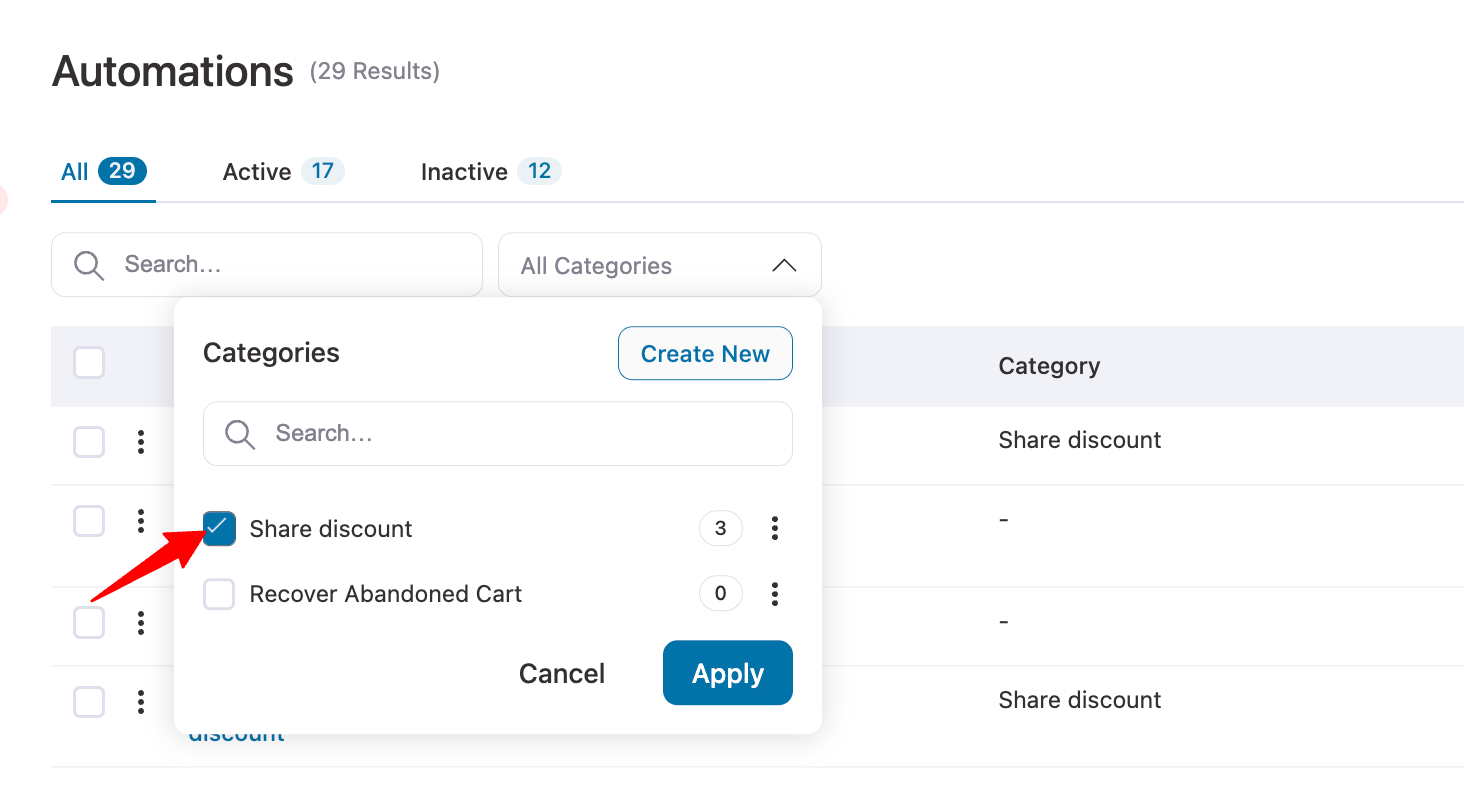
Filter by category
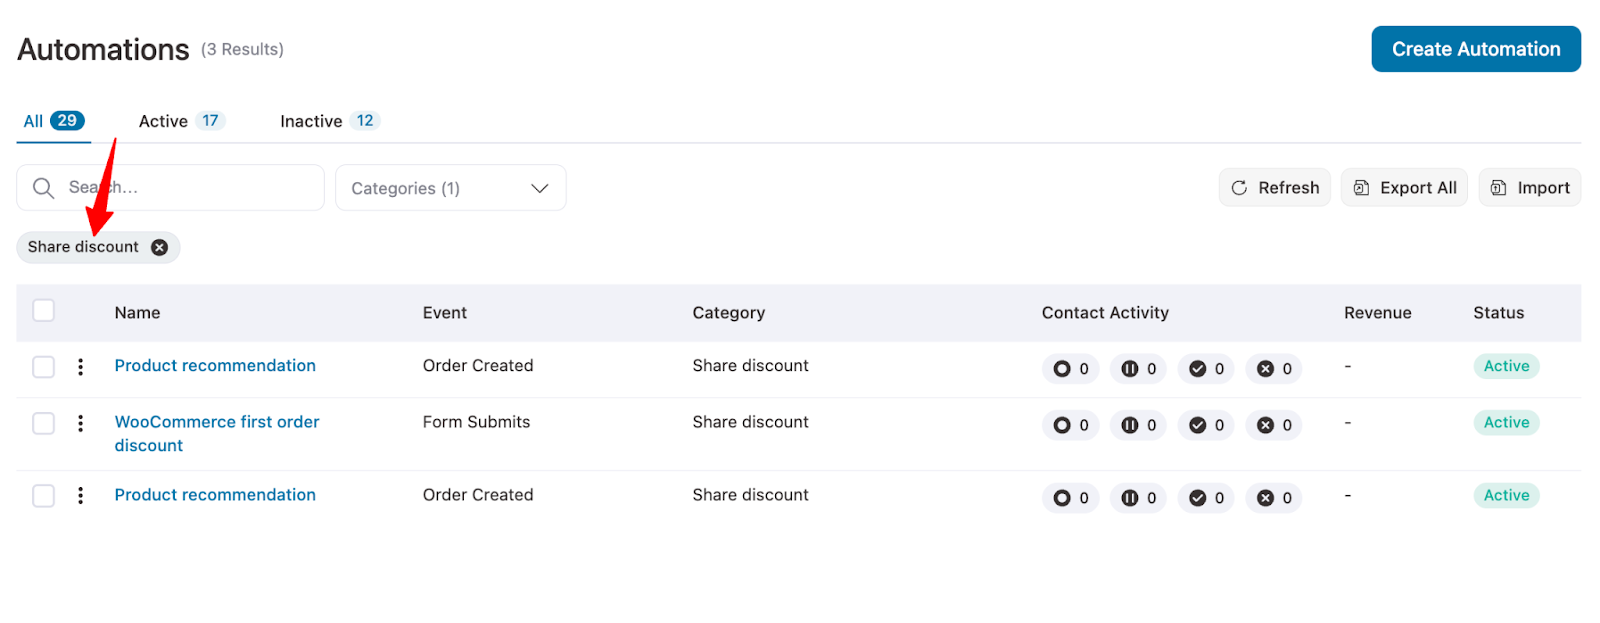
You can filter automations by Category. Simply select the category and hit Apply.
And you will see the filtered automations.
Delete a category
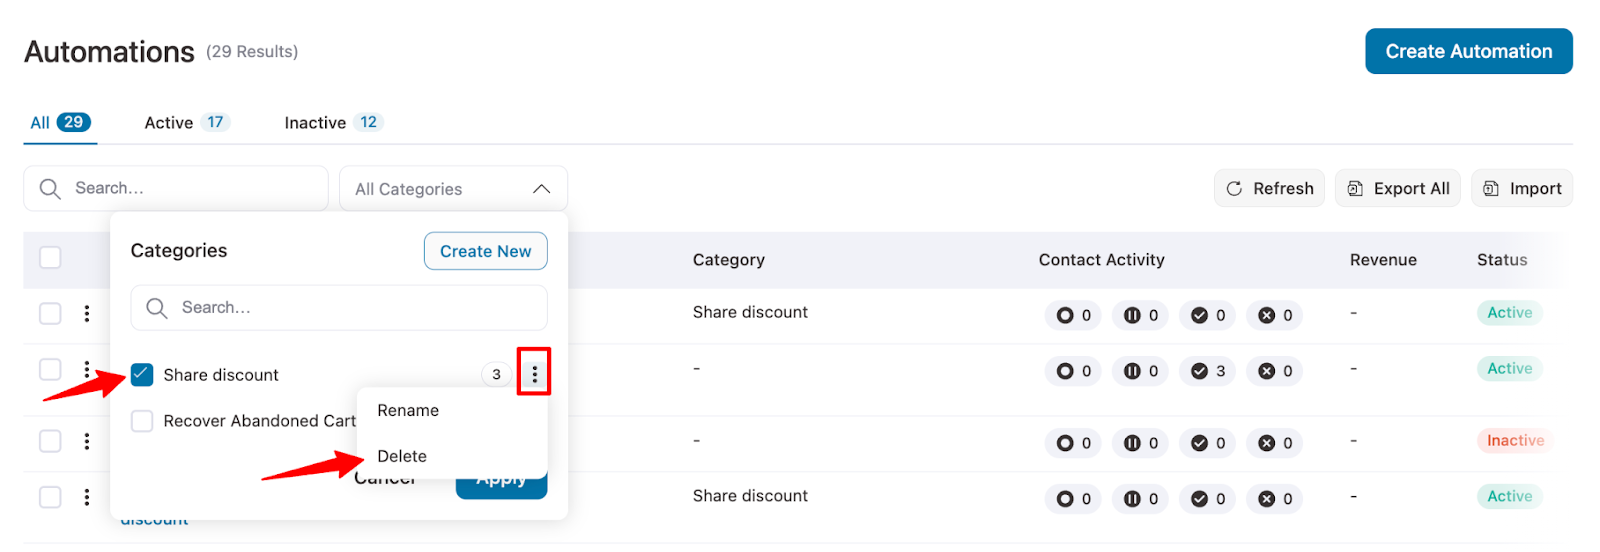
To delete any automation category, select it, then click on ⋮ it, and hit the delete option.
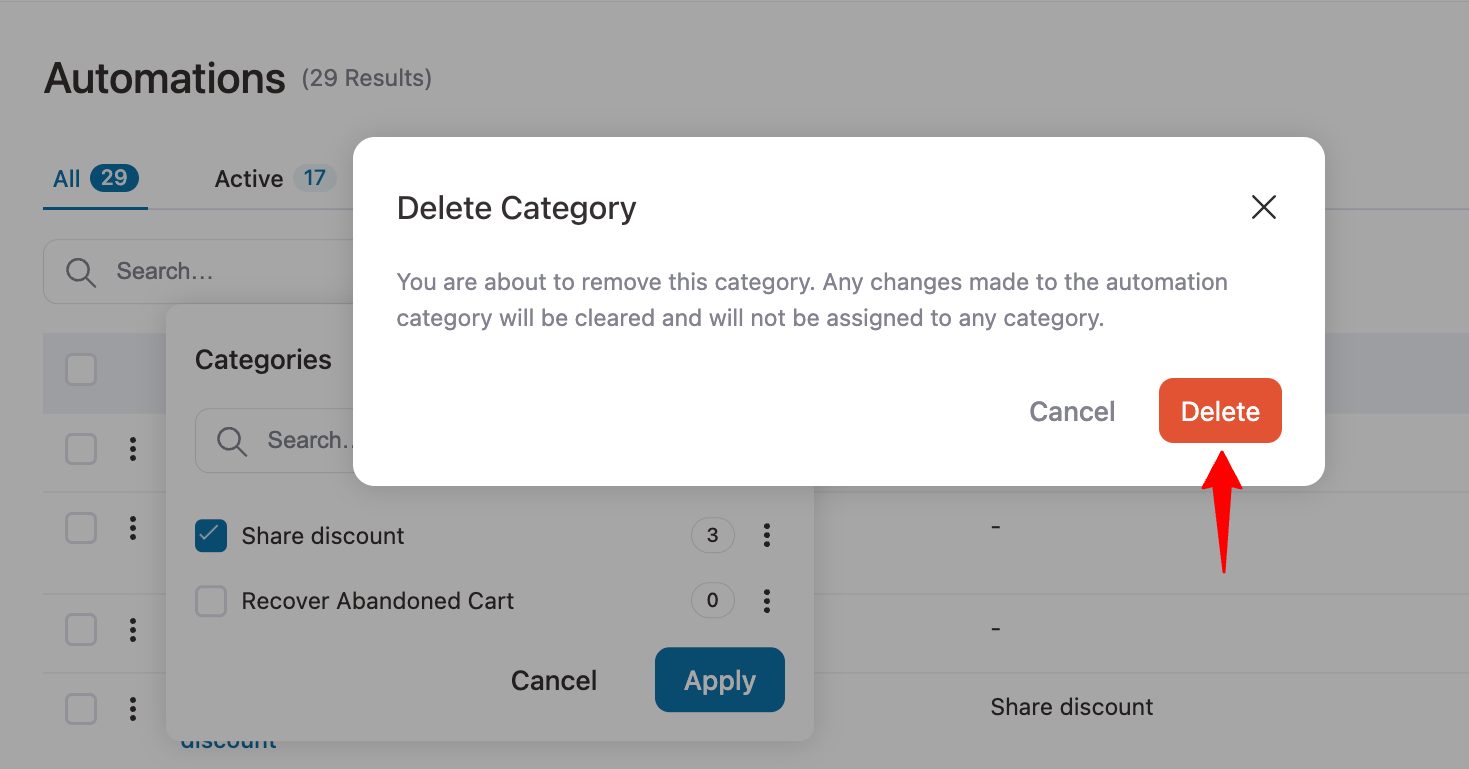
And finally, confirm by hitting the delete button to delete any category.
This is how you can manage categories in FunnelKit Automations for different entities.


