In this documentation, you can learn how to manage everything related to the Profile Page.
To access the settings, navigate to FunnelKit Automations ⇒ Settings ⇒ Contact Pages and switch to the Profile Page tab.
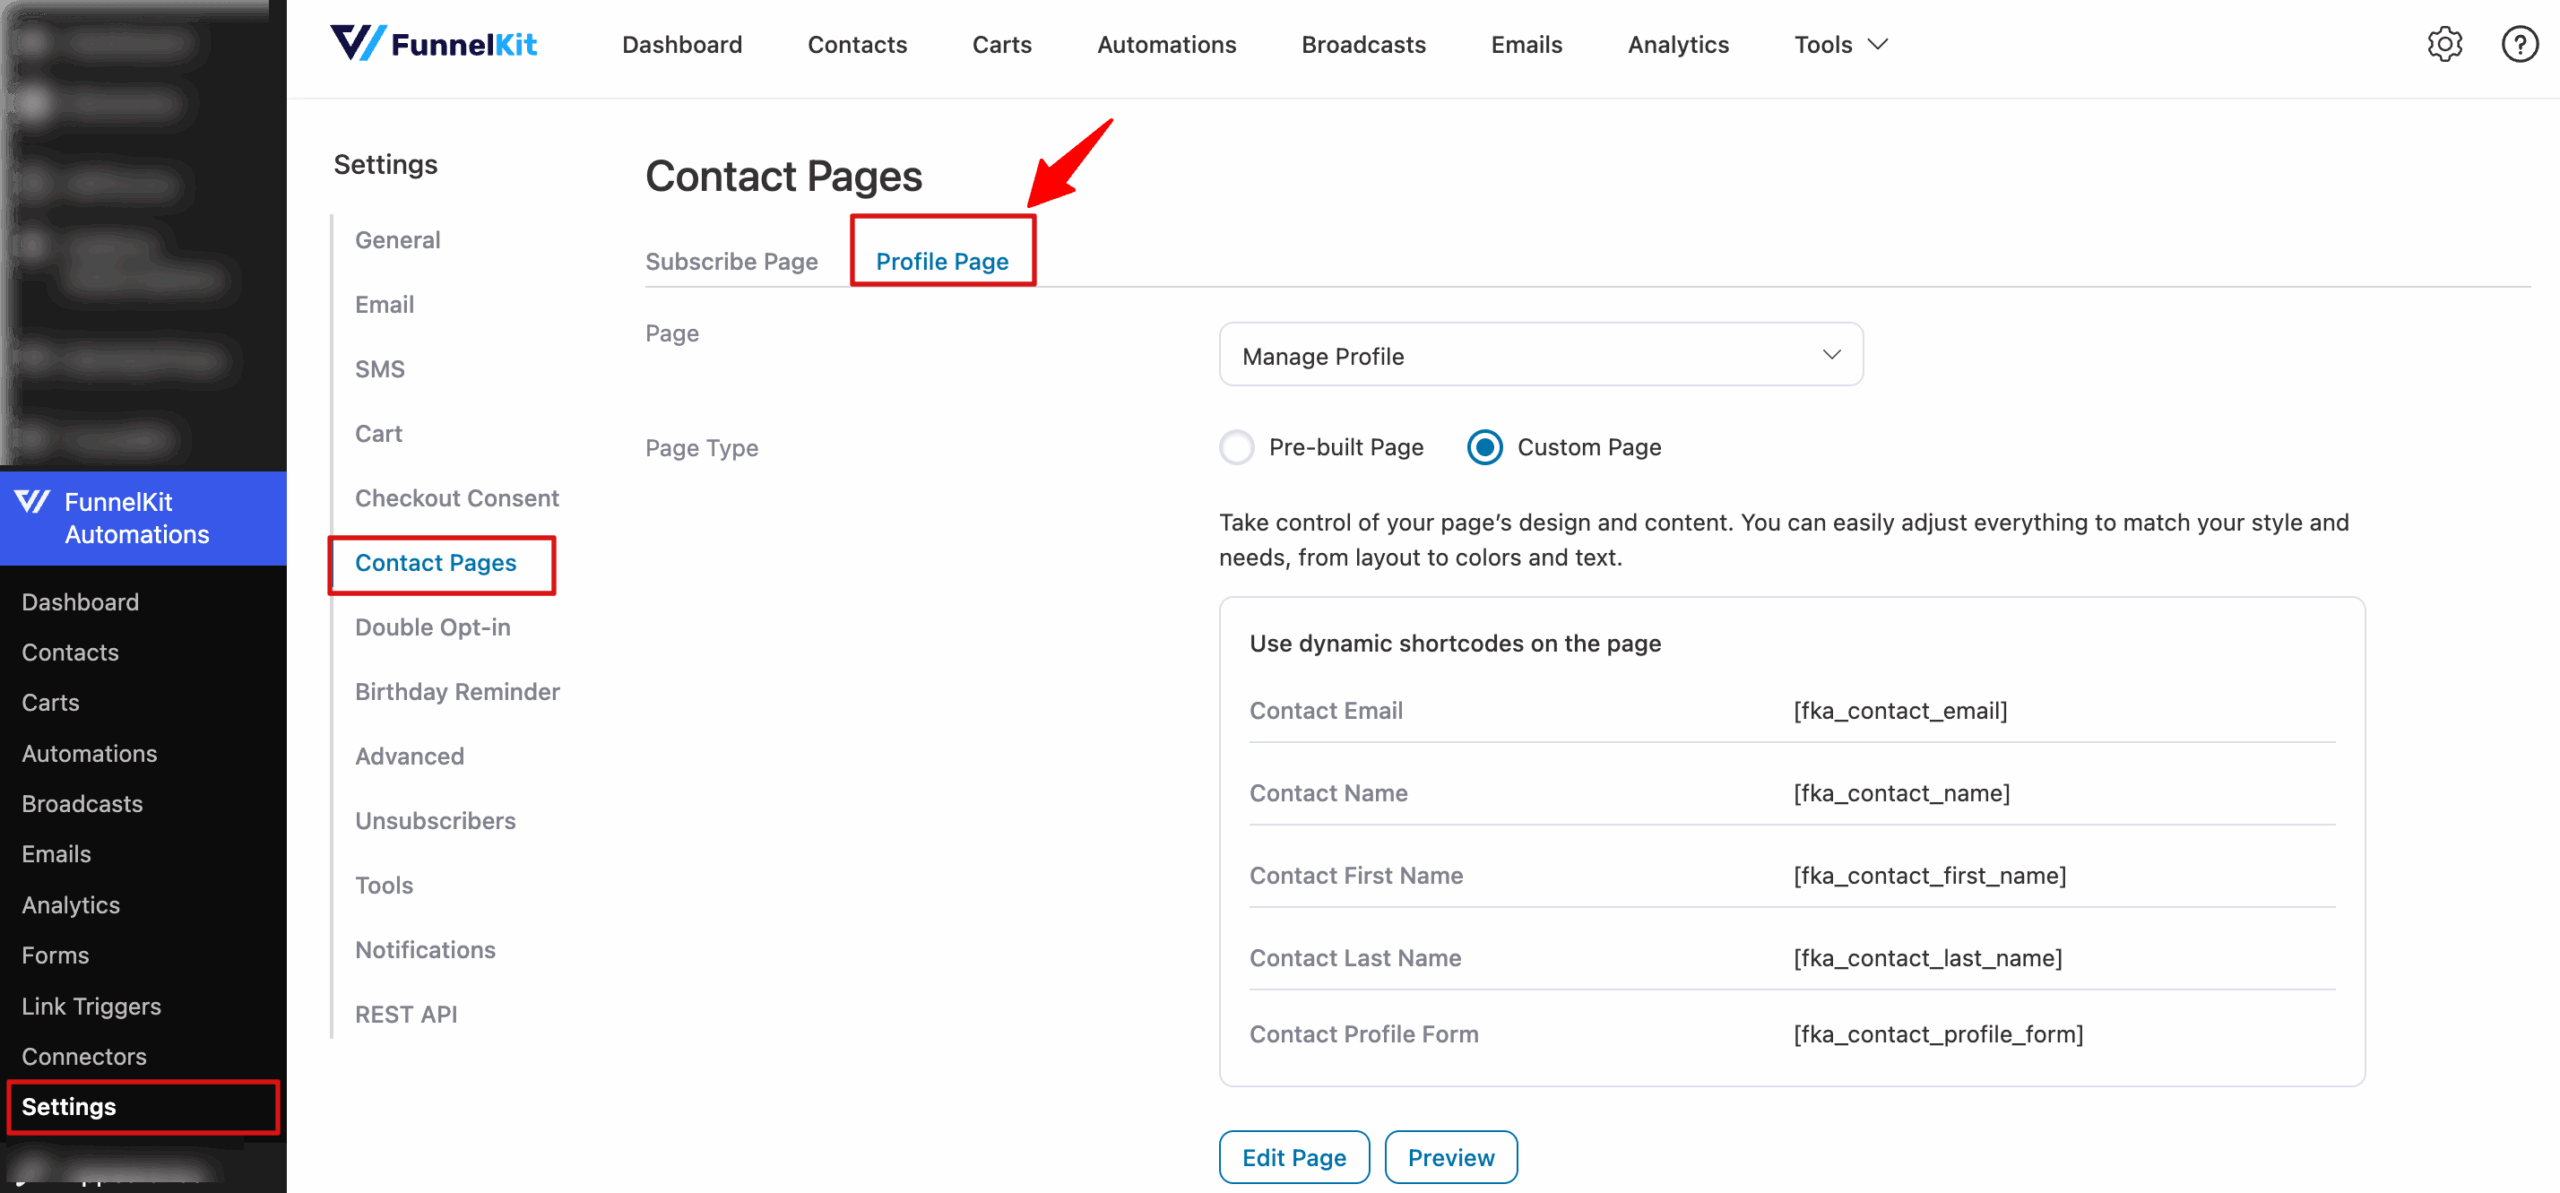
Here are the settings in the Profile page section:
Page
Select the page where you want to display your contacts so they can manage their profiles.
Page type
Here you get two options:
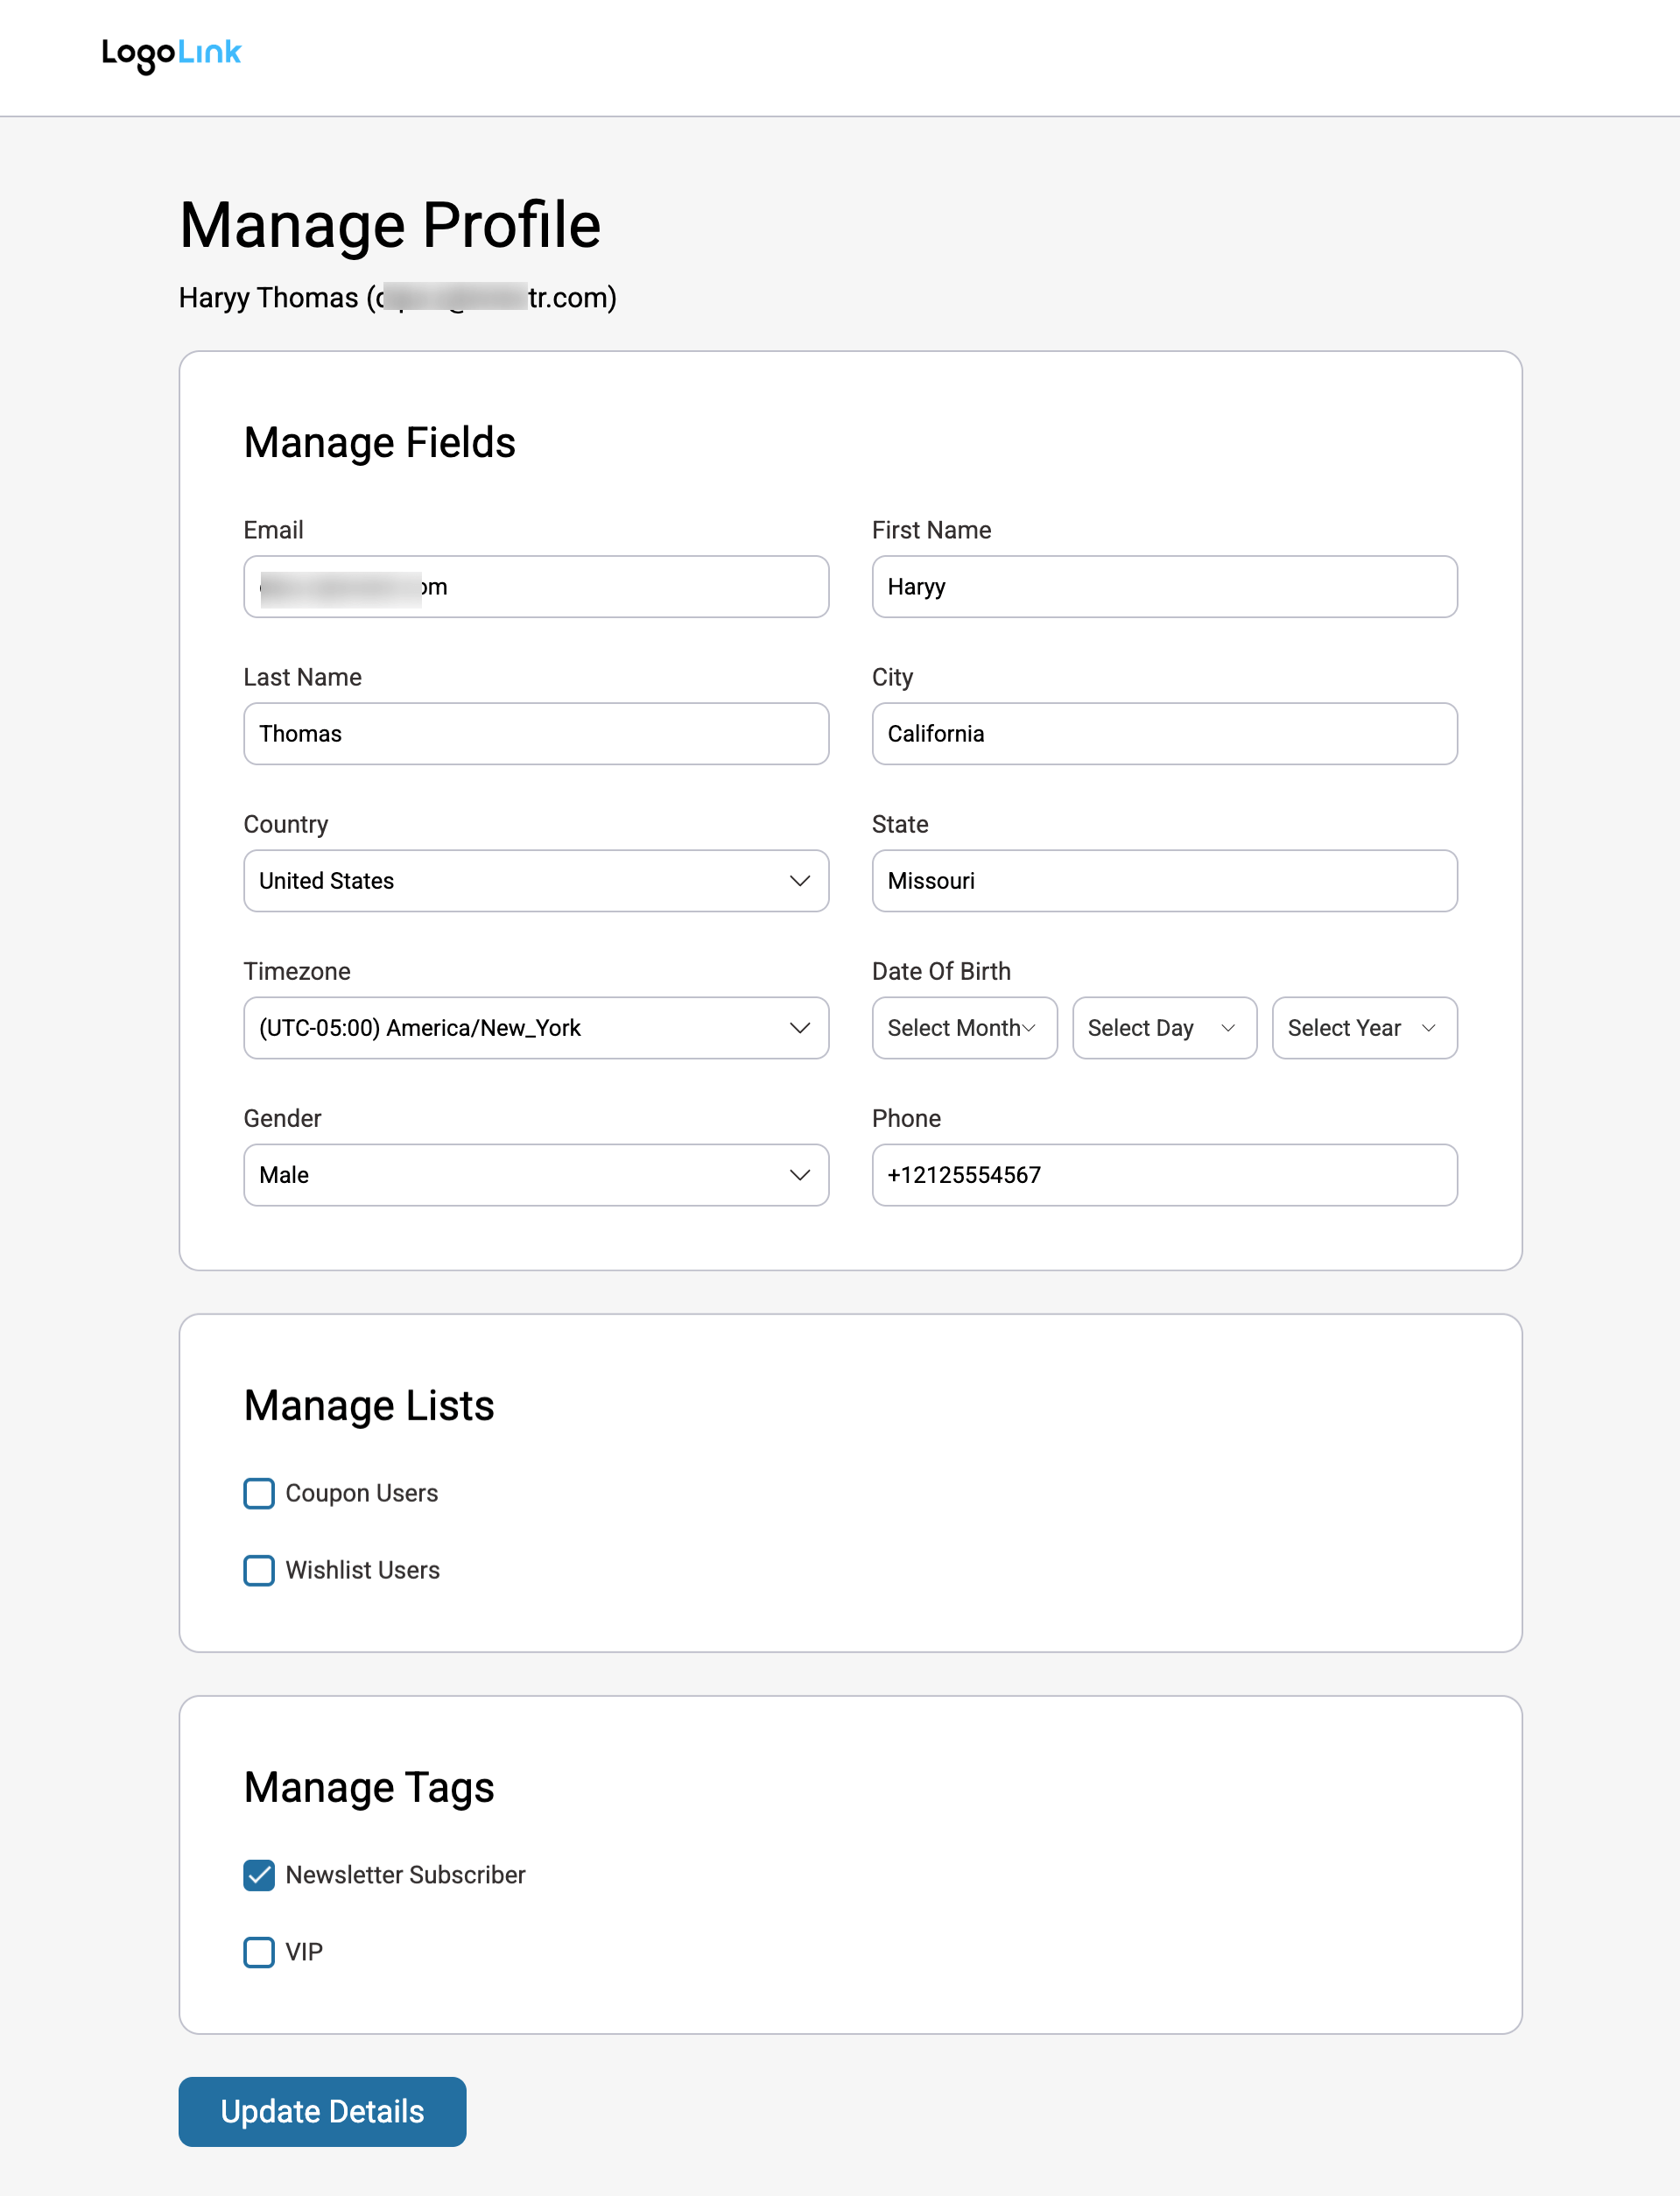
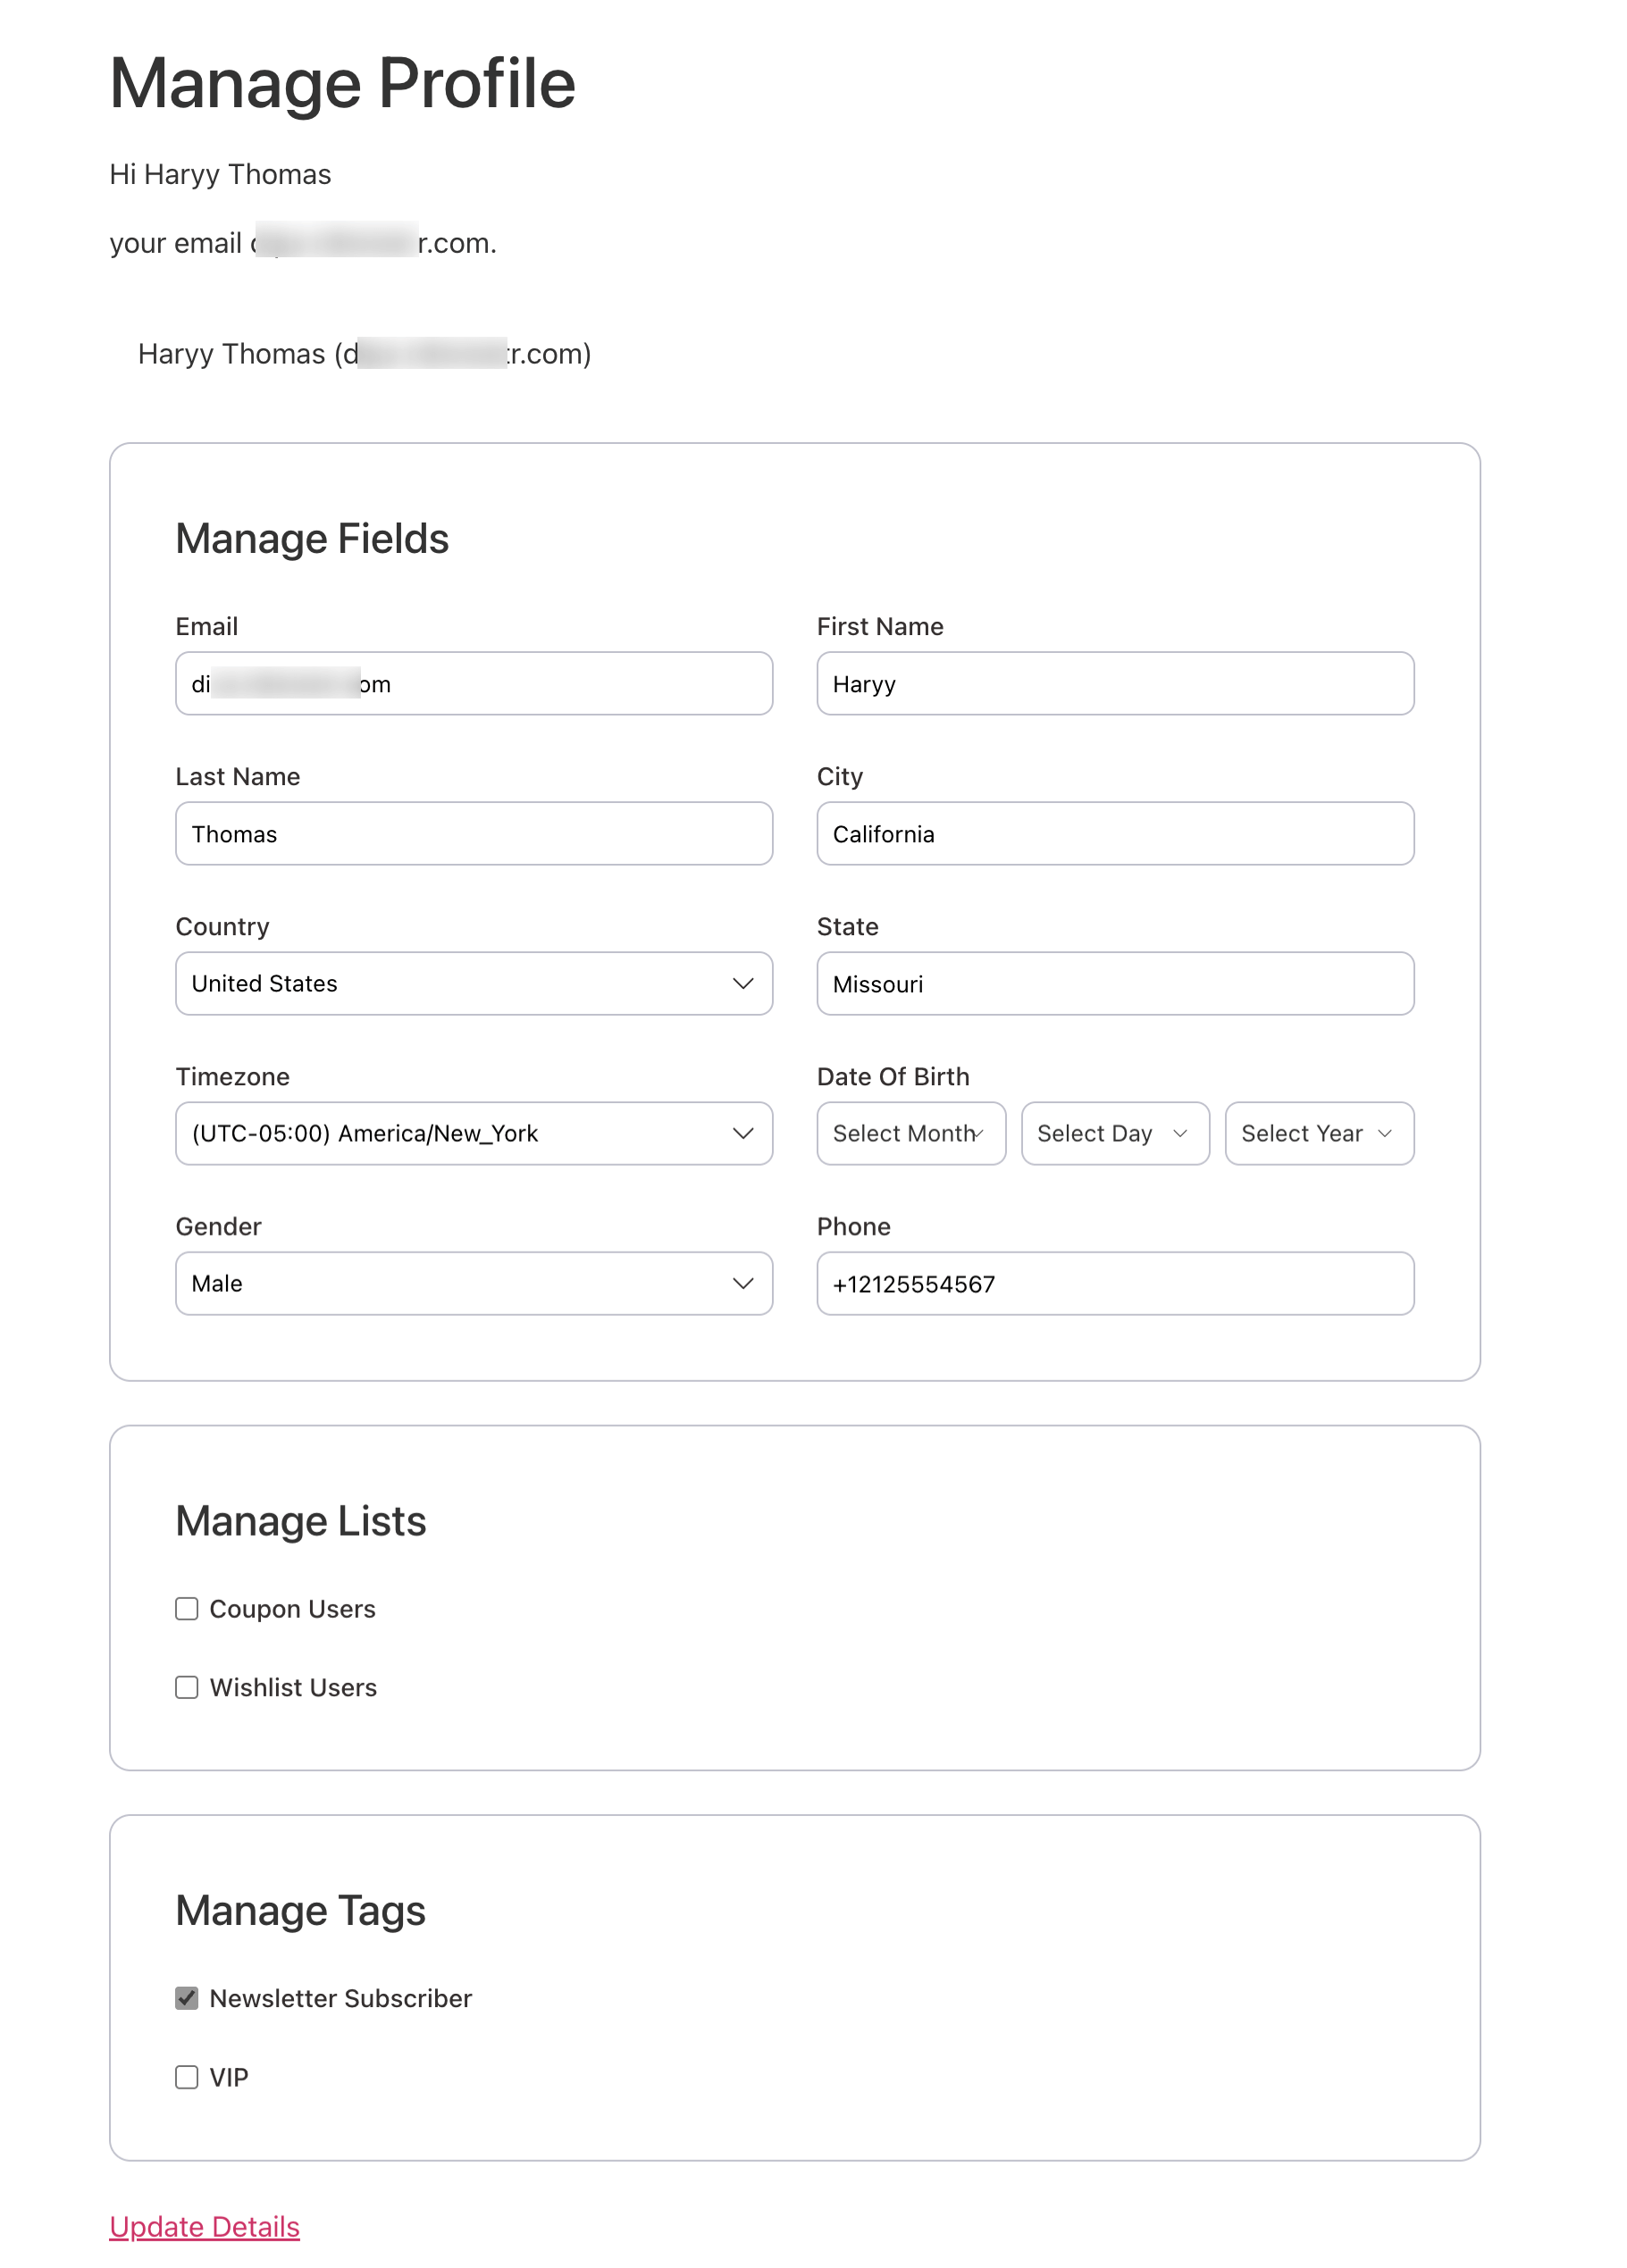
Pre-built Page: This option will show a pre-built distraction-free page cleaner by showing only what's essential. It hides things like menus, ads, and sidebars.
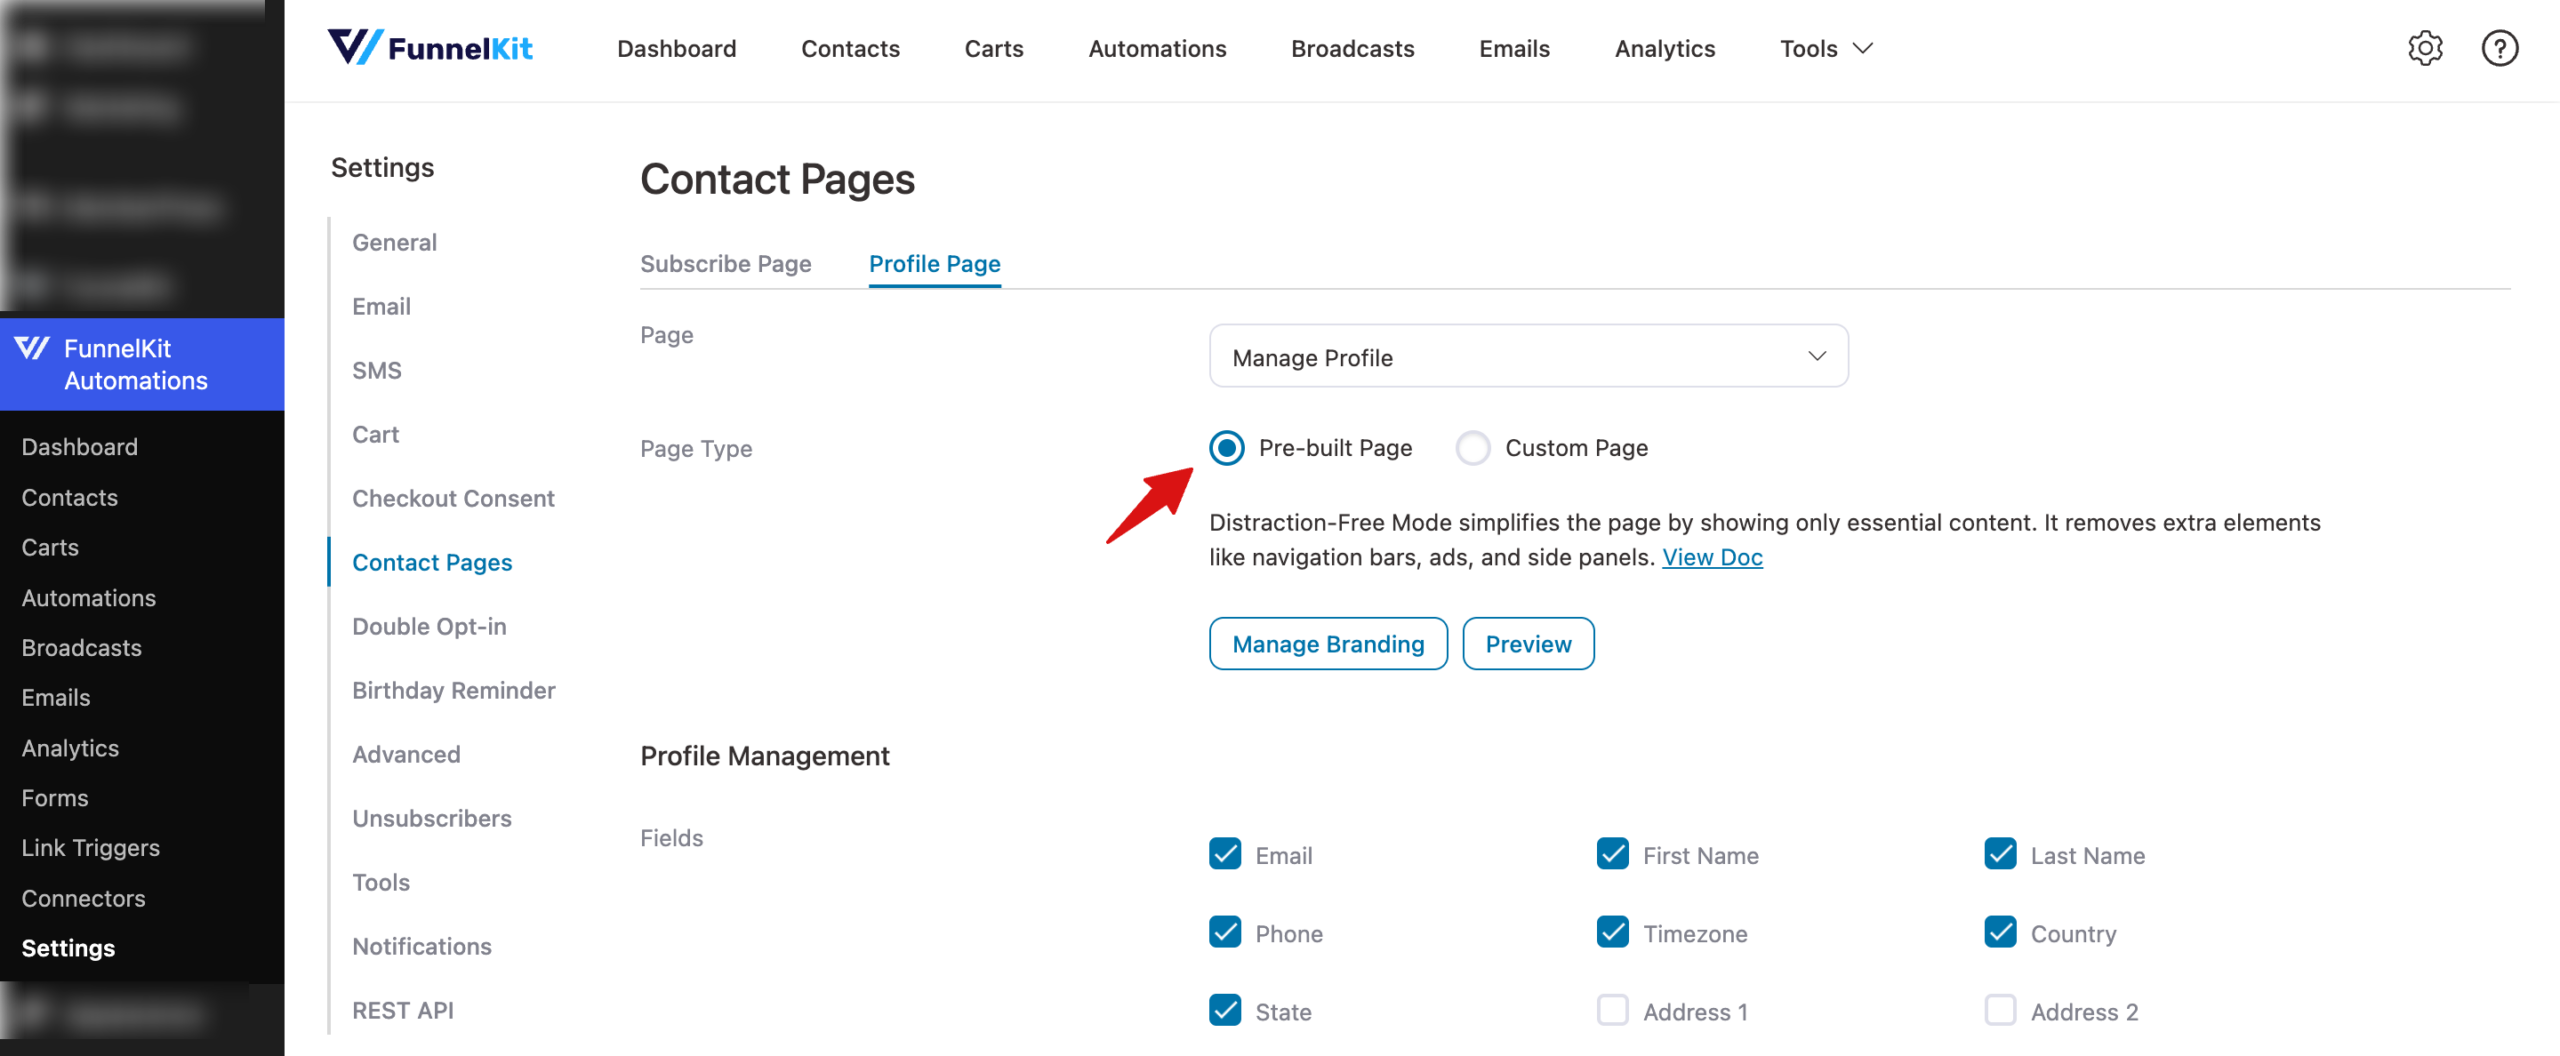
Here is what the prebuilt option looks like:
Custom Page: If you choose this option, you get more flexibility to adjust everything to match your style and needs, from layout to colors and text. However, you need to use the dynamic shortcodes on the custom page.
You can simply click the Edit page to start editing with your favorite page builder and customize. Must use the dynamic shortcodes on the page.
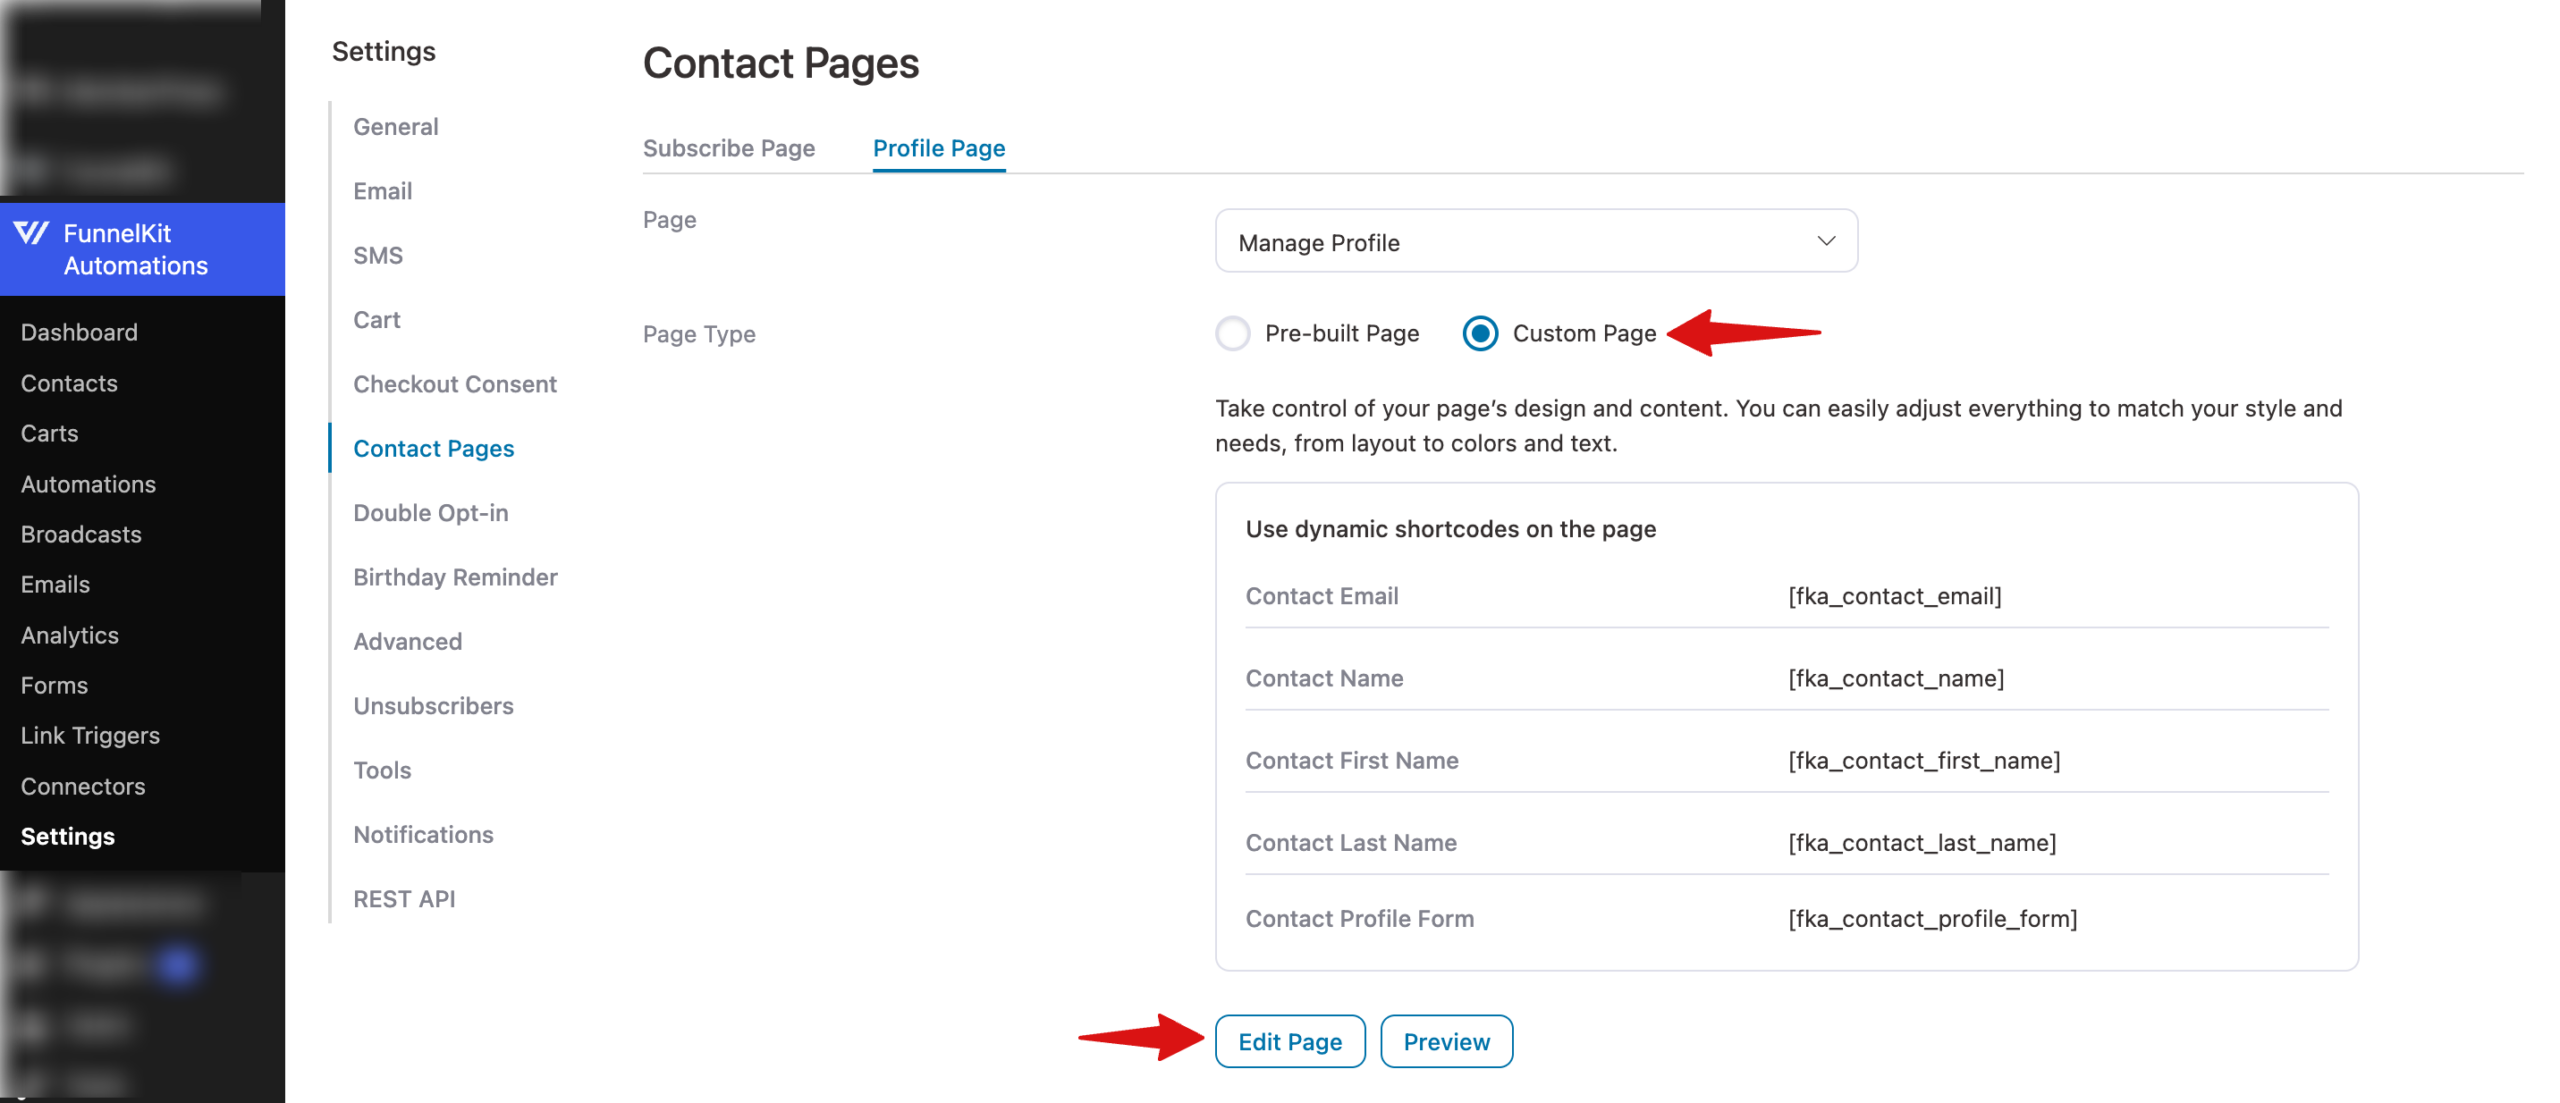
Here is what the Custom page option looks like:
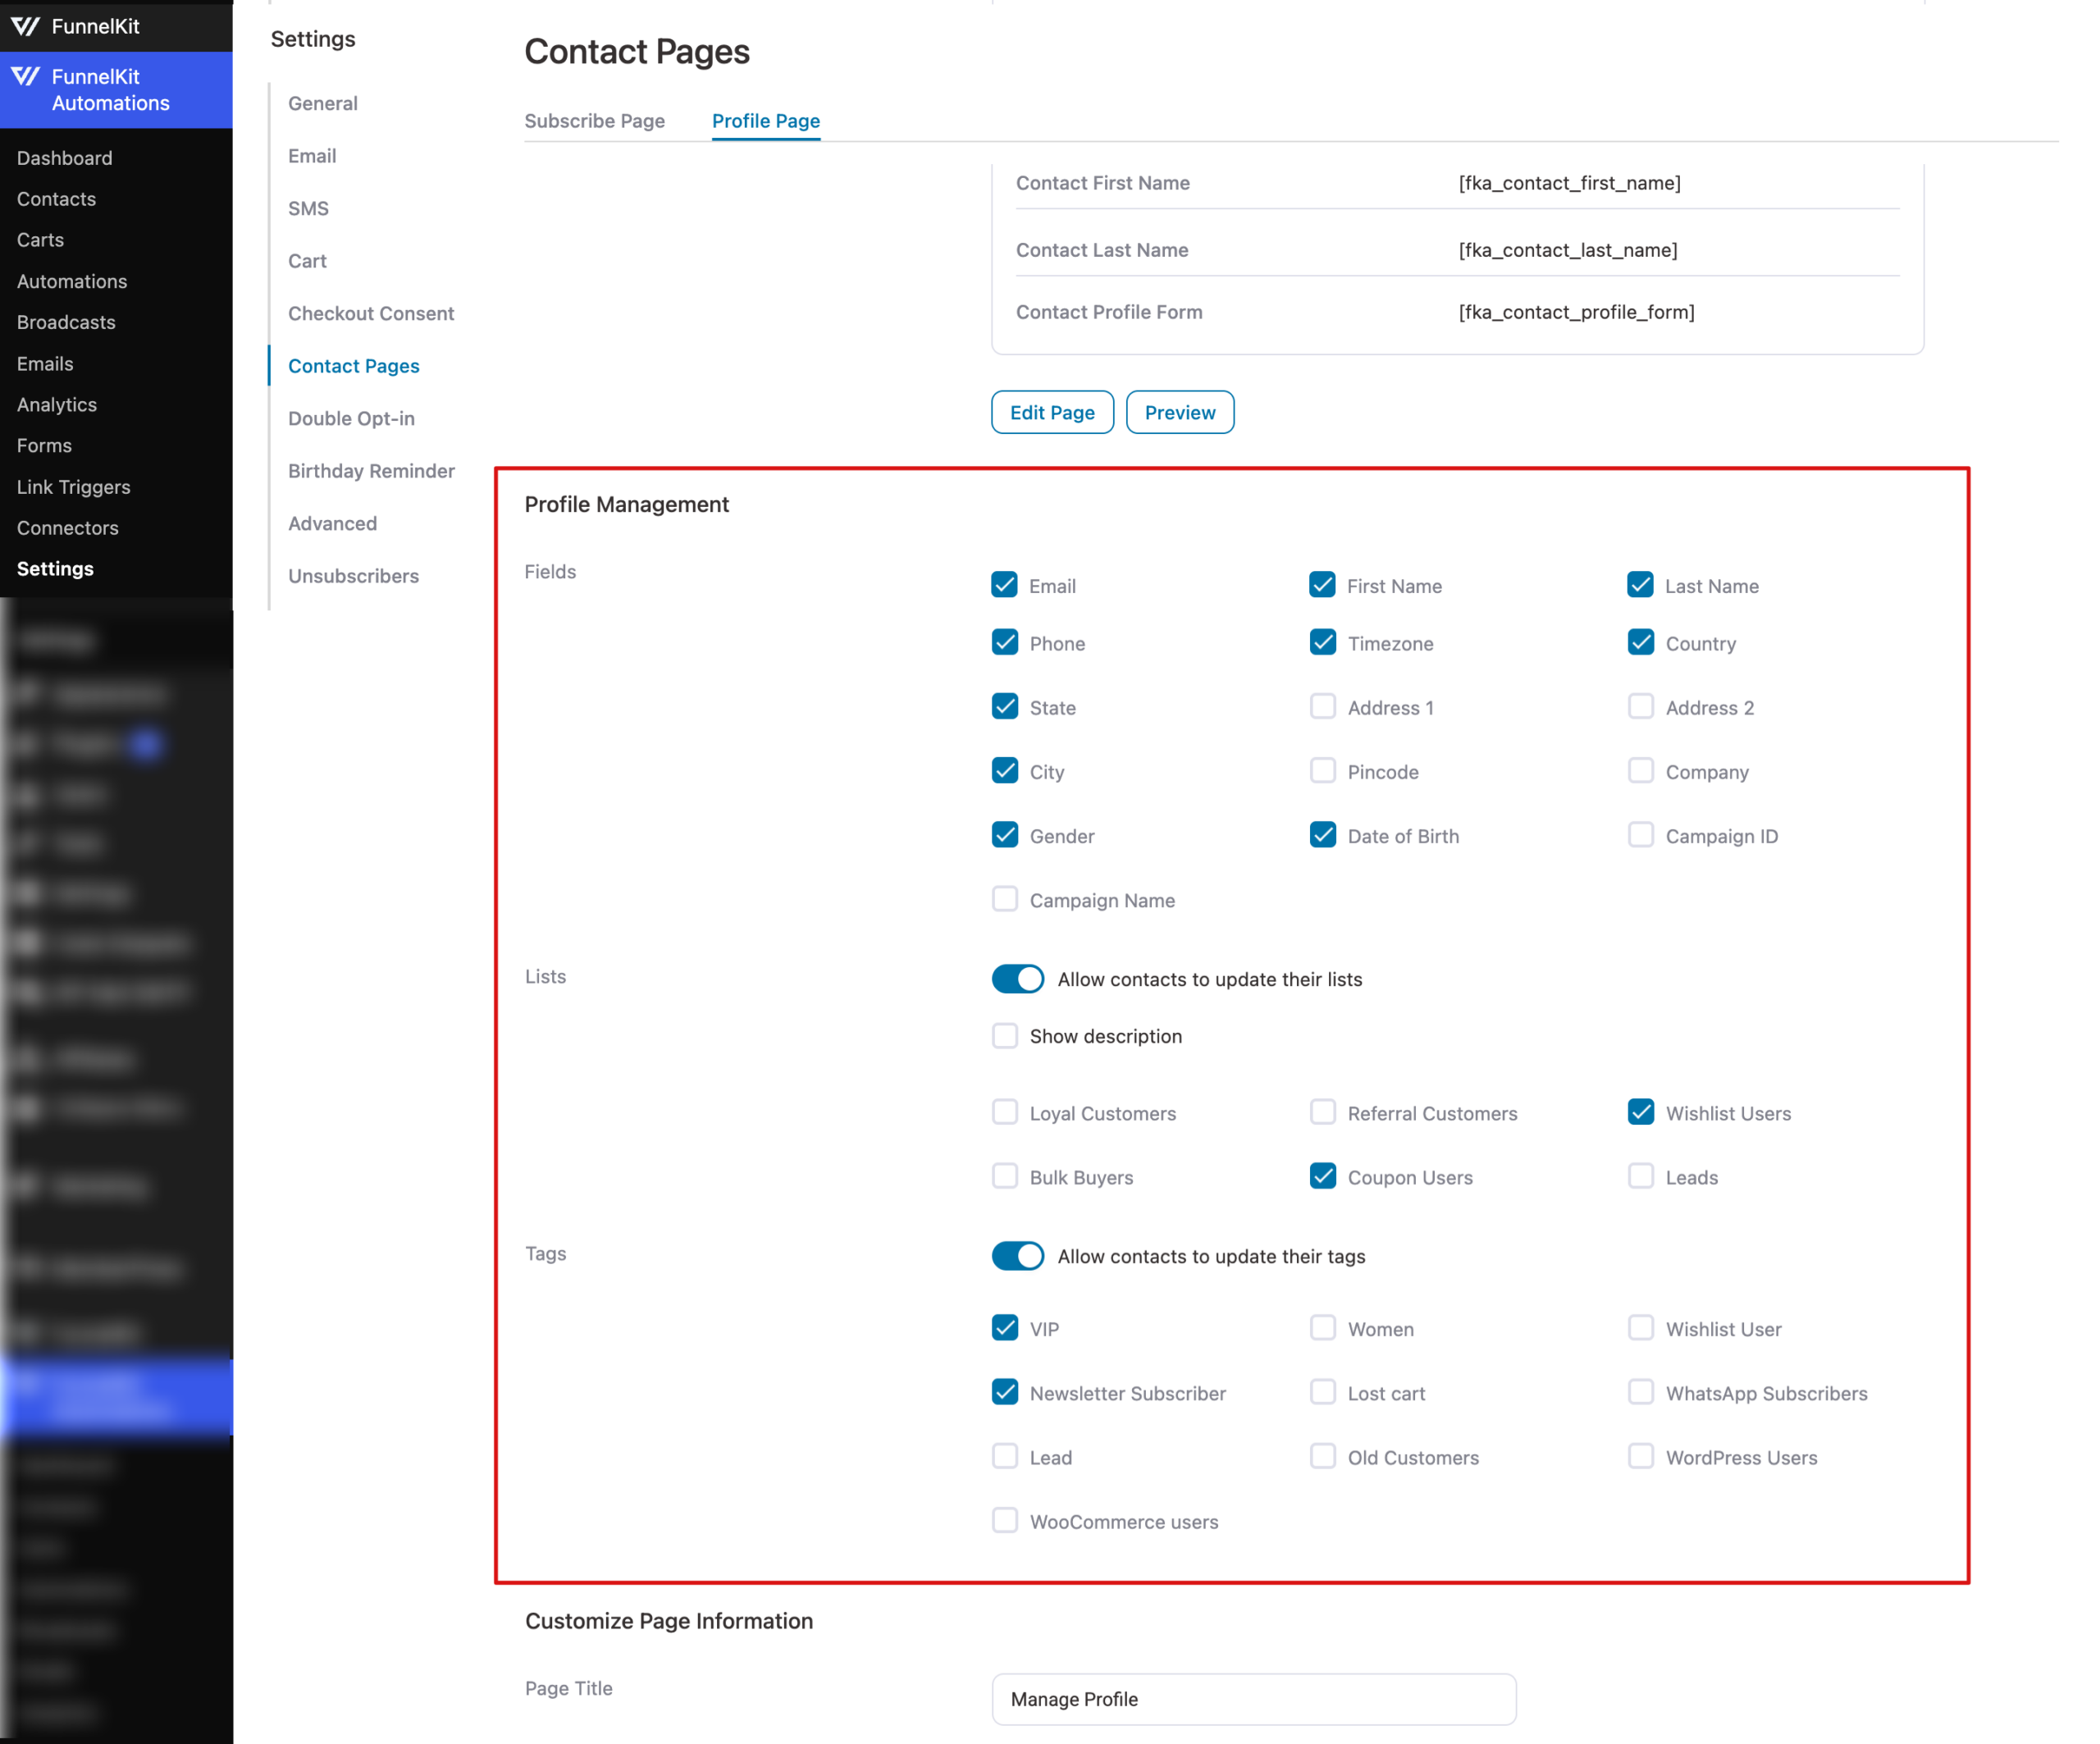
Profile Management
To let customers manage their profiles, you can offer the following options:
- Fields: Select the fields you want to let customers manage.
- Lists: Enable this option to allow contacts to update their lists. Then select the lists that will show up.
- Tags: Enable this option to allow contacts to update their tags. Then select the lists that will show up.
Customize Page Information
Here are options you can use to customize page information:
- Page Title: The main heading is displayed at the top of the page.
- Fields Heading: Set the title shown above the profile or form fields.
- Lists Heading: The title is shown above the list of email subscriptions.
- Tags Heading: Set the title shown above the tag options.
- Submit Button: Set the text shown on the button that users click to submit information.
- Confirmation Message: Set the message users see after successfully submitting or updating information.
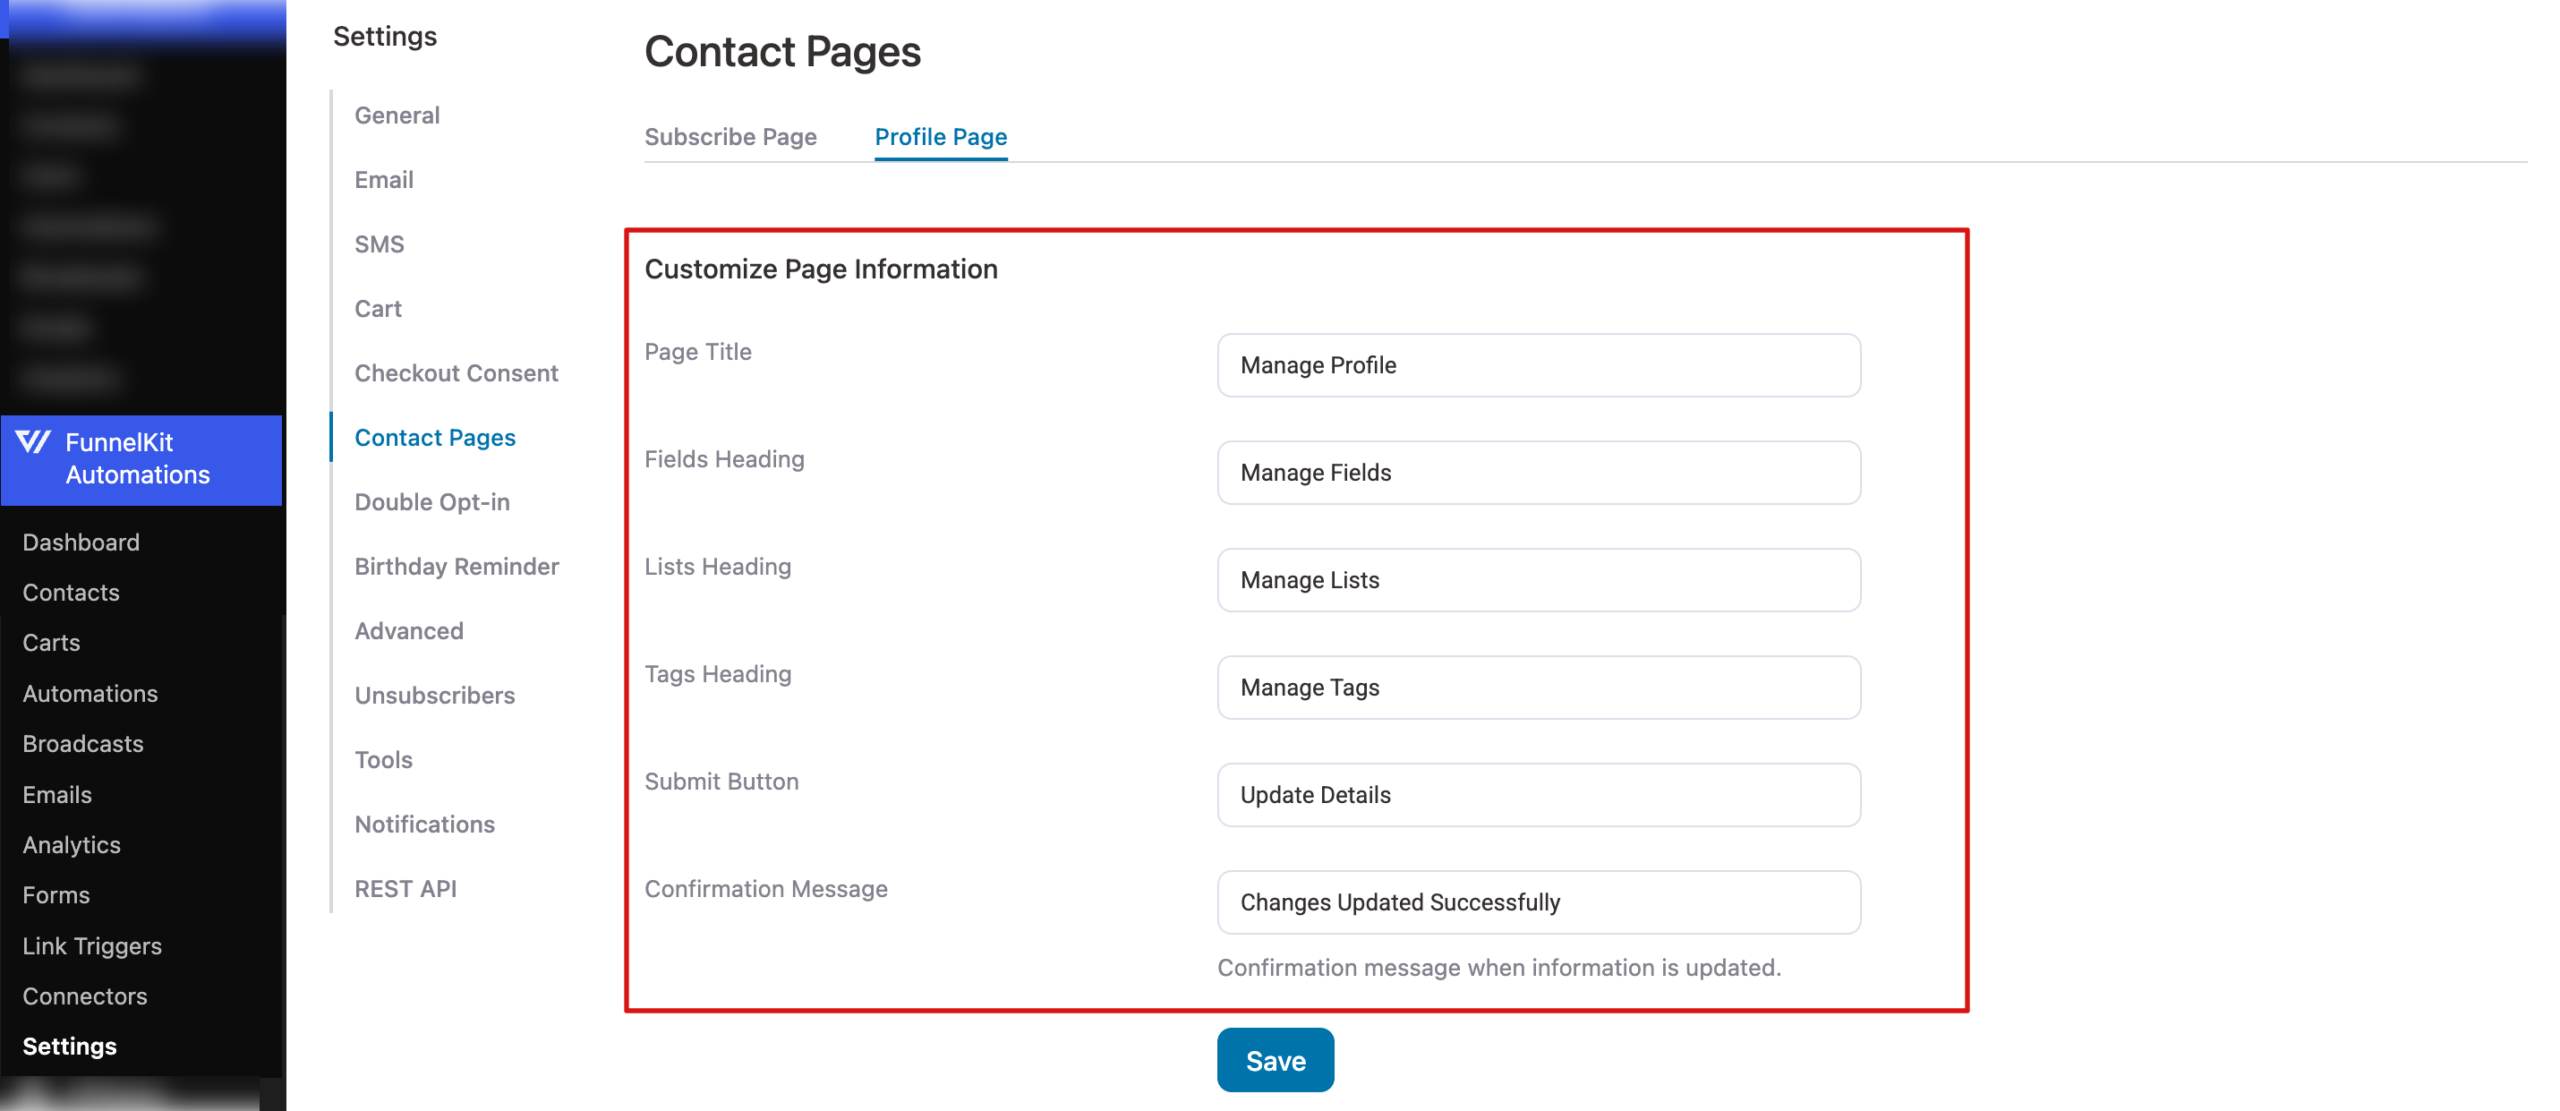
Make sure to hit Save to update the settings.
That’s it. This is how you can manage the profile page.


