Unsubscribe text lets your contacts stop receiving promotional emails in case they are no longer interested in them. However, they’ll still be receiving transactional emails they do on your website.
As per the GDPR compliance, it's significant to add the unsubscribe text every time you're setting up SMS marketing campaigns.
Any of the STOP keyword replies will prevent your contact from receiving new messages from the Twilio phone number they're responding to.
When Twilio receives one of these replies, a "block list" entry gets created and then the message is passed on to our webhook.
After that, their subscription status will be marked 'Unsubscribed' in FunnelKit Automations.
🔔 Quick Note: Please note that you can add Unsubscribe text on SMS when setting up Automations and SMS Broadcasts in FunnelKit Automations.
In this documentation, you will learn how to add unsubscribe text in your SMS and set up unsubscribe webhook URL in your Twilio account.
Set up SMS Unsubscribe - Webhook URL
Since Twilio has only one webhook option to configure, FunnelKit Automations has enhanced its webhook URL.
You can now set up unsubscribe text or receive a response using a single webhook URL.
Follow the instructions below:
Step 1: Copy the Unsubscribe Webhook URL
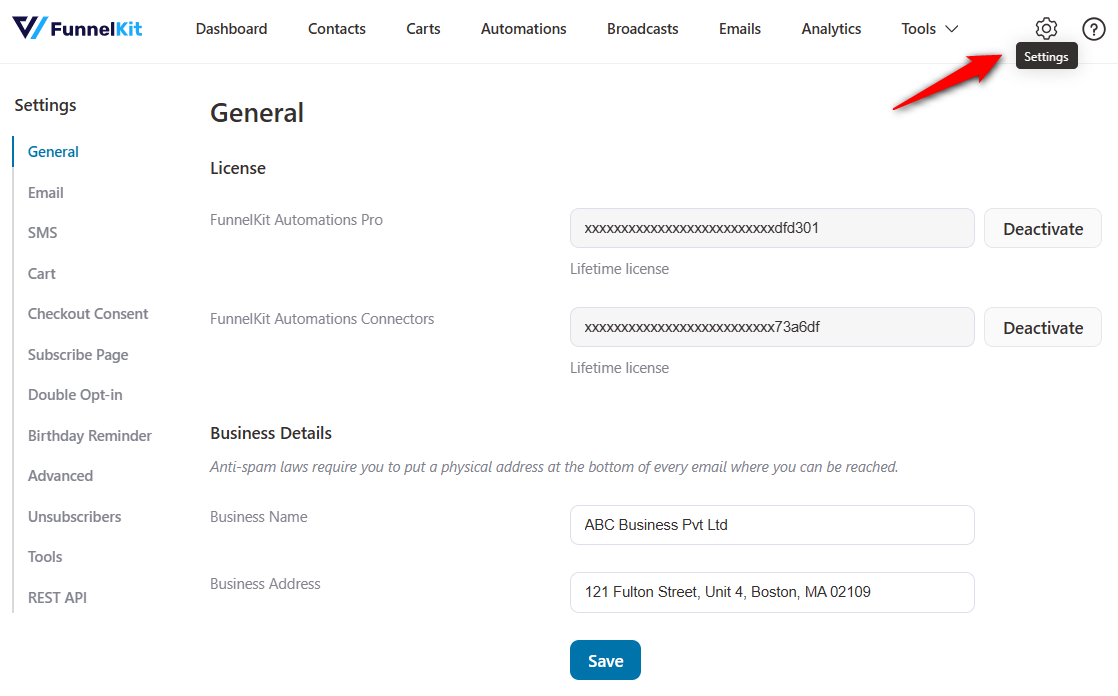
Go to the Settings section in FunnelKit Automations.
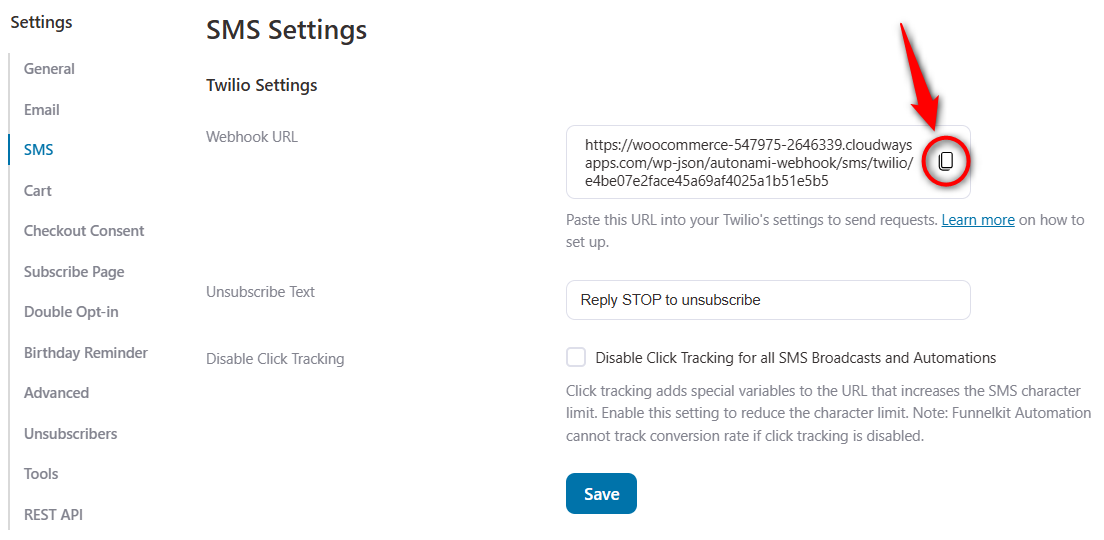
Under the SMS settings, copy the Twilio Webhook URL.
Step 2: Create a webhook trigger on your Twilio Account
Log in to your Twilio Console.
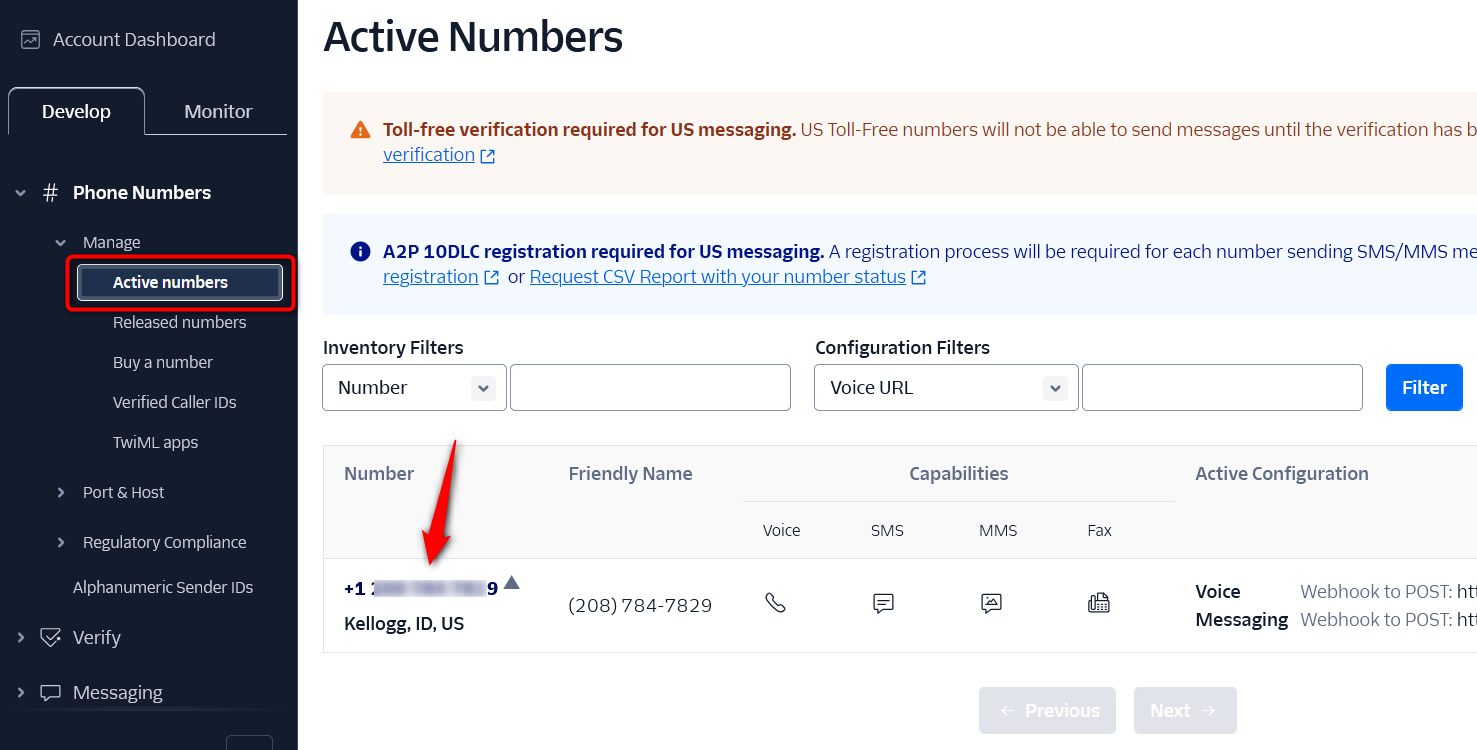
Next, click on your phone inside Active numbers under Phone Numbers > Manage.
Scroll down and you'll see the Messaging there.
Paste your webhook URL here as demonstrated:
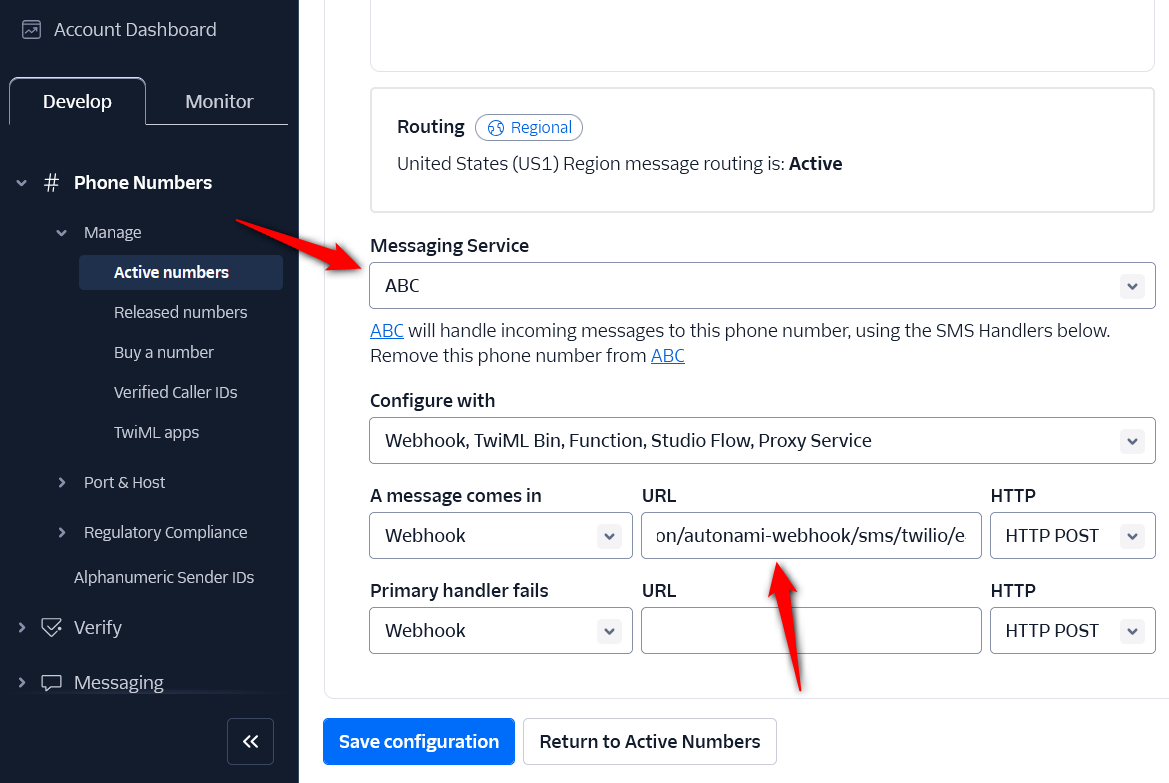
🔔 Make sure to set up Twilio Messaging Service before configuring your incoming messaging webhooks.
Once done, click on Save configuration.
Well done! You have created a trigger to receive alerts from Twilio.
Now, we need to add unsubscribe text to your SMS.
Add Unsubscribe Text to SMS
Step 1: Create your SMS content
Start creating your SMS content when creating your SMS broadcasts.
If you’re new to FunnelKit Automations, then we advise you to visit this link for detailed information on how to create SMS broadcasts.
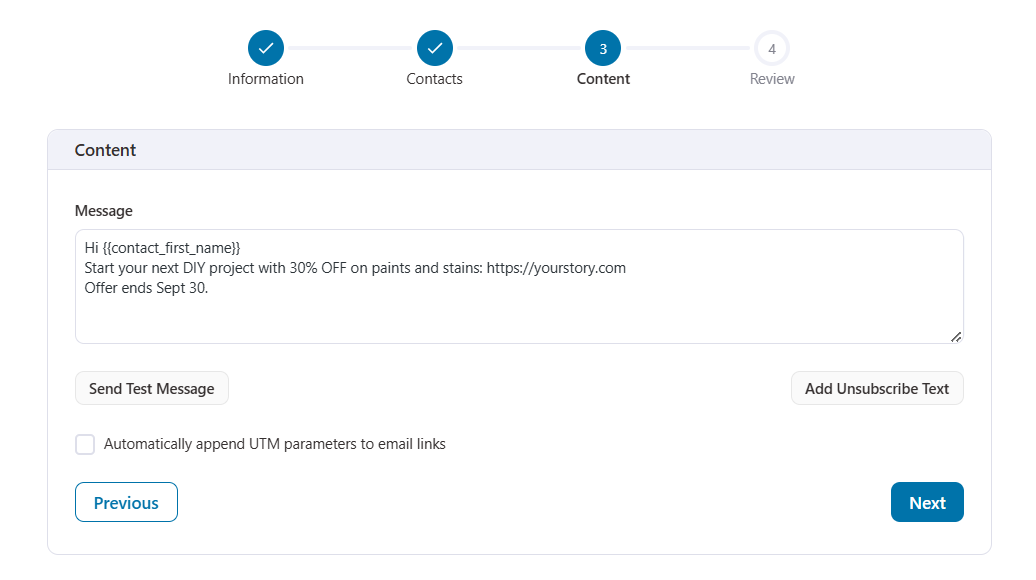
Step 2: Insert unsubscribe text
Click on Add Unsubscribe Text.
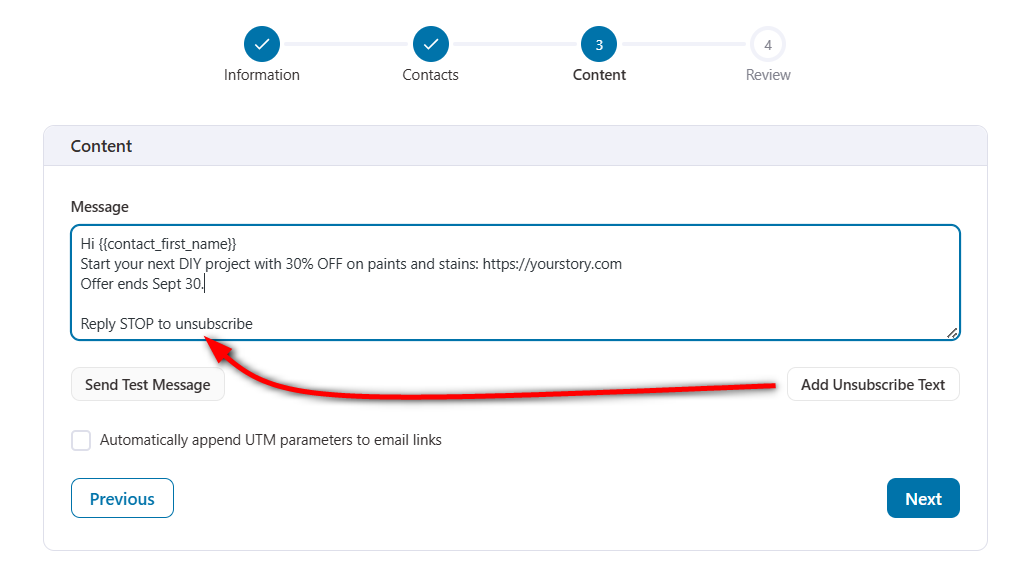
Send or schedule your SMS broadcast to your contacts.
That's it! You have successfully set up the SMS unsubscribe webhook URL and scheduled your broadcast with the unsubscribed text.
When a contact replies with a "STOP", "Stop", or "stop" text, Twilio will create a blocklist entry and pass it to our webhook.
That's where the subscription status of that contact will be turned to "Unsubscribed".


