ConvertBox allows you to capture leads, engage your visitors, build targeted lists and helps you drive sales for your business.
You can send the data from ConvertBox to FunnelKit Automations and create multiple automations quite easily.
In this documentation, you'll learn how to receive data from ConvertBox via Webhooks and perform different actions.
Step 1: Create a new Automation in FunnelKit Automations
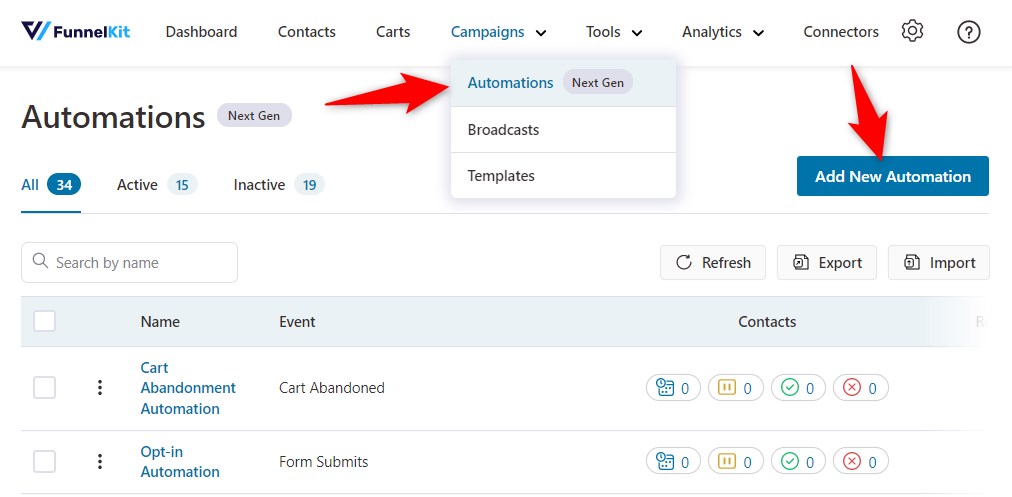
Go to Campaigns ⇨ Automations and click on Add New Automation.
Start from the scratch and name your automation.
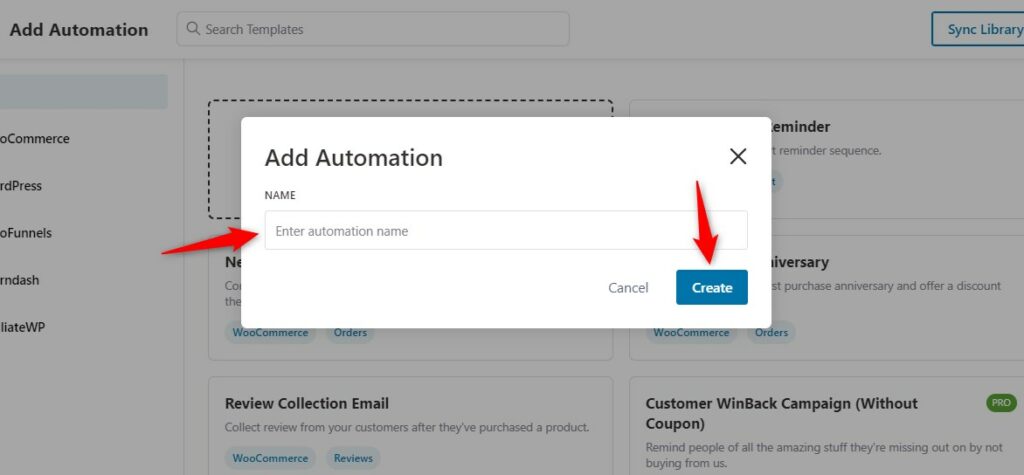
Once done, click on Create.
Step 2: Select the Webhook Received as the action
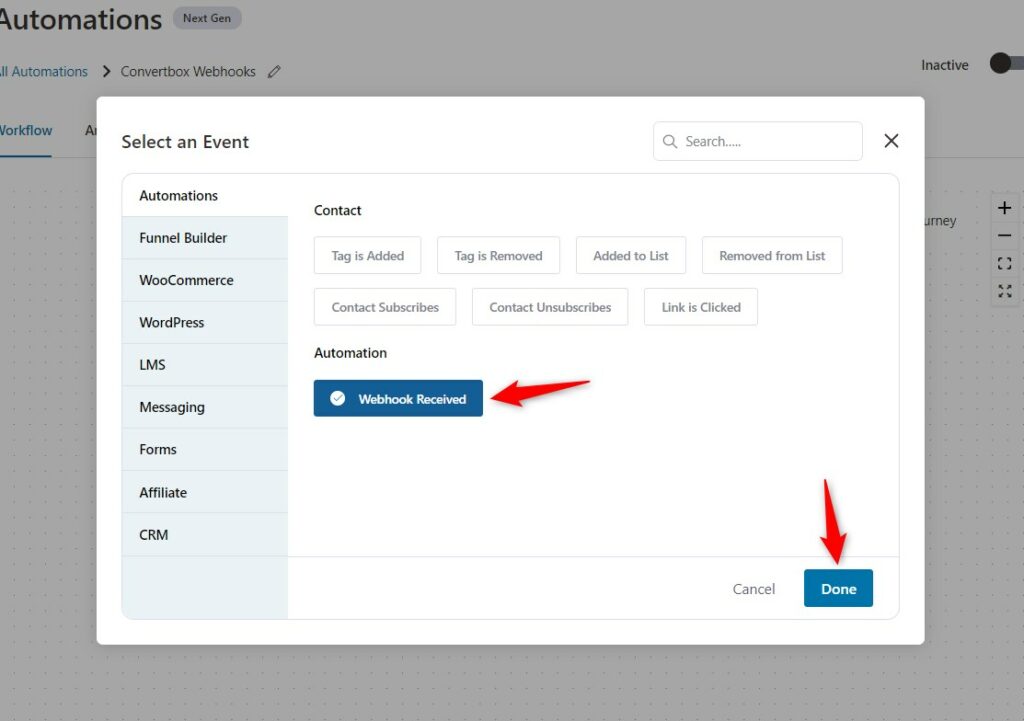
Select the event - Webhook Received and click on Done.
Step 3: Copy the Webhook URL
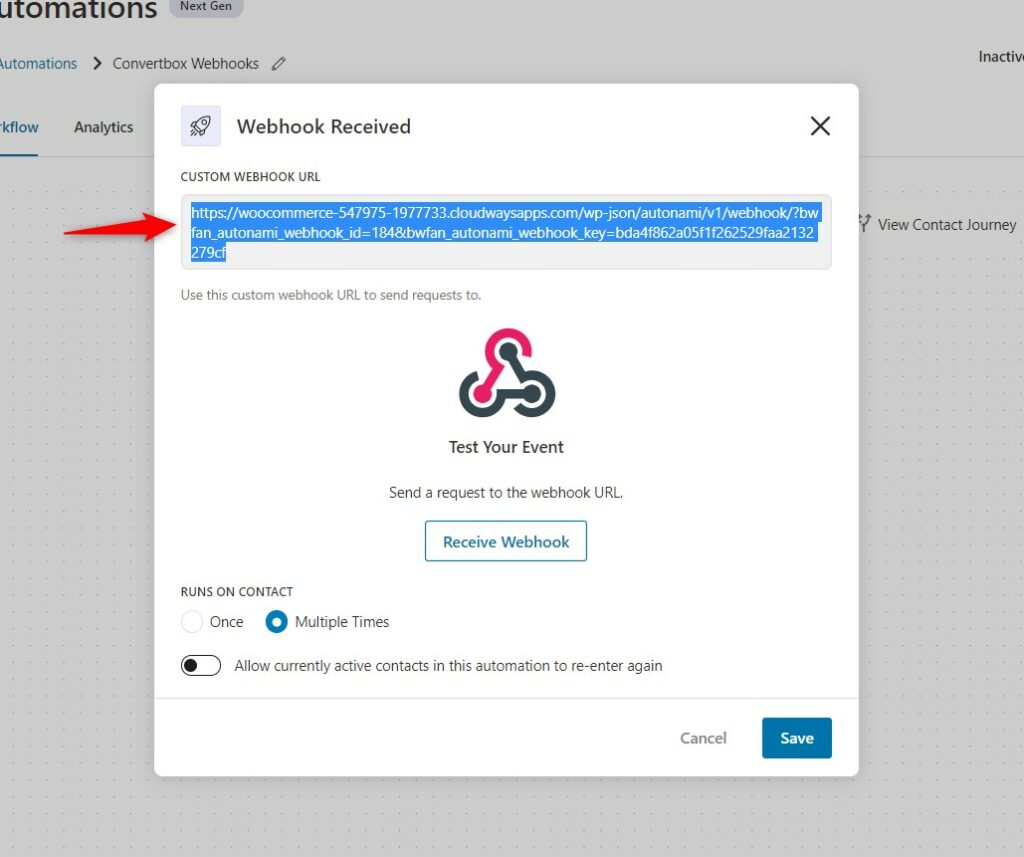
When you select the event, a Webhook URL is created automatically.
Copy this URL.
Step 4: Create a lead generation form in ConvertBox
Here we have created a form in ConvertBox.
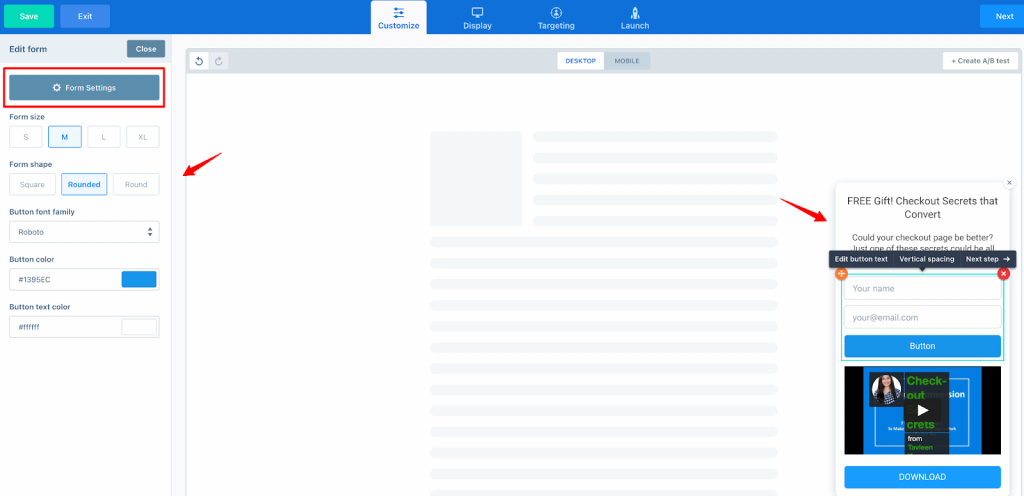
Step 5: Paste the copied Webhook URL in ConvertBox
Under Form Settings, go to INTEGRATIONS.
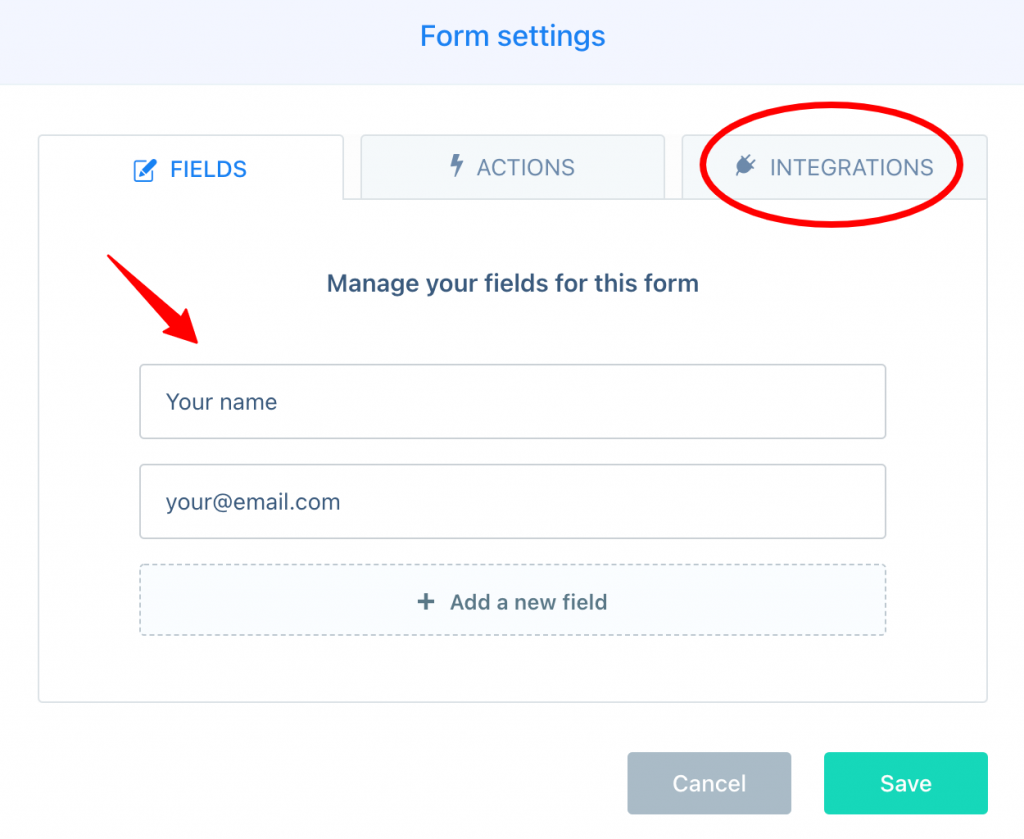
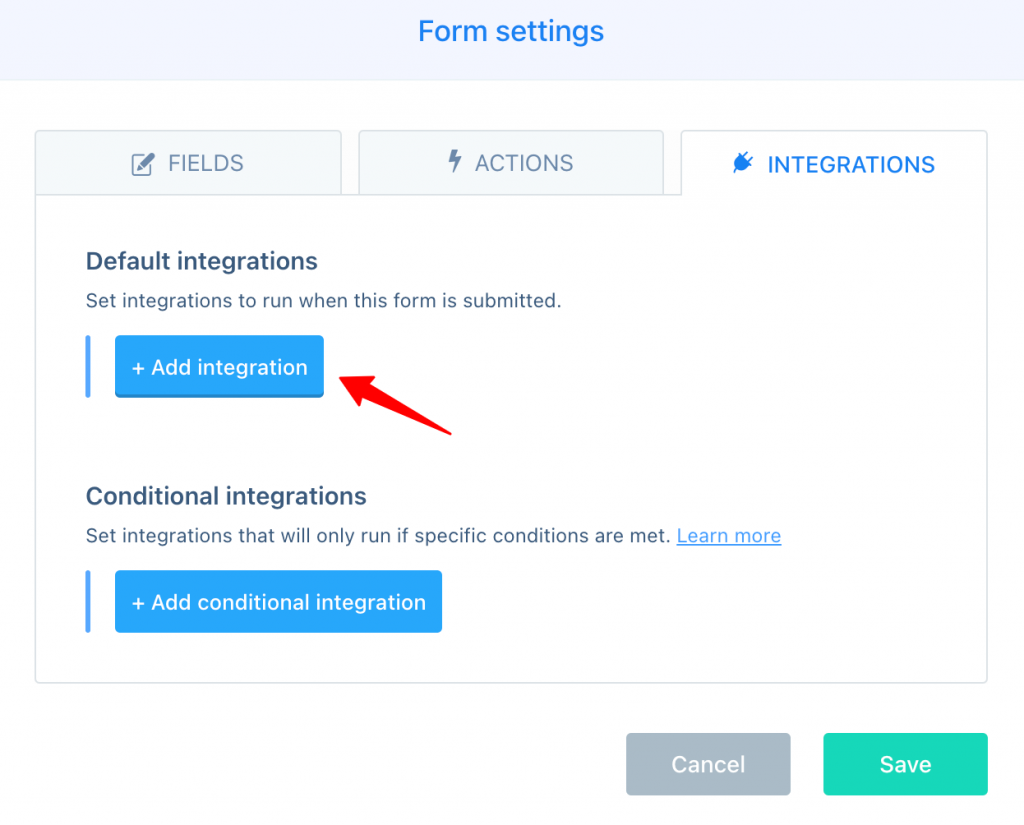
Click on Add Integration.
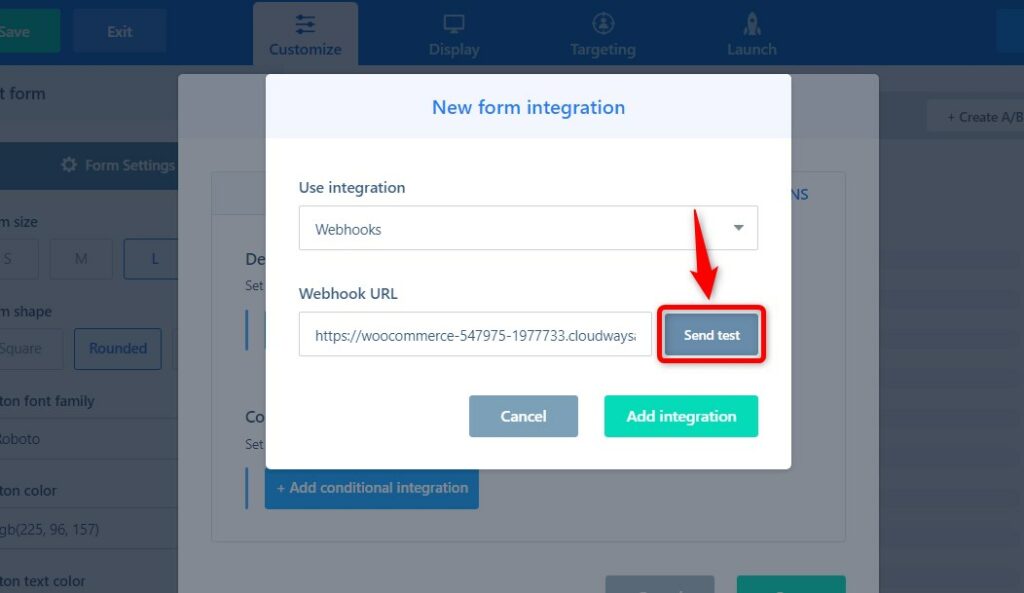
Select Webhooks and paste the copied Webhook URL over there.
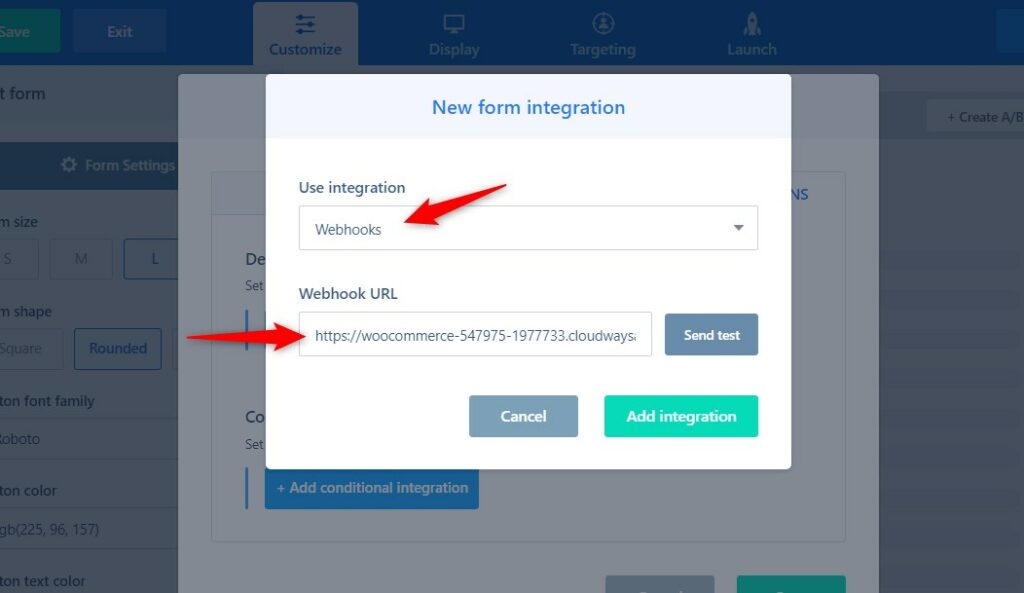
Once done, click on Add integration.
Step 6: Testing the data from ConvertBox to FunnelKit Automations
Click on the Send test button to test the Webhook.
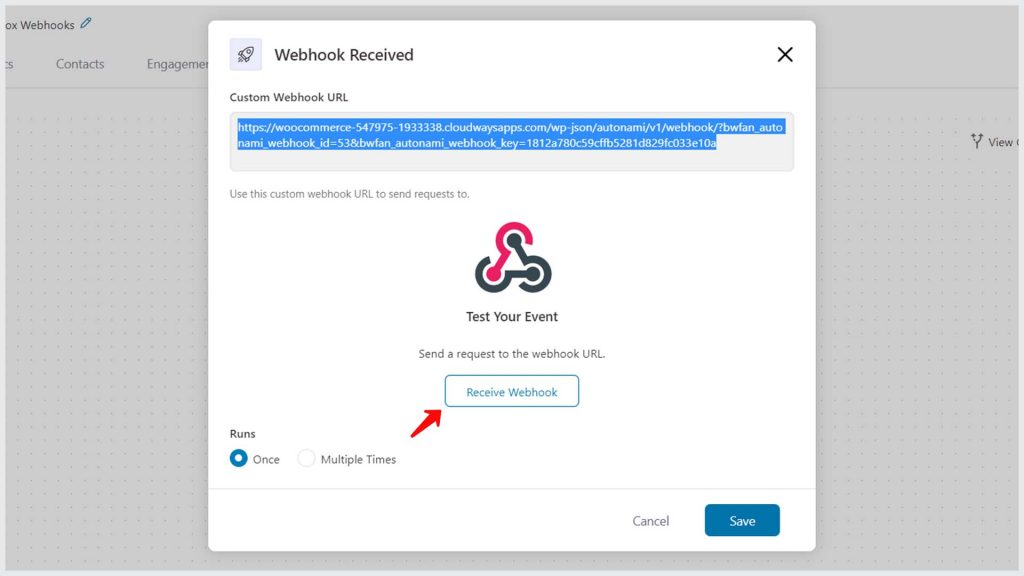
Now, go over to FunnelKit Automations and hit Receive Webhook.
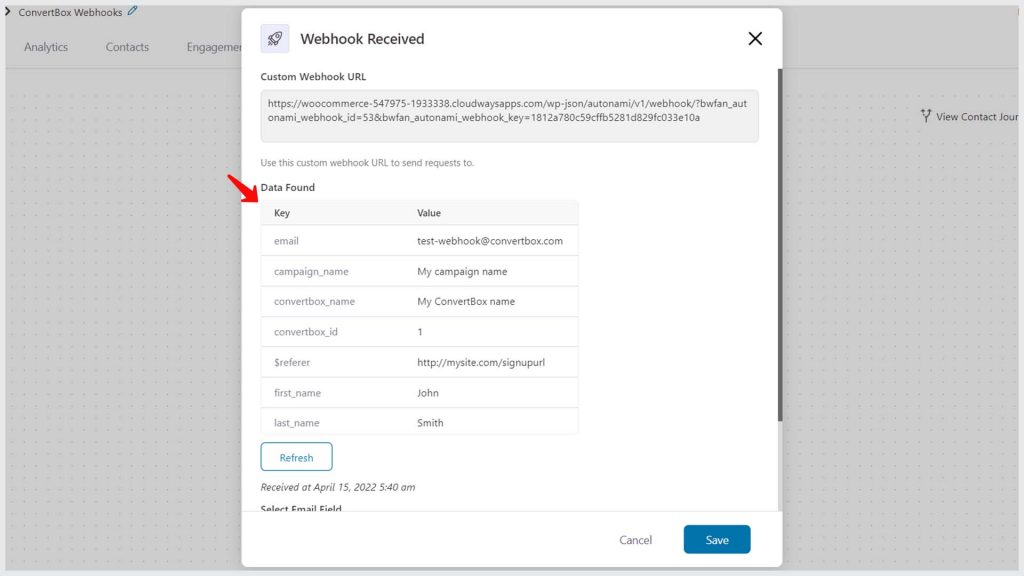
You can see the test data gets captured here.
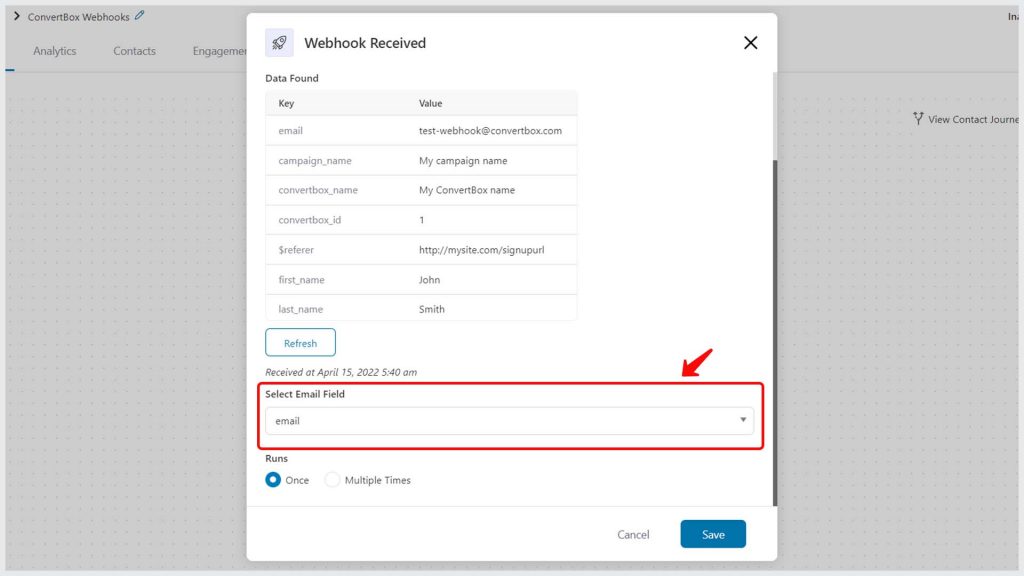
Map the email field on your form with FunnelKit Automations.
Step 7: Set the action "Create Contact" in your automation
Add the direct action - Create Contact in your automation.
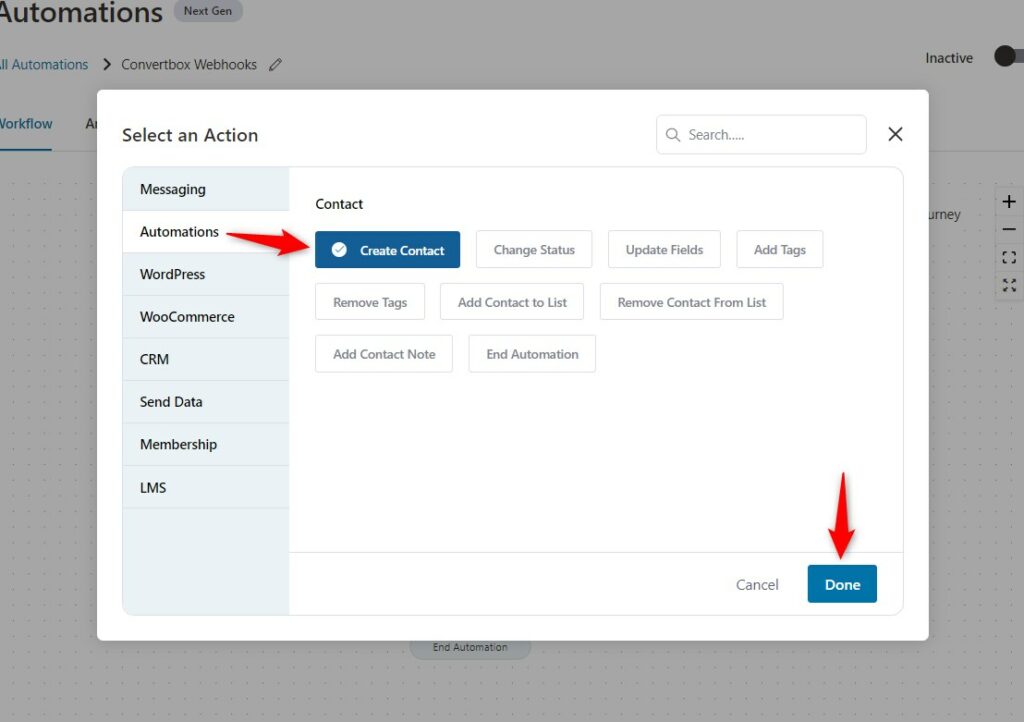
Click on Done.
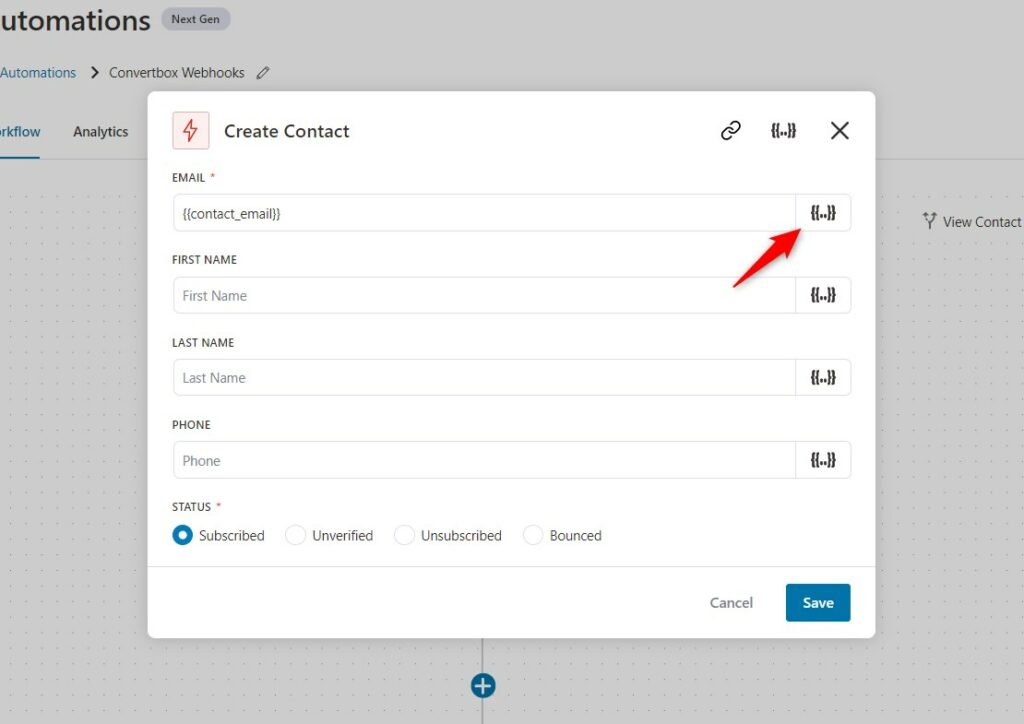
Step 8: Enter the field name using merge tags
To enter the field name, click on Merge tags.
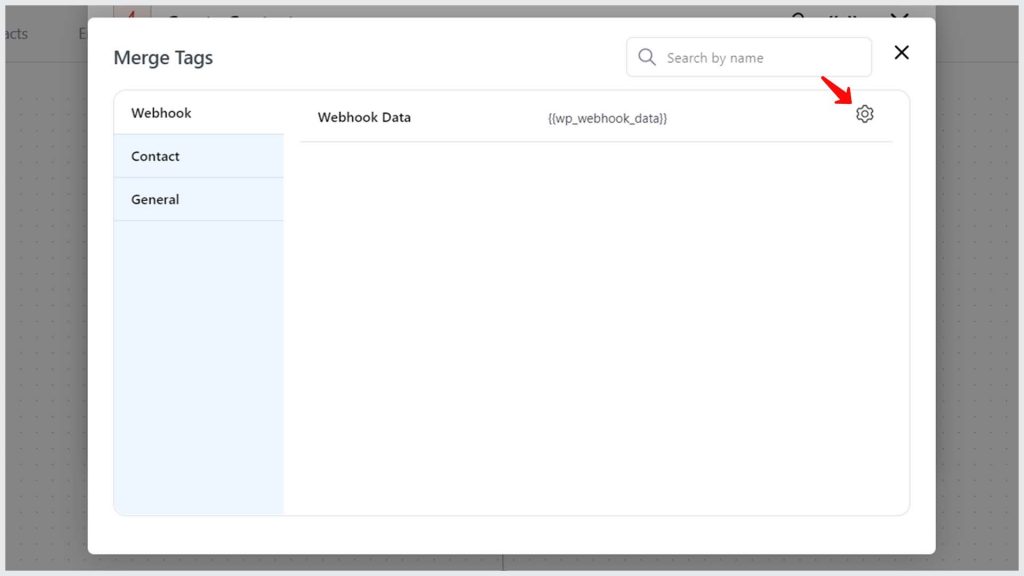
Click on Configure next to Webhook Data.
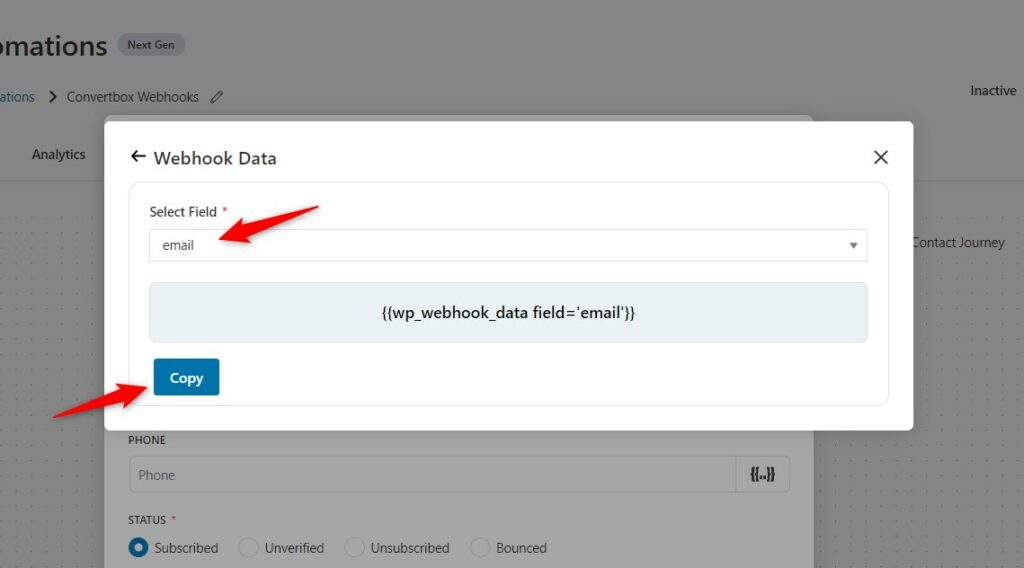
Select email and copy the merge tag.
Now, paste the copied merge tag to the field.
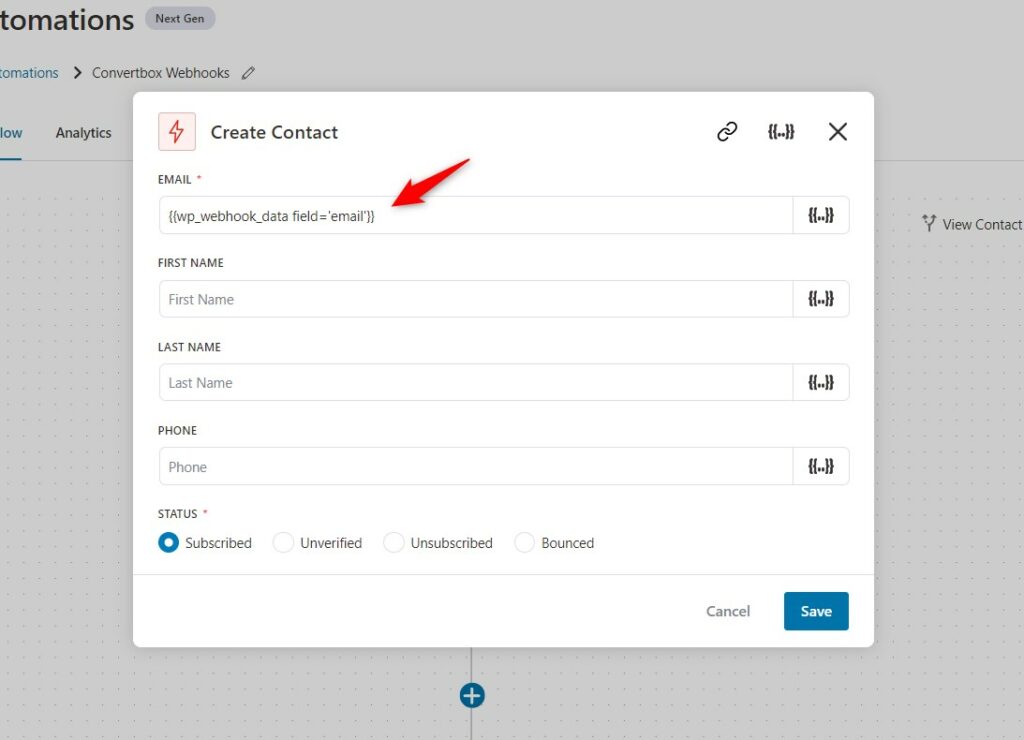
Once done, click on Save.
Step 9: Add tags to the contacts (Optional)
Create a new action - Add tags.
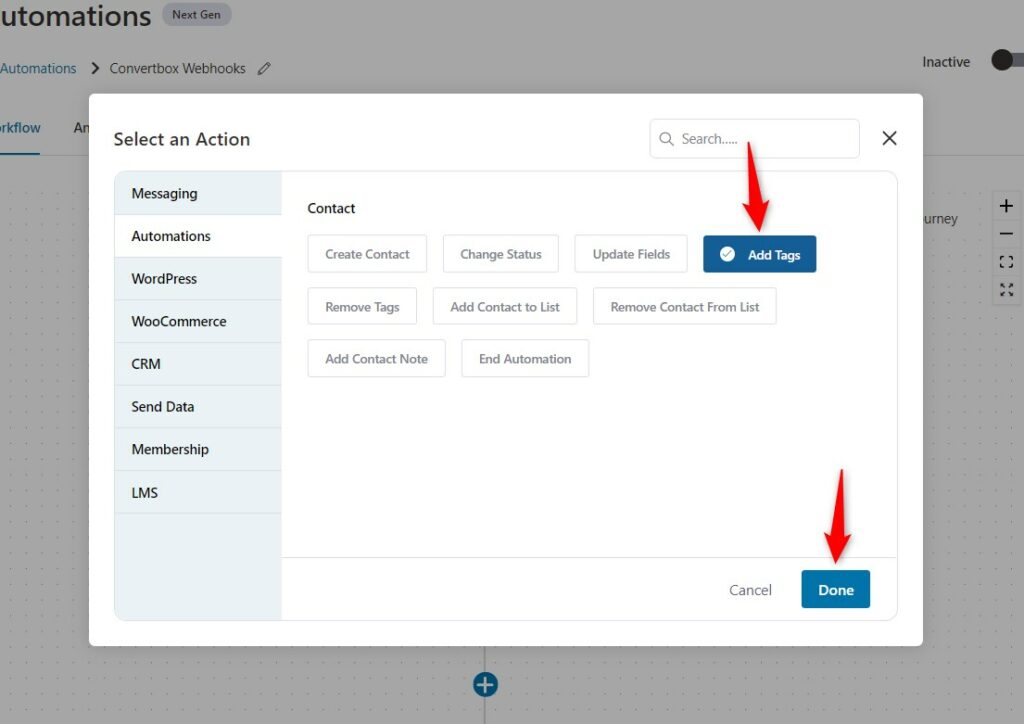
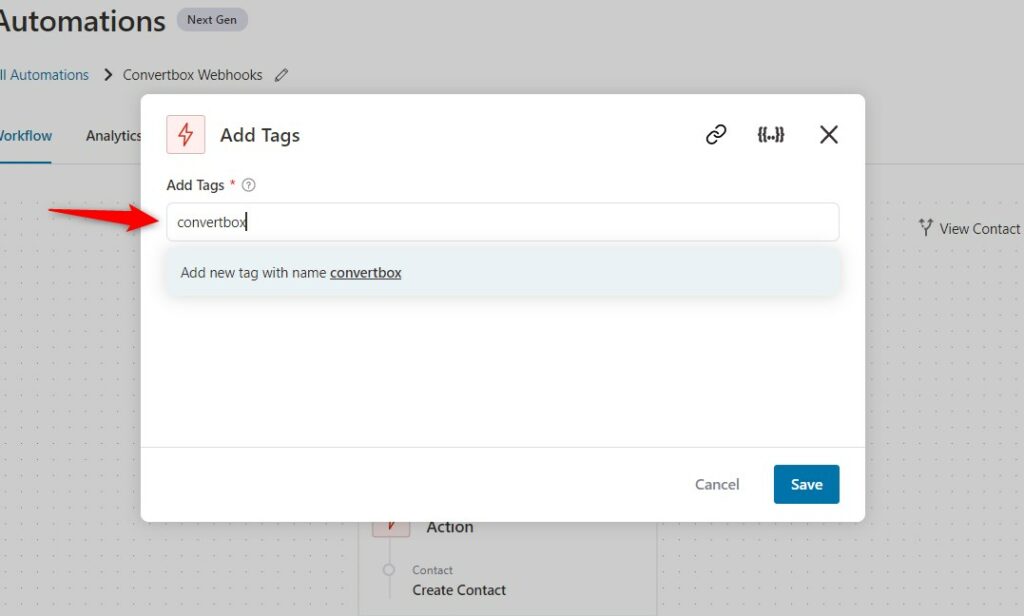
Now add a tag to your contacts.
Step 10: Update the custom fields (Optional)
You can also update any number of fields using FunnelKit Automations.
Click on Add Action and select Update Fields.
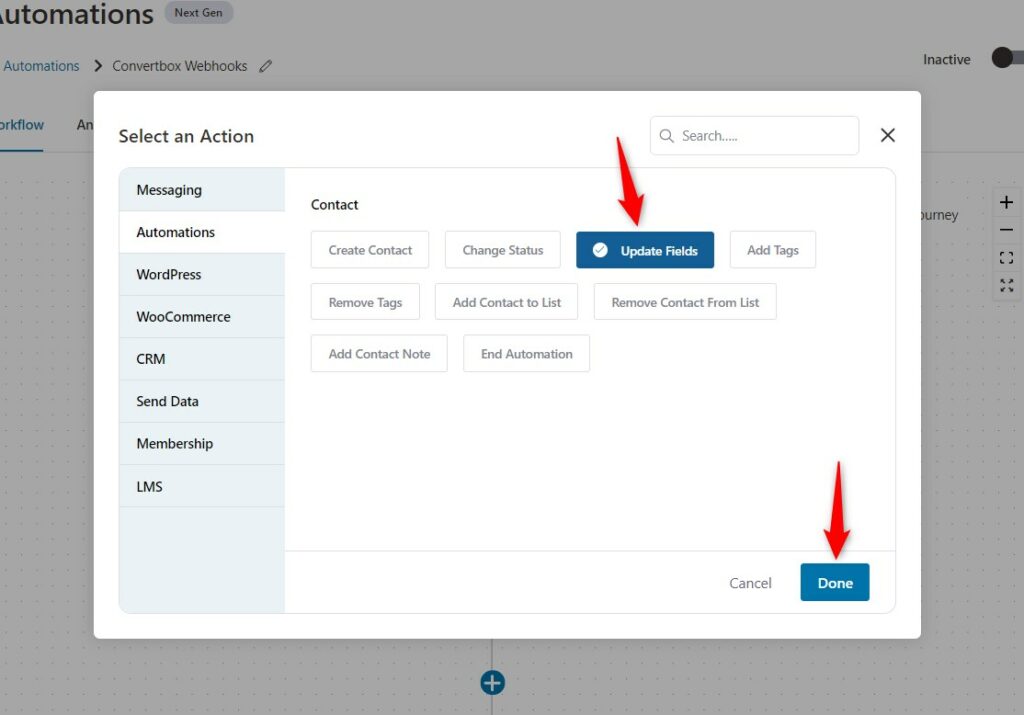
Click on Done.
You can select your custom fields to populate your webhook data.
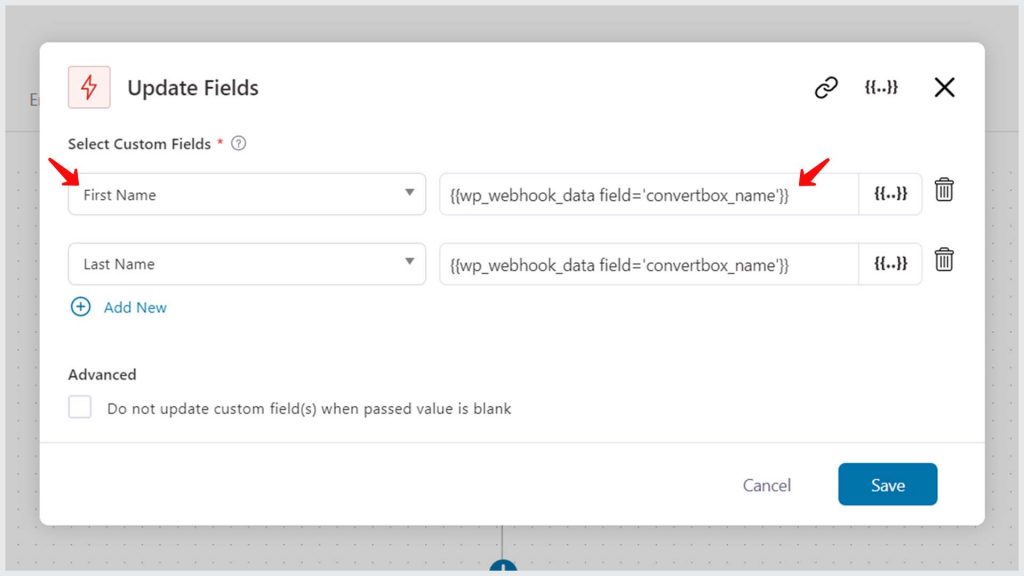
Click on the Save button when done.
Step 11: Make the Automation live
Turn the toggle to active.
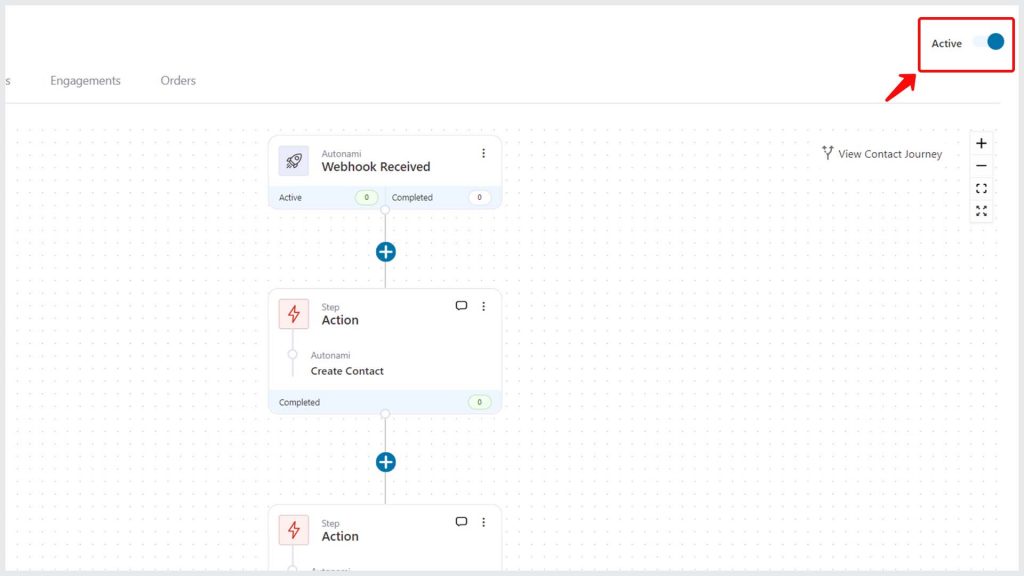
Well done! Your automation is live and running.
You've successfully integrated Convertbox with FunnelKit Automations using webhooks.
Now when someone fills the specified form on Convertbox, their contacts will be created in FunnelKit Automations using data received from the webhook. Also, a 'convertbox' tag will be added to these contacts.


