FunnelKit Automations’ new visual email builder allows you to design beautiful emails using pre-designed templates.
It has a WooCommerce product block that lets you offer upsells and cross-sells to your contacts via email.
This product block simply fetches products from a WooCommerce store to use them in emails.
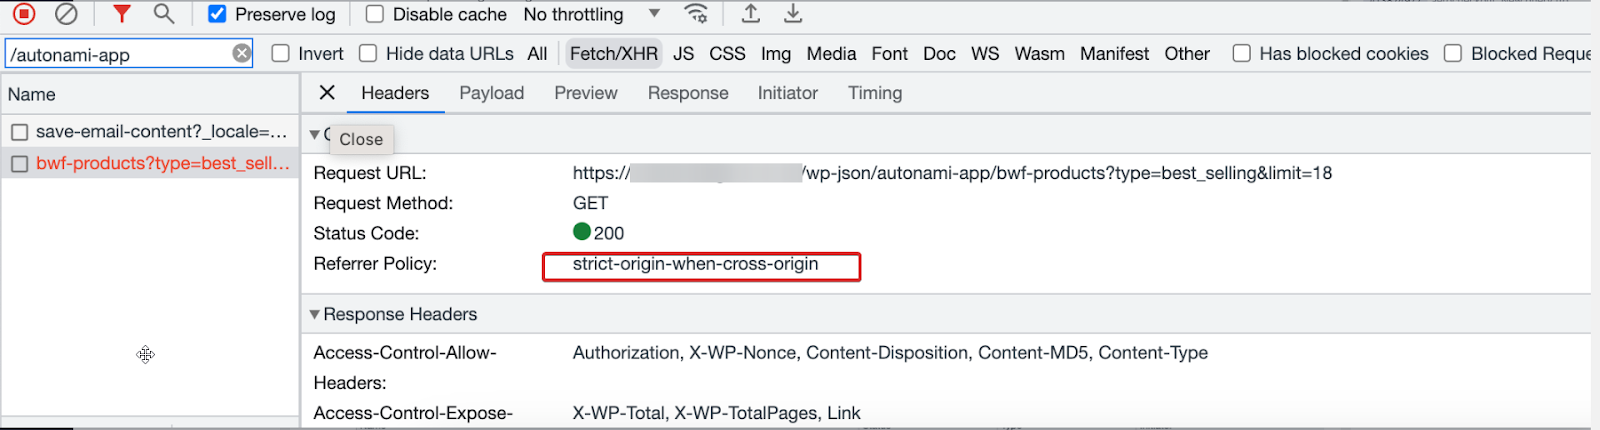
There is a strict origin policy that needs to be relaxed, or the domain needs to be allowed: https://app.wpmailkit.com.
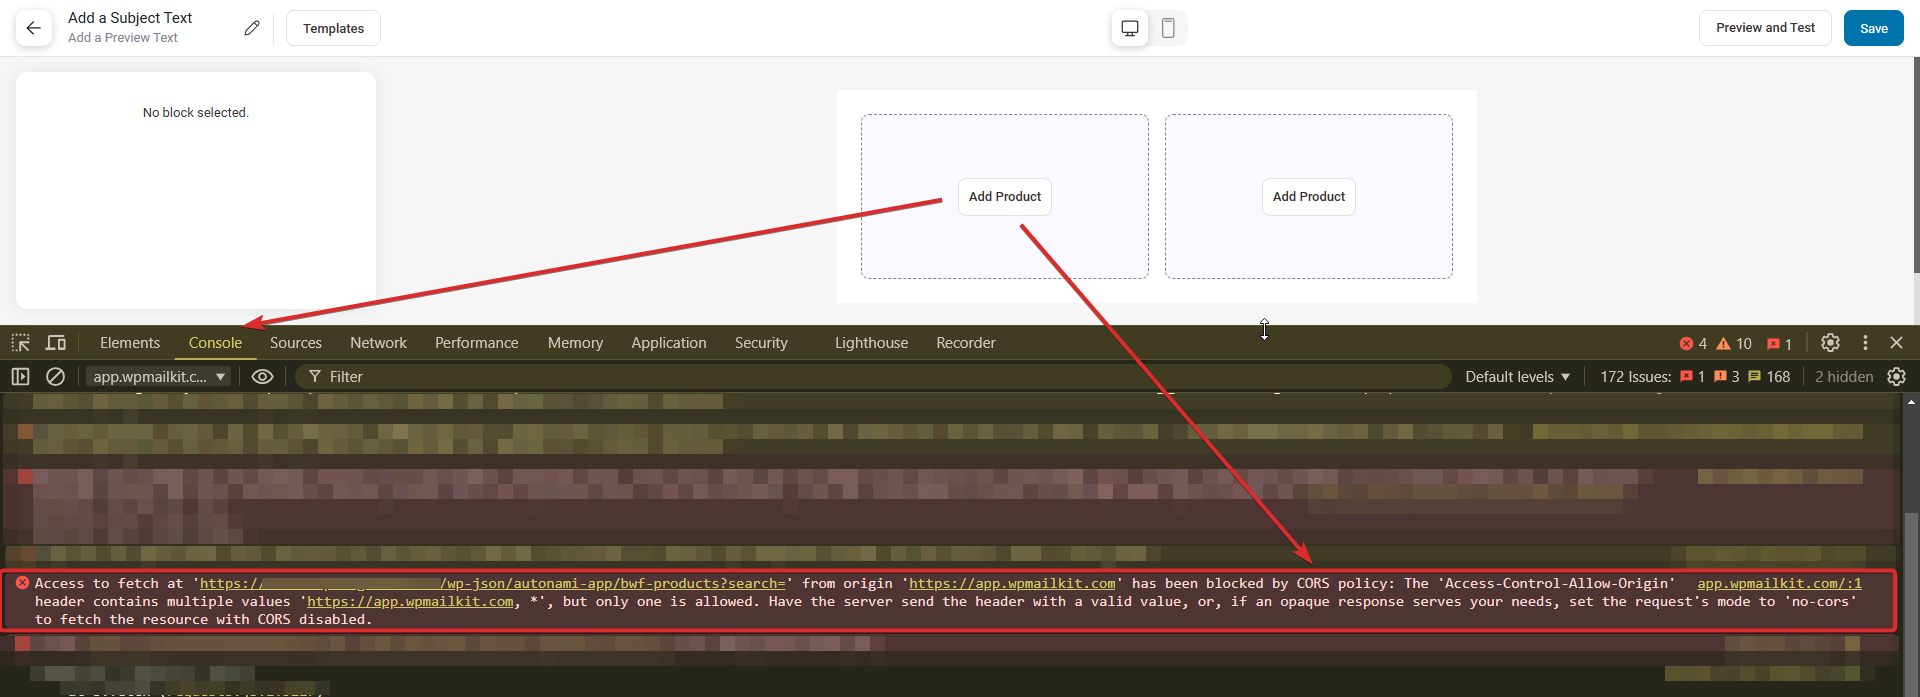
This ultimately gives you the CORS error like this:
You may also witness such an error while adding images to the email, trying to save a layout, or performing any other action that requires our API call to be fired to fetch the required data from the server.
This error comes from the server’s end, not from FunnelKit Automations. It ultimately impacts your website’s email-building capabilities.
To detect the issue, right click and hit Inspect on your web browser. Head over to the Console tab, you’ll see the error code: CORS (in this case)
On clicking on the Network tab, you’ll see the complete details of the CORS error.
Method 1: Contact Your Host
Here are a few steps to resolve the CORS error on your website.
- Add the following lines to your website’s .htaccess file:
<IfModule mod_headers.c>
Header set Access-Control-Allow-Origin "*"
</IfModule>- In case you don’t have access to .htaccess file, you can easily create one and then add the above lines to start using CORS.
- In case, you want to define the cross-origin headers in a PHP file, use the following code:
<?php
header("Access-Control-Allow-Headers: Authorization, Content-Type");
header("Access-Control-Allow-Origin: *");
header('content-type: application/json; charset=utf-8');
?>
📝 Note: Please note that CORS needs to be added to the origin source for the resources to load properly.
We highly recommend sharing this information with your hosting provider team and asking them to perform these steps.
Method 2: Set Up a CORS Plugin
This is an alternative solution to fix the CORS error other than contacting your host.
Make sure to install and activate the EnableCORS plugin on your website.
Open the plugin and configure the following options:
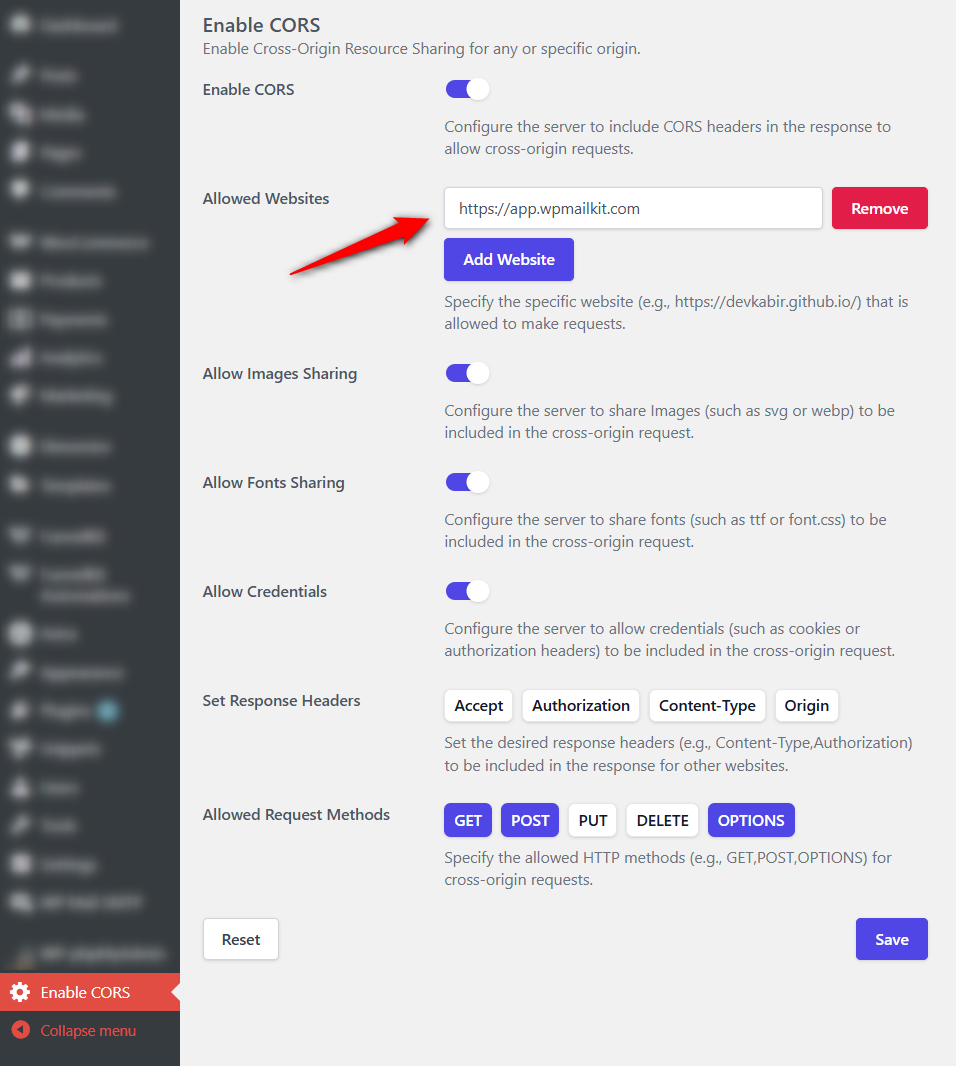
- Enable CORS: Enable the CORS to allow cross-origin requests
- Allowed Websites: Enter the website(s) to allow them to make requests
- Allow Images Sharing: Enable this option to share images in the cross-origin request
- Allow Fonts Sharing: Enable this option to share fonts to be included in the cross-origin request
- Allow Credentials: Configure the server to allow credentials (such as cookies or authorization headers) to be included in the cross-origin request
- Allowed Request Methods: Specify the allowed HTTP methods for cross-origin requests.
Click on Save when done. Make sure to keep this plugin activated.
Now, when you insert a product block and add an item, there will be no CORS error on your website.
This is how you can resolve the CORS error on your website and effortlessly create beautiful emails.


