Contact Form 7 is a WordPress plugin that lets you create forms to help you capture leads and grow your business.
FunnelKit Automations integrates with Contact Form 7 and helps you set up well-crafted campaigns using smart automations.
Let's think of a situation, we will be creating a sign-up form using Contact Form 7 and collect the data from subscribers related to which products they are interested in.
Then accordingly we will send them follow-up emails using FunnelKit Automations.
For this, you need to install the Contact Form 7 plugin on your WordPress site.
Let's start building this automation.
Step 1: Create a new form using Contact Form 7
Under Contact Forms, click on Add New.

Create your form using the template provided by Contact Form 7.

We have created a form and embedded the shortcode on the page:

Step 2: Create new automation and Select ‘Form Submits’ from list of events
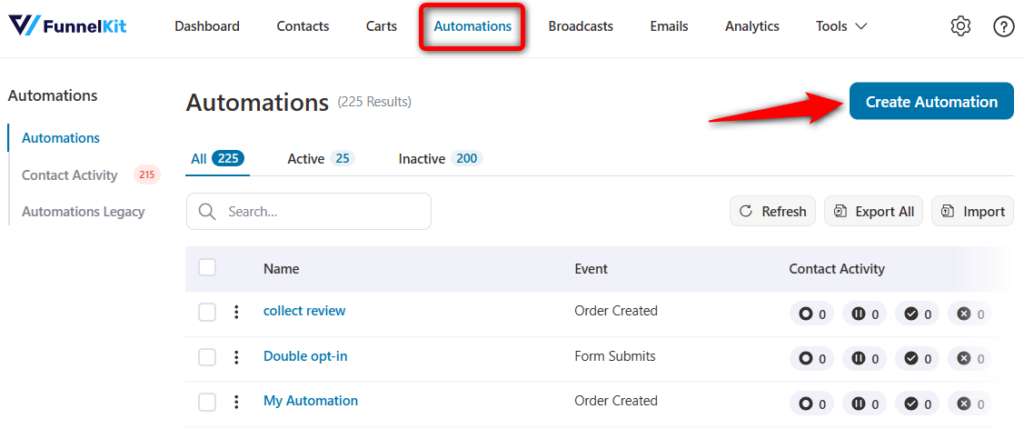
Go to Campaigns ⇨ Automations (Next Gen) and click on Create Automation.
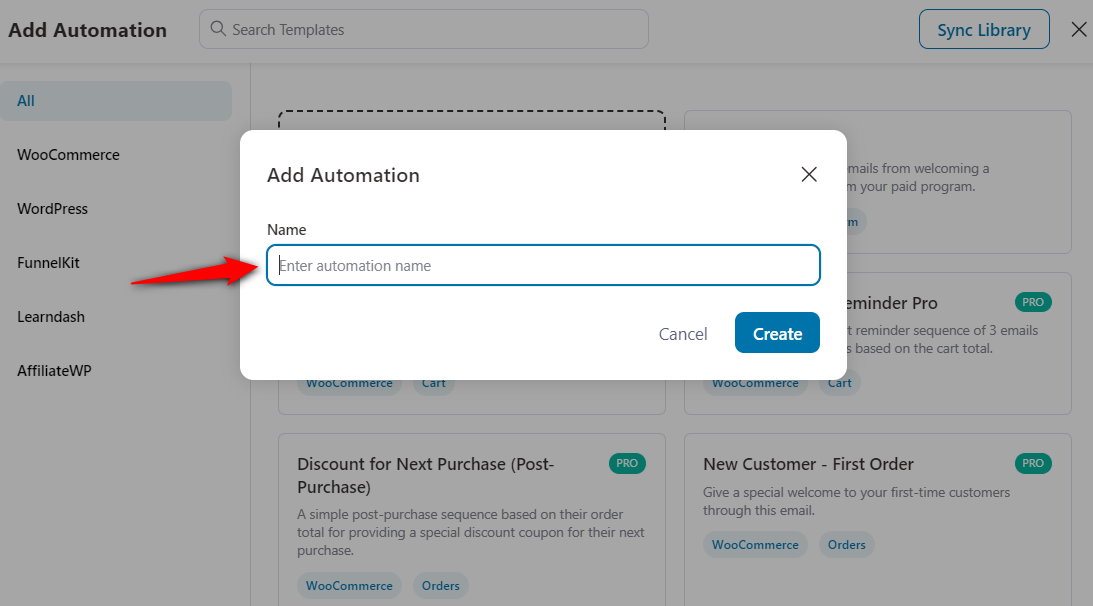
Select 'Start from scratch' and enter the name of your automation.
Add your event trigger - Form Submits under Form.
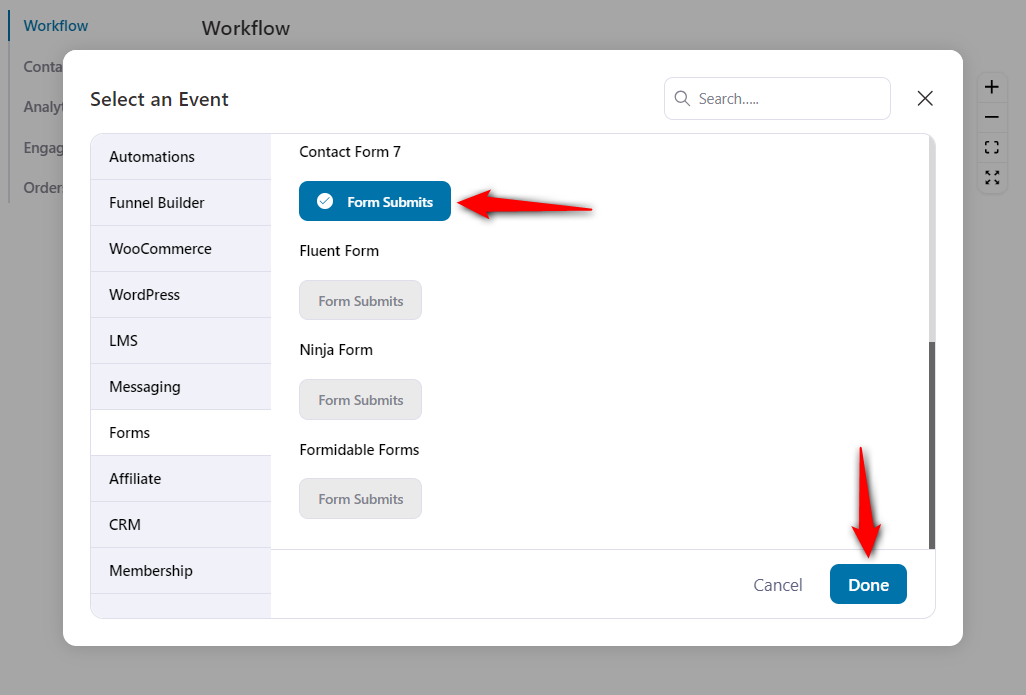
Click on Done.
Step 3: Select the form and map the field
You’ll see the lists of forms under Contact Form 7. Select the one that you've created.
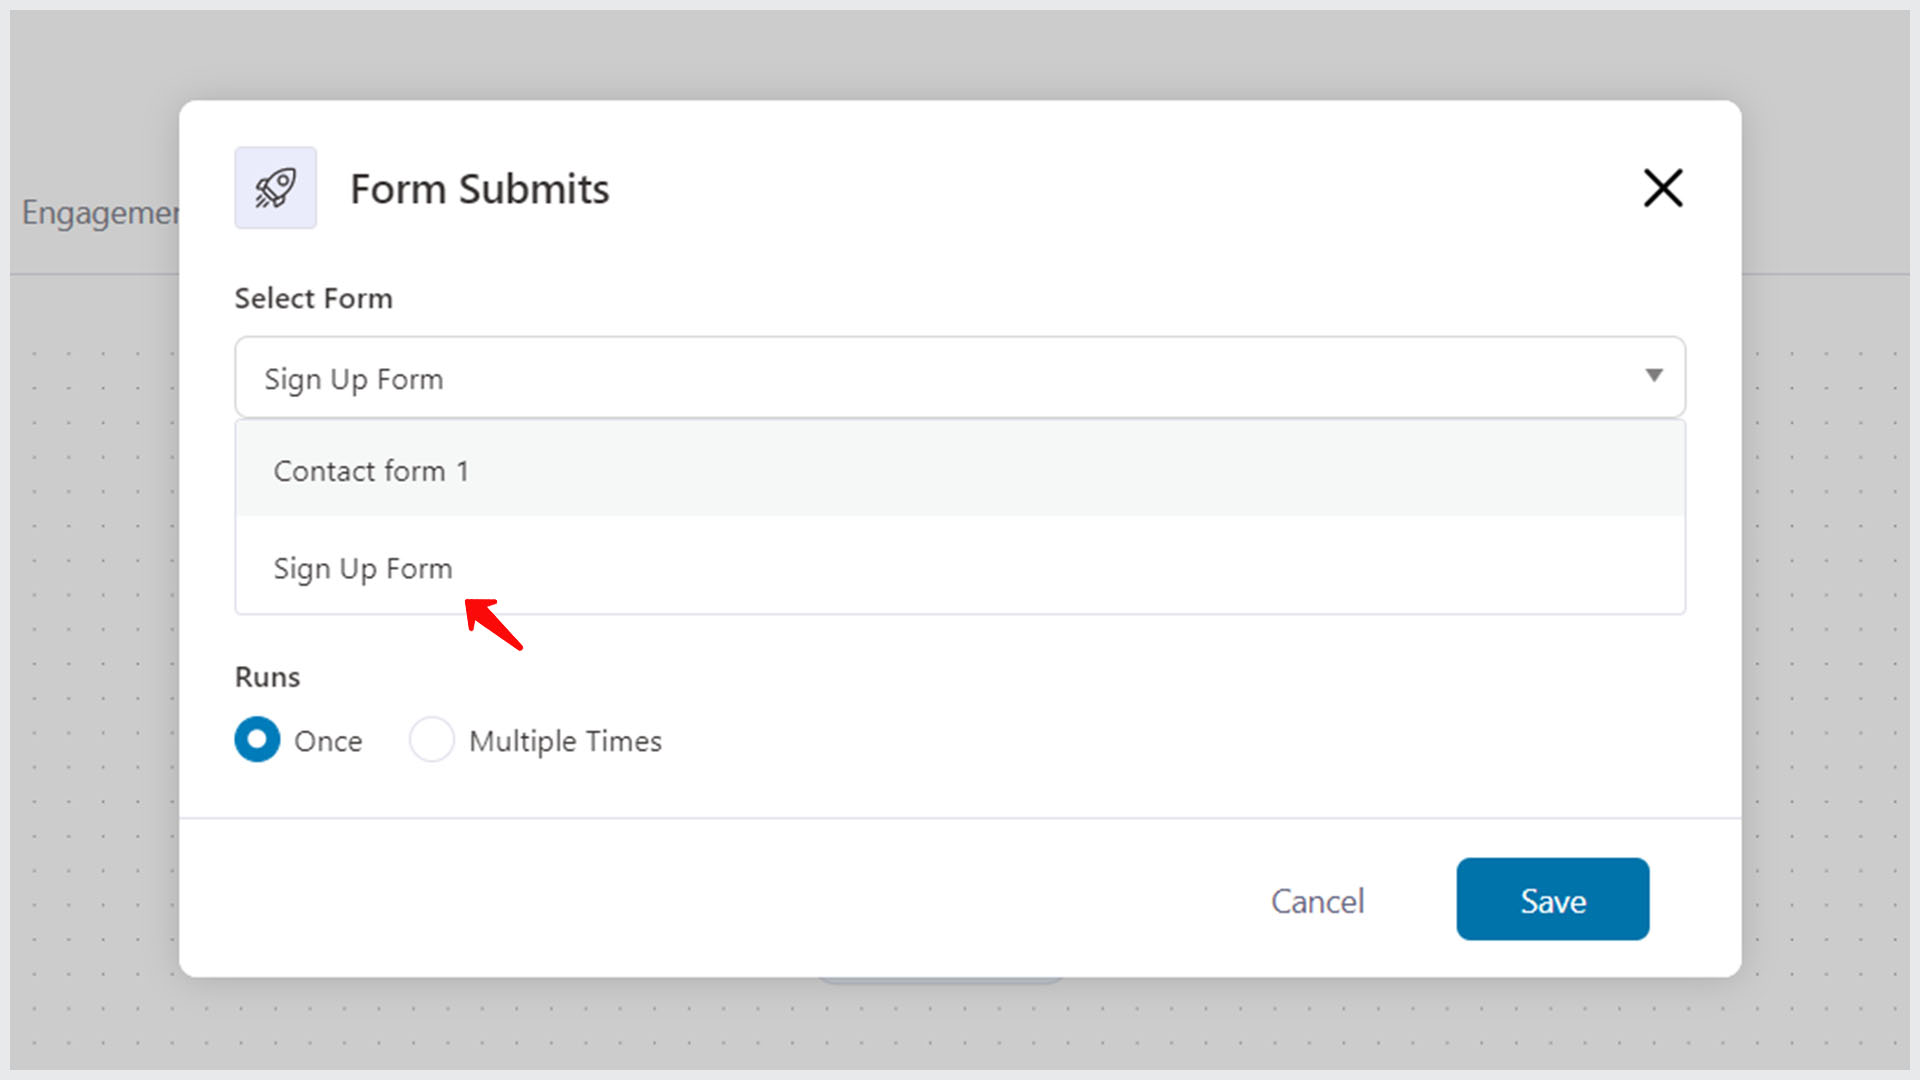
Now, map the email field.
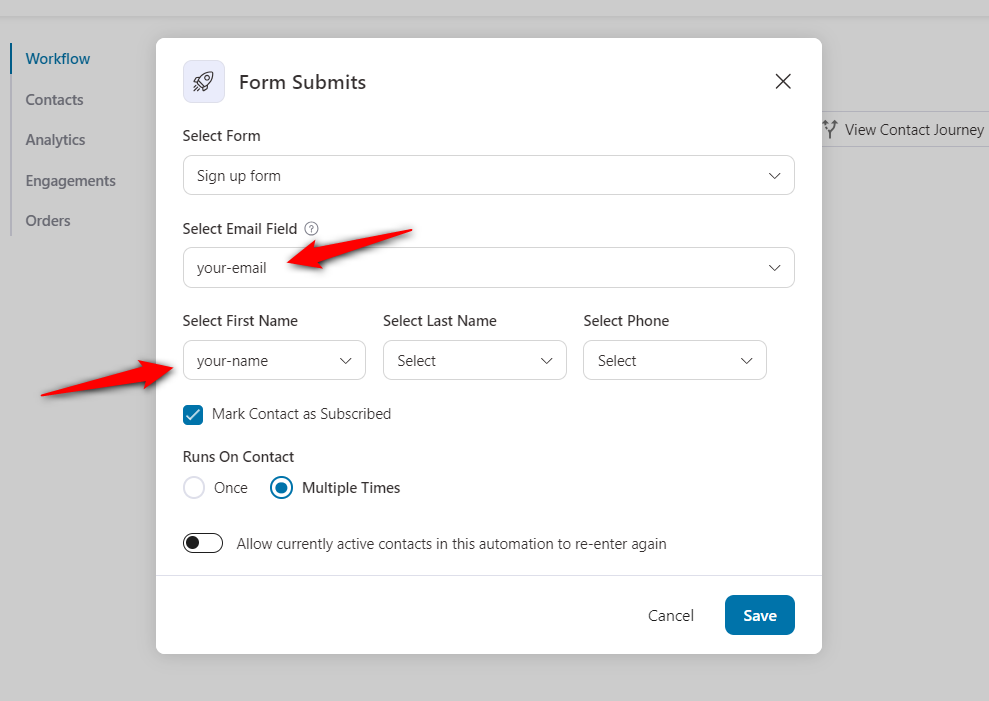
Once done, click on Save.
Step 4: Set up rules for your automation
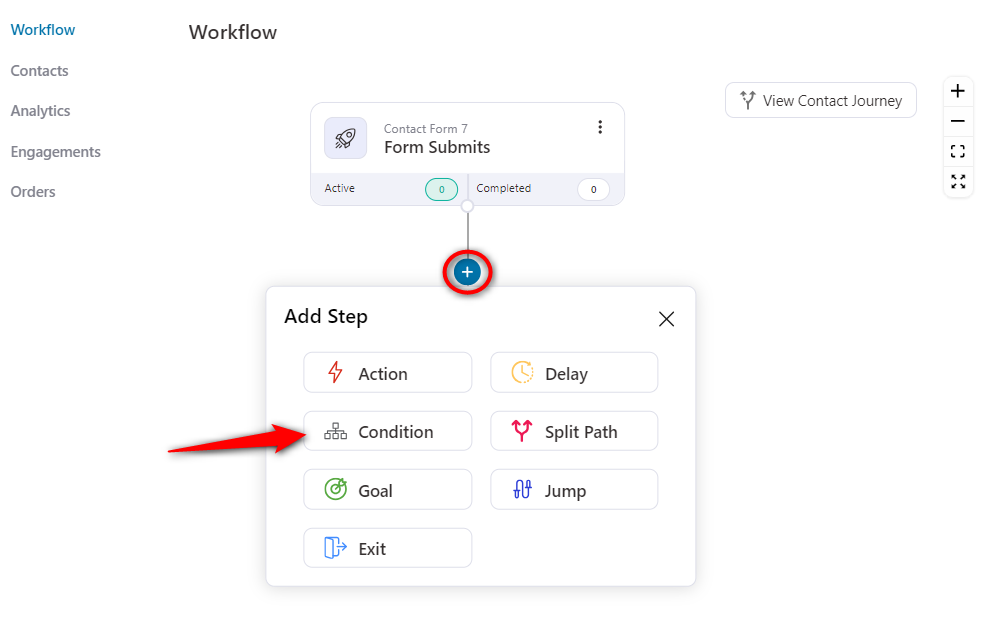
Click on the '+' icon and add Condition to set up rules for this automation.
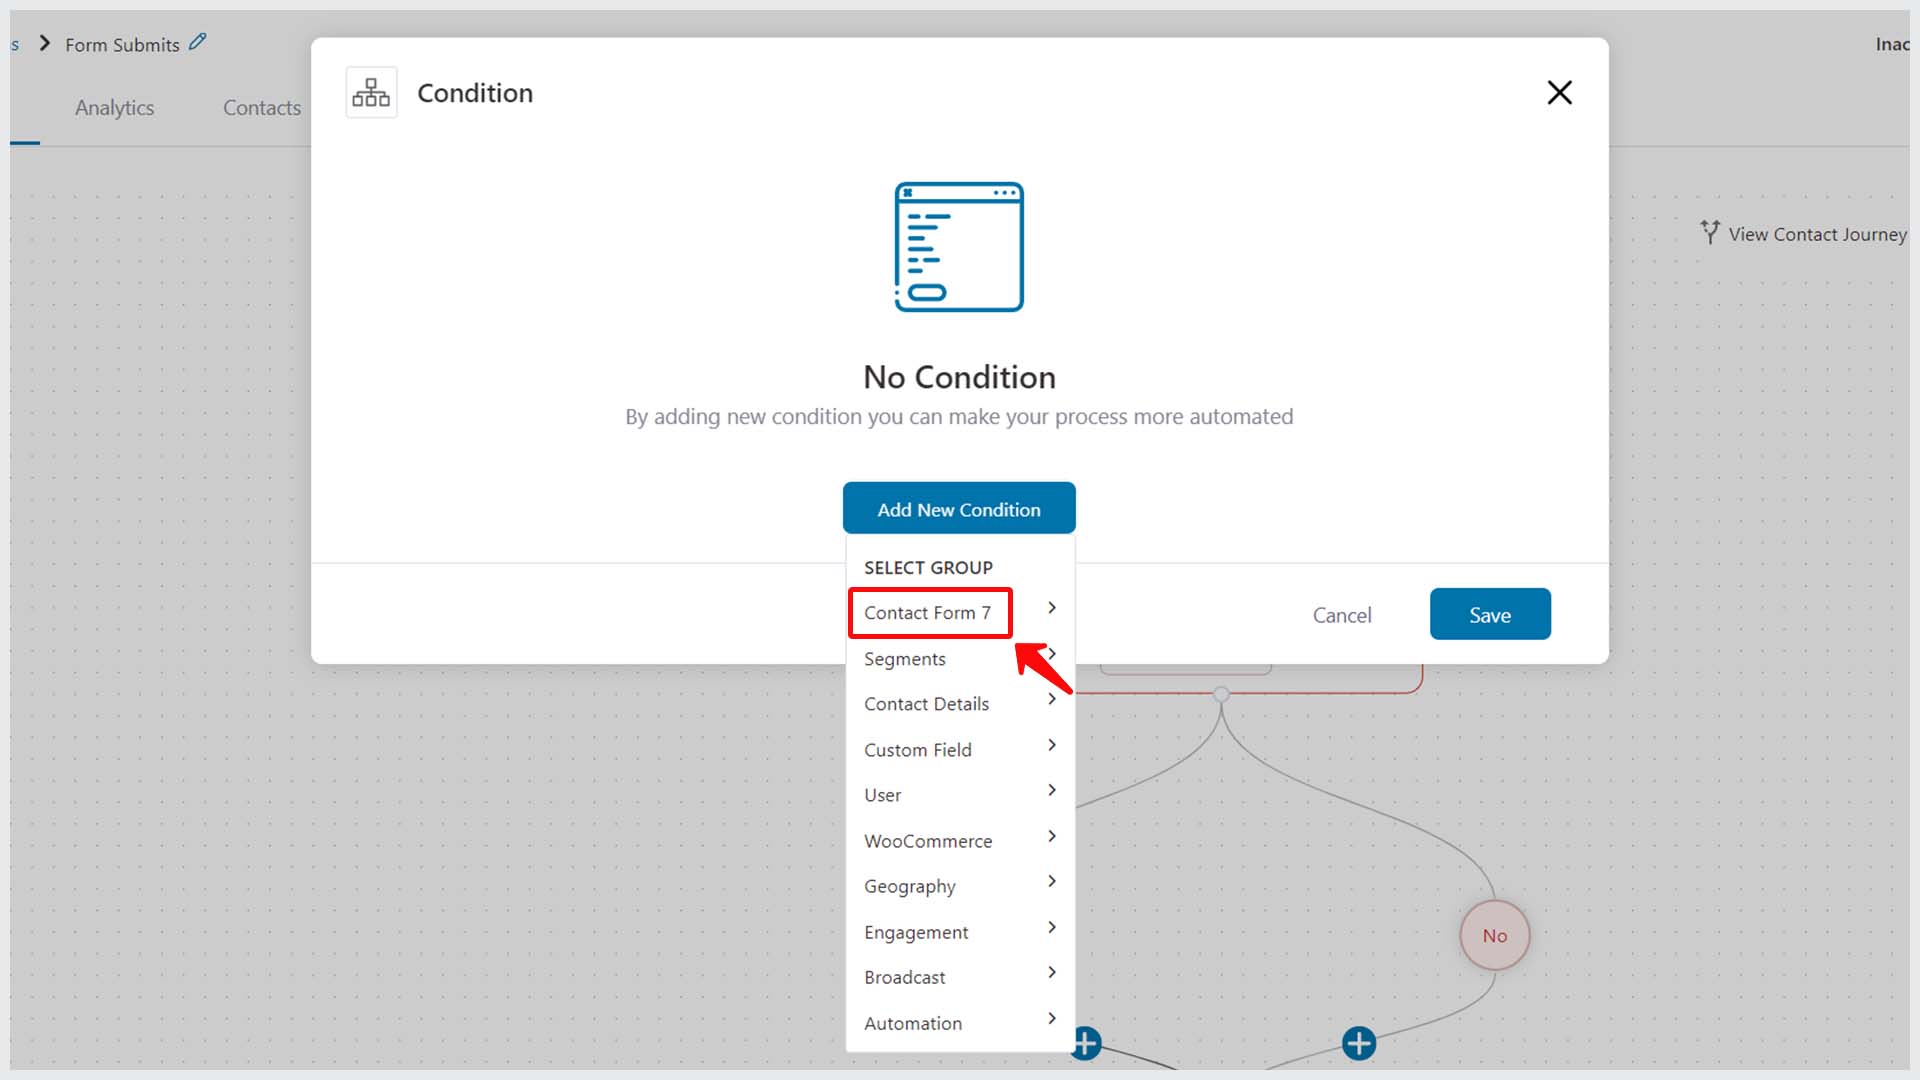
Select the rules by clicking on Add New Condition.
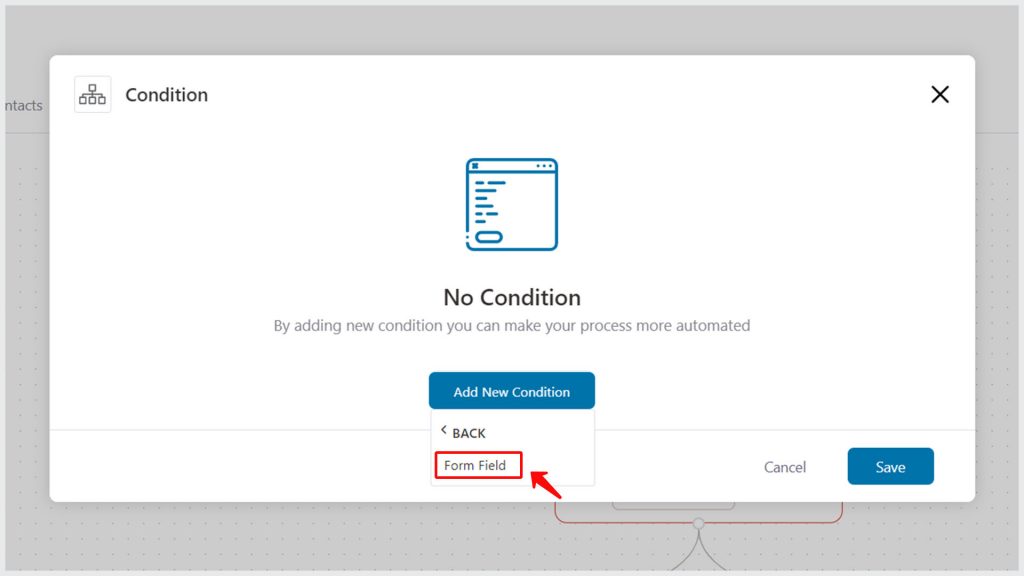
Click on the Form Field.
So, we will set the radio button field and their selected option as one condition.
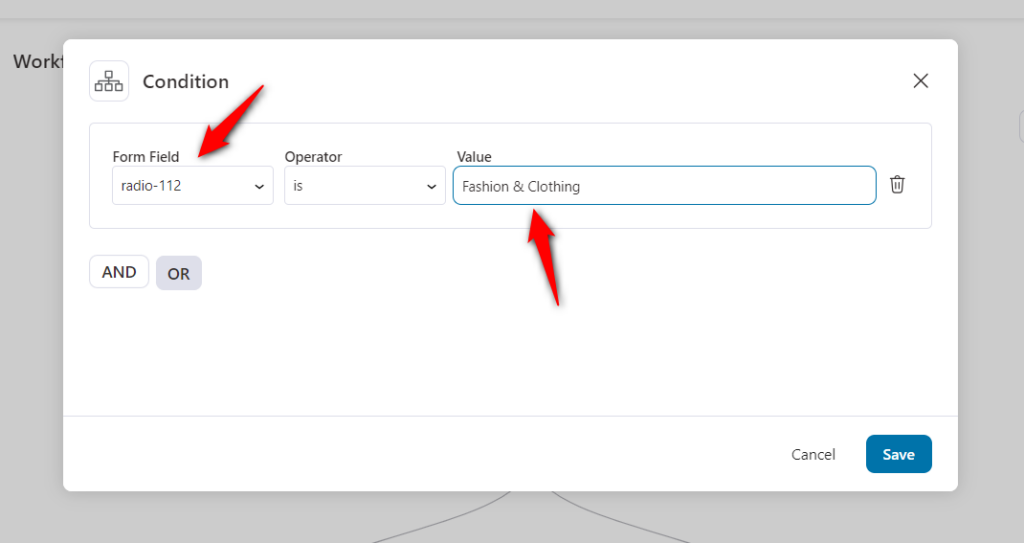
Note that the value mentioned here should exactly match the ones in the form.
Step 5: Select ‘Send Email’ as the action
Under the If-yes condition, add an Action.
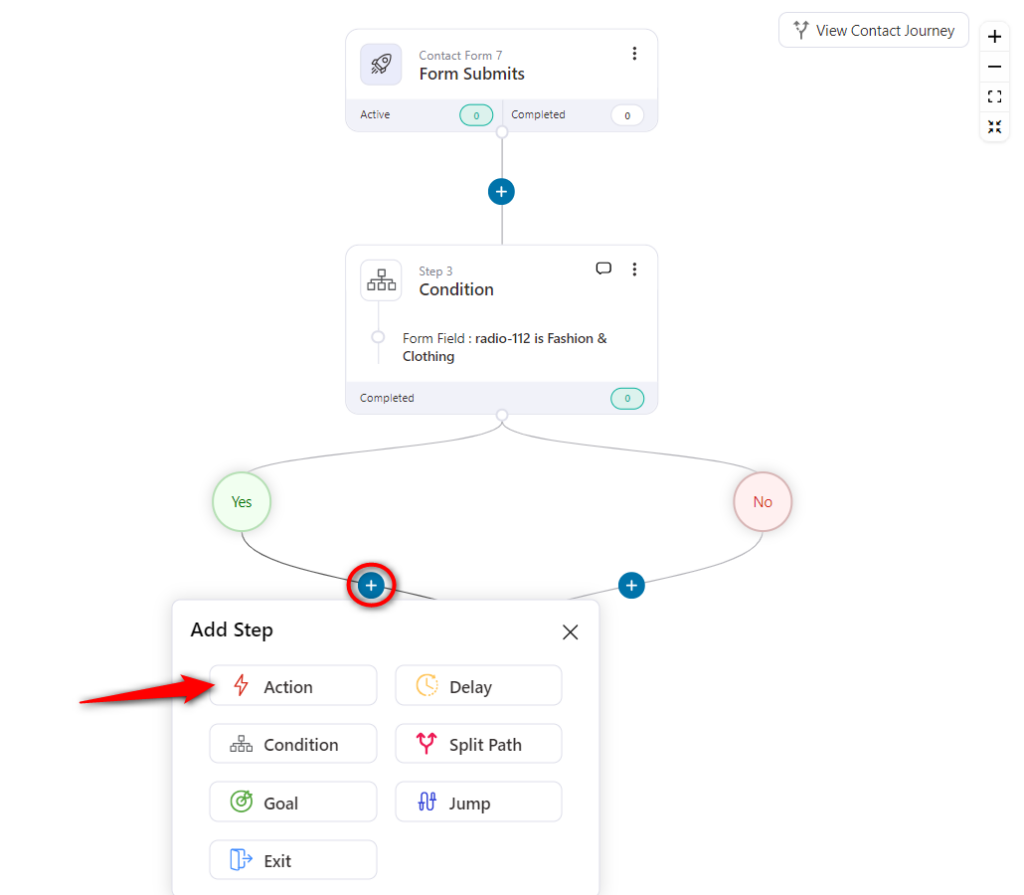
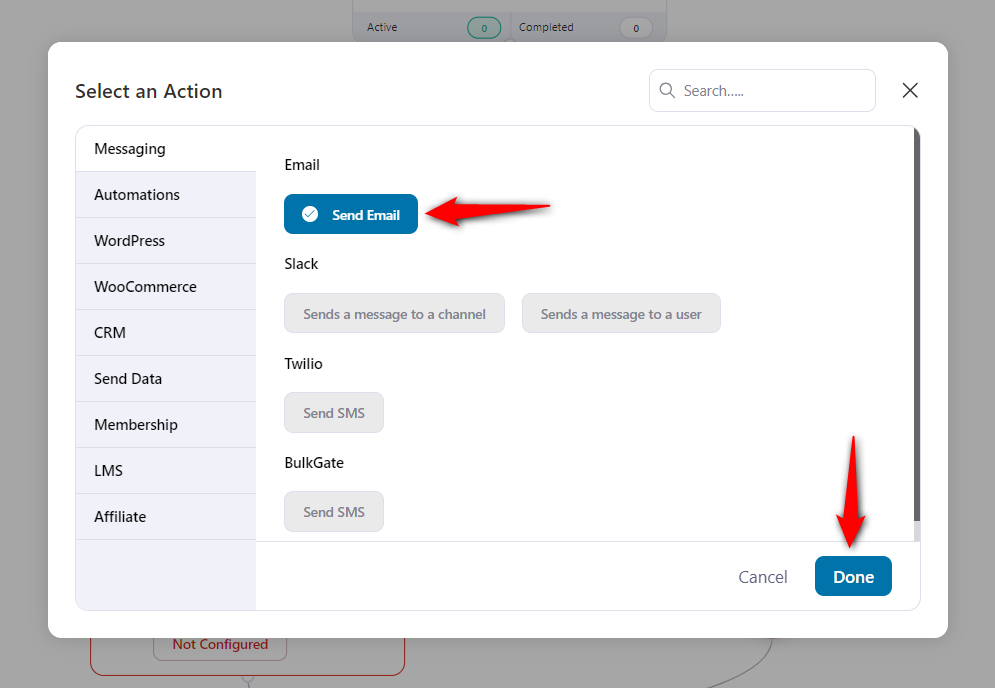
Choose Send Email under Messaging as shown here:
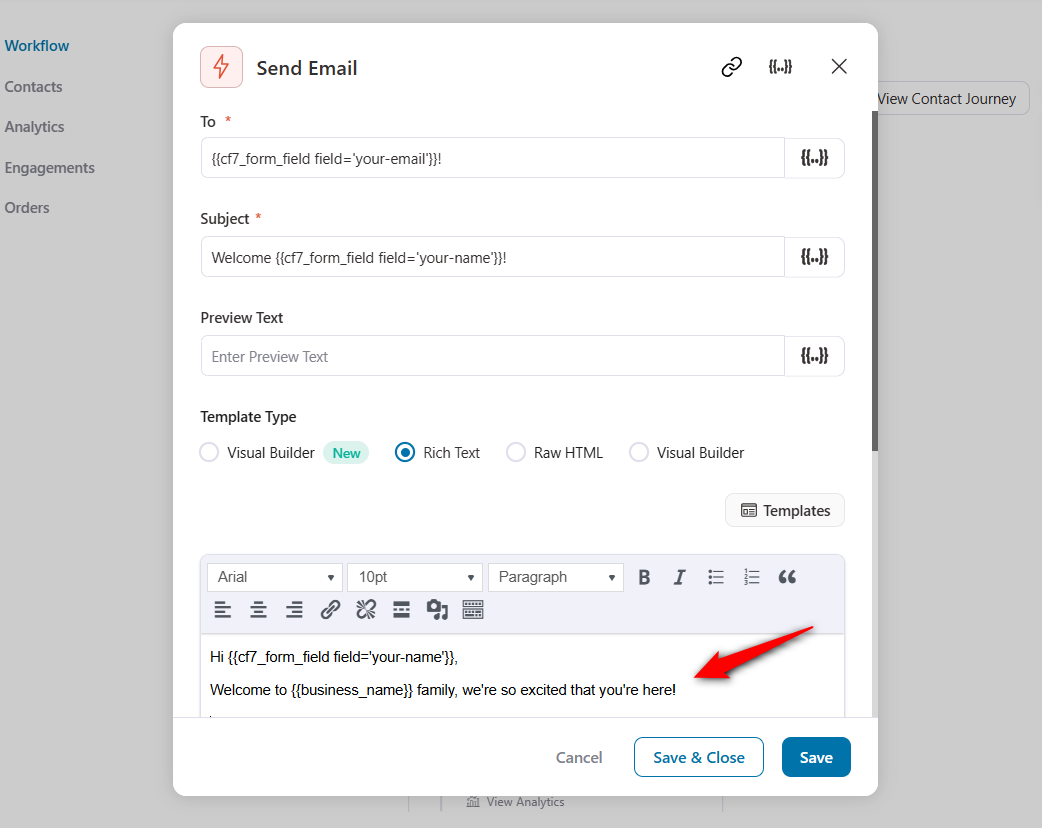
Now, craft your email body. You can use pre-designed email templates to customize and design your emails with the enhanced email builder or simply go with simple text emails.
You can create a personalized message using a number of merge tags.
Take a look:
Step 6: Set rest of the conditions
Set the rest of the conditions as per your sign-up form to send out the relevant follow-up emails to the chosen category.
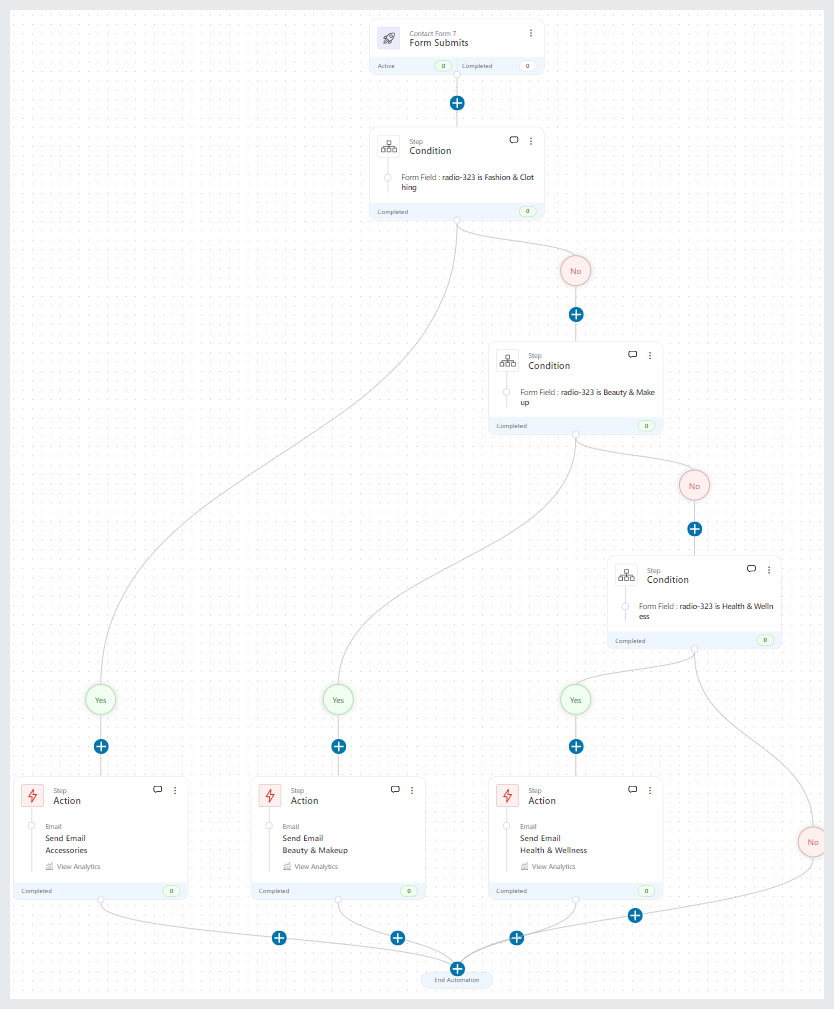
There is no limit to the condition you can set in an automation.
Step 7: Make your automation live
Turn the toggle to Active.
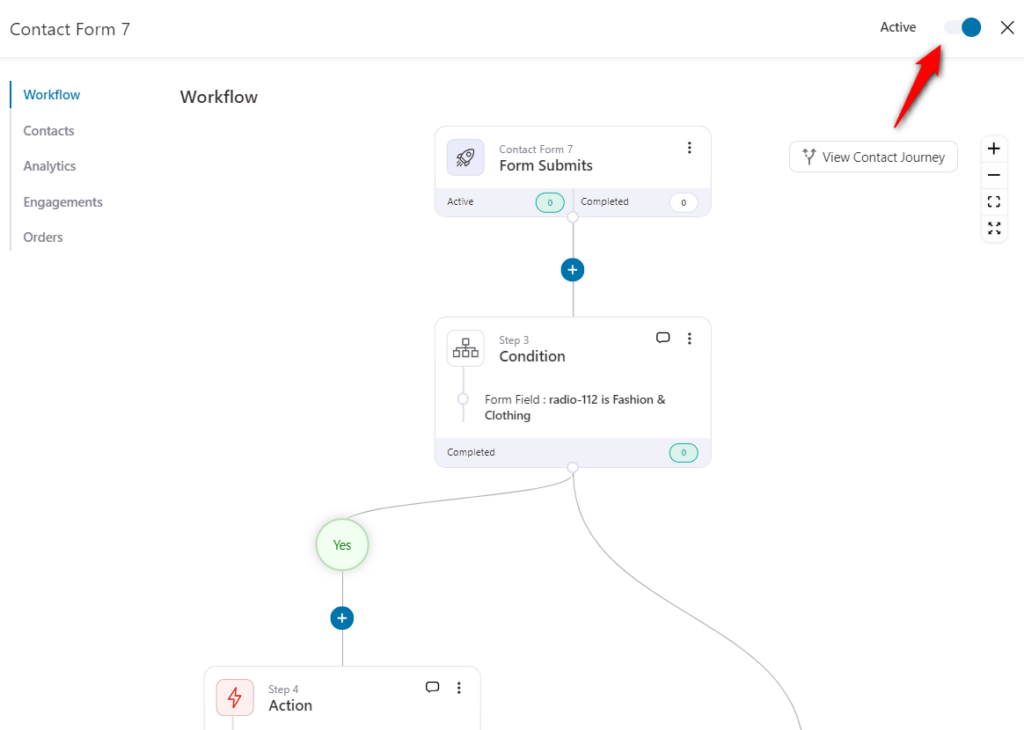
Your automation is live and running.
Now when any user signs up to your form and selects one of the product categories, it'll send the particular email you assigned to them.
Well done! You've successfully set up an automation using Contact Form 7 in FunnelKit Automations.


