Fluent Forms is a WordPress plugin that lets you capture leads using forms for your website.
FunnelKit Automations integrates perfectly well with Fluent Forms. In order to work with the Fluent Forms, make sure you've installed the plugin on your WordPress site.
Let’s consider a scenario where a user submits a form and chooses a specific option provided in that form, we will send them a follow-up email.
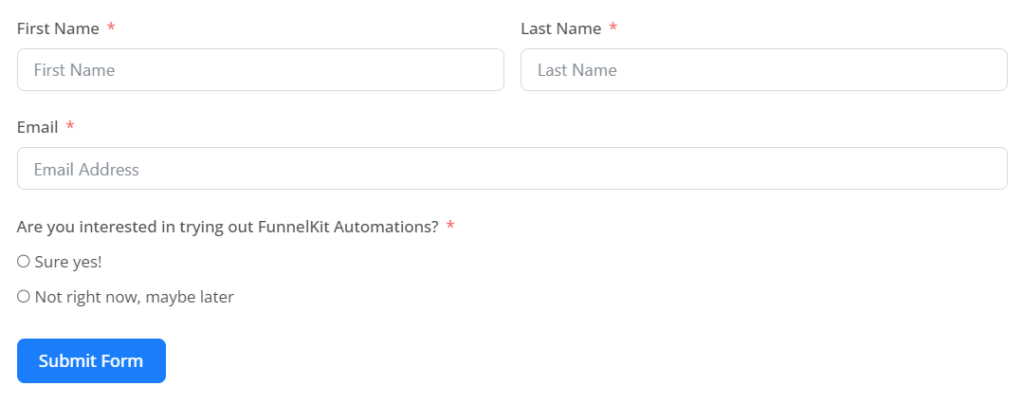
So if they select “yes” for the question - ‘Are you interested in FunnelKit Automations?” - then we'll send an email informing them more about it.
Let's learn how to build this automation using Fluent Forms.
Step 1: Create a new form using Fluent Forms
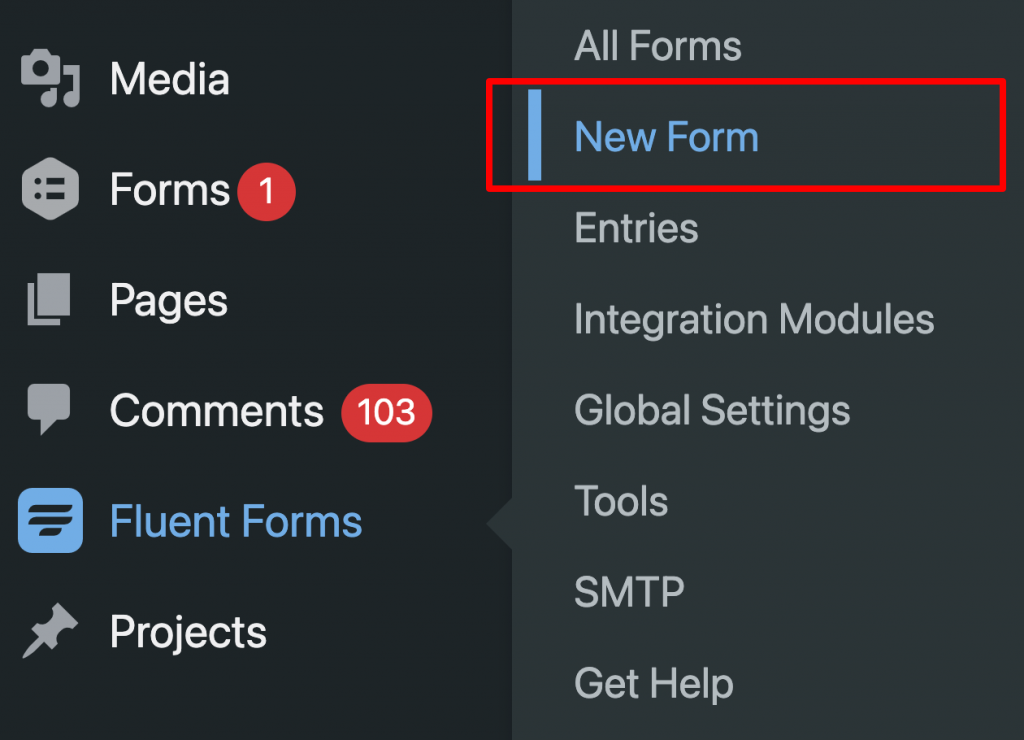
Under Fluent Forms, click on New Form.
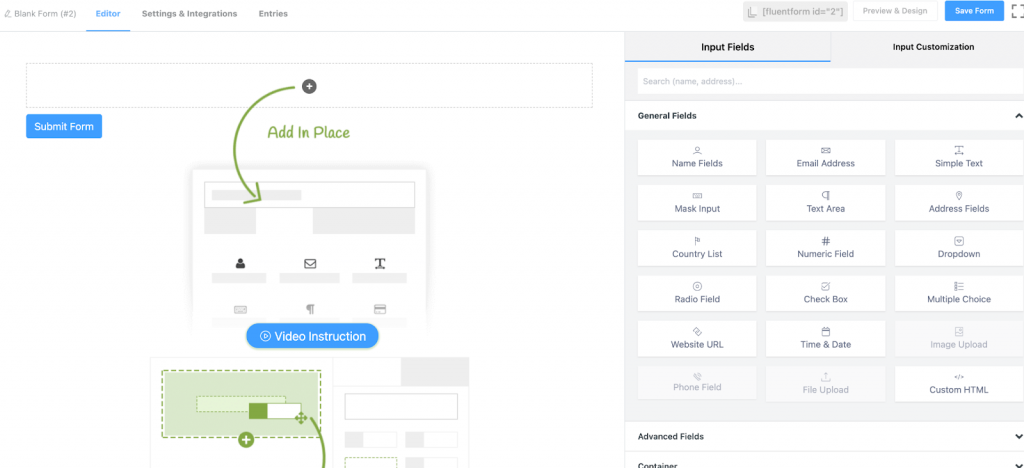
Create your form using the drag and drop feature provided by Fluent Forms.
We have created a form like this:
Step 2: Add a new automation and Select ‘Form Submits’ from list of events
Go to Campaigns ⇨ Automation (Next Gen) and click on Add New Automation.
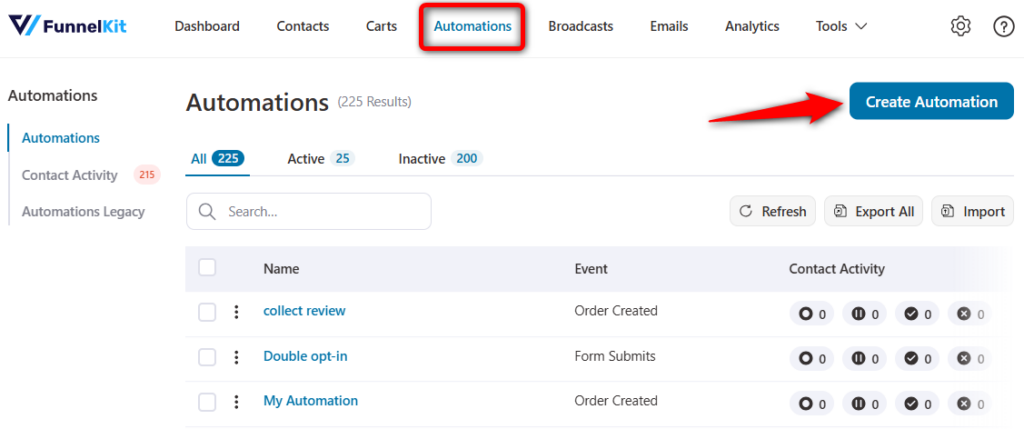
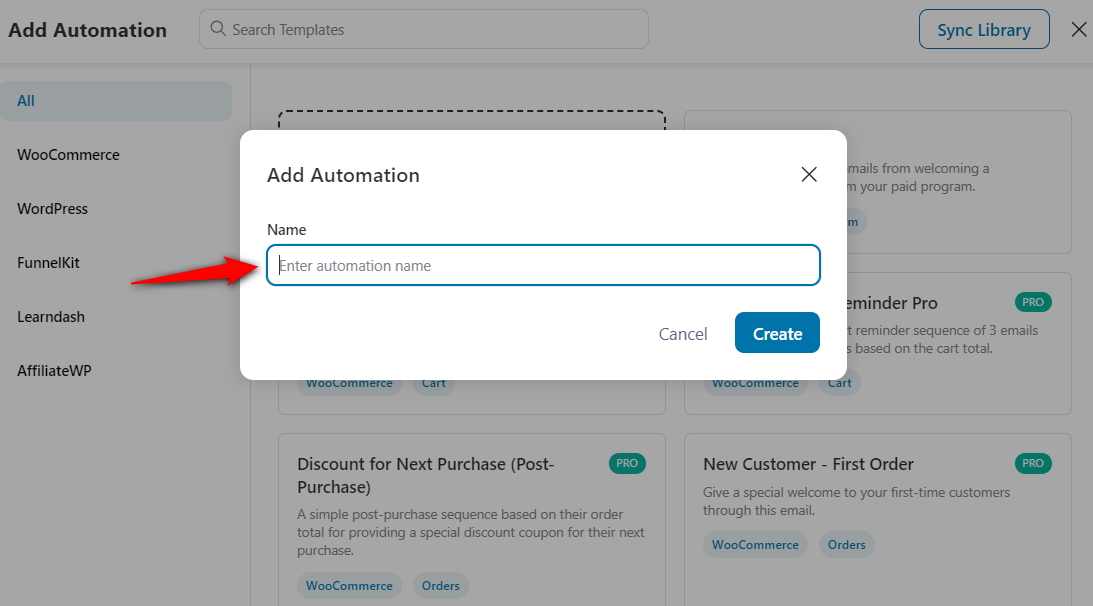
Click on Start From Scratch and name your automation.
Next, add your event trigger - Form Submits under Fluent Forms.
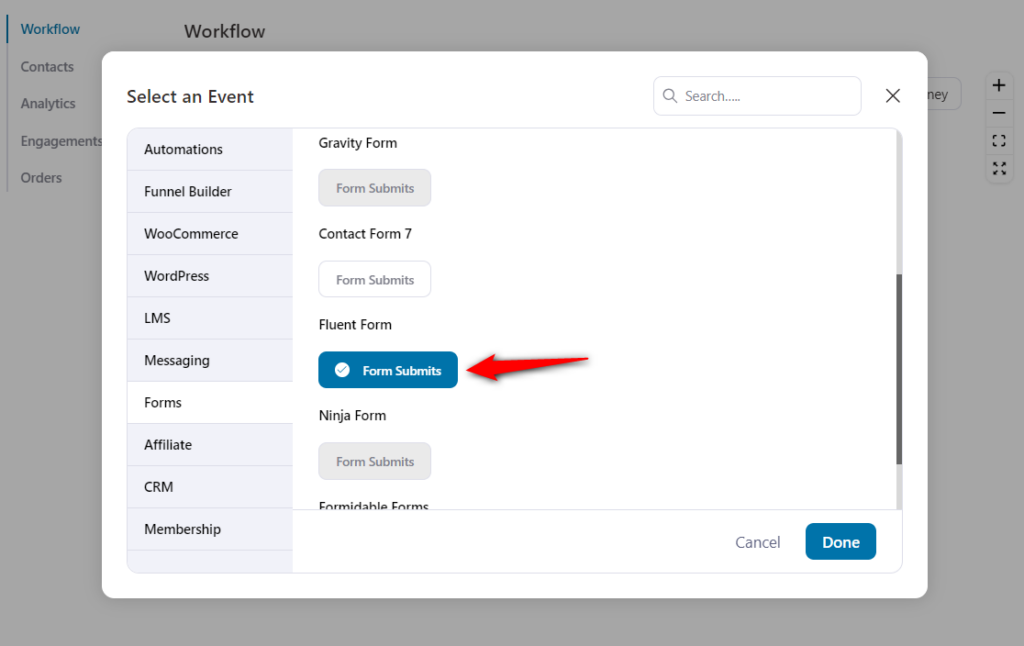
Click on Done.
Step 3: Select the form and map the fields
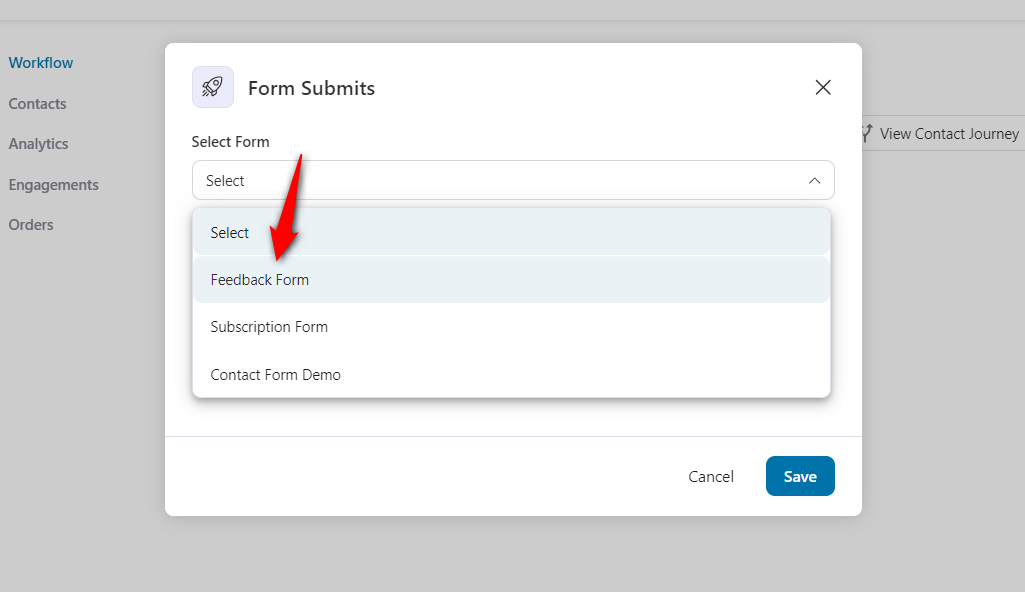
You’ll see the lists of forms. Select the one that you've created.
Now, map the email field.
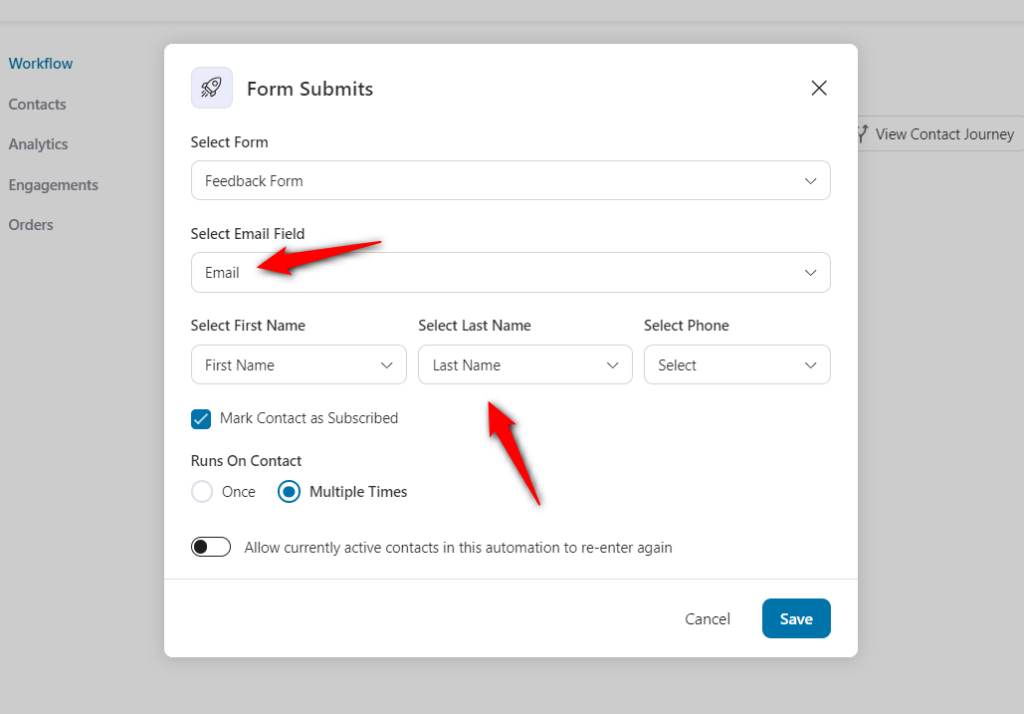
Once done, click on Save to lock all the changes you made to your automation.
Step 4: Add condition to set up rules for your automation
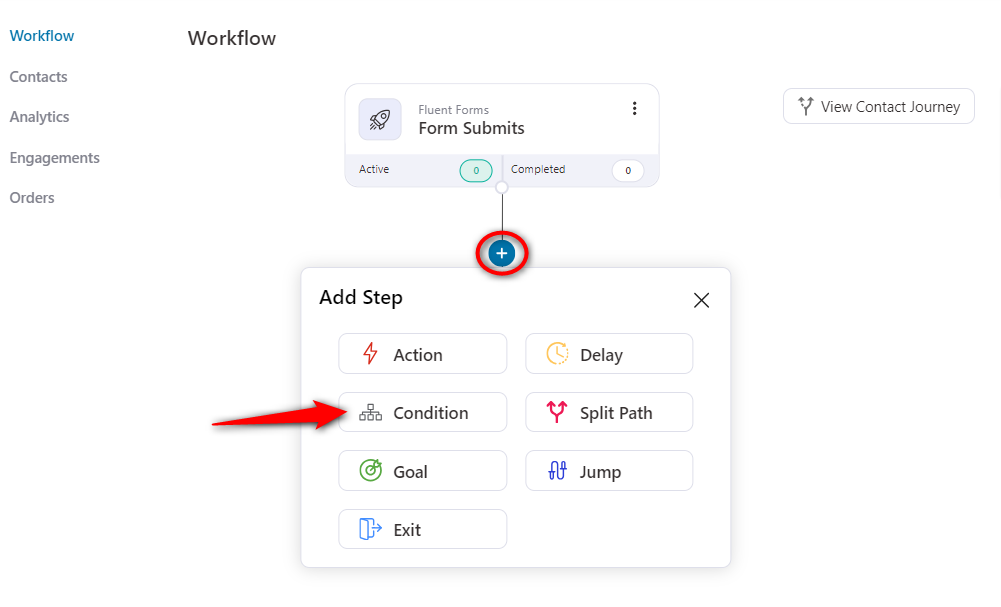
Click on the ‘+’ icon to select your next step.
When setting up your automation, you can select from Action, Condition, Split Path, Goal, Delay, or Exit.
Select the Condition to set up rules.
Select the ‘Form Field’ (Fluent Forms) rule under the ‘IF’ section.
Here, we have selected the "Are you interested in trying out FunnelKit Automations" field.
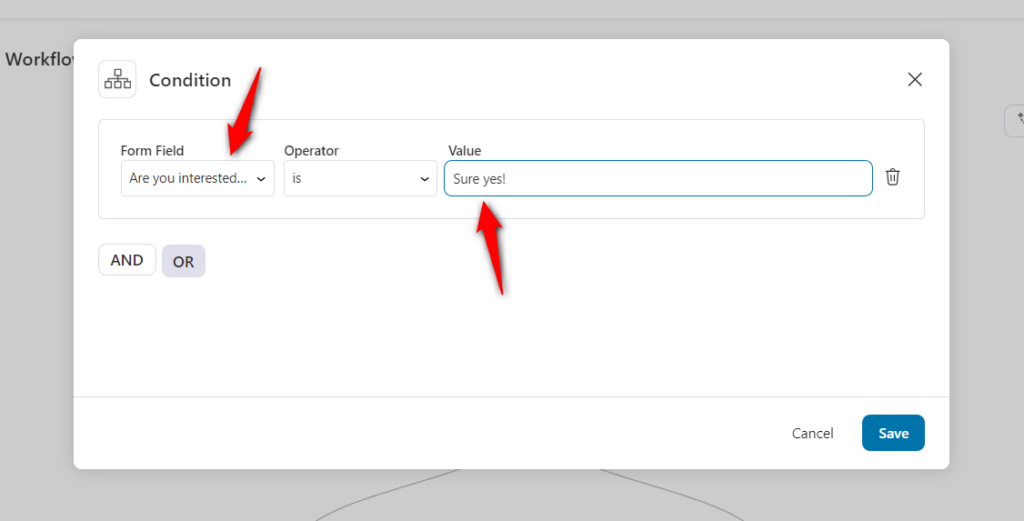
Once done, click on the Save button.
Step 5: Select ‘Send Email’ as action
Under the If-yes condition, add the action - Send Email under Messaging as shown here:
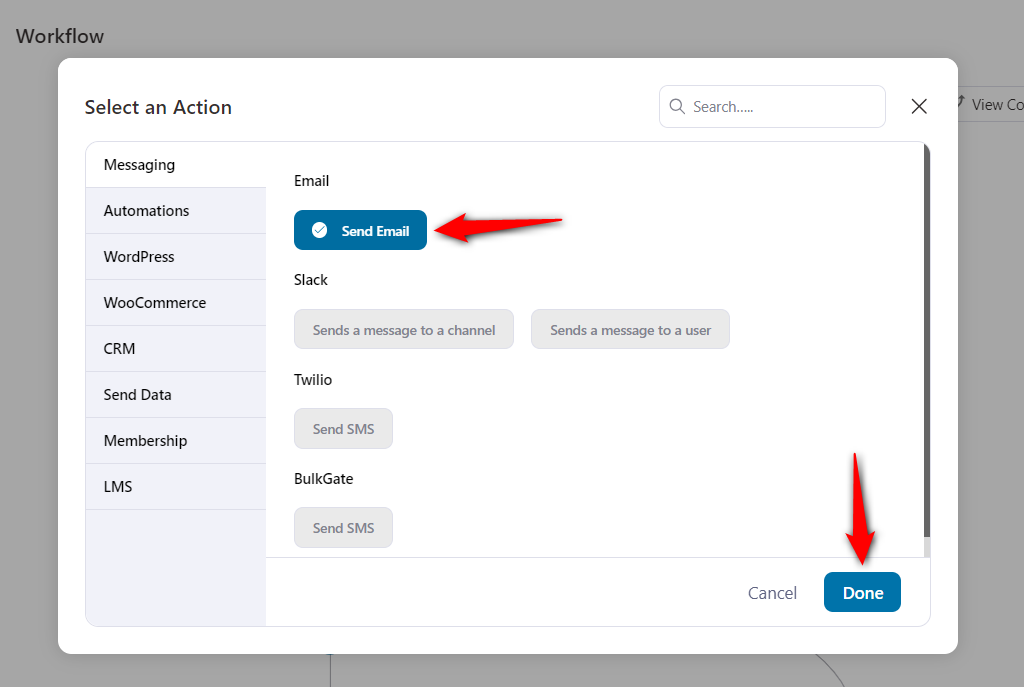
Click on Done.
Step 6: Select the merge tag
You can create a personalized message using a number of merge tags.
Click on Merge Tags.
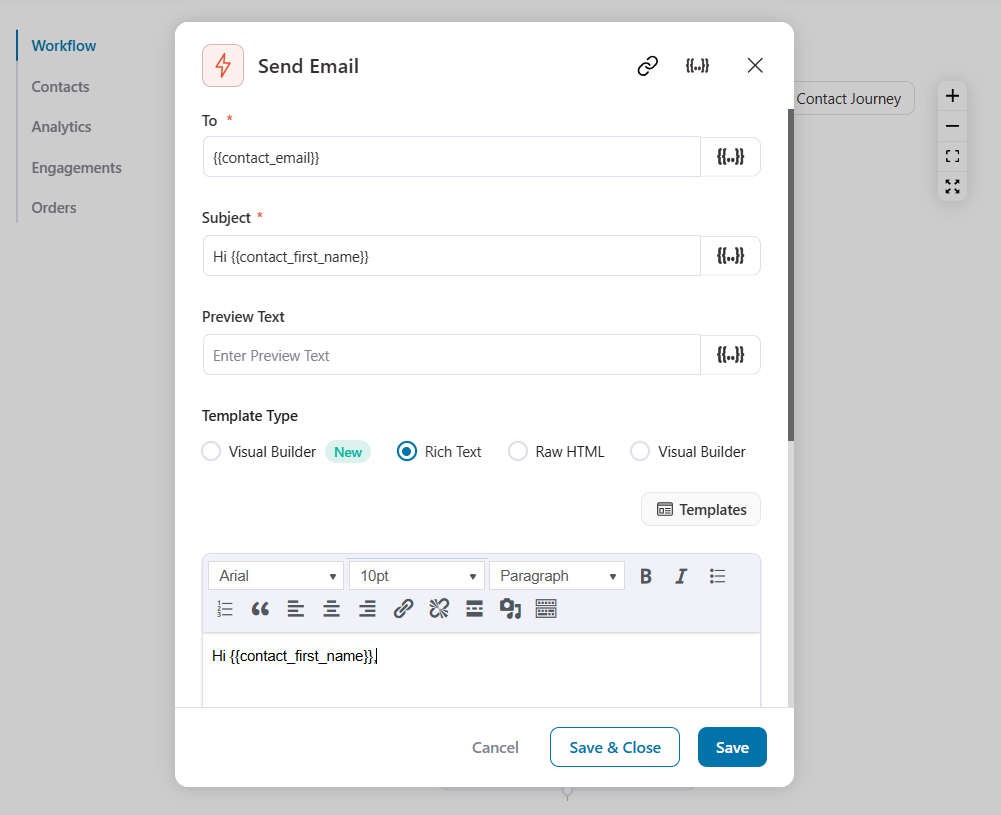
Click on Configure next to Form Field.
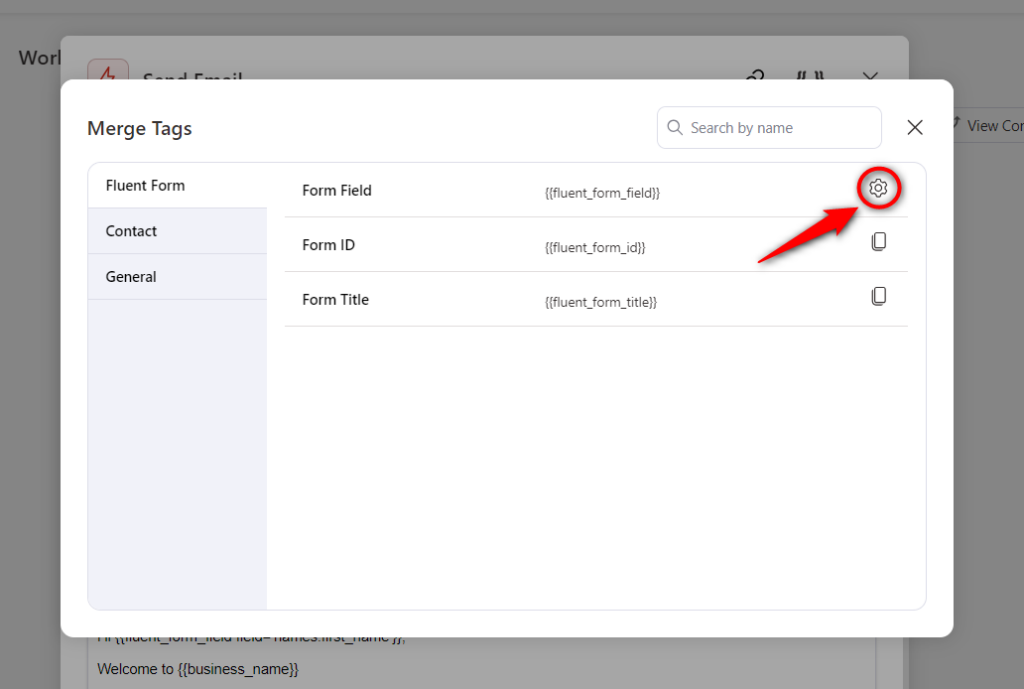
Select the email and copy the merge tag.
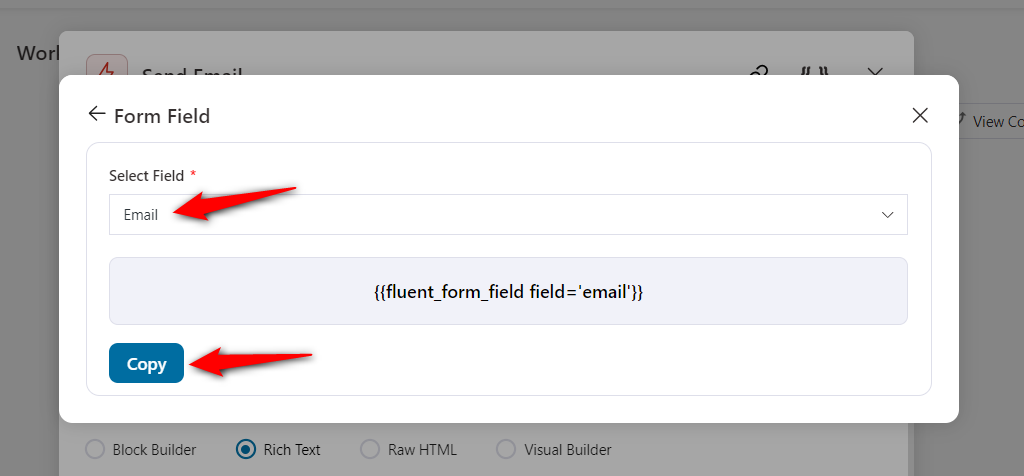
Now copy the merge tag by clicking on Copy To Clipboard.
Paste this merge tag in the email field.
Step 7: Compose your email
You can use the name merge tag for personalized emails.
The process of selecting the name merge tag is the same as above. Compose your email content body.
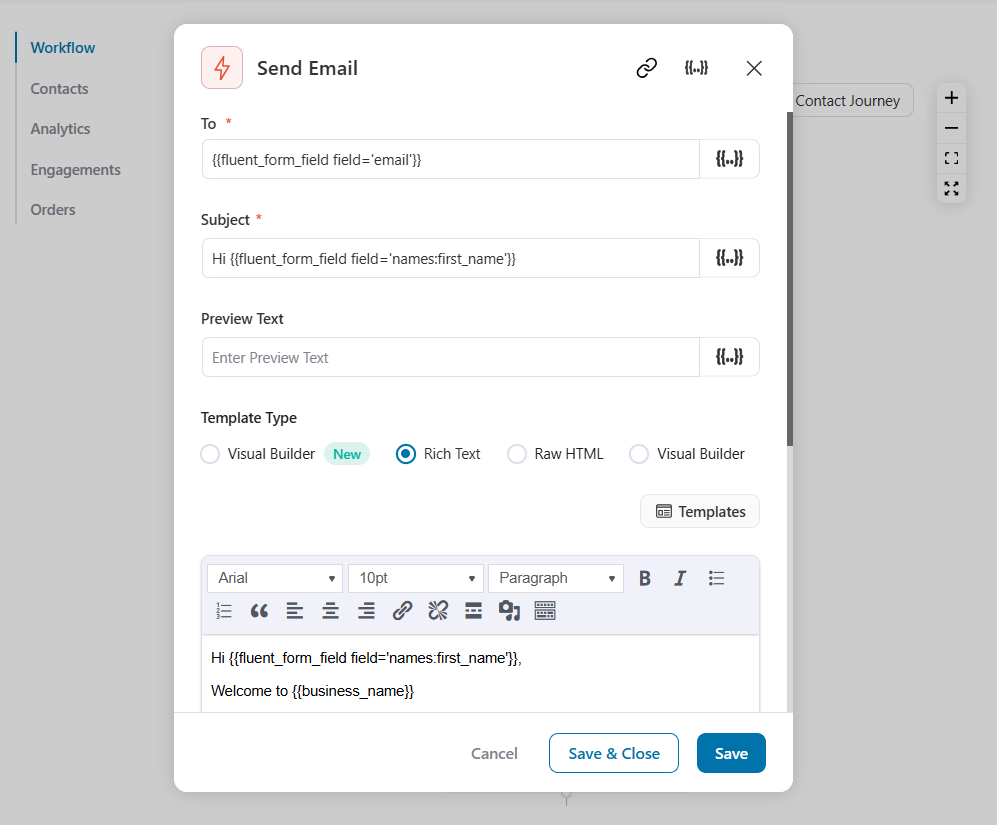
Click on Save & Close when done.
Step 8: Make your automation live and test it out
Turn the toggle to Active.
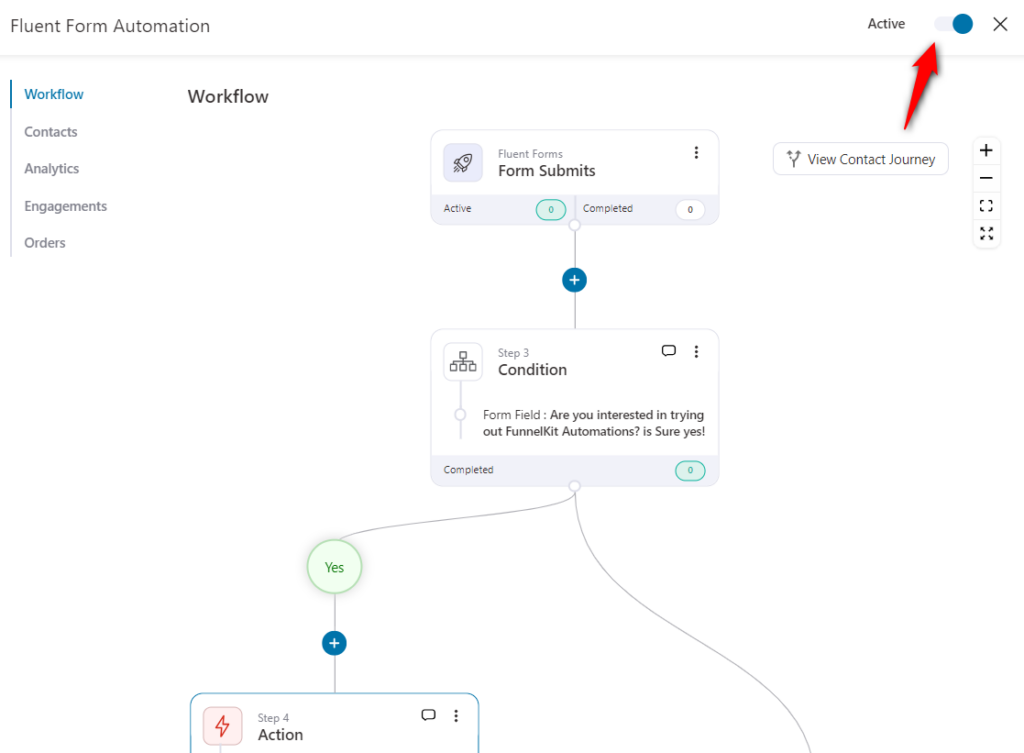
Now your automation is live and running.
Testing the Automation
Next, to test the automation go to Fluent Forms >> Select ‘All Forms’ >> Choose ‘Preview’ option for the form that you’ve used to set up your automation.

When you click on ‘Preview’, the form opens up.
Here you’ll have to key in values.
Keep in mind that you enter a valid email address where you’ll receive an email from FunnelKit Automations.
Also, make sure that you choose ‘Hell yes!’ as the option here:
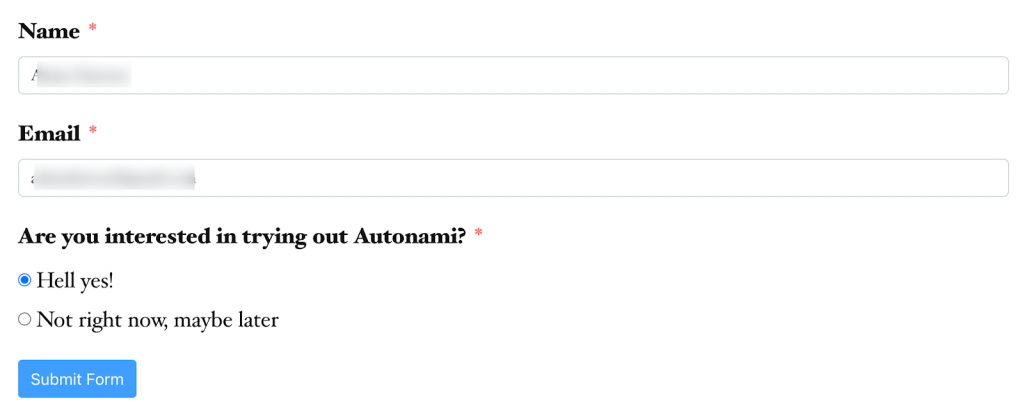
Once you enter the details, hit the ‘Submit Form’ button.
When you do that, check your inbox for an email. The email should look like this:

So, this is just one use case of using FunnelKit Automations with Fluent Forms.
You can create and try out several other use cases as per your requirement.


