Wishlist Member is a membership plugin for WordPress that lets you securely protect your website content.
You can create different levels and membership plans to assign users to them so that they’ll be able to see your segmented content. You can even create forms and allow users to choose and pay for the different membership plans.
FunnelKit Automations deeply integrates with Wishlist Member to seamlessly connect your contacts, set up automations, and perform different functions as per your requirements.
Here are a few things to emphasize on FunnelKit Automations’ deep integration with Wishlist Member:
Let’s take a look at each one of these.
Importer
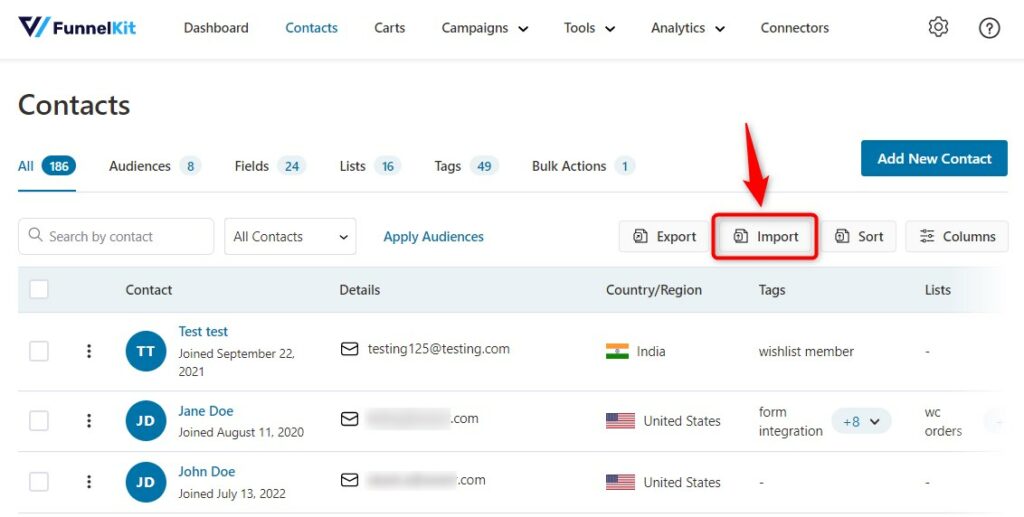
You can easily import Wishlist Member contacts to FunnelKit Automations.
To import your Wishlist member contacts, go to Contacts and click on Import.
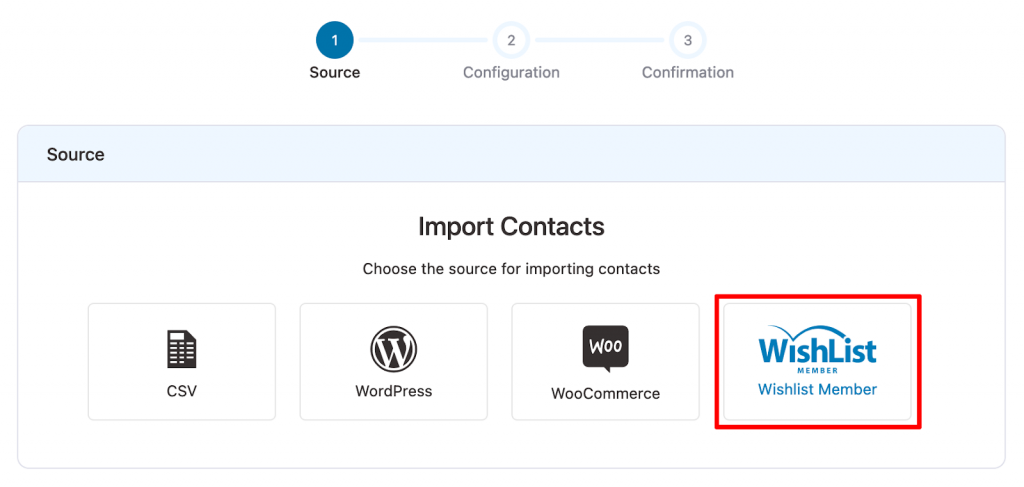
Now choose the source for importing contacts.
Here we will click on Wishlist Member.
Now configure the import settings.
You can add tags to these contacts or add them to a list, mark their subscription status, trigger automations for any tag/list-related events, and more.
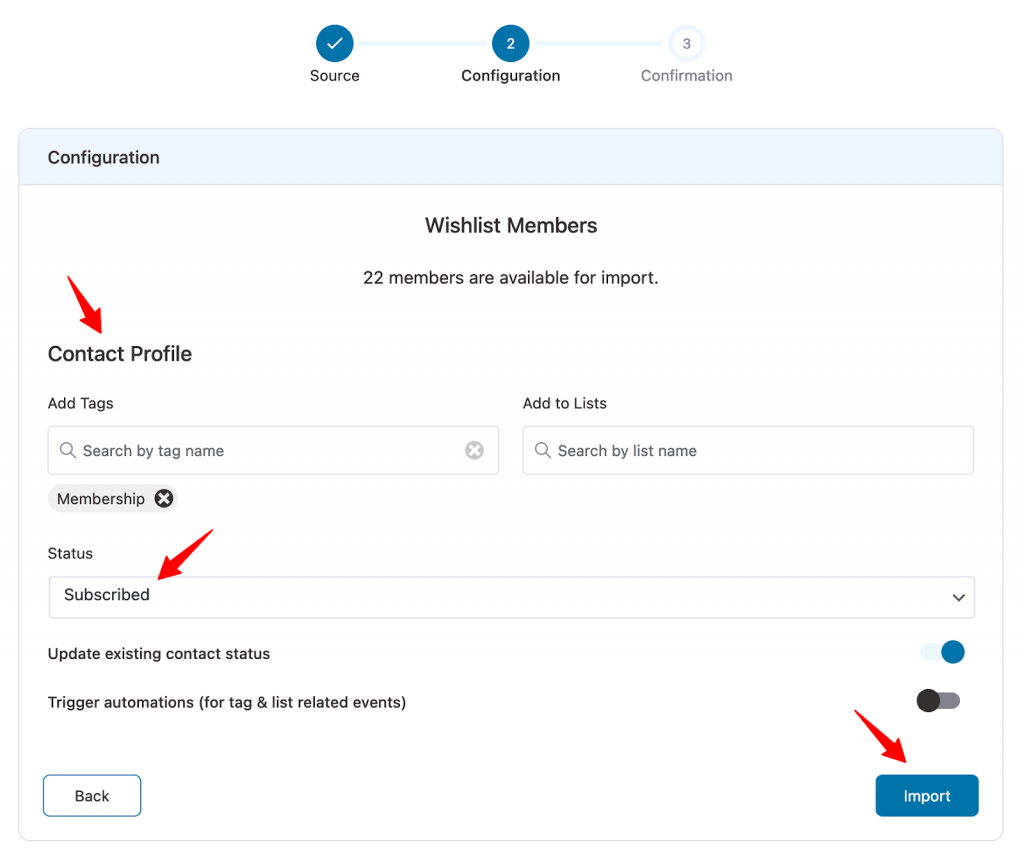
Once you’re happy with the settings, click on Import.
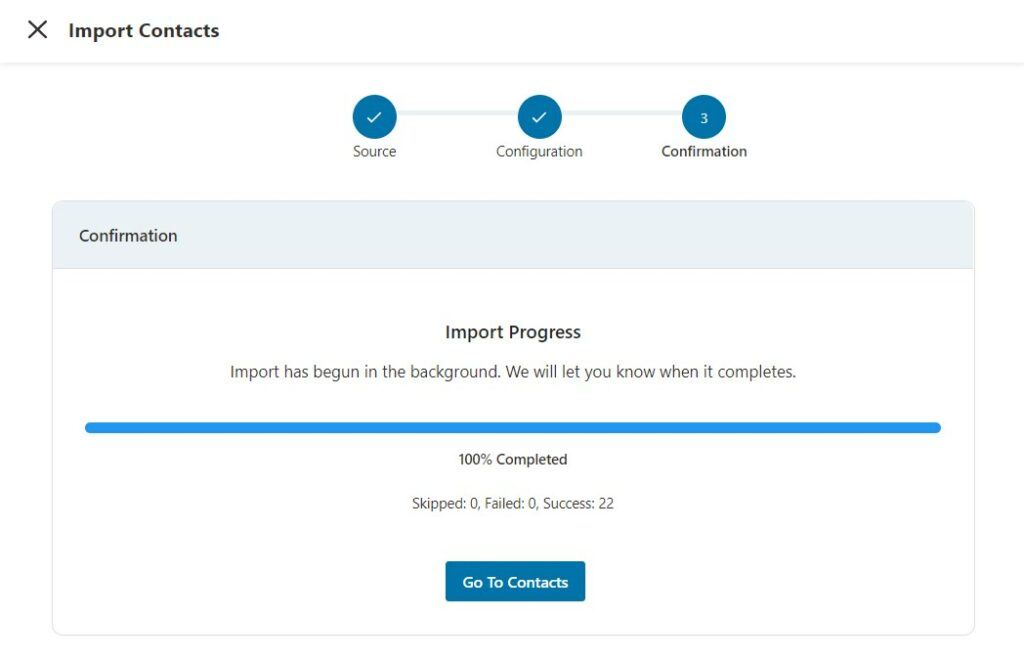
Well done! Your import is complete.
You can go to the Contacts section to see your newly imported contacts.
Filters
You can filter your contacts based on the different attributes of Wishlist Member.
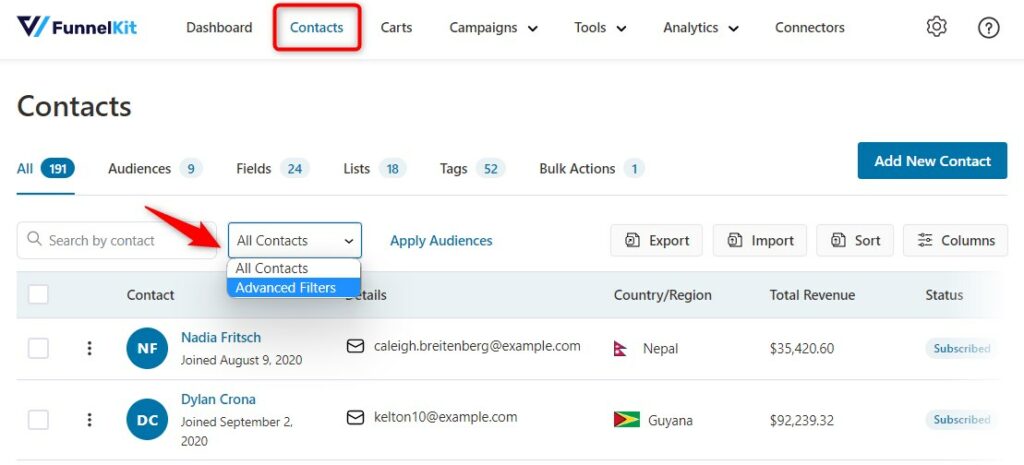
Select Advanced Filters.
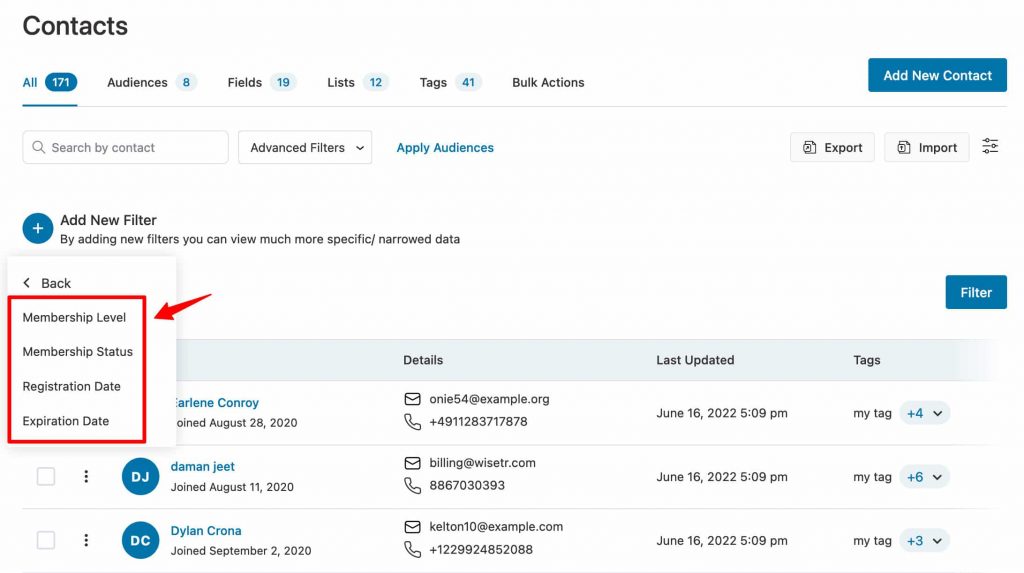
Click on Add New Filter and you’ll see Wishlist Member.

You can filter your contacts based on Wishlist Membership Status, Registration date, expiration date, and member level.
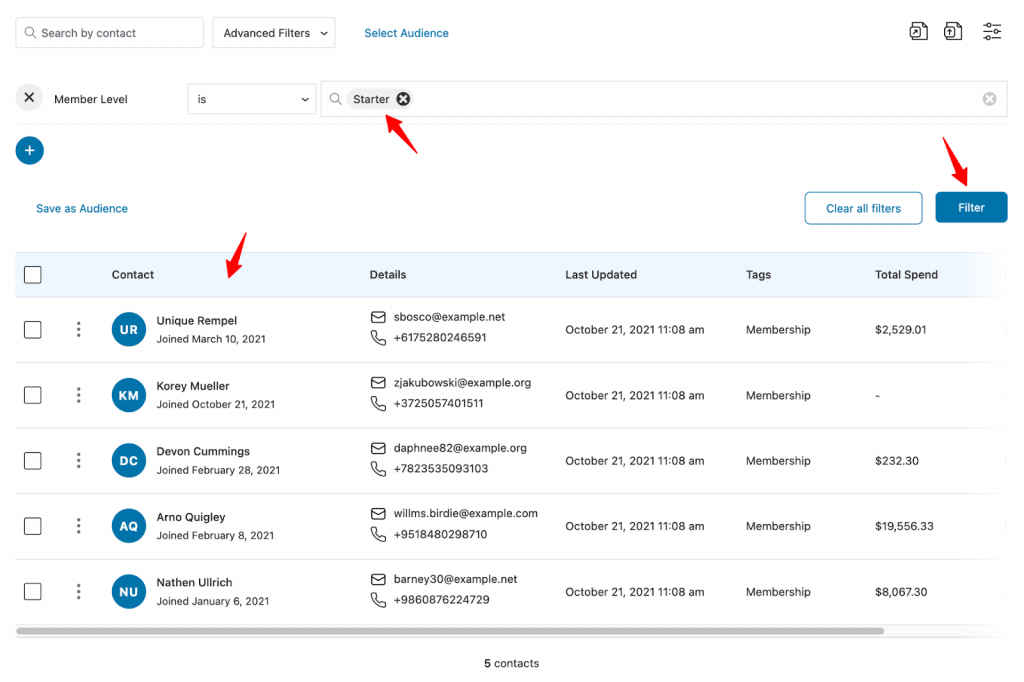
Here we are filtering our contacts who are on the “Starter” membership level.
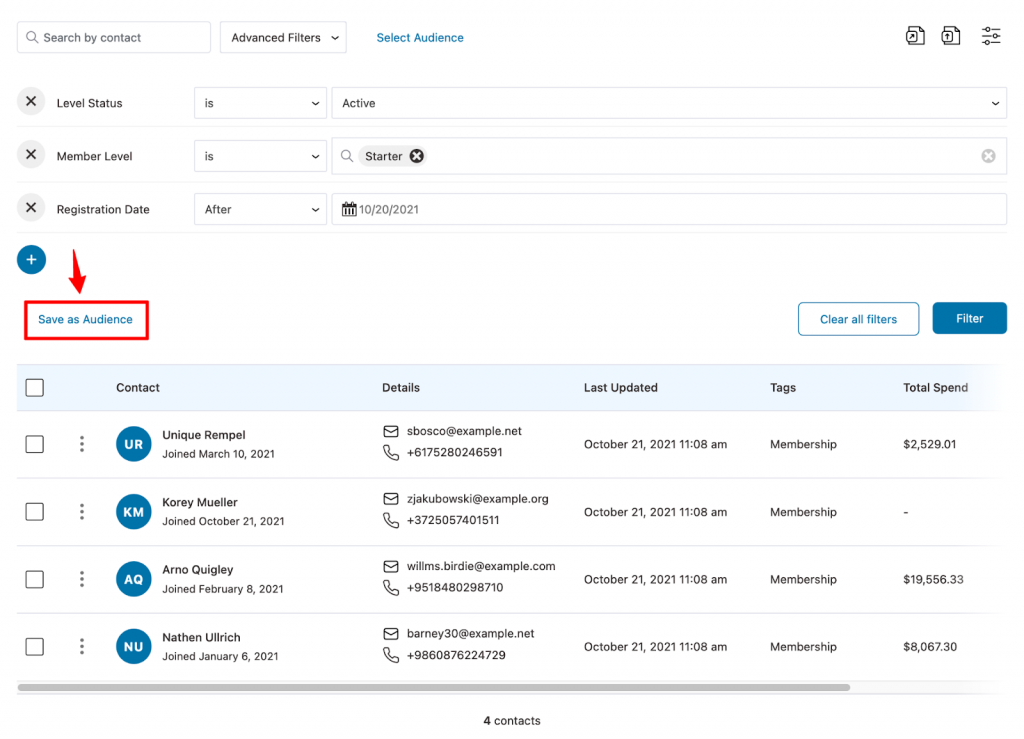
You can even further apply multiple filters and save them as your audience:
This is how you can filter your contacts based on the attributes of Wishlist Member.
Contact
FunnelKit Automations’s deep integration with Wishlist Member brings a huge change within the enriched profile of your contact.
You’ll see a new tab named “Wishlist Member” and it lists all of their membership level details.
Go to the profile of your contact:
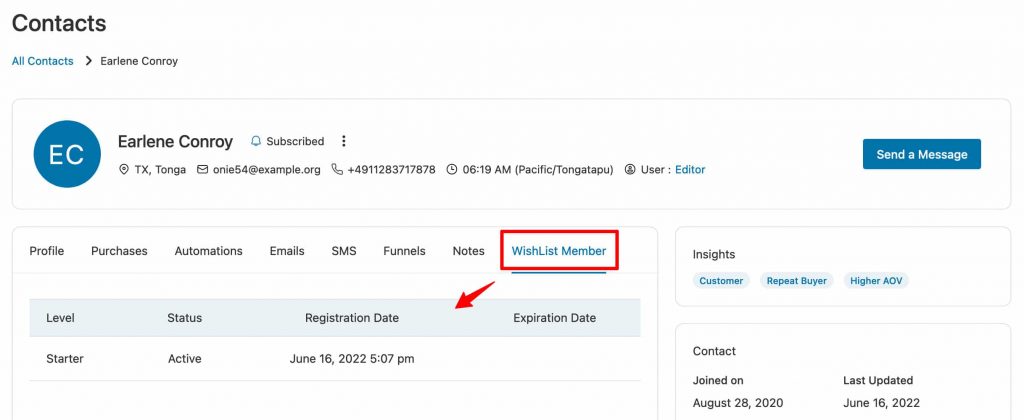
Along with their usual contact details, you’ll be able to see all the information about their memberships under a single tab.
Export
You can now export your contacts using the attributes of Wishlist Member.
FunnelKit Automations’s deep integration with Wishlist Member has added the Level Status, Registration Date and Expiration Date of every contact to be exported.
Go to Contacts and click on Export.
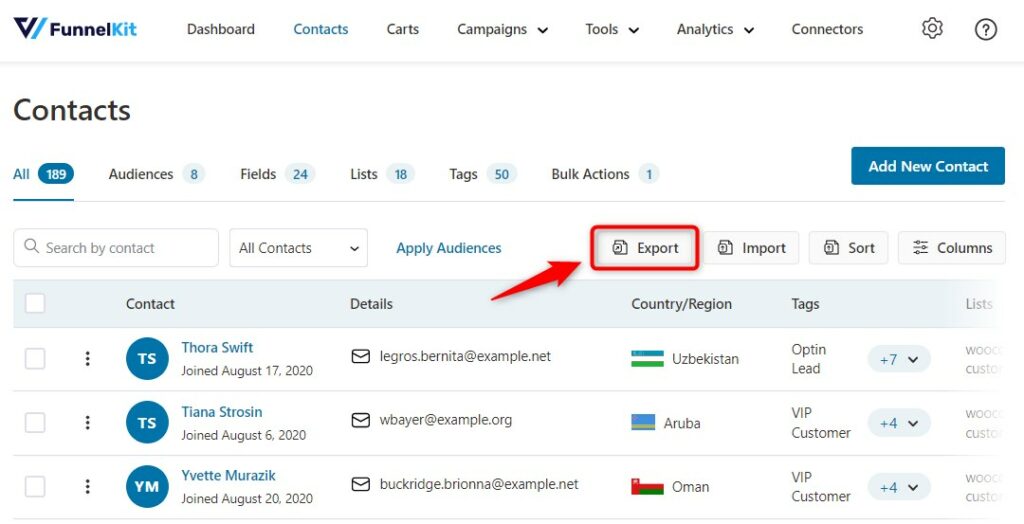
Click on Add New Export.

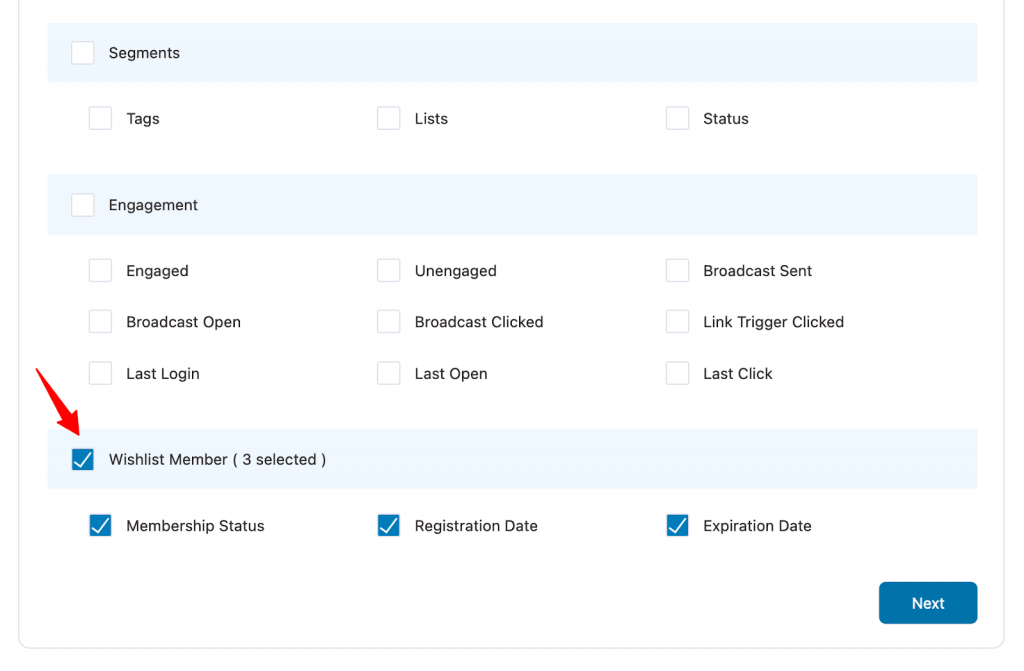
Now select all the fields you want to export.
Scroll down and you will see the fields of Wishlist Member here:
Once you have exported your contacts, you can see the data in this form:
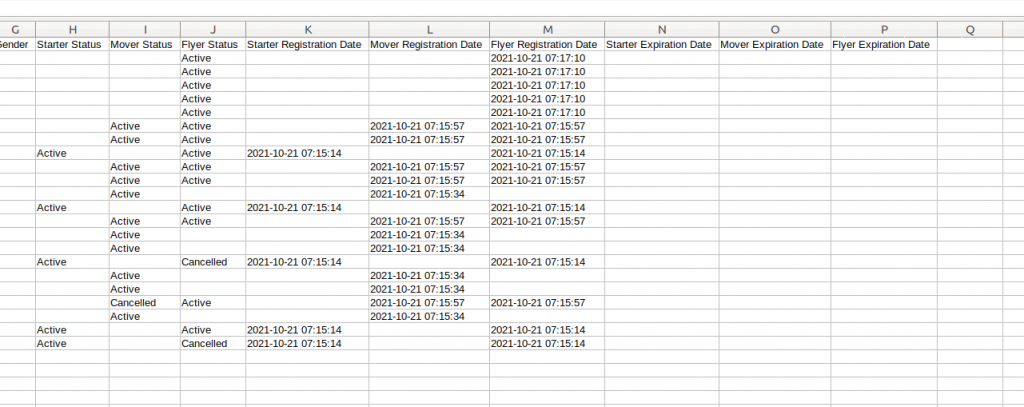
For example, let's say you have three membership levels. Therefore, the export data will get created in 3 X 3 = 9 columns.
The columns will be {Level} Status, {Level} Registeration Date, and {Level} Expiration Date for every membership level.
Read this documentation for detailed steps on how to export contacts in FunnelKit Automations.
Events
Here are the triggers/events that you get with Wishlist Member in FunnelKit Automations:
- User Submits a Registration Form
- User Added to Membership Level
- User Removed from Membership Level
- User Cancelled from Membership Level
- User Membership Level Expired
To select an event, go to Campaigns ⇨ Automations.
Then, click on Add New Automation.
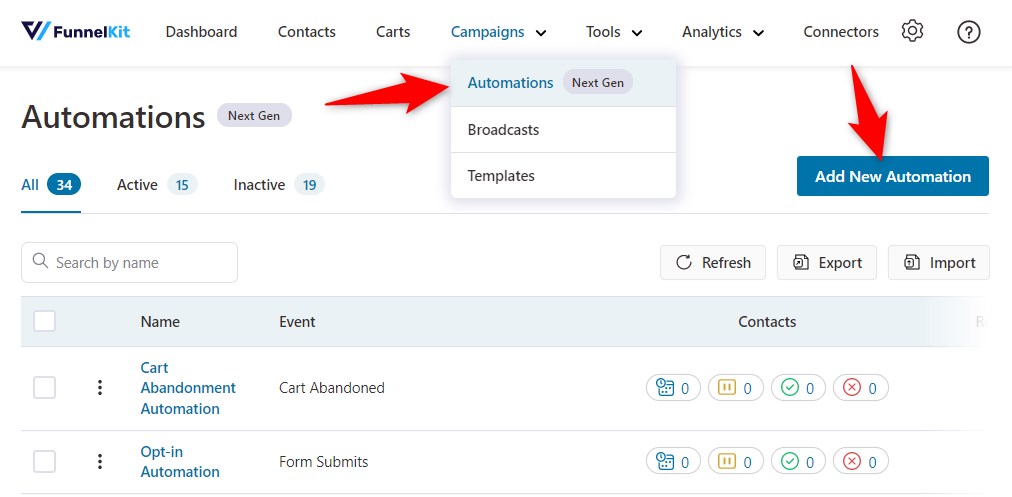
Start from scratch and enter the name of your automation.
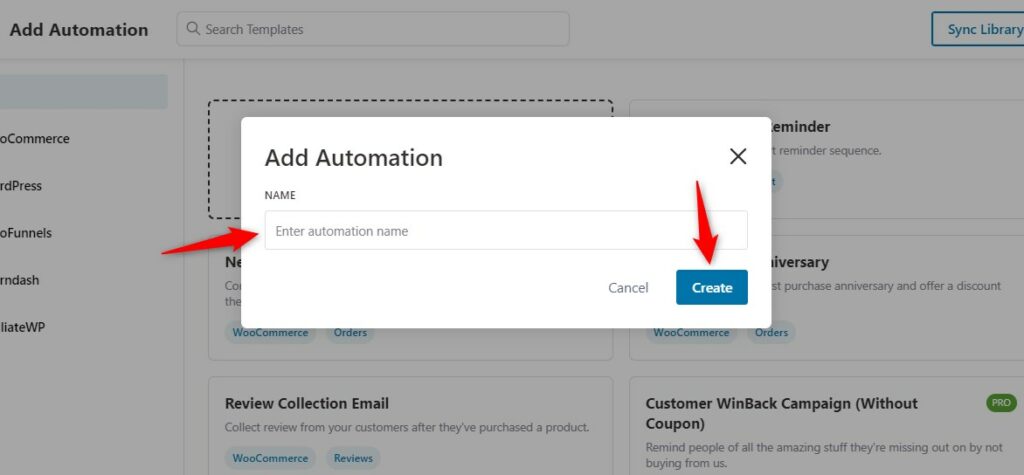
Click on Create.
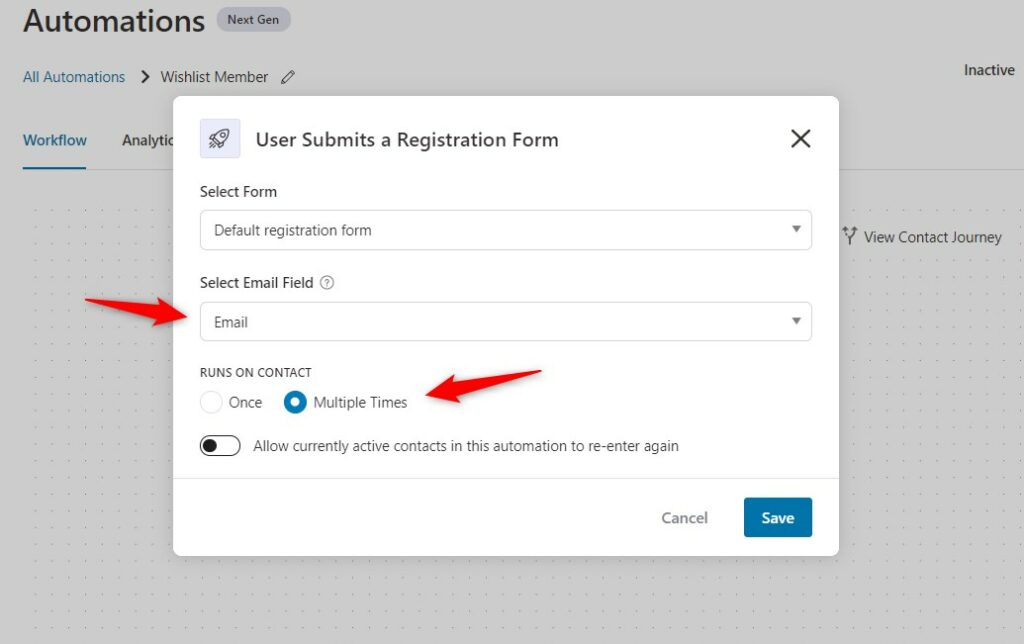
Now, select an event under Wishlist Member. Here we have selected the “User Submits a Registration Form” event.
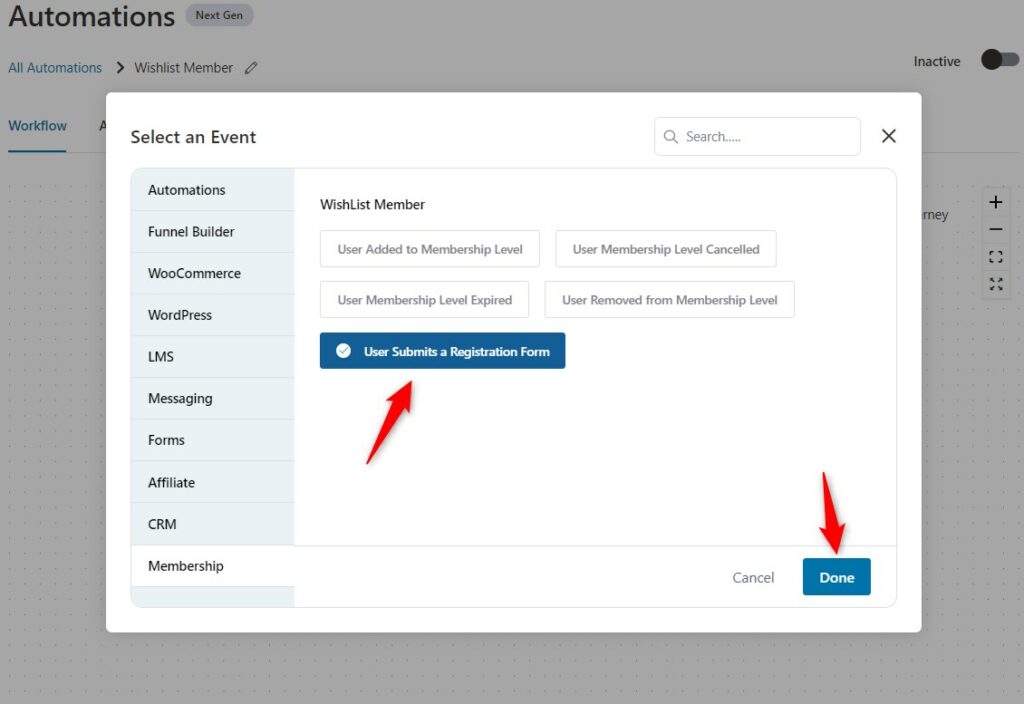
Click on Done.
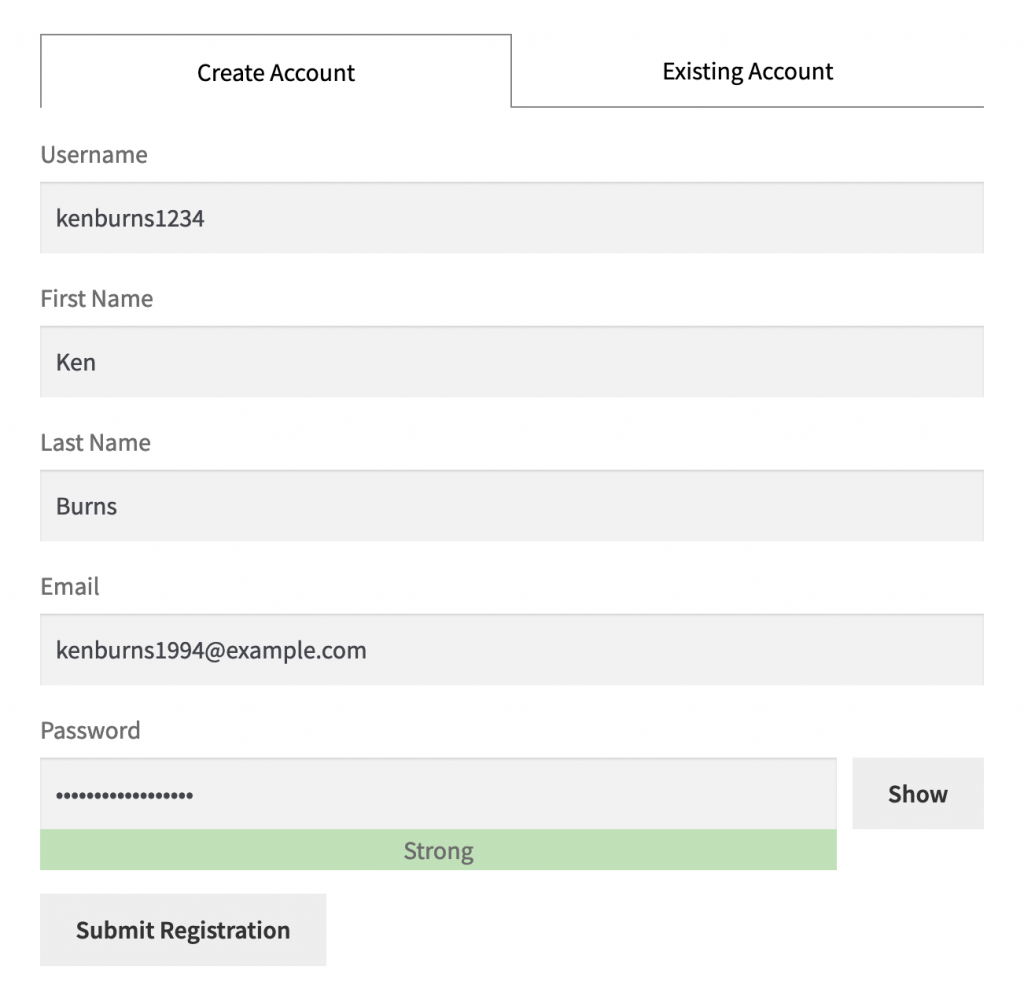
Now, select the registration form that you want to trigger this event. You can even create a custom registration form within the Wishlist Member.
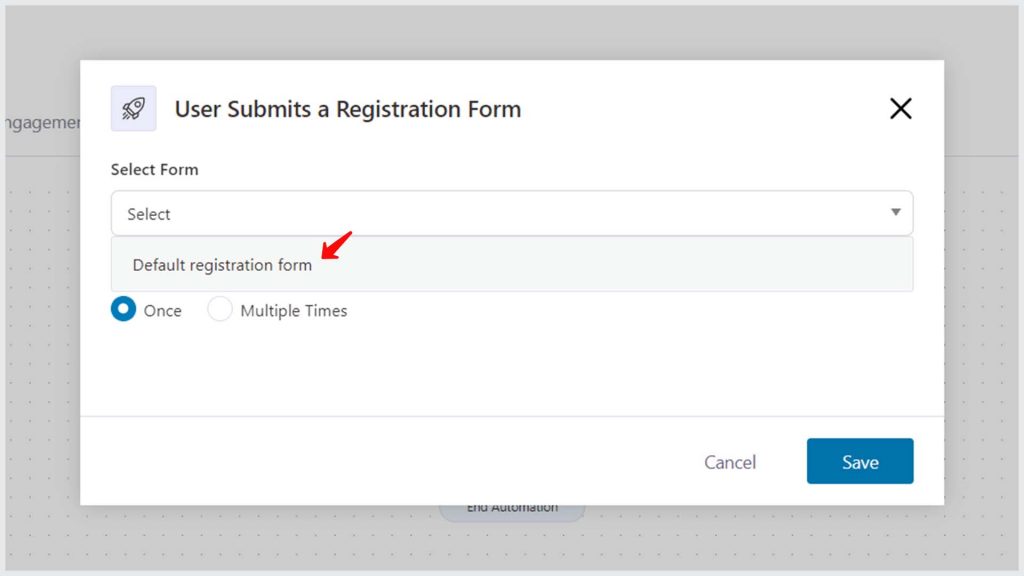
Map the fields on the form with the field in FunnelKit Automations.
Now, the next step is to define an action that will be performed in case this event gets triggered.
Actions
Here are the actions associated with Wishlist Member:
- Add User to Pay Per Post
- Remove User from Pay Per Post
- Add User to Level
- Remove User from Level
- Cancel User Level
- Move User to Level
Click on the Action and select any action from above.
Here we have selected our action to add the user to a membership level.
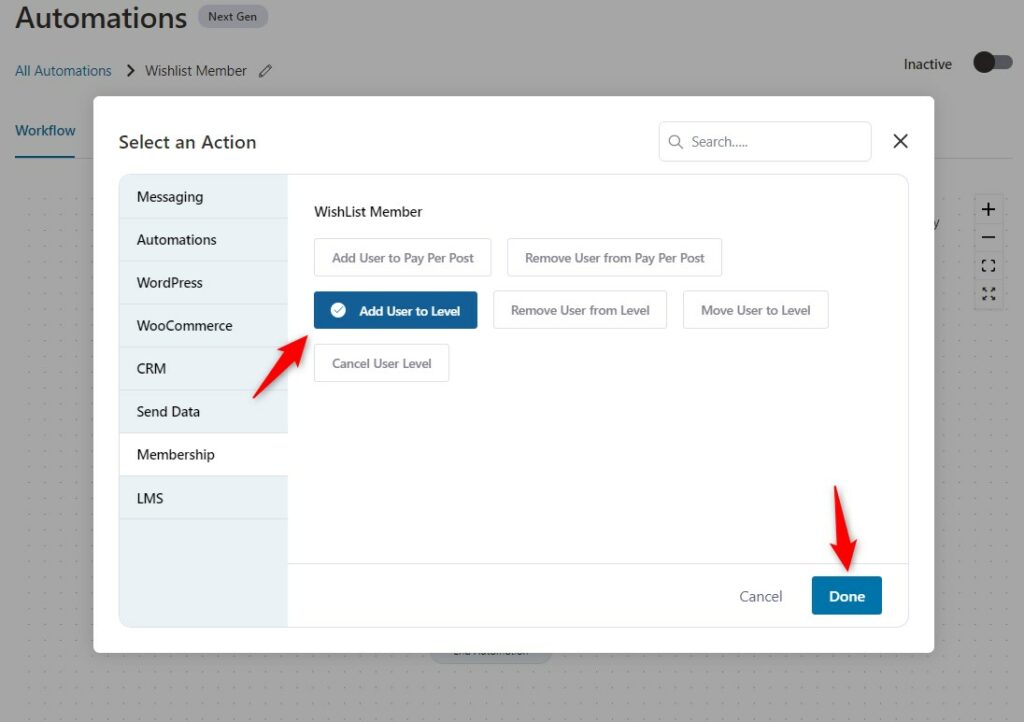
Click on Done.
Now select the membership level you want to assign to newly registered users.
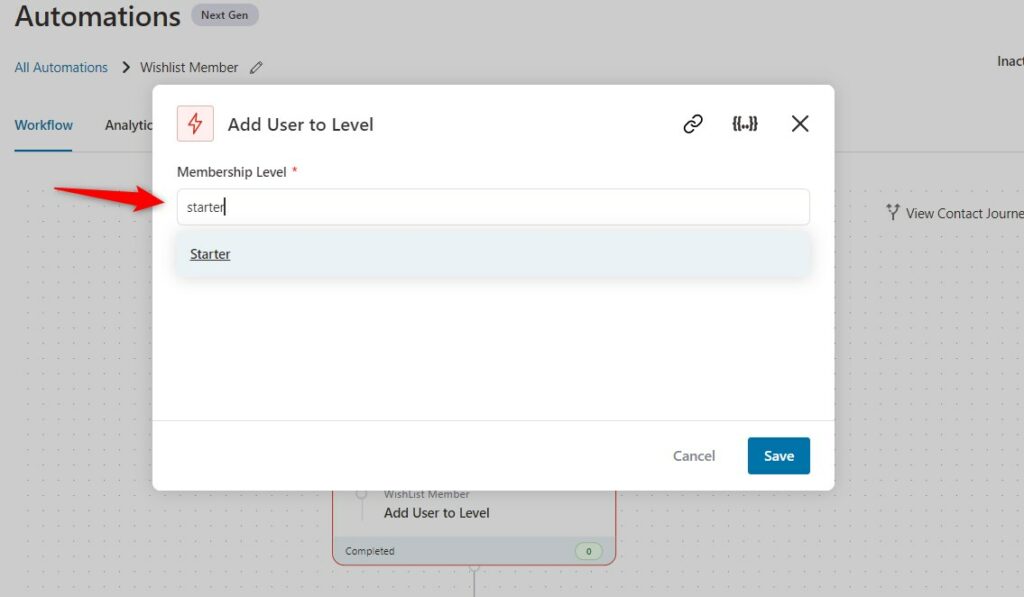
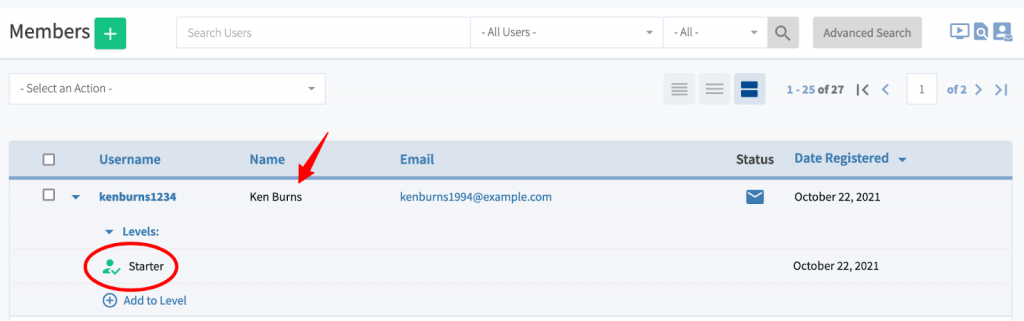
Now, when a user submits the registration form, they will be added to the Starter membership - that we have set to expire in 30 days within Wishlist Member.
As you can see, the registered user has been added to the Starter membership plan.
Similarly, you can add other membership plans and perform automated actions based on your requirements.
Rules
You get one rule of Membership Level when setting up your automations using Wishlist Member in FunnelKit Automations:
Let’s look at it.
Click on Add New Condition to set up rules.
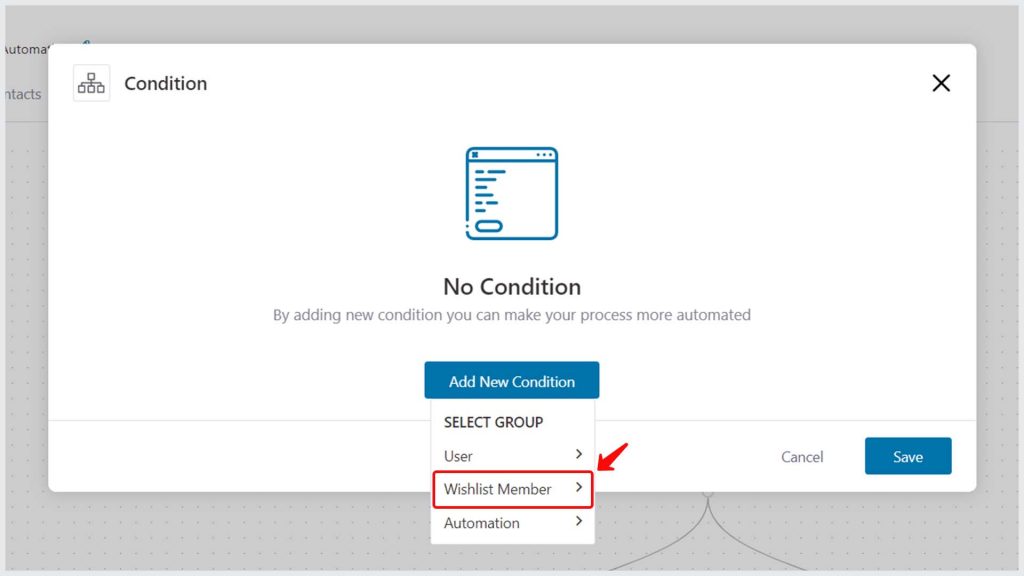
Select the membership level rule under Wishlist Member.
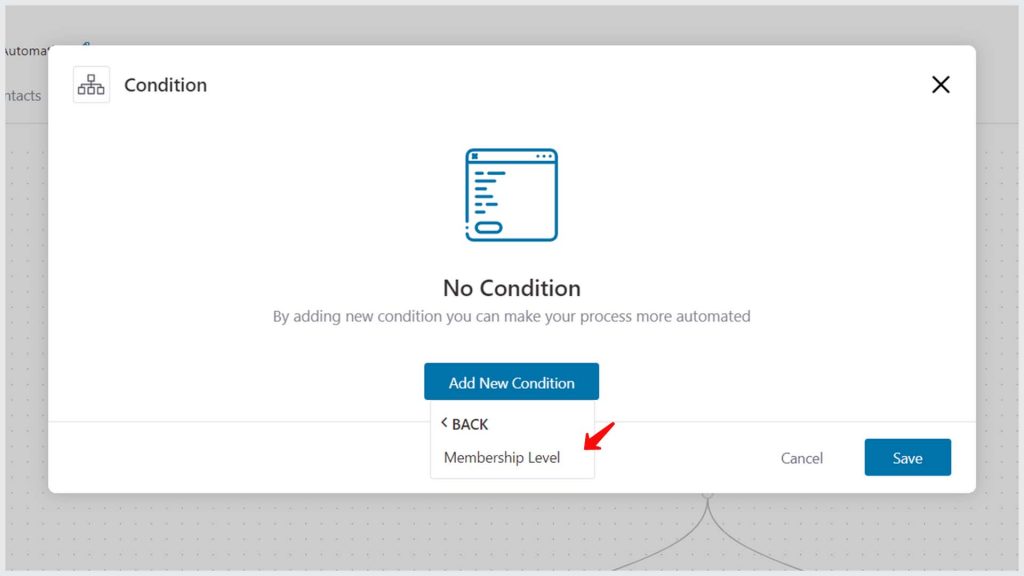
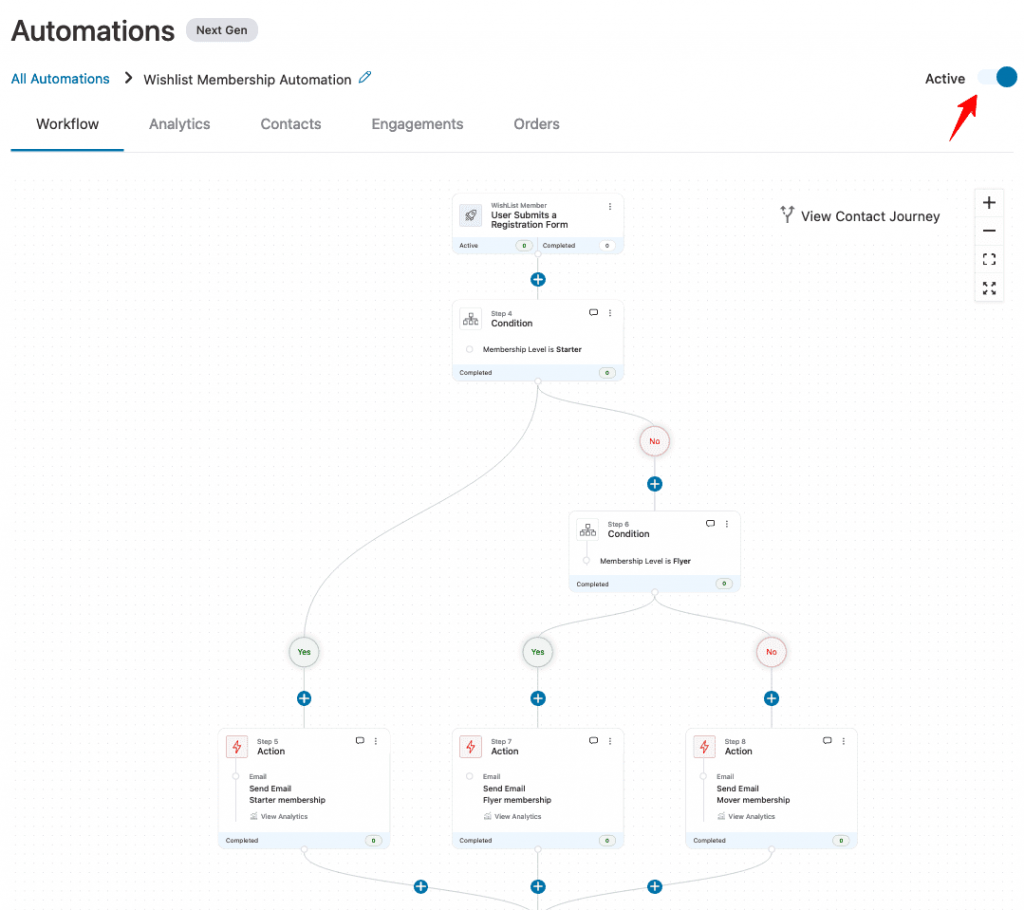
Configure the membership level you’ve selected. Here we will send different emails to contacts at different membership levels.
Once done, turn the toggle to make the automation go live.
This is all about the rules/conditions you can set with Wishlist Member in FunnelKit Automations.
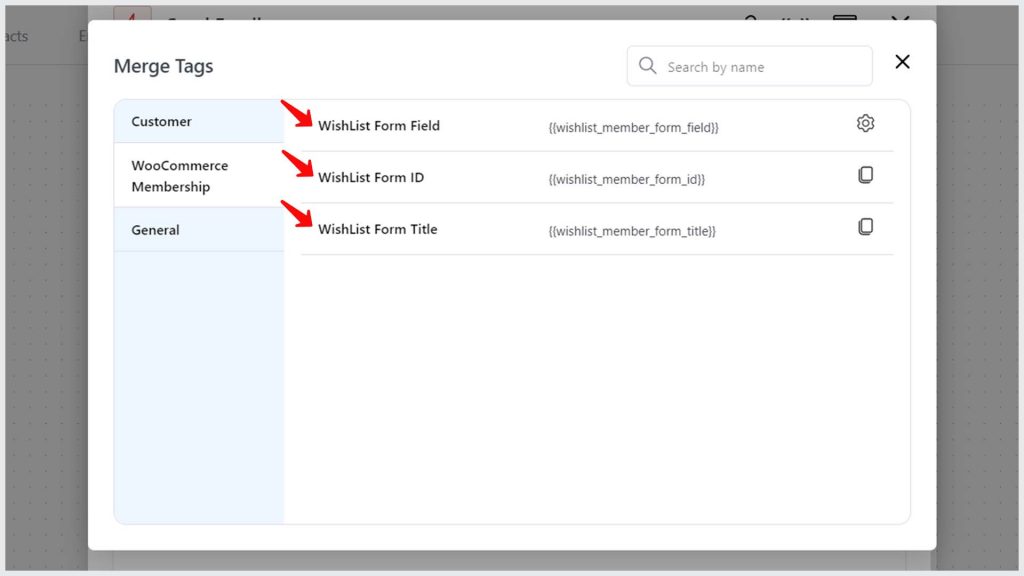
Merge Tags
You get six merge tags with Wishlist Member in FunnelKit Automations.
- Membership Level Name {{wishlist_member_level_name}}
- Membership Level ID {{wishlist_member_level_id}}
- Membership Level Expire Date {{wishlist_member_level_expire_date}}
- Registration Form ID {{wishlist_member_form_id}}
- Registration Form Title {{wishlist_member_form_title}}
- Registration Form Fields {{wishlist_member_form_field}}
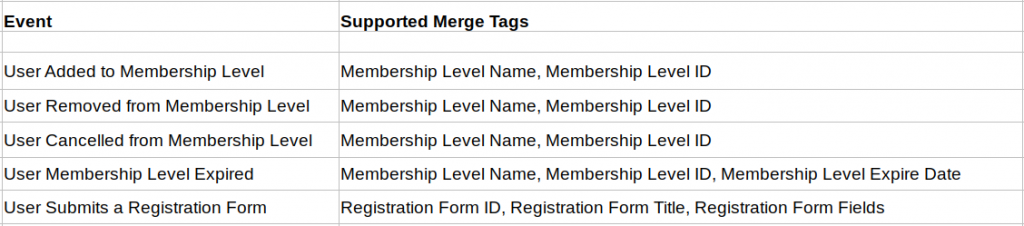
Here are different merge tags associated with specific Wishlist Member events:
This is all about the merge tags within Wishlist Member.


