Email Template Categories in FunnelKit Automations help you organize, manage, and filter your Email Templates efficiently for better workflow and clarity.
Create a Category
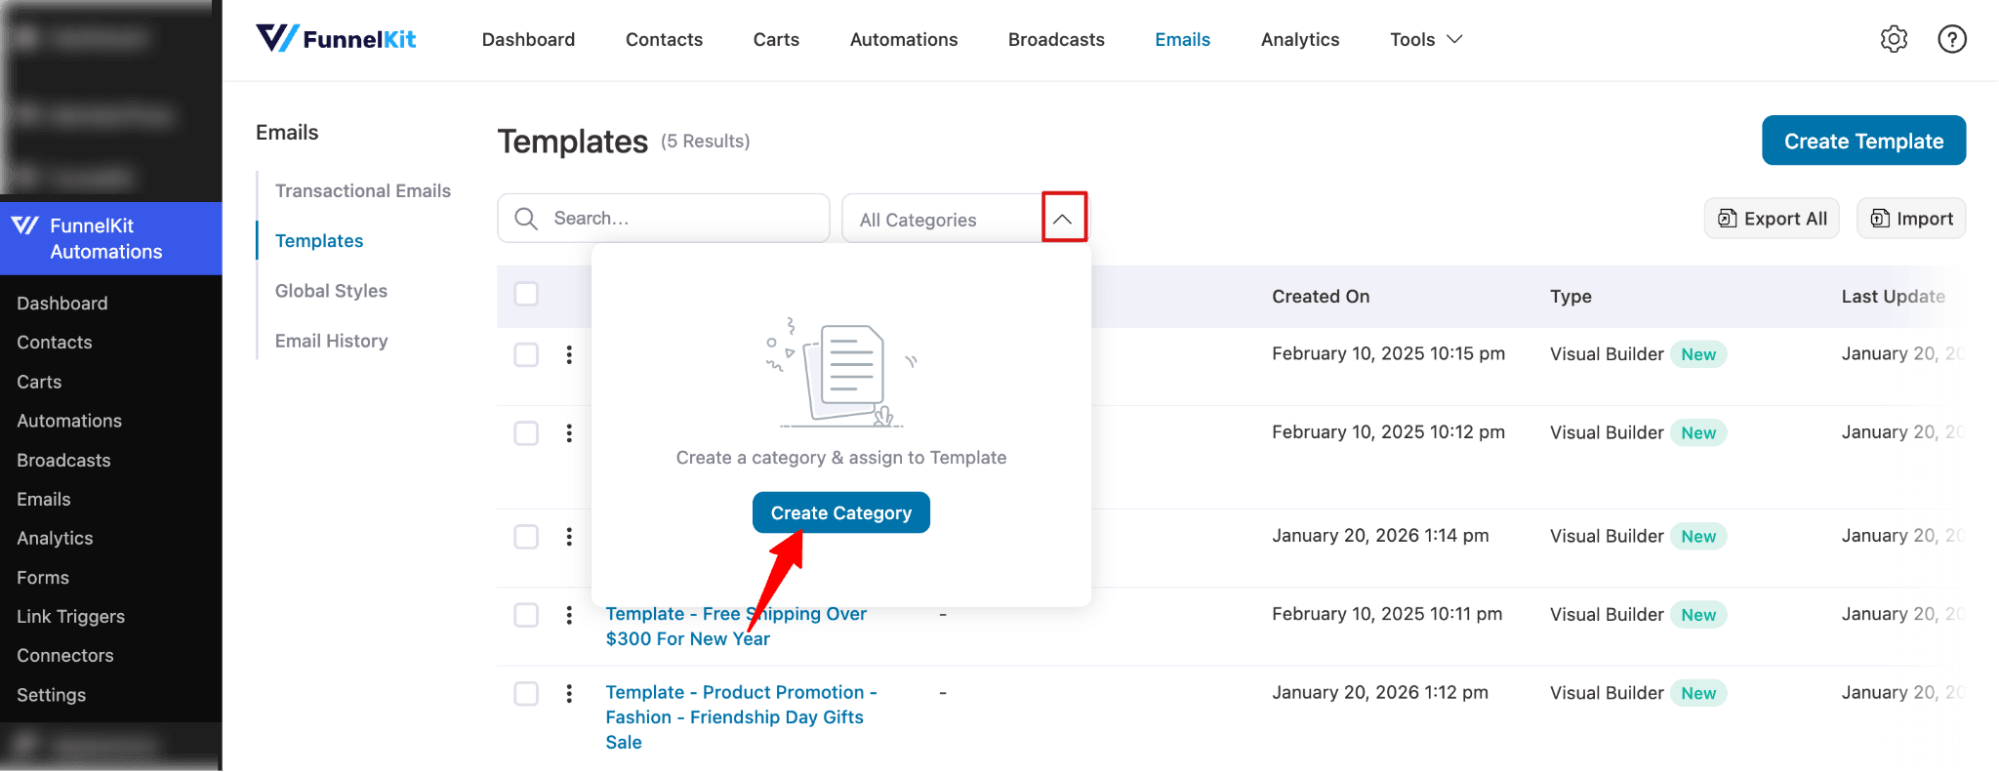
To create a category for Email Templates, expand the “All Categories” section and hit “Create Category”.
Next, provide a name and hit Create.
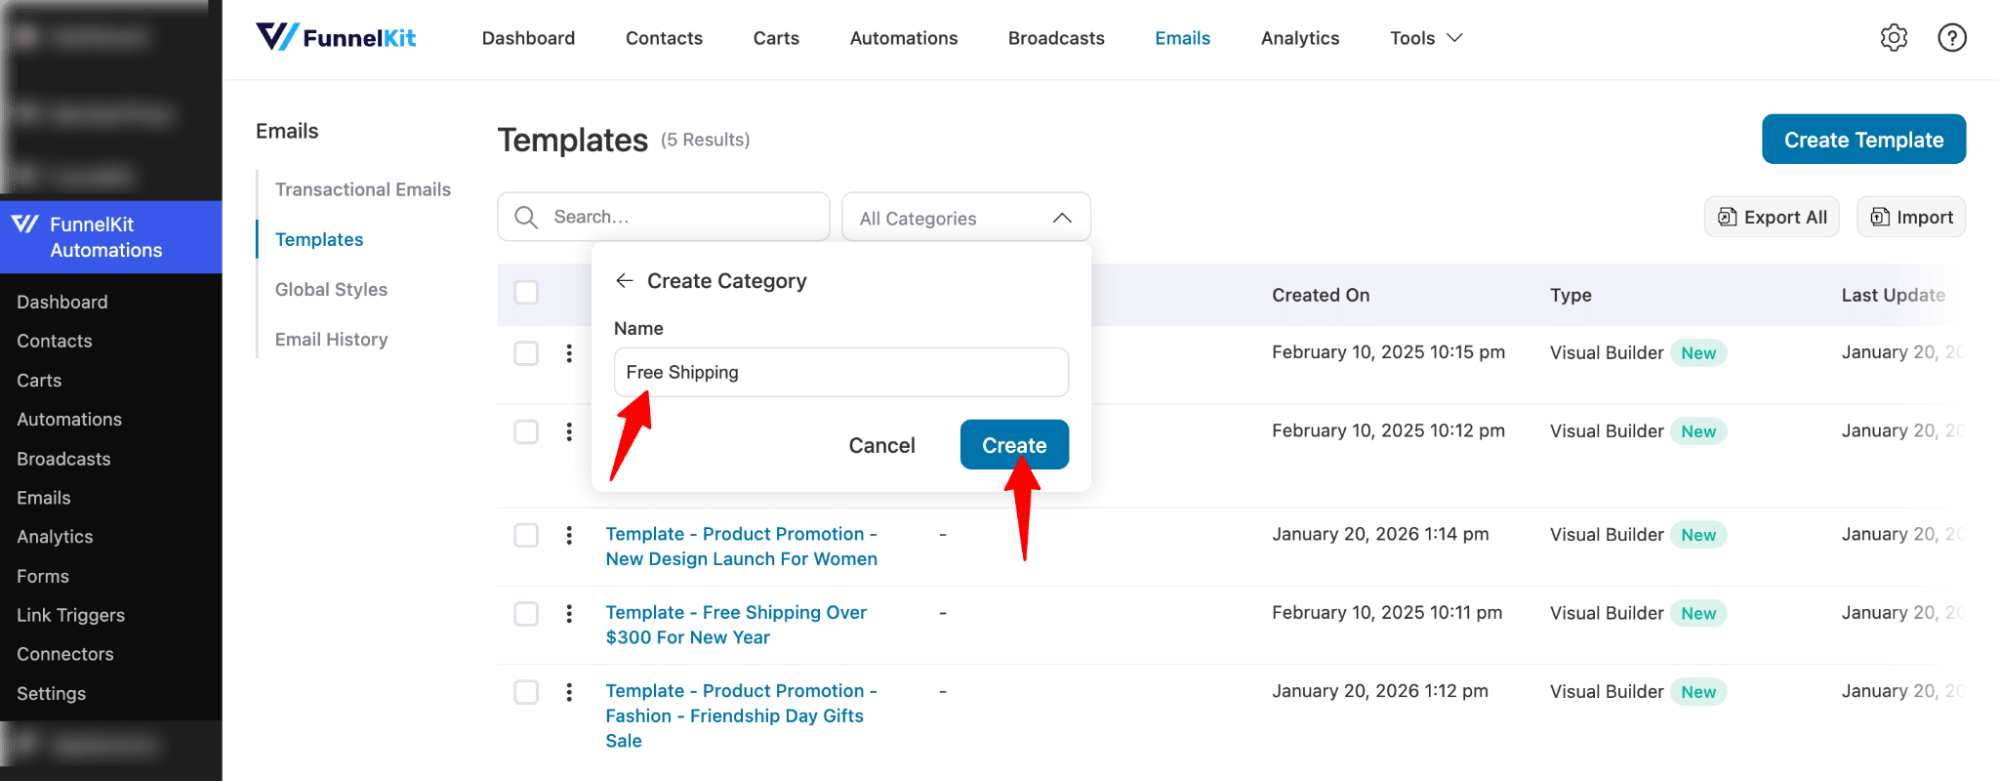
This will create a category for Email Templates.
Assign a Category to Email Templates
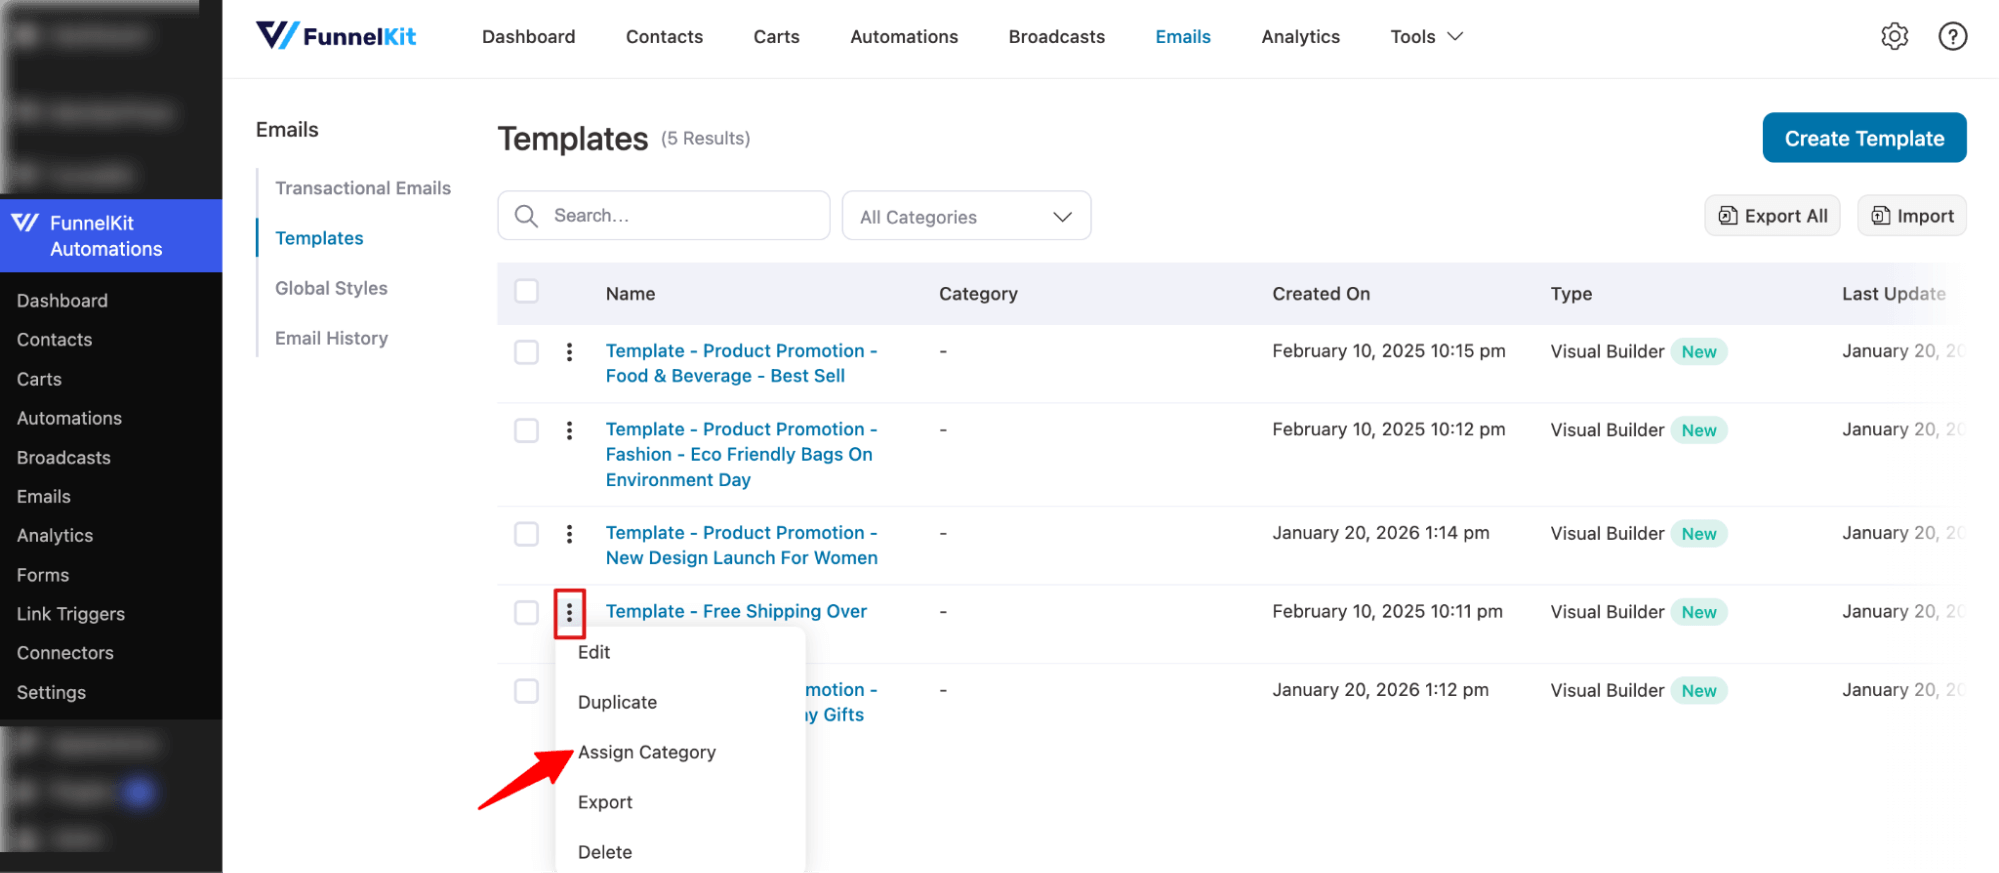
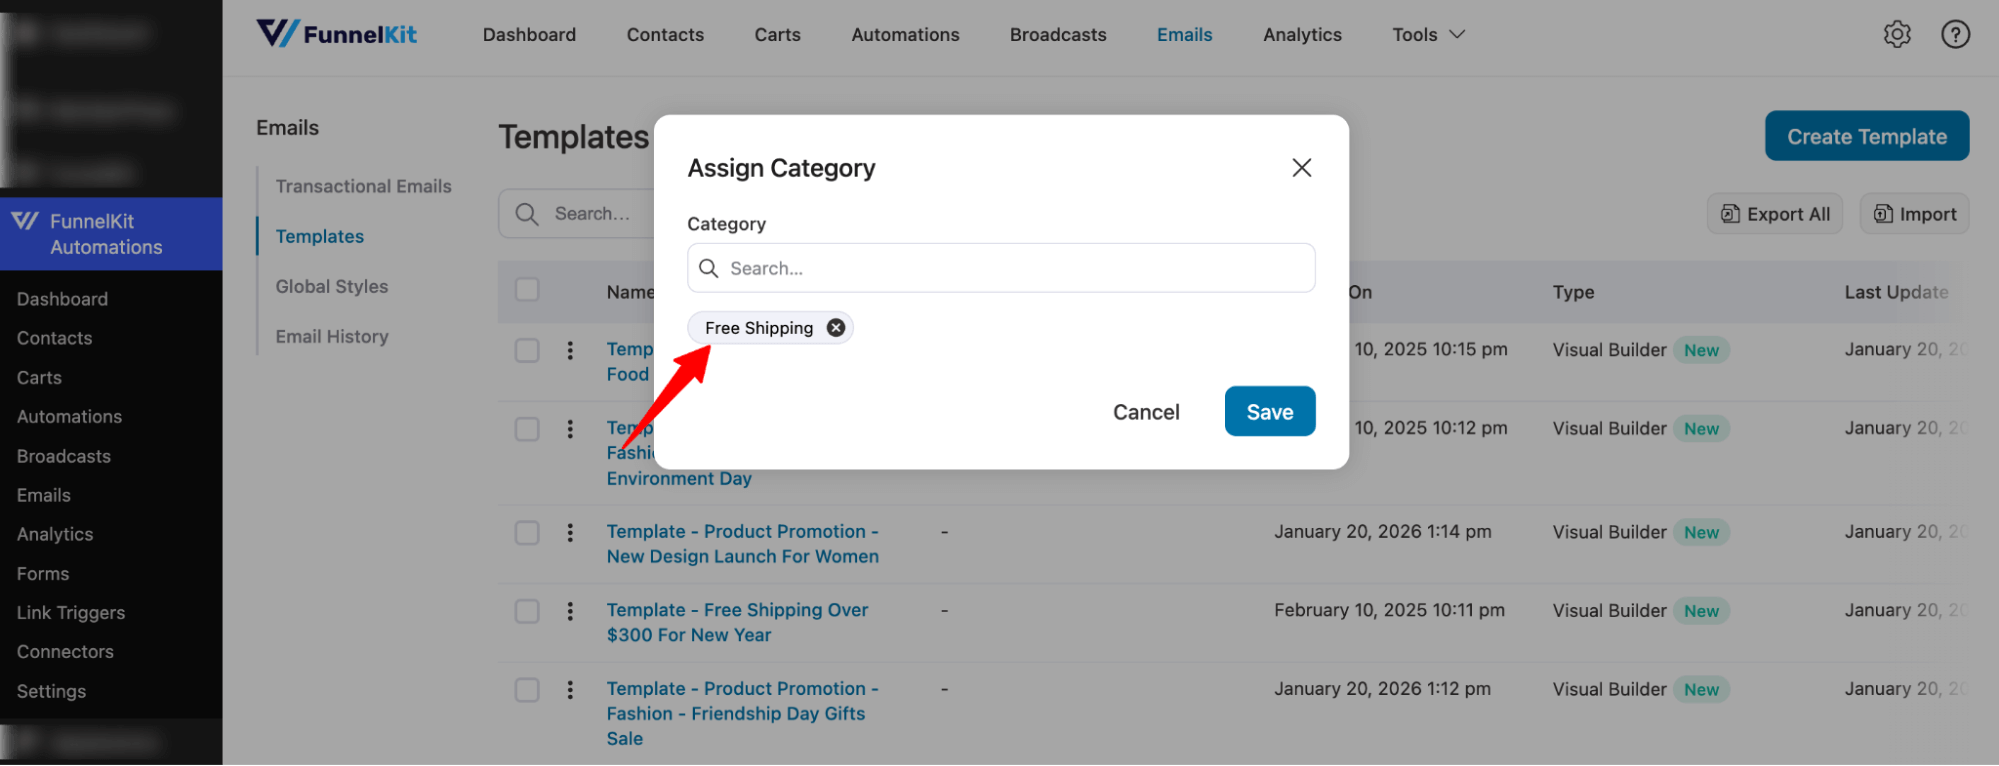
To assign a category to any single Email Template, hit the three vertical dots (⋮), then from the options select Assign category.
Now search and assign a category. You can assign multiple categories if you want.
Make sure to hit Save.
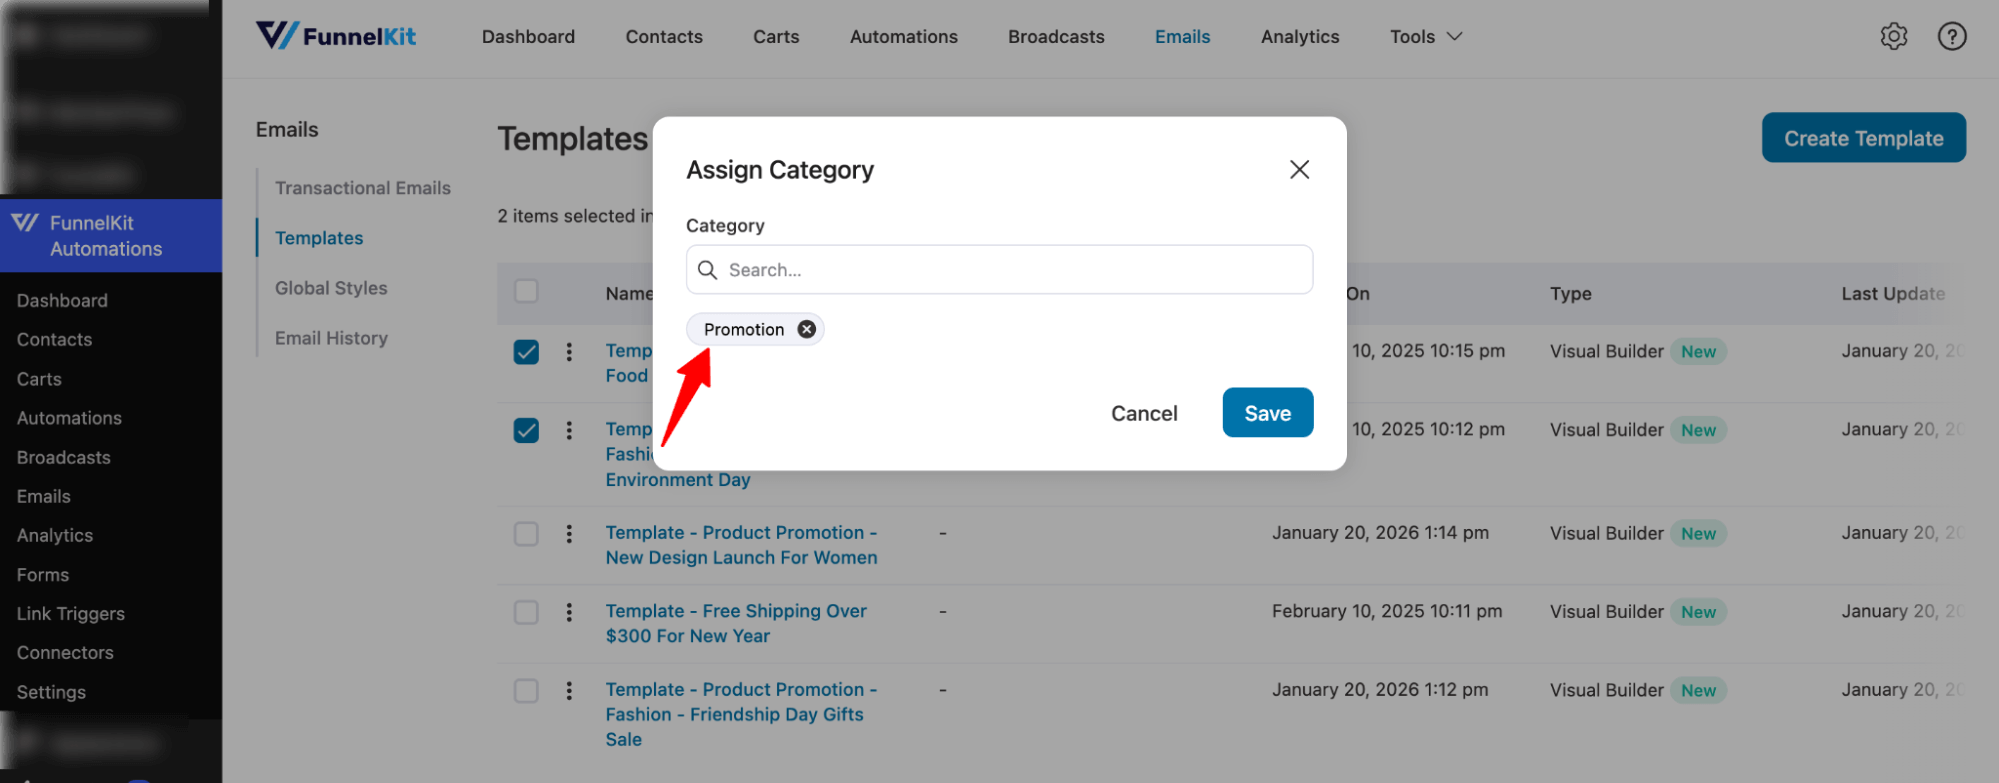
If you want, you can select multiple Email Templates and assign a category at the same time.
For this, click on the check box next to each Email Template, then hit Assign category on top.

Next, search for and add the category.
Unassign a Category
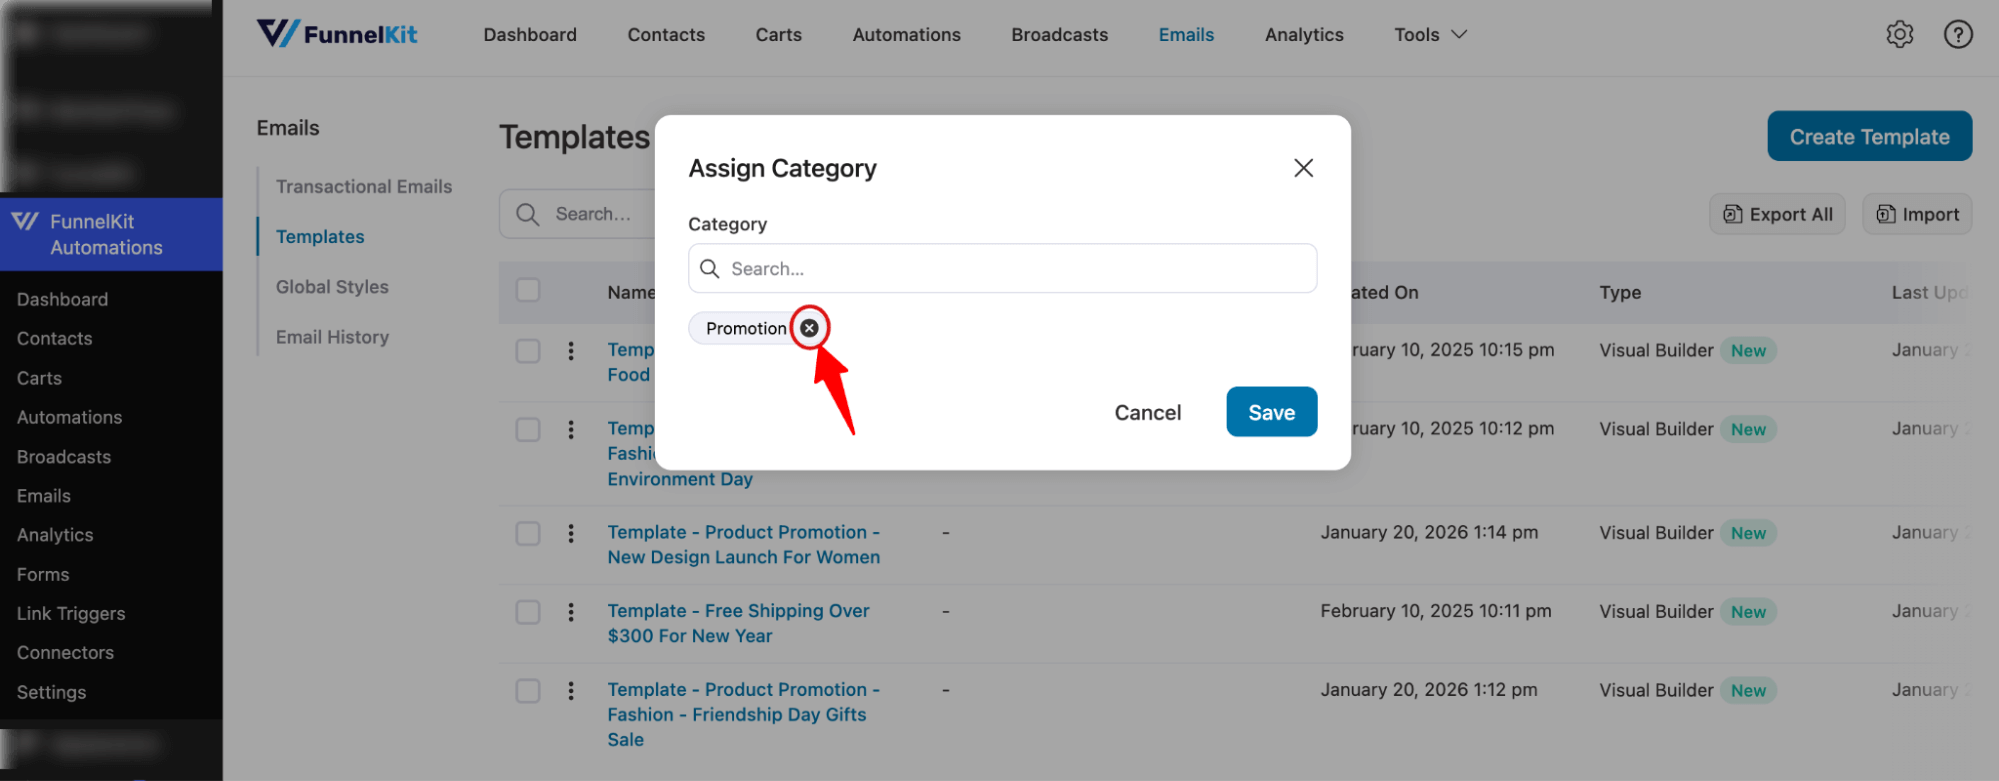
To unassign a category from any single Email Template, hit the three vertical dots (⋮) , then select Assign category from the options.
Next, click the X icon next to the assigned category. Make sure to hit Save to apply the changes.
Filter By Category
To filter by Email Template category, select any of the categories by checking and hit Apply.
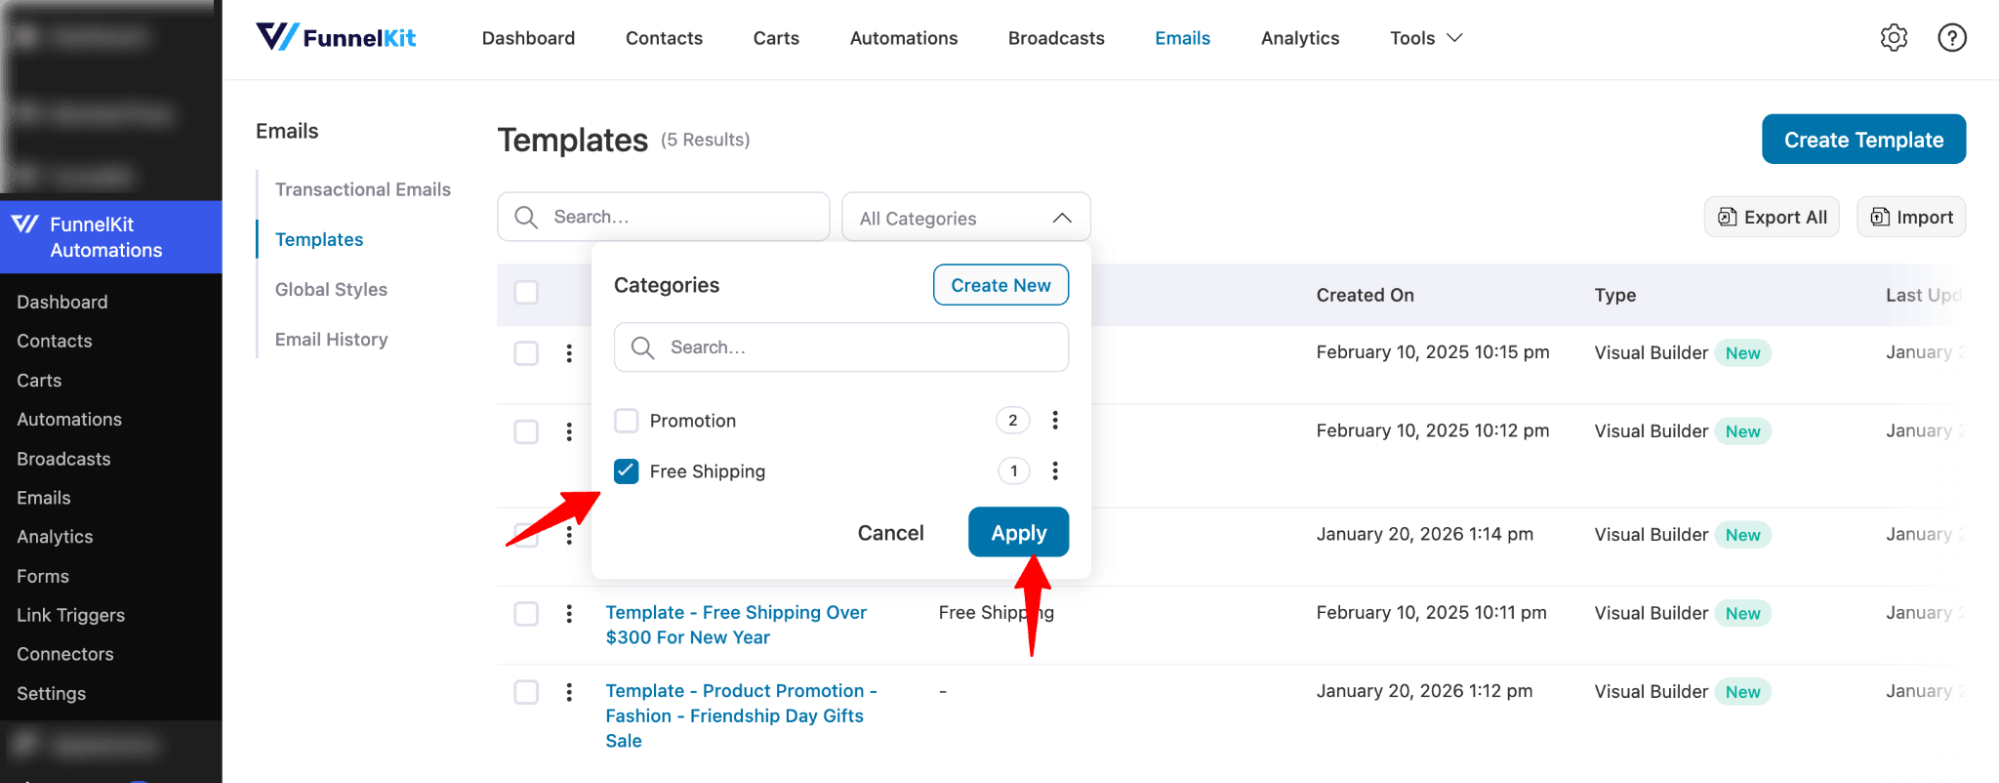
Now you should see the filtered categories.
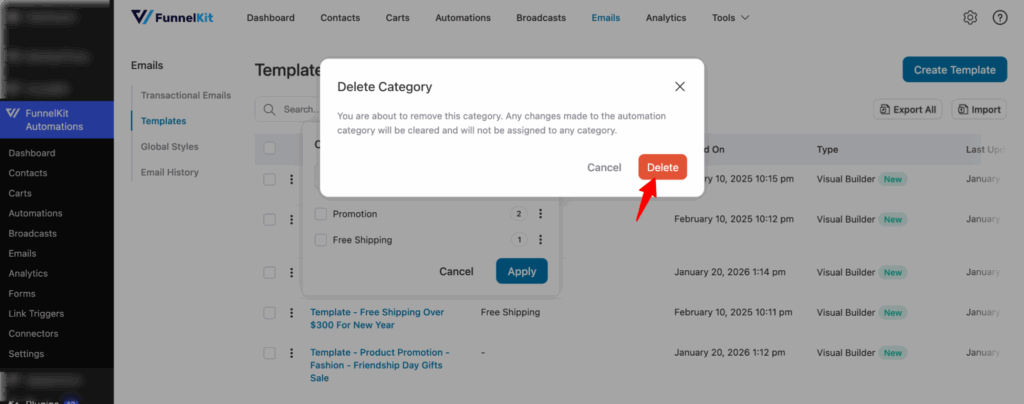
Delete Category
To delete any category, expand All Categories, click on the three vertical dots, and hit the Delete option.
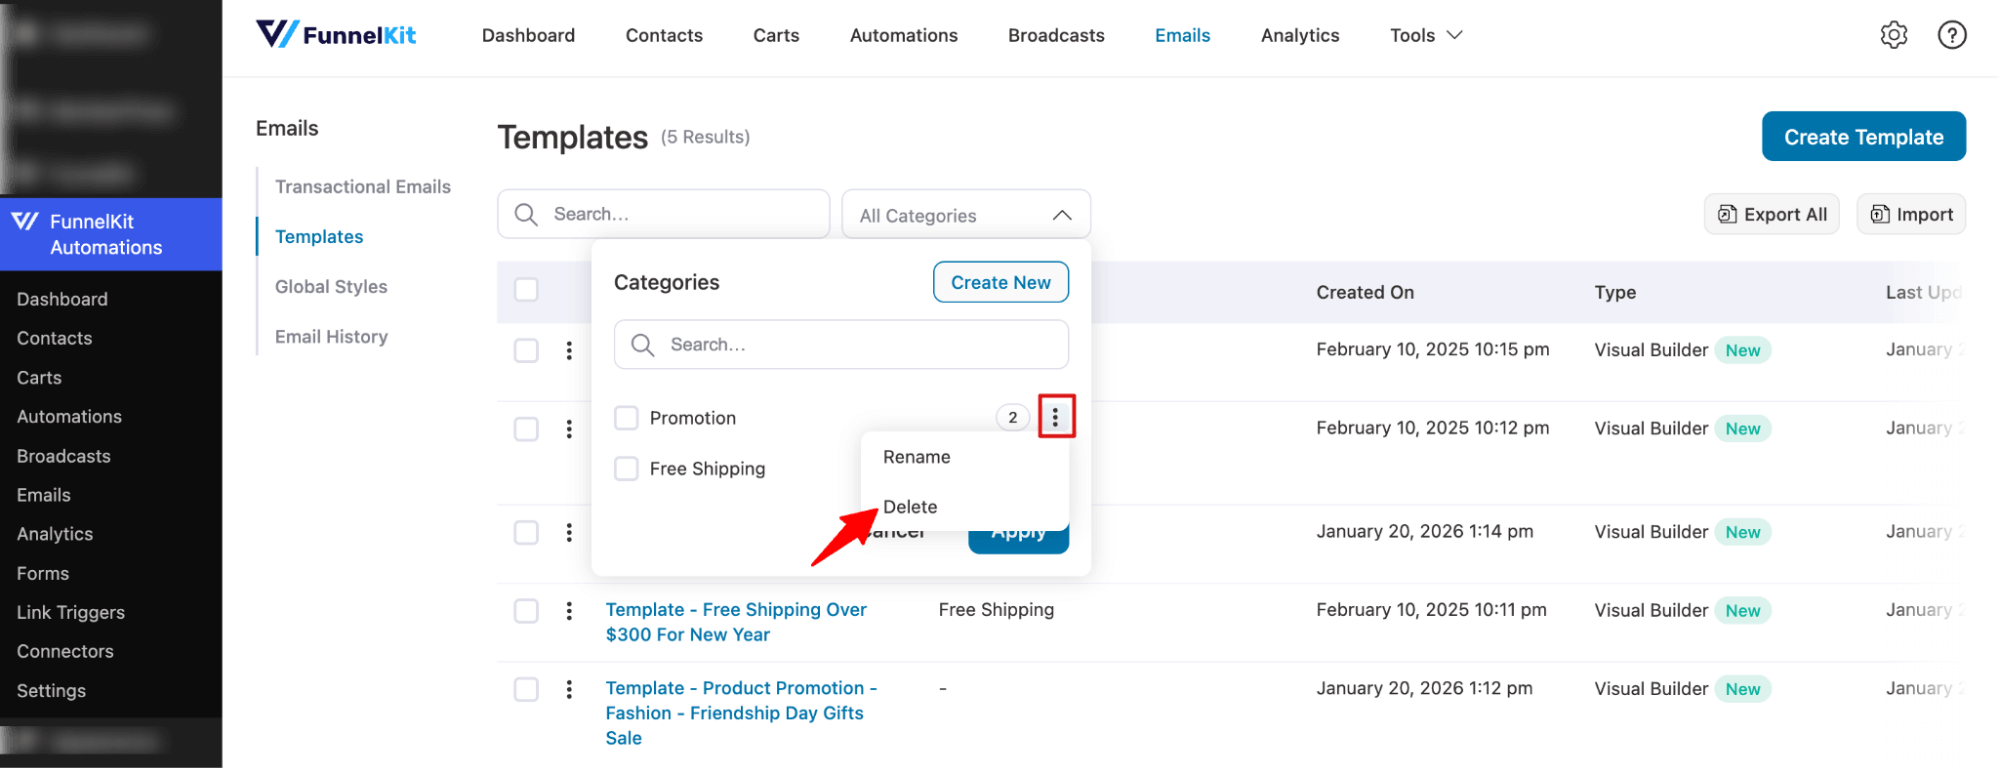
Finally, confirm the deletion to permanently delete it.